I’ve been using Luminar as my main image processing software for well over a year now. I find it to be a very easy to use program, and with the diverse set of tools and presets it contains, as well as Customizable Workspaces, it’s not only a very powerful editing solution, it offers a fun canvas with which to explore your creativity.
With the most recent update, Luminar was given a number of performance upgrades. RAW engine has been re-engineered, which means it does a remarkably better and faster job demosaicing RAW files, especially those shot with Fujifilm cameras.
This means you’ll get cleaner, smoother RAW files, more accurate colors with fewer artifacts, and automatic corrections for lens distortion, chromatic aberrations and fringing.
In addition, Skylum will be coming out with their promised DAM (Digital Asset Management) feature later this year. This will give Luminar full image catalog capabilities, which will make it an all-in-one image file and editing solution and a viable alternative to Lightroom. (You can read my full review of the Luminar 2018 improvements here.)
Today, I’d like to offer a short Luminar tutorial and give you some insight on some of my favorite and most used tools when I process my images. Hopefully this will shed some light on what you can do with the program and give you some ideas of your own.
Keep in mind that in addition to doing my RAW conversions in Luminar, I also use the program to tweak select JPEGS in order to give them a little more life.
1. Accent – AI Filter
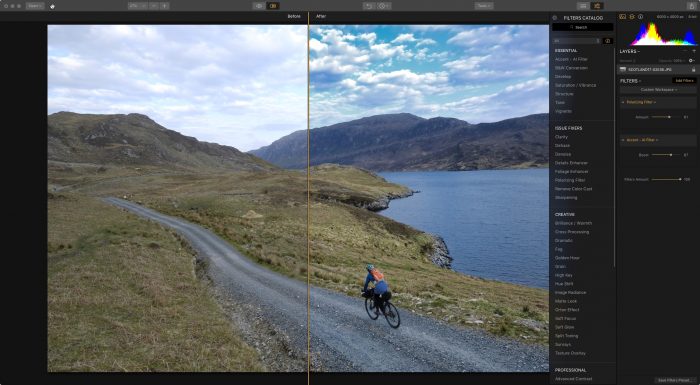
The Accent – AI Filter automatically analyzes your image and uses artificial intelligence and carefully written algorithms that apply “smart enhancements” to improve your photo. If you only have time for a single tool, or if you just want to make a very quick adjustment, this is probably the first tool you should reach for.
In most cases, the Accent – AI Filter does a great job of controlling your highlights & shadows and adding a little bit of vibrance and clarity to make your image pop. Here’s a before and after example to show you how it works.
For very quick adjustments with added control, choose the Quick & Awesome Workspace, which contains the AI Filter, as well as the Saturation/Vibrancy and Clarity tools.
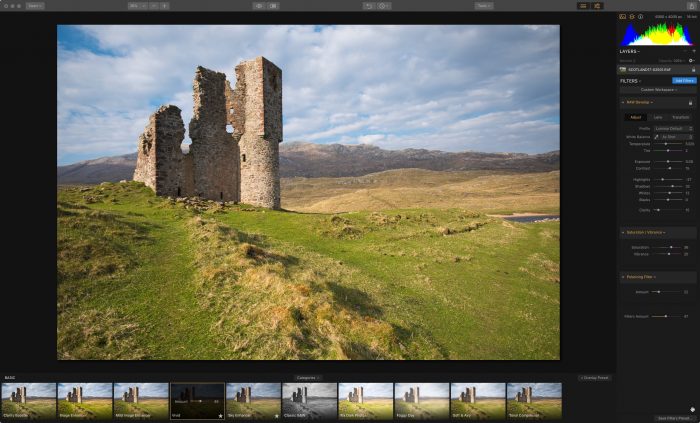
2. Develop / RAW Develop Tool Panel
The RAW Develop tool panel is your standard, full-service toolkit for adjusting the specific exposure parameters of your RAW files. (If you’re working on a JPEG file, this tool is simply called Develop.)
Similar to what you’ll see in Lightroom, Photoshop and many other image processing programs, this is where you can make adjustments to White Balance, Tint, Exposure, Contrast, Highlights, Shadows, Whites, Blacks and Clarity.
In addition, you can also apply Lens Corrections and make Transform adjustments. If you’re used to working with this kind of tool and enjoy the process of fine-tuning your exposures, then you’ll probably use this tool quite often.
For even more tonal control, try adding in the Advanced Contrast tool.
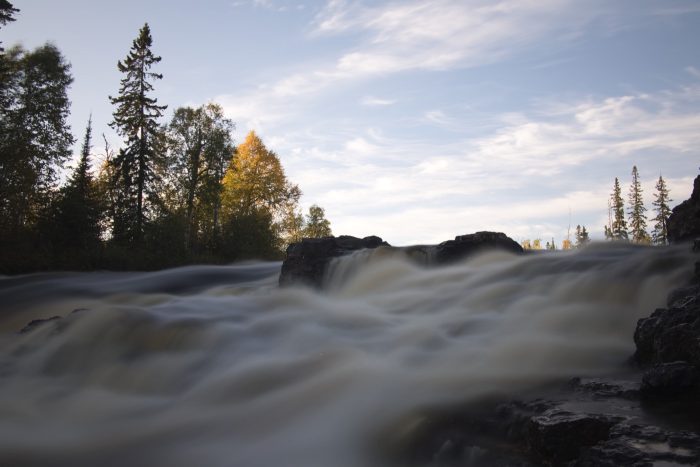
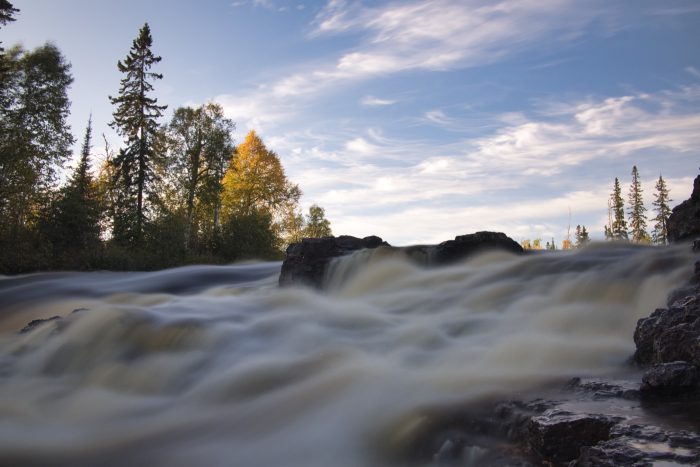
3. Structure
Sometimes you feel as if your image would be improved with a little sharpening and definition. This is when you reach for the Structure tool, which increases Clarity and micro-contrast in the areas between the edges in your photo.
In other words, it doesn’t sharpen the edges, it enhance definition in the areas next to your edges. This gives the impression of added sharpness and it increases the overall “crispness” of your photo.
For more control, you can adjust the Softness slider, which controls the overall softness of the textures in your images and adds/decreases the apparent contrast of your darker tones. The Boost slider accentuates and softens the edge detail in your photo, which adjusts the overall clarity of your image.
Be careful, though. A little goes a long way. You can easily overdo your Structure control, and it will be easily apparent if you slide too far.
4. Polarizing Filter
Just like the real thing, the Polarizing Filter in Luminar darkens your blue tones, which increases the richness of your blue skies. It also darkened the less obvious blues inside clouds and on distant mountainsides, which adds contrast and gives the appearance that it’s reducing atmospheric haze.
This is a great tool for just about any landscape photo, especially if if your image contains sky, water or faraway hills.
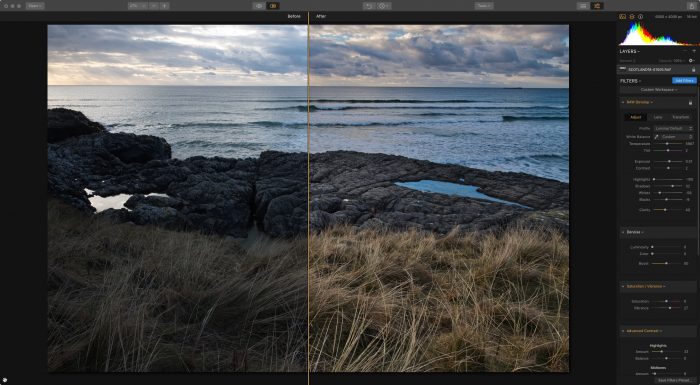
5. Golden Hour
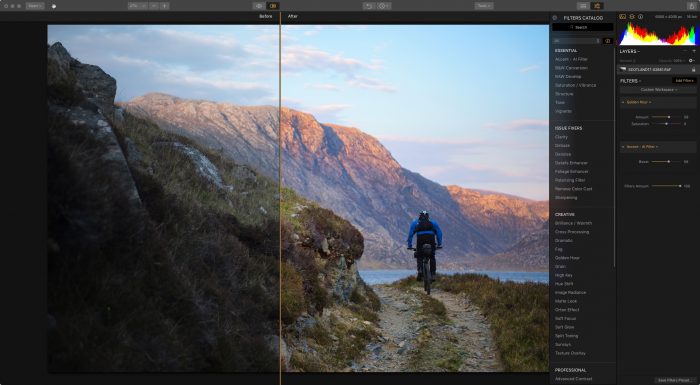
The Golden Hour filter can be an extremely useful solution for helping add life to dull photos. It adds a degree of warmth that is reminiscent of the kind golden, indirect light you get when the sun is low on the horizon.
If you have subjects in your photo that area already lit by direct sunlight, this tool will accentuate your sunsets even more, as you can see in this example below. For everything else, you’ll simply raise the color temperature of the image slightly, just enough to give it a more pleasing look.
The reality is that simply warming the color temperature can help many shots look better. Not only does it add a degree vibrance and dimension, it helps commutate the “larger than life” memory of your scene, which I discuss here, in my previous post.
Can you overdo it with the Golden Hour slider? That’s up to you. Depending on the scene and what kind of look you’re going for, adding a lot of warmth might just be what your shot needs.
You’ll find that it works best with scenes that are already shot at or near the natural “golden hour.” Go too far with photo shot at midday and you’ll just end up making them orange.

This is only a tiny sample of the useful and creative tools and effects you have at your disposal in Luminar. You’ll find that the tools are all very easy to use, and each one has a short description that tells you exactly what it will do, so I encourage you to dig in and play around. Visit this page to see a complete list and description of all the tools contained in Luminar 2018.
If you have’t tried Luminar yet, visit this link to check out the program and download the demo. If you decide to purchase Luminar 2018 or upgrade from a previous version, use coupon code DANBAILEY and you’ll save $10 on your order.