 People love shooting the Fuji X cameras, largely because the images have a certain “look” to them. This is due to the Film Simulations that the Fuji engineers carefully modeled into the image processing software. These are taken from some of Fuji’s most celebrated film stocks from the past 80 years and they include films like Provia, Veliva, and Astia, as well as a handful of color negative and black and white choices.
Whenever you’re shooting in JPEG mode, you select one of these film sims. The color palette of that particular film are embedded in your final image. Essentially, it’s like using film again. You choose a desired look based on your style lighting conditions and subject matter and go for it, and since the Fuji JPEGS are so good, it saves time from having to shoot everything in RAW and then process later. Having shot many of these original films, I can attest, they look great.
Under most conditions, the JPEGS are more than adequate and perfectly fine for general use, and even a variety of professional applications. However, what about when the light is tricky or when you simply want more control? Up until now, if you shot RAW, you’d lose the look of the Fuji film sims, and believe me, it’s next to impossible to perfectly recreate them yourself.
Fortunately, the Adobe Lightroom 5.4 update includes the Fuji color profiles in the Development panel. This means you can not only preserve your selected film sim, you can actually go back and apply any one of them to your RAW file. This gives you a tremendous amount of control and lets you take full advantage of how good the Fuji X-Trans sensor really is.
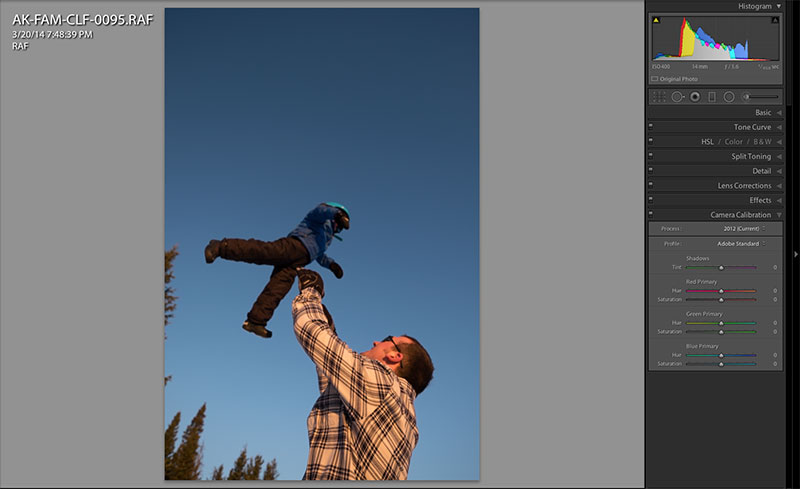
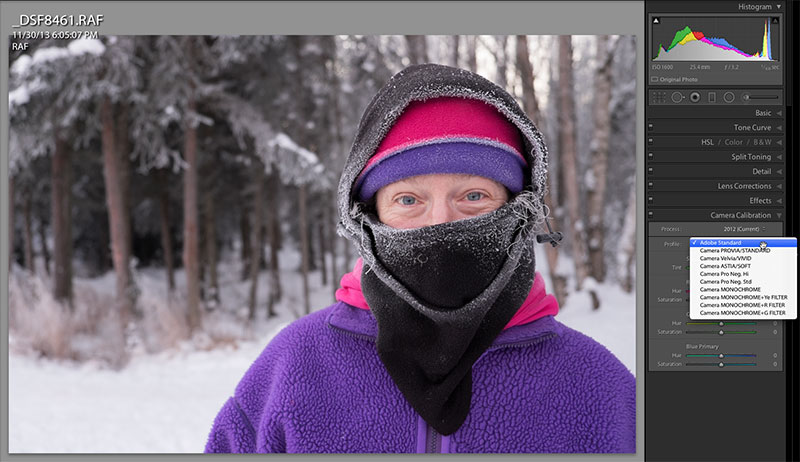
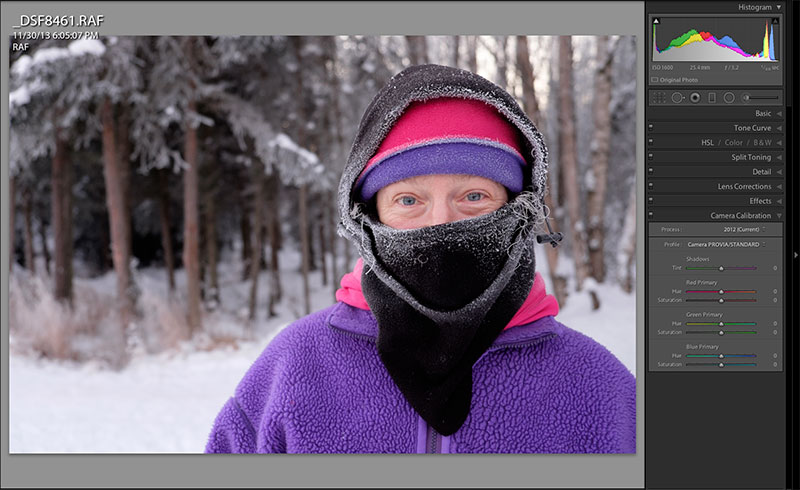
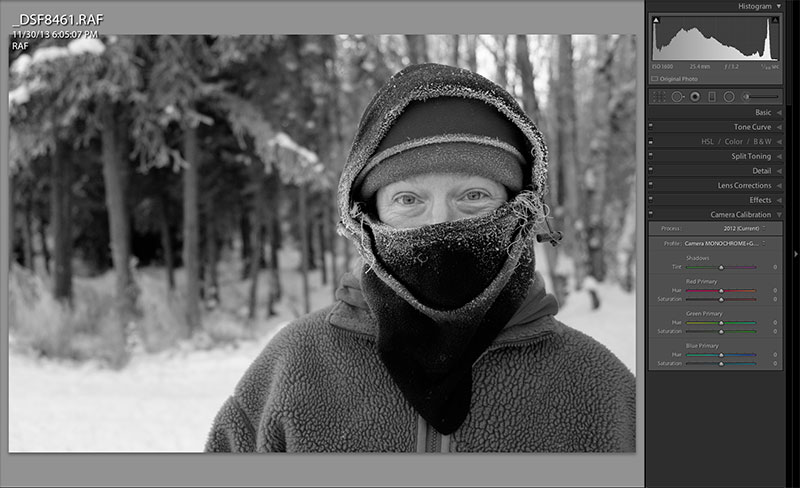
Here’s how it works. When you open your Fuji RAF file in the Development panel, click on the Camera Calibration Tab at the bottom (see top photo). In the Profile menu, you’ll see that Lightroom has automatically applied the Adobe Standard Color Profile.
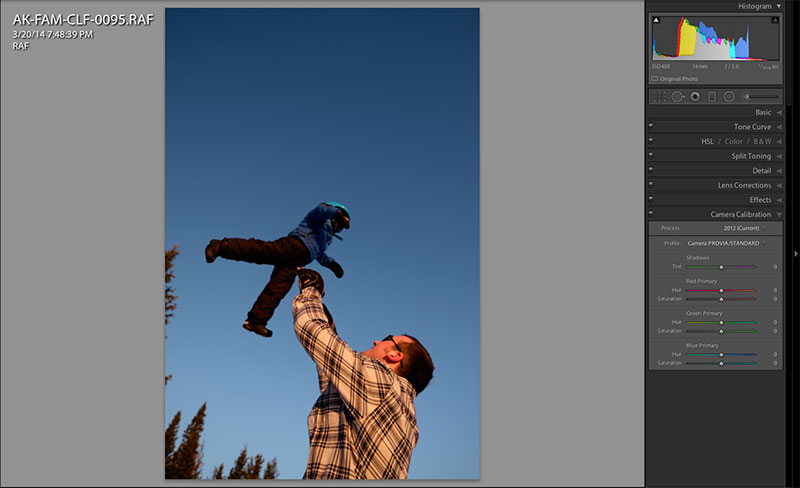
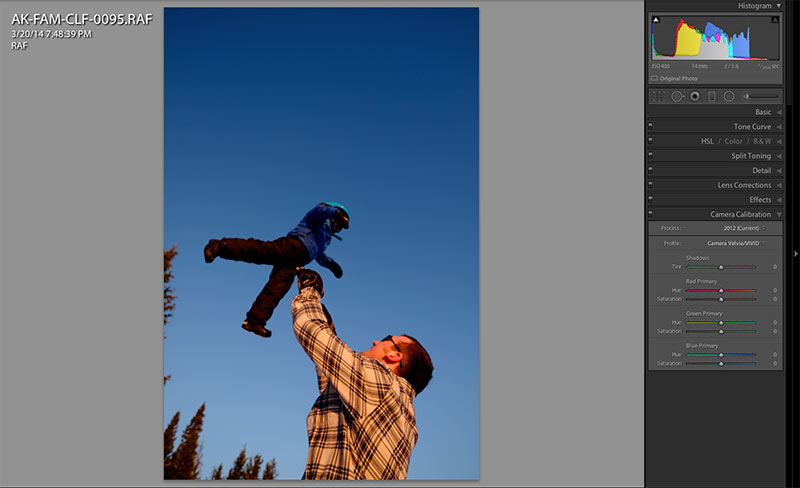
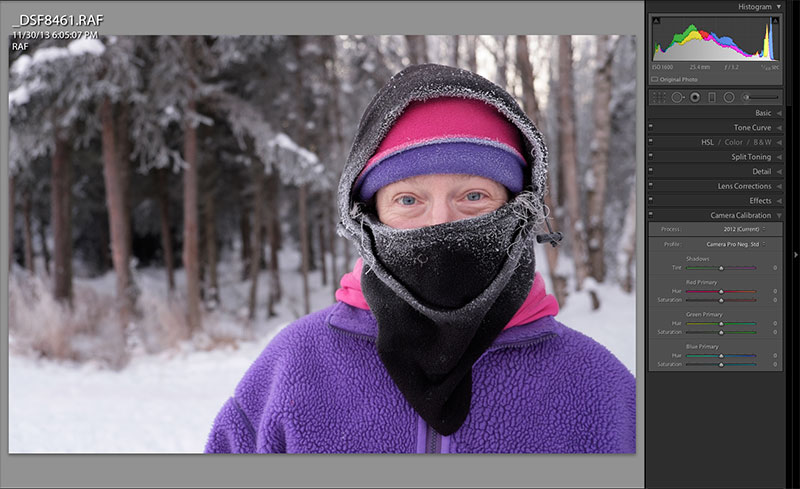
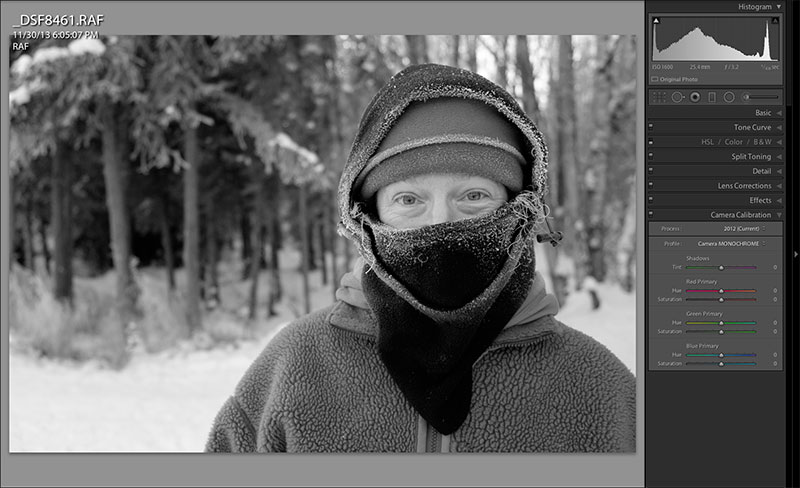
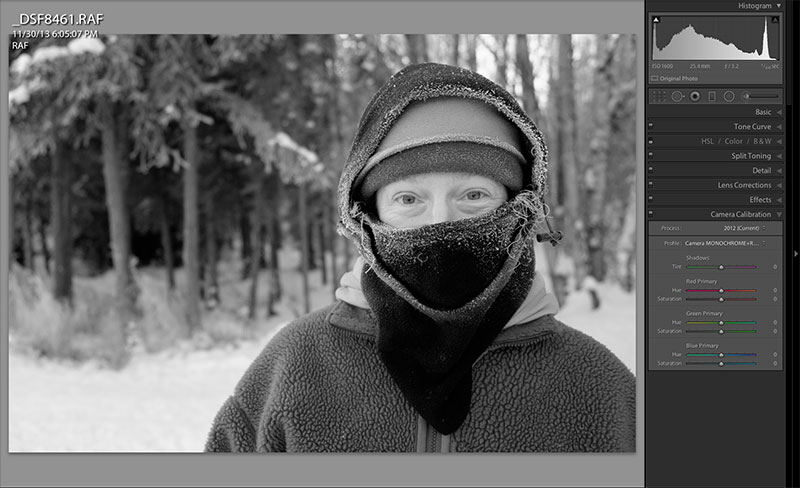
If you click on the Profile menu, you’ll bring up the entire list of Fuji profiles and apply any one of them to your image, or not. Since you’re developing a RAW file, you’re not actually writing the profile to the image, and you can always go back and change it if you wish.
The color profiles you have at your disposal are, PROVIA, VELVIA, ASTIA, Pro Neg Hi, Pro Neg Std, Monochrome (black and white), and three Monochrome settings with different filters applied, RED, YELLOW and GREEN. The only one that’s not included is SEPIA, but that’s not a big deal, since Lightroom already has Split Toning effects built right in.
You can do this with RAW files from any of the Fuji X cameras, including the X10 and X20, and all the interchangeable bodies from the X-A1 all the way up to the X-E2, X-Pro 1 and the new X-T1.
Note, these options is also included in the latest version of Adobe Photoshop. You can find the profile choices in the same place, inside the Camera Calibration Tab in the Camera RAW window. Also, here’s a how to apply them on Import, rather than applying them later. This could save you even more time.
[…] People love shooting the Fuji X cameras, largely because the images have a certain “look” to them. This is due to the Film Simulations that the Fuji engineers carefully modeled into the image processing software. These are taken from some of Fuji’s most celebrated film stocks from the past 80 years and they include films like Provia, Veliva, and Astia, as well as a handful of color negative and black and white choices. […]
[…] | danbaileyphotoPeople love shooting the Fuji X cameras, largely because the images have a certain “look” to them. This is due to the Film Simulations that the Fuji engineers carefully modeled into the image processing software. These are taken from some of Fuji’s most celebrated film stocks from the past 80 years and they include films like Provia, Veliva, and Astia, as well as a handful of color negative and black and white choices. Whenever you’re shooting in JPEG mode, you select one of these film sims. The color palette of that particular film are embedded in your final image. Essentially, it’s like using film again. You choose a desired look based on your style lighting conditions and subject matter and go for it, and since the Fuji JPEGS are so good, it saves time from having to shoot everything in RAW and then process later. Having shot many of these original films, I can attest, they look great. Under most conditions, the JPEGS are more than adequate and perfectly fine for general use, and even a variety of professional applications. However, what about when the light is tricky or when you simply want more control? Up until now, if you shot RAW, you’d lose the look of the Fuji film sims, and believe me, it’s next to impossible to perfectly recreate them yourself……. […]
[…] See on danbaileyphoto.com […]
Thanks for this Dan, I’d not taken a look at this before now and its a really nice upgrade to lightroom. Astia is my favourite and they look like they nailed it.
Mike, I love Astia too. That and Sensia, which was the amateur (cheaper) version, were my favorite 100 speed Fuji films back in the day. It’s great for portraits, and I especially like using the Astia film sim on the X cameras for shooting snow scenes, it seems to handle the contrast really well.
Hi,
Enjoyed you article. Great reference.
Can you tell my why when using the one of the B&W film conversions in Lightroom for Fujifilm camera the B&W color way adjustment button blacks out and is not possible to use. I would like to adjust the film conversion there. What am I missing
Larry
Larry, it does appear that once you apply the Fuji BW film simulation color profile in LR, you cannot use Lightroom’s BW conversion/adjustment panel. Not sure why this is, but it obviously only lets you apply a BW profile once to the file. It looks like you can still use the adjustment sliders in the calibration panel, and also in the main exposure panel. Or, you could apply the Fuji Monochrome profile, save the image as a 16-bit TIFF, then reimport and use Lightroom’s BW conversion tools. That’s my best answer, hope it helps. -Dan
Do I need to upgrade my LR (I’m using Lightroom 3.6) in order to use this feature?
Yes, the Fuji film simulation color profiles were first introduced in LR version 5.4. Also, upgrading to the latest version will give you slightly better RAW demosaicing quality and sharpness when converting the Fuji RAW files.