Even though I’ve been a Lightroom user for many years, I’ve really been excited about Luminar lately. In fact, I’ve used Luminar far more often than LR or PS during the past two months to process my photos. I like that I can totally customize the user workspace and add whatever tools I need. This way, it doesn’t get cluttered up with a ton of tool palettes that overwhelm.
Also, I love the presets. I’m not usually a preset guy, but the ones in Luminar are really fun and they offer a diverse array of options to expand your creativity, whether you’re trying to tweak just a little bit to make you shot pop, or if you want to take it off in a totally new direction and give it a unique look.
If you’re inclined to dig deeper with more advanced processing, Luminar has over 300 professional-grade tools and features, including layers, batch processing, blend modes, custom brushes, PSD support, masking, social sharing, MacPro Touch Bar support, and full RAW support for most cameras systems, including the Fujifilm X-Trans RAW files, which haven’t always played very well with Lightroom.
I feel as if I’ve barely scratched the surface with Luminar, and to me, that’s one of the things I like so much about the program. It doesn’t cost very much (only $69), so if you only use it “lightly”, you don’t have to fret that you’re not getting your money’s worth. If you make use of the more advanced features, you’re getting a real bargain when you compare the price against Adobe.
Although I’ve been using the program as a standalone to process brand new images before they go into Lightoom, Luminar also functions as a Lightroom Plugin. This offers even more flexibly for how you can use the software.
In this post, I’d like to share with you some of the ways I use Luminar to process my photos.
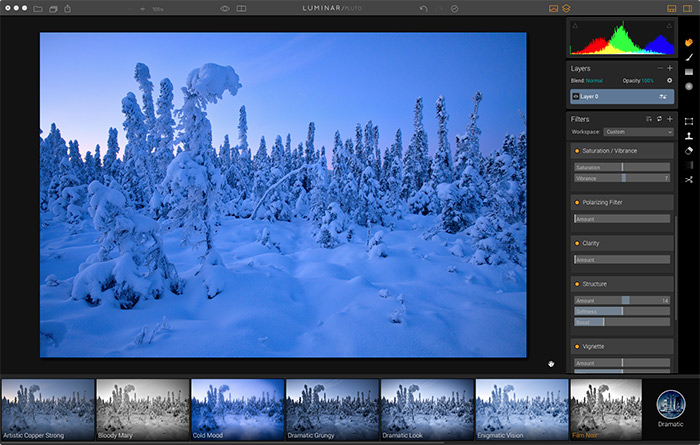
Winter Landscape

In this first example, I just wanted to add a little vibrance and clarity to make the image pop. Here, it was a simple matter of choosing the Image Enhancer Preset and than dialing it down to about 20 or 30%. That’s the really nice thing about the presets, and it’s what makes Luminar so easy and fast. You choose a look, and then you can dial it anywhere from 0-100%. Then you can add in whatever slider tools you want, and if you have a similar style of processing you can save your tool setup as a custom workspace.
So, for this one, after I applied and dialed in the preset, I used the Exposure Filter to bump the Exposure and Vibrance levels up just a little bit. That’s all. From start to finish, it probably took about two minutes.

Snow Biking

In this example, I used the Detailed Preset and dialed it down to 67%. Then I brought the Highlights down and increased the Shadows to open up the mid tones. It’s a very dramatic shift, and it only took a minute or two. I wouldn’t normally crank an image up so much, but for this shot, I wanted to really bring out the drama of the scene by enhancing the texture in the clouds.

Winter Landscape 2

For this image, which is a straight JPEG, I wanted to get even more creative and go for a totally different look. Honestly, I wasn’t sure what I was going to do here, I just started picking presets and seeing what they looked like.
I settled on the preset called Film Noir and dialed it down to about 50%. This preset gives a very dramatic look, and it varies quite a bit at each of the different percentage settings. At the higher levels, it added even more film grain and produced a very monochromatic look. Dialed down, it brought some color back, but keep the grain and a certain level of “grayness.” All the way down it reduces contrast and brings back the color.
Again, this adjustment took all of about 30 seconds from start to finish after the image file loaded into Luminar.

There are many 3rd party photo processing programs out there, but Luminar appears to be firmly planting itself in the game. Macphun did an amazing job with Luminar. It’s no surprise, even though Luminar is relatively new Macphun has a 10 year track record of producing award winning software, and they’ve won “Best Of Apple Store” awards for five straight years.
If you haven’t checked out Luminar, you can download the demo here, and as one of my readers, you can use this special link and the coupon code DANBAILEY to save $10 on the program. Windows users, fret not, apparently MacPhun is planning on bringing out a PC version of the program later this year. Even if you use Lightroom, Luminar is definitely worth a look.