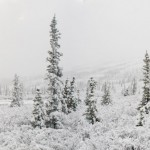
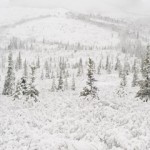
Wintertime photography often requires some very specialized equipment and methods. I’m not talking about the ways that you keep your lithium battery packs warm or how you deal with condensation and ice on your lenses, I’m simply referring to the gear that keeps you warm and dry.
Plain and simple, keeping your body comfortable in cold weather will allow you to create better imagery, because instead of shivering uncontrollably or worrying about how to get the blood back into your hands and feet, you’ll be free to focus on your subject and the process of photography.
Although everyone will have their own setup, I’ll go from head to toe with my gear and let you know what works for me. Hopefully it will give you some ideas about how not to freeze when you’re outside with your camera this winter.
Head: Everyone knows that you lose most of your body heat through an uncovered head, so wearing a good hat is key to keeping warm. A jacket with a hood will help keep out the wind as well.
Face: Fact- cameras are made of metal and plastic. Fact- photography usually involves placing these items against your face. Take it from me, when outside temperatures are below freezing, and especially when they’re in the neighborhood of 0-degrees and below, putting a cold camera body against the bare skin of your nose and cheek is an easy way to give yourself frostbite. I learned this the hard way last year when I frost nipped the end of my nose while shooting some landscapes at 10-below.
Obviously, the easiest way to avoid this is to cover your face with a balaclava or neoprene face mask. I’ve used both types and which one works best is usually a matter of preference, and/or how cold it is outside. If you find yourself shooting outside without one of these this winter, you can always try to hold the camera back a millimeter or two away from your nose, or use the Live View feature to view your scene on the camera’s LCD screen.
Body: This is an easy one. Wear a jacket. Bundle up. If you’re shooting static subject such as landscapes or portraits, a big puffy down or fiberfill jacket is your best bet. If you’re actively photographing outdoor sports such as skiing, then dress appropriately for the specific activity. Dress in layers and make use of high tech synthetic and wool fabrics that are made by many of the outdoor clothing companies like Patagonia, Smartwool, Mountain Hardwear, Ibex, etc…
Hands: Keeping your hands and fingers warm while still retaining the dexterity needed to manipulate the camera controls can be tricky in wintertime. I’ve used chemical hand heater packs made by Grabber for years. They fit right inside your gloves or mittens and provide an easy way for you to warm up after using bare hands for short periods to adjust camera controls. Try to find handwear that is not so bulky that it won’t let you feel and press the shutter button. Fingerless gloves that fit inside bigger mittens work well, as well as lobster claw mitts that separate the index finger from the rest of your hand.

Feet: Winter photography often means tromping around for hours in deep snow. Lord knows we have plenty of that up here in Alaska! In the past I’ve used mountain boots and gaiters to keep the snow out. Insulated boots from Sorel and Kamic work great as well.
Lately, though, I’ve been rather excited about my Neos Explorers. Neos makes insulated (and non insulated) waterproof overshoes that go right over your regular shoes or boots. My Explorers are insulated and keep my feet dry and warm down to 20-below, and offer the versatility of wearing regular my street shoes underneath, which can be handy if you’re going in and out and don’t want to carry an extra pair of bulky boots. They work really well for cold weather bike riding here in Anchorage, which is typically how I get around. In fact, Neos are the choice for many of the ultra-winter and fat-tire bike riders here in Alaska.
They also work well for winter aviation, since they pack light and go on and off easily and pack light and they were perfect for that winter ski-flying photo shoot that I did last week (see previous post). They not great on ice, but they do have a STABILicers version of the Explorer if you need the extra traction.
No matter what you shoot, winter offers wonderful opportunities for outdoor photography. With all the great gear that’s available, don’t let the weather keep you from getting outside and creating some great images this year! And since it bears repeating, remember to keep that cold camera back away from your nose!