Starting today, I’m introducing the first of three featured contributors who I’m bringing on to write monthly columns for this site.

In my quest to bring you the best information, resources and creative tips, I’ve found three great photographer/writers who I feel will fit right in with what I typically post here. In fact, if you’re a regular reader, then you already know two of them, Dan Moughamian, aka @Colortrails and Anne McKinnell. The third is John Shafer.

Each of these people has a unique background and thus each one offers a unique perspective and level of insight into the world of outdoor photography. I think that you’ll find their posts informative, and I look forward to reading their posts myself here in the coming months.

Today, please join me in welcoming today’s featured guest, fellow powder hound and mountain bike junkie, John Shafer, aka @Photo_John, from PhotographyREVIEW.com. Each month, he’ll be writing guest gear reviews.

———-

“Pocket Superzooms” by John Shafer

John Shafer aka @Photo_John

I assume most of the readers of this blog are fairly serious outdoor photographers who do most of their shooting with a good digital SLR. This article is about the other end of the camera spectrum. I don’t care how serious or professional you are or how important image quality is to you; everyone needs a good point-and shoot camera.

Most serious photographers are interested in high-end compacts like the Canon G12, Nikon D7000 and the Panasonic LX5. Not me. If a “compact” camera doesn’t fit in my pocket, I’m not interested. My favorite compact cameras are what I call pocket superzooms – pocket-sized cameras with 10x or longer zoom lenses.

The pocket superzoom camera first appeared a few years ago in the form of Panasonic’s Lumix TZ camera line, which featured a 10x zoom lens in a relatively compact body. To be fair, the Panasonic TZ cameras were a little big to comfortably fit in a pants pocket. Luckily, pocket superzoom cameras have shrunk considerably in the past couple of years. I finally bought one late last year – the Canon PowerShot SD4500 IS. It’s the smallest available pocket superzoom and has a 10x 36-360mm (equivalent) zoom lens.

Most recently I’ve been using the Nikon Coolpix S8100 (on loan from Nikon for review), which has a 30-300mm lens. Both cameras produce great image quality and also have full HD video making for a super versatile pocket camera. When I’m skiing or mountain biking I usually have a digital SLR in my pack but sometimes I need to work quick or I just don’t feel like taking out the big camera. That’s where the pocket superzoom excels. And what can you say about a 300mm lens that fits on your pocket? Just one word – awesome!

Two photos taken from the same location with the Nikon Coolpix S8100 pocket superzom camera. The left image was taken at the 30mm wide end of the zoom and the right image was taken zoomed all the way in to 300mm

If you want to know more about pocket superzooms, I recently wrote a “Top Five” superzoom camera guide with my picks for the top cameras in the class.

Since that guide was published a bunch of new pocket superzooms were announced at the annual CES consumer electronics tradeshow. You can learn more about the new pocket superzooms and other new cameras announced at CES in my CES Cameras Final Report.

————

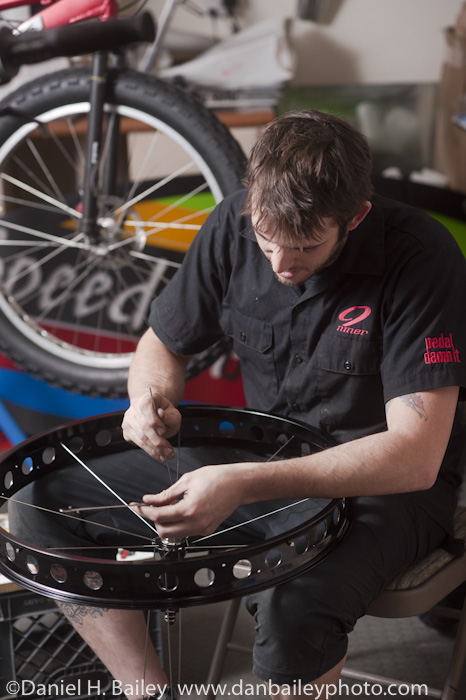
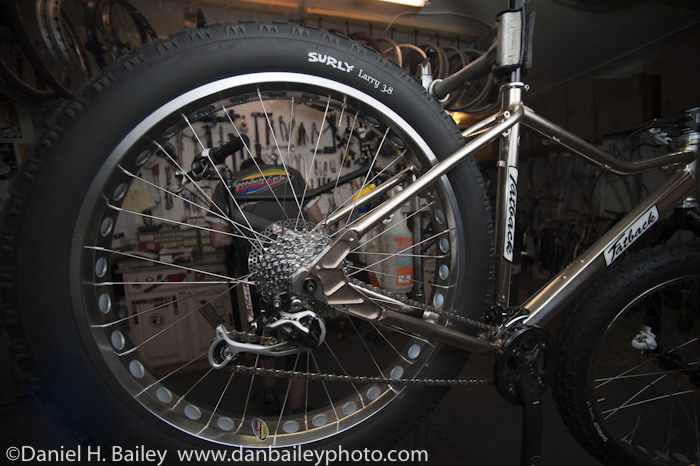
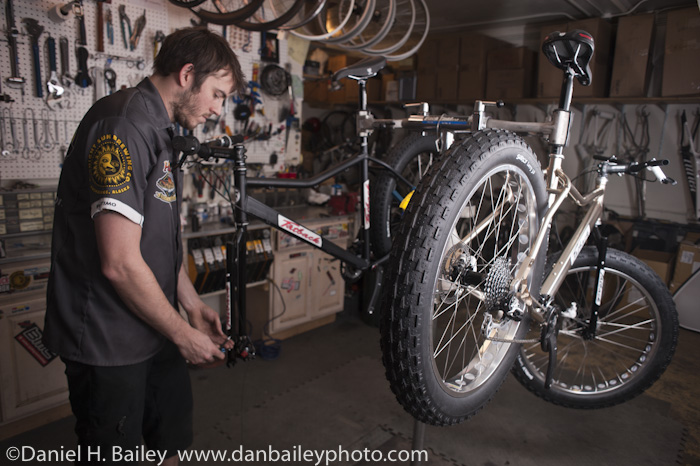
Photo-John is John Shafer, Managing Editor of PhotographyREVIEW.com since 1999 and a sometimes published, totally addicted mountain bike and ski photographer.

January 21, 2011
See this post
Guest Gear Review: Pocket Superzooms by John Shafer

Here’s an image that I shot about two months ago, before all that white stuff fell on Southcentral Alaska. I shot it at ISO 2500 with my Nikon D700 and 14mm f2.8 lens, which I love for low light situations, because you can get pretty slow with the shutter speed and still get sharp images.

I like it because even though it’s got some real technical problems, namely that the trail runner’s legs are all but lost in shadow, it has kind of a cool feel.

But who cares? I like it anyway. Sometimes you just need to break the rules, shoot for the moment and see what happens. I knew that I was going to lose the legs, and I knew that if I brought up the shadows in Lightroom, the whole impact of the image would suffer because it’s the deep shadow that adds drama.

Plus, we know what a trail runner’s legs look like, so by abbreviating the subject matter and focusing on the upper body and swinging ams, we know that she’s running. We don’t need to see legs to proove that. Besides, this photo is as much about environment as it is the runner, so those kinds of details don’t really matter as much as mood, feel and place.

Let me know what you think.

January 19, 2011
See this post
Breaking the Rules!
Winter in the Canadian Rockies by Darwin Wiggett

Let me just say that I like winter. That’s probably why I like this gorgeous new eBook by Darwin Wiggett, Winter in the Canadian Rockies. Having traveled and skied in this part of the continent in the winter, I have a certain fondness for Darwin’s photography.

He captures winter. All of it. From the grand white landscapes, to the up close details of ice and snow, to the imagery of people exploring it as an extreme environment, Darwin creates striking photographs of an exceptionally beautiful part of the world.

And, in this great new eBook published by Craft and Vision, he shares his own insights on the creative, technical and logistical processes about how he goes about making his imagery.

Winter in the Canadian Rockies is laid out a little differently than the other Craft and Vision books that I’ve reviewed, in fact it’s a wonderfully refreshing format, one that you can absorb in depth over number of readings.

The first section of the book, The Print, which encompasses 43 pages, is nothing but a gallery of photographs. Beautiful photographs of mountains, ice, frozen rivers, snow covered landscapes, winter wildlife ice climbers, the northern lights, pine forests and more.

This section brings you right in and immediately gets your visual senses involved. You could spend days looking at and studying all these great photos, and you probably will.

When you finally work your way to page 44, you enter The Process. This is where Darwin writes in detail about his photographic process, from his attitude about his methods and subjects, like how to prepare and dress, for winter outdoor photography and how to keep the camera warm.

He also talks about the nuances of winter light and goes into detail about the special techniques and creative ideas that he uses to create his imagery.

Finally, on page 52, he revisits all of the images in the book and details the equipment used and the specific methods and approach that he took to get each shot. That goes on for another 19 pages, making the total eBook 69 pages in length.

I’m excited to find some time to sit down and go through Winter in the Canadian Rockies with a few late night sessions of undivided attention. I’m sure that I’ll learn a few things, and at the very least, I know that I’ll come away with some new creative inspiration.

And like all other Craft and Vision eBooks, this one is only $5, which costs less than a few packs of hand warmers.

Get it and immerse yourself into winter.

January 18, 2011
See this post
Winter in the Canadian Rockies: New eBook by Darwin Wiggett

Photographers, I just got wind that B&H Photo is currently running a special Lightroom deal.

If you buy any camera over $300, you can get $100 off Adobe Lightroom 3. If you’re thinking about getting a new camera and if you don’t yet have Lightroom, then this is probably as good a time as any to pull the trigger.

The offer is good for any camera, point and shoots as well as DSLR bodies. Check it out.

January 17, 2011
See this post
B&H Special: Buy Any Camera over $300 and Get $100 off Lightroom 3

Yesterday I did some location photography at Speedway Cycles here in Anchorage. The subject- Tim Reinbold, the head mechanic building up a Fatback snow bike.

In some ways, shooting inside can be way more challenging than shooting outside. For one, there’s more gear involved. Since the workshop is basically a dark room lit with overhead fluorescents, I took in my full location lighting kit, which includes a Nikon SB-900 Speedlight, a pair of SB-800s Manfrotto Nano Stands, Bogen Justin Clamps , a Lastolite TriGrip Diffuser and a 3′ x 6′ Photoflex Lite Panel with translucent fabric.

I set up the Lite Panel, which is attached to a light stand with a Manfrotto Super Clamp and a Bogen Friction Magic Arm over the main work stand. That would be my main light source while shooting at the stand and I placed a pair of Speedlights behind it with the dome diffusers on.

That worked well to light the shop with a large, even wash of soft illumination. Then, to add some additional interest, I took the third Speedlight, which was usually fixed to a Justin Clamp, or stuck on the Nano Stand and placed it somewhere else in the shop. I used that one to throw hard directional light onto the scene and add contrast, or else bounce light off of the tool wall. Sometimes I ended up using two directional light sources with only one flash behind the Lite Panel.

For what ended up as my favorite shot, I didn’t even use the Lite Panel. I stuck an SB-800 on the a stand about four feet away from Tim and then lit the back wall with an SB-900. I placed it as far away as I could in the right corner of the shop and set the zoom to the 200mm setting so that it would throw hard light through the bike frames and cast those shadows.

After a few shots, I stuck on the CTO gel to make it look like there was end of the day sunlight streaming in through a window of the shop. It’s certainly a feasible look, so I went with it. I love the way it came out. Here’s the scene without the CTO gel.

I triggered all the wireless remote Speedlights with the pop-up flash on my D700, which worked fine, even though I was moving around and sometimes standing in front of one of two of the flashes, like the close up shots looking through the bike wheel.

Aside from the lighting aspect, what made this shoot challenging is that Tim kept moving around. I didn’t want to disrupt his workflow too much, so I’d just follow whatever he was doing at the time. Unfortunately, sometimes meant figuring out and setting up a lighting scheme right when he was finishing a task.

Overall, this shoot was a great experience in efficiency, because it forced me to be quick, and imaginative with camera angles, lens use and lighting setups. I used everything that I took in there and I was really happy with how all the equipment performed. The SB-900‘s high temperature cut-off only kicked in once for a minute or two, but otherwise it worked great. That’s where the Nikon SB-700 would be a great unit for a shoot like this.

The SB-700 apparently runs a little cooler than the SB-900 and plus it’s quite a bit less expensive. If I look to buy another flash unit soon, I might consider the SB-700 as addition to my 800 and 900 kit.

January 14, 2011
See this post
Location Photography At Speedway Cycles- Anchorage, Alaska

There are some photographers who simply stand above the crowd. Guy Tal is one of those people. He not only has expert technical abilities, he has a wonderful creative vision which is shown by his beautiful landscape imagery of the American West.

Guy also has the ability put his creative methods and technique into words, which he does in his eBook, Creative Landscape Photography.

Originally designed as a companion to his photo workshops, this eBook is aimed at the intermediate and advance photographer who is seeking to transcend their skills, techniques and creative vision beyond the basics.

Based on his experience teaching the art and craft of landscape photography and a broad writing style that both informs and motivates, this eBook explores the process-based approach that can help you unlock your own creative potential. It can show you how to take your own ideas about the natural world and turn them into highly expressive images.

I’ve been a fan of Guy Tal’s work every since I stumbled across his website, and in fact I featured him as one my 5 favorite landscape photographers of late. His imagery is top notch and he makes excellent use of color, form and environment. Any photographer would do well to study his work and learn from his experience and creative eye.

Check out Creative Landscape Photography, it’s packed with 86 pages of solid information and wonderful imagery that’s sure to inspire and it comes highly recommended by some of the top nature photographers in the field today, including California shooter Jim Goldstein.

January 13, 2011
See this post
Creative Landscape Photography: An eBook by Guy Tal
Alaska Coast Magazine Jan 2011 Issue. Cover photo ©Daniel H. Bailey/Alaska Stock

Yesterday I stumbled across the January 2011 issue of Alaska Coast magazine and saw a familiar photo on the cover- mine.

Often times when you sell your imagery through stock agencies you don’t always know where your photos will appear until they get published, and so it can be a nice surprise when you see a local magazine running your work. Plus you know that a check won’t be far behind.

This photo is an Iditarod Invitational racer running the 350 mile ultra endurance winter race from Knik to McGrath, shot with the Nikon D200 and 14mm f2.8 lens while pedaling behind on a snow bike, steering with one hand while photographing with the other.

January 11, 2011
See this post
Cover Photo- Alaska Coast Magazine, January 2011 Issue

As I look around the web and read some of the photography forums, I see quite a few photographers who are thinking about adding a 50mm lens to their collection.

To me this is a little bit funny to hear, but only because when I got into photography, they didn’t have kits where the camera came with a zoom lens. I bought my Nikon FM2 body and a manual focus 50mm f1.4, and like many a beginning photographer back in the day, that’s what I cut my teeth on.

My 50mm of choice today is the Nikon 50mm f1.8D, although recently Nikon came out with the AF-S 50mm f/1.8G, which has much faster, silent wave autofocus. Both are lighter than the f/1.4 versions, although if want that extra half stop, Nikon has the 50mm f/1.4D and the more expensive AF-S 50mm f/1.4G. Canon also has a 50mm f1.8 lens and a 50mm f/1.4 as well.

It’s true that since the 50 shows the world in a similar perspective and angle of view as the human eye, it often gets the reputation as being ‘the boring lens.’ I’ve certainly gone through periods of time when I didn’t use my 50mm very often, but over the years I’ve come to love it. I find it to be an invaluable lens for shooting a wide variety of outdoor photography subject matter.

One thing to note- if you’re using a Nikon crop sensor DX camera body, then the 50 will effectively become a fast 75mm lens on those cameras. In order to preserve the ‘normal’ view on that type of camera, you’ll want to consider the Nikon 35mm f1.8 lens.

Landscapes

The 50 is great for shooting landscapes, because as I mentioned above, it pretty much shows what you see. It allows you do look at a scene, decide what you like about it and capture it as you perceive it with your own eyes. You don’t have to worry about trying to think about what the subject will look like when you crop with a telephoto or expand the perspective and depth of field with a wide angle. You simply slap that puppy on the front of your camera and shoot, because you already know what it’s going to look like.

People and Travel

Because it has a very shallow depth of field up close, the 50 is a great people lens.

It gives excellent results whether you’re shooting portraiture for paying clients or grabbing shots of your friends just for fun.

It’s also extremely fast, which makes it awesome for low light and inside photography. With speeds in the neighborhood of f.1, it can really come in handy when you find most of your other lenses unusable due to diminishing light.

And combined with the fact that it’s very small, light and compact, the 50 makes an awesome travel photography lens, so don’t leave it at home the next time you go on a trip. Either make room for it in your bag or leave something else behind- you won’t regret it.

Details

The 50 is not always the best lens at medium and long distances. It simply can’t bring the subject in, and when shooting subjects that are far away, it tends to produce rather amateur looking imagery.

However, but if you are able to get close enough, you can take advantage of that shallow depth of field and get pretty creative with your subjects.

Shooting in tight, you’ll have the same soft background effect as if you were shooting with a telephoto, only you can tackle subjects that are much closer than nmost teles can handle.

The 50 can focus on subjects that are about as close as one foot away, and with depth of field diminishing the closer you get, you can really create some dramatic, stylized imagery.

So take that 50mm lens out and give it some much needed attention. Chances are, you’ll the two of you will soon fall in love again, make some stunning photos and live happily every after.

Support this site: If you’re in the market for new gear, please consider visiting and purchasing gear through these links. This help cover the costs, effort and time that it takes to run this site and produce these reviews and articles. As always, thanks for reading!

[iframe]<iframe src=”http:///e/cm?lt1=_blank&bc1=000000&IS2=1&bg1=FFFFFF&fc1=000000&lc1=0000FF&t=danhbaisadvph-20&o=1&p=8&l=as4&m=amazon&f=ifr&ref=ss_til&asins=B00005LEN4″ style=”width:120px;height:240px;” scrolling=”no” marginwidth=”0″ marginheight=”0″ frameborder=”0″></iframe><iframe src=”http:///e/cm?lt1=_blank&bc1=000000&IS2=1&bg1=FFFFFF&fc1=000000&lc1=0000FF&t=danhbaisadvph-20&o=1&p=8&l=as4&m=amazon&f=ifr&ref=ss_til&asins=B004Y1AYAC” style=”width:120px;height:240px;” scrolling=”no” marginwidth=”0″ marginheight=”0″ frameborder=”0″></iframe><iframe src=”http:///e/cm?lt1=_blank&bc1=000000&IS2=1&bg1=FFFFFF&fc1=000000&lc1=0000FF&t=danhbaisadvph-20&o=1&p=8&l=as4&m=amazon&f=ifr&ref=ss_til&asins=B00007E7JU” style=”width:120px;height:240px;” scrolling=”no” marginwidth=”0″ marginheight=”0″ frameborder=”0″></iframe><iframe src=”http:///e/cm?lt1=_blank&bc1=000000&IS2=1&bg1=FFFFFF&fc1=000000&lc1=0000FF&t=danhbaisadvph-20&o=1&p=8&l=as4&m=amazon&f=ifr&ref=ss_til&asins=B001S2PPT0″ style=”width:120px;height:240px;” scrolling=”no” marginwidth=”0″ marginheight=”0″ frameborder=”0″></iframe>[/iframe]

January 10, 2011
See this post
Get The Most Out of Your 50mm Lens

Got some money burning a hole in your pocket do you? Ready to drop some serious cash on some new camera equipment and expand your arsenal of gear? Yea, me too.

Hold on a minute, though. Before rushing out and parting with what could easily be one or two thousand dollars or more, you need to do your research. In order for you to find the best digital camera or lens for your needs, you’ve got to read some legitimate reviews and figure out whether the item that you’ve got your eye on is actually going to work for your style of photography, or whether it will hold up to the abuse that it’s likely endure under your care.

I’m sure that most of you already know where to find these kinds of reviews, but I thought that I’d get them out there anyway. Hey, it never hurts to have the right resources at your fingertips, right?

1. B&H Photo and Video

There’s no better place to shop for photography gear online than B&H. Not only do they have just about every camera, lens and accessory that you’d ever need, they list reviews for most items. The reviews are usually concise, and they list pros, cons, best uses and whether the reviewer is a pro, semi-pro or enthusiast. That helps you quickly identify the reviews that are written by users like you.

And if you don’t know already, B&H has a free iPhone app (coming soon for Android) that includes reviews along with all the tech specs and info that you can find on the regular website. It’s great for reading reviews on the go.

2. Amazon

I’ve used Amazon to review everything from cameras to coffee makers and I’ll even pull it up on my iPhone to review something that I’m considering buying while actually standing in the store. Admit it, so have you.

The great thing about Amazon is that it’s written by a wide cross section of people and they’re usually fairly detailed. If people like an item, they generally tell you why, and if they don’t, they’ll tell you that as well. Of course, you have to occasionally take reviews with a grain of salt because sometimes they’re written by people who are a bit opinionated.

I’ve found that the best way to sort this stuff out is to check out the most negative reviews first. You can usually tell whether negative comments are justified, or whether they’re just written by someone who is just pissed off or who probably didn’t even use the product in the right way. After weeding those out, you can average out what the rest of the group has to say about the item.

3. PhotographyReview.com

Photographyreview.com is a great site that offers a wide selection of reviews, pro reviews, gear writeups, how-to articles, choice awards and buying guides for photography equipment of all types. They also have a very active forum that’s visited by a large camera-using audience, including me. (As if that has any sway…)

If you need any information about a specific camera, lens or piece of photo gear, or if you’d like to write your own reviews of products that you’ve used, then you should definitely check out this site.

January 7, 2011
See this post
3 Great Places to Read Camera Gear Reviews

I’m a Nikon guy. I use Nikon cameras and Nikon flashes.

So, when I go looking for information and inspiration to learn new off-camera lighting techniques, I turn to the guru of lighting, Joe McNally. I’ve mentioned his book, The Hot Shoe Diaries a couple of times here on the blog. It’s an awesome reference, but it’s limited in one major way. It’s Nikon only.

Fortunately, there’s a brand new book out for you Canon shooters. It’s called Speedliter’s Handbook: Learning to Craft Light with Canon Speedlites. It’s basically the Canon equivalent to The Hot Shoe Diaries and it looks to be the long awaited Canon flash bible that the other team has been waiting for.

Written by accomplished photographer and workshop instructor Syl Arena, this book is an awesome in-depth manual that shows you how to get the most out of your Canon Speedlites.

He explores it all, starting with how to navigate and use the functions, menus and buttons on the specific units, and then goes into overall lighting and flash basics, how to balance flash fill with ambient light, how and when to use E-TTL vs. manual, how to balance color and how to create dramatic effects whether you’re using one flash or multiple off-camera flashes.

[iframe]<iframe class=”alignleft” src=”http:///e/cm?t=danhbaisadvph-20&o=1&p=8&l=as1&asins=032171105X&ref=tf_til&fc1=000000&IS2=1&lt1=_blank&m=amazon&lc1=0000FF&bc1=FFFFFF&bg1=FFFFFF&f=ifr” style=”width:120px;height:240px;” scrolling=”no” marginwidth=”0″ marginheight=”0″ frameborder=”0″></iframe>[/iframe]

The book also covers studio lighting, location lighting, how to use gobos, scrims, snoots and diffusers, how to combine the light from multiple Speedlites, and how to control slaves from your master flash or camera. Basically all the stuff you’ll want to know in order to take your Canon flash photography to the next level, expand your creativity and begin your new lighting journey.

With over 400 pages and over 500 photo illustrations, its book is packed with a tremendous amount of detailed information. And even though it’s only been out for a week, it’s already received tremendous reviews from those who have read it.

In the past, you had to cobble this info from a wide variety of sources. No more. If you’re a Canon shooter, then is absolutely a must-have reference. If I were a Canon guy, I’d buy it in a heartbeat.

January 4, 2011
See this post
Speedliter’s Handbook: Learning to Craft Light with Canon Speedlites