Just days after I reviewed the gorgeous photography eBooks by Craft and Vision, they go and release yet another wonderful title, The Vision Driven Photographer by outdoor and travel photographer extraordinaire, David duChemin.

I just have to say that if I could make the perfect eBook, it would be this one. I’ve long been a strong advocate of really digging in deep to explore your personal creative vision with photography, and as many of my students who take my online photo courses would attest, I’m always trying to get them to put serious thought into what they’re trying to say with their imagery. To me, vision is everything.

And I’m always encouraging people to push their limits and experiment with their methods, equipment, locations and vantage points in their quest to create photographs that not only wow the viewer, but speak to them and effectively communicate what it was that attracted you to the subject or scene in the first place.

I’ve also traveled and photographed in many of the same places as David has featured inside The Vision-Driven Photographer, and so just looking at the incredible imagery inside brings back strong memories and makes me reflect on my own photographs from these locations. His landscapes are stunning and his travel photography is unbelievably good. And, of course, when I read the text that accompanies his breathtaking shots, I think to myself: This guy says it all and he says it right.

“Vision matters”

“Vision is not style.”

“Our best work is play.”

See what I mean? This guy David duChemin knows what he’s talking about. He’s a true master of not only creating incredible photography, he’s also a master at explaining what should go into it and why.

The goal of this inspiring and insightful book is to help photographers of all levels to make stronger photographers by getting them to identify or re-discover their own photographic vision. In it, David asks the questions and makes the statements that lead you towards clarifying what it is that you want to say with your imagery and how you want to move others with your own visual expression.

After all, truly great photos come from within, and by helping you find or fine tune your own vision through thought provoking text and a series of creative exercises, he encourages you to look inside and unlock that personal expression that lives within you.

It’s so well done and perfectly balanced with words and pictures that are not just gorgeous, but highly creative. They’re designed to inspire you to not just shoot good photos, but your photos. Like I said, it’s the perfect photography eBook. It’s the one that I would have wanted to write, because as a photographer and teacher, who wouldn’t want to strive to be like David duChemin someday?

Of course, I am not David and I never will be. I’ll always be Dan, and so I’ll keep doing what I do and release my own eBook on photographic vision and creative technique, which by the way, is currently in the works, because each photographer has his or her own set of unique talents and teaching styles.

However, that’s not to say that I can’t learn a whole lot from David duChemin and his eBooks, because I do, and so will you. He’s a remarkable photographic visionary, certainly one of the best of our time, and what he says about the craft and art of photography is absolutely right on.

If you love photography, get this book. At only five dollars, how could you not? I already have my copy and it’s only been out for six hours.

Happy Thanksgiving.

November 24, 2010
See this post
The Vision-Driven Photographer: A Stunning eBook by David duChemin

A few weeks ago, I reviewed Lightroom books by Scott Kelby, Nat Coalson and Martin Evening. Today we look at another very useful title that’s geared more toward the emerging digital photographer: Adobe Digital Imaging HOW-TOs: 100 Essential Techniques for Photoshop CS5, Lightroom 3 and Camera RAW 6.

Published by Adobe Press, and written by a veteran of the Adboe test team, Dan Moughamian, Adobe Digital Imaging HOW-TOs is a concise manual for working with digital images and learning how to easily navigate through Adobe Lightroom 3, Adobe Camera RAW and Photoshop CS5.

Unlike many software manuals that can often overwhelm new users, this book was designed with a very simple goal in mind: to teach you the important and relevant techniques and functions so that you can jump right in, learn the programs and begin building a solid digital imaging expertise.

It does a very good job at that. Written as a series of 100 essential tips, and targeted to beginning and intermediate users, the book walks you through the four main steps of any digital photography workflow, which are importing and organizing your images, developing your RAW files, retouching and perfecting your images in Photoshop, and preparing your finished images for output.

Technique #1 starts right at the beginning by getting you familiar with the Lightroom 3 interface, and from there it teaches you all the important steps that you’ll need to know to make use of this powerful program, like adding metadata, using smart collections, synchronizing and renaming folders, how to shoot tethered, and how to compare similar photos during your editing process.

From there, it moves onto the developing stage and it teaches you how to fine tune your images and how to get them ready for print, slideshows or web galleries. The last section teaches you how to setup the Photoshop CS5 interface and make use of the powerful tools at your disposal, like how to use the new Content-Aware Fill Tool, how to make Photomerge panoramas, how to Refine Selections, how to use Adjustment Layers, the Spot Healing tool, HUD color pickers, Lens Correction and more. There’s even a section on how to make the most of CS5’s great new HDR-Pro features and some more advanced techniques, such as Manual Lens Correction and HDR Toning.

Each of the 100 techniques is written as a series of very clear steps and illustrated with full-color screenshots that teach you how to perform and understand exactly what you’re doing. Many of them even contain useful sidebar tips. Most of the techniques take up a single flip of the page, while a handful take up a few pages. It’s quick, easy and concise. This method lets you become familiar with each step so that it will quickly burn itself into your workflow memory. If you forget how to perform a specific technique, though, you can simply refer to the table of contents and easily find what you’re looking for.

I see this book as an excellent reference for photographers who are new to Adobe software, or who want a book that will guide them along quickly and clearly. Like I said, it doesn’t overwhelm, it gives you the essential information that you need to know, and it gets you going quickly.

Maybe you’ve been using iPhoto or Picasa to organize and edit your images and have just decided to make the jump to Lightroom and/or Photoshop, or maybe you’re looking for a single, affordable reference that covers both programs (three if you count Adobe Camera RAW, which is built into LR and PS).

If so, then I’d highly recommend Adobe Digital Imaging HOW-TOs: 100 Essential Techniques for Photoshop CS5, Lightroom 3 and Camera RAW 6. It’s a really great book that contains enough detail so that you can jump right in and begin, learning the software, improving your photos and establishing a workflow right now. And as you work through it, you’ll build a solid working expertise of these powerful applications one technique at a time.

Check out www.colortrails.com for more information and tips by author Dan Moughamian.

November 23, 2010
See this post
Book Review: Adobe Digital Imaging HOW-TOs by Dan Moughamian
Blinkbid Software for Photographers and Creative Pros.

During the past few months, I’ve been working hard to increase the efficiency of my photography business with a new MacPro, lots of new new software upgrades and new methods for completing many of my daily tasks like writing bids, keeping accurate records and billing clients.

Not that I was horribly inefficient before then, it’s just that as I get continue to get busier, every little inefficiency is magnified by ten fold. The few minutes that I was spending writing out an assignment estimate or typing in the terms of a stock photo usage was time not spent editing images, marketing myself or creating new work.

And, when I bought my new Mac, a very important change occurred. No more Classic Environment.

Over ten years ago, using FileMakerPro v2.1, I had created a series of custom databases for all my client contacts and accounting. I used these to keep track of all my records. However, when I finally upgraded to OS X Leopard, I was suddenly faced with a choice: Either spend $300 bucks on the latest version of FileMaker Pro (I had never bothered to upgrade) or look for a new system.

I chose to look for a new system, and after looking at a number of options, I decided on Blinkbid.

Why? Because photographer Lou Lesko and his team have come up with a REALLY useable and sensible program for estimates, billing and invoicing that allows me to create, save and print jobs in a fraction of the time that it took me to complete these tasks before. It’s already used by thousands of photographers and it’s endorsed by groups such as National Geographic, ASMP, Editorial Photographers and NPPA.

Designed as a complete bidding and billing solution for creative professionals, Blinkbid is a FileMaker Pro based program that incredibly easy to use and powerful enough to let you customize it to suit your specific needs. What makes it so fast and easy is that the specific language that covers all kinds of image licensing, usage rights, territories and fee categories that include everything from studio and location fees, travel, insurance, production charges, stylists and more is built right into the program.

When you go to create an estimate or an invoice, you simply enter the client, fill in the job description and then select the dropdown categories that apply to the job. It literally takes seconds to write up the license, because you don’t need to actually write it, you just click the applicable options and hit enter and the proper license is added right to your form.

And although Blinkbid is not a photography pricing program, the latest version does include a new feature called Bid Consultant, which acts as a pricing guide. It won’t quote an exact price, but if you’re unsure about how much to charge for a specific type of shoot, it can at least help get you in the right neighborhood so that you don’t severely over or undercharge your client. I’m really excited about this feature, because, let’s face it, pricing jobs is not always easy.

Sure, I probably could have just upgraded my version of FileMaker Pro and made my own client and billing database, but I don’t really have time to do that. Although in the past, I tried to be resourceful and do everything myself, I’m learning that in certain areas, it’s much more efficient to take advantage of the innovations that others provide. This is one area where it makes perfect sense to go with a pre-made system that not only works, but that works really well.

I downloaded the 14-day trial version of Blinkbid, but after seeing how well the program worked, I went ahead and bought the full version. It’s made a huge difference in my business efficiency, and At $229, it’s already paid for itself many times over with the jobs that I’ve bid and billed with it.

November 22, 2010
See this post
Blinkbid Software for Photographers and Creative Professionals
Beautiful eBooks from Craft and Vision

Of all the eBook publishers out there, in my mind, Craft and Vision definitely ranks near the top of the list, if not at the very top.

Without a doubt, they produce some of the finest photography eBooks that I’ve ever seen. They’re professionally designed with gorgeous layouts and absolutely stunning imagery, and they’re sure to inspire any photographer who wants to improve their craft, enhance their own creativity and learn from studying the photographic talents of some outstanding photographers like David duChemin, Mitchel Kanashkevich and Andrew S. Gibson.

Craft and Vision offers a wide variety of titles, all of which are designed to help you improve as an outdoor or travel photographer. Some focus on the skills and technical aspects of image making, while others help you expand your own vision and see the world in a more creative way. And the best part is that they’re all only $5.

Their latest offering is Close to Home by Stuart Sipahigil, which is about finding and seeing the extraordinary in a world that we often regard as mundane. Its filled with creative methods and visionary tools that will help you break out of your photographic rut and make great images of your own familiar environment.

Every one of their books is beautifully done. In fact, they’ve set the bar really high for all other eBook publishers to follow. I’ll be honest here, they definitely influenced me as I was designing my own eBook, which I just released last week.

If you’re looking for some motivation or creative inspiration, check out Craft and Vision and treat yourself to one or two of their eBooks. I highly recommend any of their titles. You won’t be disappointed in the visual quality and education that they have to offer. Besides, you and your photography deserve some occasional creative goodness.

What else were you going to spend five dollars on this weekend?

November 19, 2010
See this post
Great eBook by Craft and Vision: Close to Home by Stuart Sipahigil

Attention photographers, photo bloggers and writers, I’m looking for people to be guests on this site.

Is that you?

I’m thinking that I’d like to start featuring a guest blogger about once a month in order to highlight some great image makers, diversify the content and hopefully share some readers with each other.

As far as style goes, I’m looking for something introspective and entertaining that includes at least one great image; something that will engage an audience of enthusiastic outdoor photographers who look here to be inspired, informed or humored. Something that you’d be ok with having your mother read.

If you’re a regular visitor to this site, then you’re already familiar with the kind of content that I typically feature. If not, then take a few minutes to look around at some of my past articles and see if it matches with the type of post that you think you’d want to contribute.

I’ll start looking now for someone to feature at the end of November, and also for someone to feature in December.

If you’re interested, click on the contact page above and send me a message. Include a link to your blog so that I can see examples of your work and your writing style.

Depending on how many emails I get, I’ll try to choose someone in the next week or so. If you’re the lucky blogger, then I’ll contact you directly and we can discuss how and when I’ll put your post up.

I look forward to seeing who replies!

November 18, 2010
See this post
Are You Interested in Writing a Guest Post on This Blog?

Edit- Updated April 25, 2011:

In my role as senior contributor to The Photoletariat,  I’ve written nearly 150 posts in the past year. (Read all my posts here.) To celebrate, I thought I’d reflect back on some of the topics that I’ve covered and pick out a few of my favorites.

Writing for The Photoletariat has definitely helped me stay inspired and it keeps me in tune with the photo industry.  And with many of my articles, I often write them for myself. It’s like my therapy. My posts make me smarter, they keep me informed, and they help me look at my imagery and business in new ways. And sometimes, they just make me laugh. I hope that they do the same for you.

If you’re a regular reader, you might remember some of these posts. It might even be fun to see what you get out of reading them for a second time. You may be in a different place with your photography or your business now than you were a few months ago, and reading these articles again might give you some new perspective.

So, in no particular order, here are the top 5.

Why Competition Makes us Better Photographers

Sometimes it’s easy to get discouraged by how well you think everyone else’s business is doing compared to your own. This is natural and it probably happens to more people than you think. I wrote this post as a reminder as to why competition is actually good for our industry and to help readers keep in perspective that no matter what anyone else is doing, you have a unique path in life and thus a unique road to success with your photography. I think it’s one of my more motivating posts.

6 Things Photographers Like to Argue About

I came up with the idea for this post while riding the camper bus in Denali National Park. To date, it’s the most read and most commented post on the site. Although it was meant to be funny, some people took it a little to seriously. It’s fun to read through some of the comments and see what the ‘serious’ people wrote.

8 Ways to Spot the Pro Photographer

Another humorous post. I have lost of fun with these, and judging by how many times this one got tweeted around, so do you. Of course, the funniest thing about this post is that all of the examples are true. I just took a quick look at myself and came up with the list. I could have titled it “8 Ways to Spot Dan Bailey.”

Landscapes: Worth Waiting For

I liked writing this one because it was such a good reminder that creating a great image takes time, patience and slow observation. This is in stark contrast to our current fast paced, and often frantic world of Facebook, Twitter, email, concise blog posts and the hours that we spend each day absorbing as much content as humanly possible.

Is Photography About Pure Skill or a Little Bit of Luck?

The morning I sat down to write this one, I had just seen an amazing photo of a mama moose fighting off a wolf pack that was threatening her calf. The photo was shot by fellow Alaska photographer, Patrick Endres, and it reminded me that as much as we practice our skill, hone our technique and buy the best equipment, the truth is that sometimes, a great image comes down to simply being in right place at the right time. Sometimes it’s all about luck.

November 17, 2010
See this post
My 5 Favorite Blog Posts That I’ve Written on The Photoletariat
Rock climber on Supercrack, Indian Creek, Canyonlands, Utah
Heath Mackay climbing the legendary route, Supercrack, Indian Creek, Utah

Supercrack.

This legendary and almost mythical feature that breaks the Dakota standstone on a certain wall in the Canyonlands of Southeast Utah is, without a doubt, one of the most famous rock climbing routes in all the world.

First climbed in 1976 by Earl Wiggins, five years after it was discovered by three young unruly, yet talented and athletic fellows, who were exploring the desert for new routes, Supercrack draws climbers like a religious monument draws the faithful.

They come loaded down with braided rope and slings full of cams, and they stare in awe when they finally stand below this magnificent four inch wide crack that splits the nearly featureless, bronze colored rock face, for it is truly a sight to behold.

And once you step into your harness, tie into the rope and make that first hand or fist jam, depending on how big your paws are, and take that first step off the ground, you are in it. You are committed, because if you came to climb Supercrack, there’s no giving up. You made it this far and if you do not reach the top of the route, it will only be because your muscles or technique came out, not because your heart lacked the desire.

Unless you’re an expert climber, it’s by no means easy. Supercrack is rated 5.10, and that means hard. It’s a stout climb, and it’s perhaps the perfectly designed route, because as you stuff your hands and feet inside the crack, you discover it to be deviously off-kilter, not too mention the fact that there is absolutely nothing whatsoever to grab or hold on to as you struggle to make your way higher. Plus it’s dead vertical.

When you’re halfway up, your forearms begin to burn. If your crack climbing technique is bad, then you’re even more spent. Supercrack is relentless. It makes you fight for every single inch, and as you expend muscle and energy to propel yourself upwards, the crack begins to widen, which makes it even harder. It’s like some kind of cruel joke.

At one point, you probably look down and realize how far you’ve come, but your joy only lasts so long because looking up, you realize that those last thirty feet will take every bit of strength that you have left.

You lean your body to the side, trying milk every bit of friction that the crack gives against your hands, arms and feet. It’s friction that keeps you from falling out. Friction and muscle. However, you pay the price in lost skin. Like fine grit sandpaper, Supercrack abrades. It rubs. It cuts. If your technique is sloppy, and who isn’t a little bit sloppy after eighty feet of hard climbing, you lose even more skin. In the end, whether you make it or not, you’ll come out with the Supercrack signature rash. We all get it.

As with any desert crack, the last fifteen feet is the hardest and only guts, heart and endurance will see you through. If you reach the top of the route… well, I won’t tell you what it’s like. You either know or you don’t. If you run of of steam or if the crack spits you out, then you’ll lower off and come back another day.

Nearly every climbing and adventure photographer has photos of Supercrack. This is mine. It’s my friend Heath Mackay. He made it to the top that warm November day.

November 16, 2010
See this post
Heath Mackay Climbing Supercrack, Indian Creek Canyon, Utah

The Complexities of Outdoor Light.

tape in hair extenstions

Some photographers obsess about color. I’ve never been one of those people. That’s not to say that I don’t care about how my images appear on my computer monitor, I just don’t spend too much time worrying about it. I let my calibration system worry about it instead.

I shoot outdoor subjects under an incredibly wide spectrum of lighting conditions. More often than not, I shoot at magic hour when the light contains shades of orange, red, magenta, yellow, blue and pink.

Throughout my career, not only have I had to deal with constantly changing light, I’ve had to deal with how digital sensor and slide films like Kodachrome and Velvia reproduce those colors. The simple fact is that film and digital cameras never show color the exact same way your eye sees it, especially when it comes to the complexities of warm and cool light that we find outside.

Neither do ink and paper. Since I often shoot stock for publication, I never know how and where my images were going to be reproduced in magazines and catalogs. Do my published tearsheets always look exactly like the original did? No, and they never will.

Are they usually close? Yes, in fact, I can’t think of a single time when one of my published images looked horrible. Sure, consistency varies sometimes, mostly because of the limitations that occur when going from the film or digital image to the computer screen to the printing press, but with the type of subject matter that I typically shoot, there will always be variation.

The truth is that color often ends up being very subjective. Every person and every device interprets it differently. What’s to say that your image of a trail runner who’s wearing a bright red top that’s shot under warm, highly saturated direct sunset light is the “right” color? Or your photo of wet autumn leaves shot under the cool blue cast shade on the forest floor?

You. That’s who.

If the image on your screen looks like you remember it when you shot it, then that’s what matters.

However all devices and computer monitors reproduce color differently, and displays shift slightly over time, even the good ones, and even you may not notice the slight color differences in your photos as your monitor drifts. If you prep an image on a non-calibrated monitor and then send that image off for printing, or email it to a client for publication, you risk the possibility of it looking very different on the other end.

Calibrate Your Monitor

In order to ensure accurate color across different devices, especially when you hand off your images, you should get yourself a decent monitor and calibrate it on a regular basis, ESPECIALLY if you use two monitors in your digital imaging workstation. Calibrating is a fairly easy process, you simply get yourself a monitor calibration device and run the software as part of your regular workflow every month. Some people like to calibrate every week, but I find that once every month is adequate for my needs.

If you’re especially concerned about color, then you might want to consider buying a really high end monitor like an NEC or Eizo, but before you run out and drop two or three thousand bucks on a new monitor, know that there are many photographers out there, me included, who do pro work on displays made by Apple, Dell, HP and Samsung. (I just updated to the new Dell UltraSharp U2413 24″ monitor. It’s a high quality, non-glossy 24-inch IPS display that only costs under $500.)

There are a few display calibration systems on the market. Three common systems that will work well for outdoor photographers on a budget are the X-Rite i1Display Pro, the Datacolor Spyder4 Pro and the Datacolor Spyder4 Elite. (The Elite offers Both are very user friendly and will do an excellent job of standardizing your displays so that you get consistent color from camera to display. And although they’re being phased out with X-Rite’s product line update, you can still get the X-Rite i1 Display 2 and the X-Rite Eye-One Display LT for around $169-189.

Easter spring backdrops for photographyIf you’re really concerned about color, or if you need professional quality calibration for shooting subjects such as studio portraits, products or weddings, then you might consider the newest offerings from X-Rite, the iBasic Pro and the iPhoto Pro. These systems cost much more, but they let you achieve true color response on your LCD, CRT or laptop monitors, RGB printers with unlimited gamma and white point settings, custom monitor profile, full PANTONE color management and more.

For the most part, though, the above three options will probably serve the needs of most photographers who shoot landscapes, nature, people, sports and other subjects under the varying conditions of outside light. The small investment of a calibration system and the time spent once a month can potentially save you some real headaches down the road, so do you and your imagery a favor and give it the color accuracy that it deserves.

[iframe]<iframe src=”http:///e/cm?lt1=_blank&bc1=000000&IS2=1&bg1=FFFFFF&fc1=000000&lc1=0000FF&t=danhbaisadvph-20&o=1&p=8&l=as4&m=amazon&f=ifr&ref=ss_til&asins=B0055MBQOW” style=”width:120px;height:240px;” scrolling=”no” marginwidth=”0″ marginheight=”0″ frameborder=”0″></iframe><iframe src=”http:///e/cm?lt1=_blank&bc1=000000&IS2=1&bg1=FFFFFF&fc1=000000&lc1=0000FF&t=danhbaisadvph-20&o=1&p=8&l=as4&m=amazon&f=ifr&ref=ss_til&asins=B006TF37H8″ style=”width:120px;height:240px;” scrolling=”no” marginwidth=”0″ marginheight=”0″ frameborder=”0″></iframe><iframe src=”http:///e/cm?lt1=_blank&bc1=000000&IS2=1&bg1=FFFFFF&fc1=000000&lc1=0000FF&t=danhbaisadvph-20&o=1&p=8&l=as4&m=amazon&f=ifr&ref=ss_til&asins=B006TF36TM” style=”width:120px;height:240px;” scrolling=”no” marginwidth=”0″ marginheight=”0″ frameborder=”0″></iframe><iframe src=”http:///e/cm?lt1=_blank&bc1=000000&IS2=1&bg1=FFFFFF&fc1=000000&lc1=0000FF&t=danhbaisadvph-20&o=1&p=8&l=as4&m=amazon&f=ifr&ref=ss_til&asins=B004C04P0A” style=”width:120px;height:240px;” scrolling=”no” marginwidth=”0″ marginheight=”0″ frameborder=”0″></iframe>[/iframe]

[iframe]<iframe width=”120″ scrolling=”no” height=”240″ frameborder=”0″ border=”0″ src=”http://mer54715.datafeedfile.com/widget/aff_widget_prdt_generate-2.0.php?aff_num=6746&aff_net=1&widget_num=5993&sid=” marginheight=”0″ marginwidth=”0″></iframe><iframe width=”120″ scrolling=”no” height=”240″ frameborder=”0″ border=”0″ src=”http://mer54715.datafeedfile.com/widget/aff_widget_prdt_generate-2.0.php?aff_num=6746&aff_net=1&widget_num=5994&sid=” marginheight=”0″ marginwidth=”0″></iframe><iframe style=”width:120px;height:240px;” marginwidth=”0″ marginheight=”0″ scrolling=”no” frameborder=”0″ src=”//ws-na.amazon-adsystem.com/widgets/q?ServiceVersion=20070822&OneJS=1&Operation=GetAdHtml&MarketPlace=US&source=ss&ref=ss_til&ad_type=product_link&tracking_id=danhbaisadvph-20&marketplace=amazon&region=US&placement=B00BN2BIUK&asins=B00BN2BIUK&linkId=WGS3DSF7L5JLDZE3&show_border=true&link_opens_in_new_window=true”>
</iframe><iframe width=”120″ scrolling=”no” height=”240″ frameborder=”0″ border=”0″ src=”http://mer54715.datafeedfile.com/widget/aff_widget_prdt_generate-2.0.php?aff_num=6746&aff_net=1&widget_num=5995&sid=” marginheight=”0″ marginwidth=”0″></iframe>[/iframe]

November 15, 2010
See this post
Display Calibration Systems for Outdoor Photographers

Last week I reviewed three books that will help you get up to speed on Adobe Photoshop Lightroom 3 and learn all the new features that they’ve packed into, what has proven to be an excellent and indispensable upgrade to an already great photo management and processing program.

The truth is, though, that I wasn’t so much writing the article for you as for me. You see, I’m a new Lightroom user.

I upgraded my computer this month, and having been on a G5 Power Mac for the past five years, I was unable to use Lightroom. I did try out the LR2 trial version two years ago, but it ran pretty sluggish on my non-Intel processor, so I quickly gave up on it and went back to the system that was working so well for me at the time, which was a combination of Photo Mechanic, Photoshop and iView MediaPro 3.

Those days are over. Just as I needed the power of a new computer to keep me running efficiently, I also realized that it was time to upgrade to a better system of file management and organization. My file of images has grown enormously during the past few years and the system that had worked previously for me was now beginning to show signs of real inefficiency.

As I got busier, I started to see how much time I was losing with my old system, and so the second I booted up my new Mac Pro for the first time, I downloaded the trial version of LR3 and began my transition to a brand new workflow.

However, being a new Lightroom user, I knew that I had a certain amount of learning to do in order to get up to speed. Sure, I felt pretty confident that I could learn on the fly by playing around with the different menus and reading the Adobe help pages, but that’s not very efficient. I don’t really have time to waste playing around.

So, I decided to buy a book.

I did my research and found the three most likely titles, and then went over to Barnes and Noble to check them all out. I think I wrote an accurate synopsis of what each book has to offer the photographer who wants to work efficiently with Lightroom, and after mulling it over for a few days, I finally made my own pick.

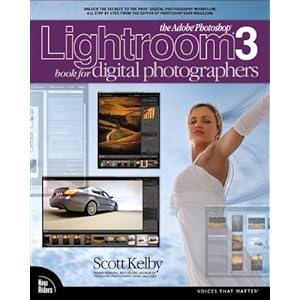
I chose Scott Kelby’s book, The Adobe Photoshop Lightroom 3 Book for Digital Photographers.

Why? Because it’s written so that you can sit down with it and learn as you go. It’s fast. It’s efficient. It’s designed as a reference that you can use from the moment you sit down to import your images and take them through your workflow.

I didn’t really need a full manual to teach me every single thing about the program. I know that the more I use it, the more I’ll learn. I’ve used enough software to know that can figure that stuff out as I go.

What I needed was a book that would guide me through that first lap around the track. After that, I’ll know enough that I’ll probably start adapting Scott’s example workflow to my own needs and veer off in my own direction, but for that first lap, I just wanted a solid rundown of how the program works.

Not that those other two books on my list aren’t great, because they are. I just decided that this one would work best for me. And I didn’t want an eBook, because I wanted something that I can take to the couch or to bed if I want to do some nighttime reading.

Not that eBooks aren’t great, in fact I just published my first one. Sometimes I just like real books. Call me a modern, digital age traditionalist.

So that’s my recommendation. Scott Kelby’s Lightroom 3 book will get you on the right track, right away. That’s really what most of us need, right?

Note: Scott Kelby’s Lightroom 4 book is know available.

[iframe]<iframe src=”http:///e/cm?lt1=_blank&bc1=000000&IS2=1&bg1=FFFFFF&fc1=000000&lc1=0000FF&t=danhbaisadvph-20&o=1&p=8&l=as4&m=amazon&f=ifr&ref=ss_til&asins=0321819586″ style=”width:120px;height:240px;” scrolling=”no” marginwidth=”0″ marginheight=”0″ frameborder=”0″></iframe><iframe src=”http:///e/cm?lt1=_blank&bc1=000000&IS2=1&bg1=FFFFFF&fc1=000000&lc1=0000FF&t=danhbaisadvph-20&o=1&p=8&l=as4&m=amazon&f=ifr&ref=ss_til&asins=0321700910″ style=”width:120px;height:240px;” scrolling=”no” marginwidth=”0″ marginheight=”0″ frameborder=”0″></iframe>[/iframe]

Like what you see here? Get my newsletter and have exclusive outdoor photo tips, reviews and pro insight delivered right to your inbox.

Subscriber Counter


November 10, 2010
See this post
My Pick: Scott Kelby’s Lightroom 3 Book

I am very excited to announce that I have just released my fist eBook:

How to Become a Pro Photographer

This 27 page eBook is aimed at photographers who want to know what it actually takes to make the jump into a professional photo career.

Illustrated with full page imagery and packed with in-depth information, industry resources, links and personal insight that I’ve gained from my experience working as a full time pro for a decade and a half, it will tell you what you need to know in order to get started working in this field and lay the groundwork towards building a successful photography business.

The fact is that the global economy, digital technology and the internet have drastically changed the business model of photography during the past few years. Now more than ever, photographers who want to make money with their cameras face stiff competition and a very saturated market.

It won’t replace the hard work that you’ll need to do if you want to become a pro, and it certainly won’t guarantee success, but it will point you in the right direction and answer many of the questions that you probably have about what it takes to be a professional photographer in this day and age.

The book is broken down in to five sections that cover how to determine if you’re ready, technology and equipment, marketing and social media, business and taxes and building your brand as a working photographer.

If you want to turn your photography passion into a career and start making money with your camera, or even if you’re an emerging pro who still has questions and wants to get on the right track, then this eBook is for you.

Buy Now (Select if you don’t have a PayPal account.)

[ssg-superb-slideshow=widget=348=450=8000=500=0=NO]

November 8, 2010
See this post
Brand New eBook: How to Become a Pro Photographer