Shooting action is a blast. Except when it’s not. There’s nothing more exciting than trying to freeze an exhilarating moment when your subject is whizzing by; trying to capture the feeling of speed and physical exertion in a single frame, except when the light is really bad.
Then this supremely awesome style of photography can turn into an immensely frustrating challenge. Photography is all about light, and if you don’t have very much of it, then you’re hard pressed to get the kinds of images you were hoping for. You’re left standing in the dark with a card full of blurry, grainy frames and very few keepers.
It happens to the best of us, but rest assured, I’m here to help. In this post, I’ll give you five simple tips that will ensure better images when you’re trying to photograph moving subjects in terrible light.
Remember, it takes a lot of practice to be a good action shooter, so don’t get discouraged if you’re not always getting killer shots. Look at each outing as a new opportunity to learn and build valuable experience. These techniques work with any kind of moving subject, no mater if you’re shooting adventure, wildlife, indoor sports or kids running around the yard.
1. Crank The ISO Dial Up…WAY Up.
First and foremost, don’t be afraid of shooting at high ISO. The noise war is over and we won. Modern cameras do an amazing job in low light, so you shouldn’t be afraid of those big numbers on the far end of the dial.
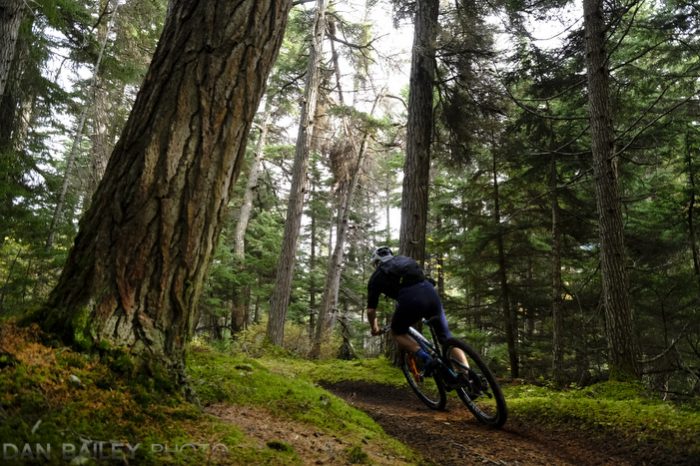
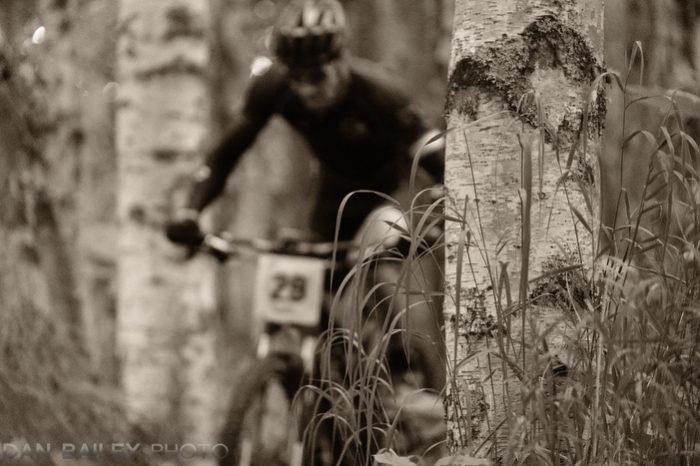
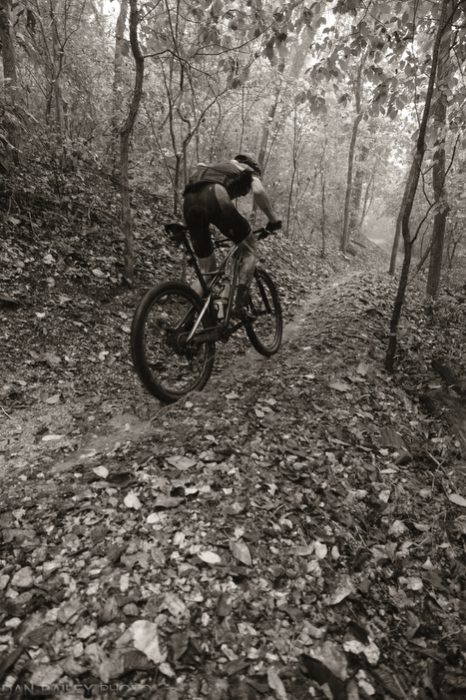
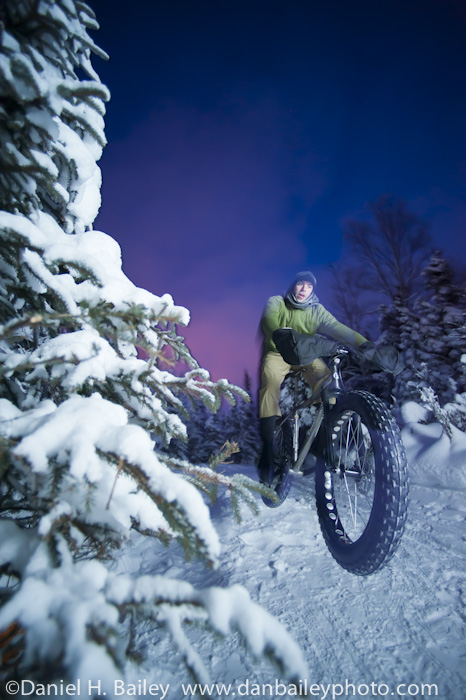
You’ll find that any camera made within the past four years will do a decent job. With my X-T2 and now the X-T3, I have absolutely no problem using ISO 1600 as a baseline and spinning the dial up to 3200 or 6400, or even 12,800 when things get really dim. (The lead off shot above is ISO 1600.)
Sure, you’ll get noise, but today’s image processors are able to render it as “grain” instead of the offensive, blotchy, digital noise that we used to get. And even if you do get a lot of grain, so what?
I know some of you old school guys get a little uncomfortable with this kind of cavalier, care-free attitude, but as I like to say, a little grain never hurt anyone. Your alternative might be a card full of blurry images, so deal with it. If you get a truly great shot, no one will care. They’ll be so blinded by the jaw-dropping bad-assery of your killer action image, they won’t even see the grain. They’ll just see awesome.
This being said, ISO noise does tend to block up in those mid-range tones, so it’s often most noticeable on human skin. i.e., bare arms and faces. If things get a little too splotchy for you, try using different compositions that don’t accentuate your subject’s faces, focus on other elements in the frame or back off and shoot wide.

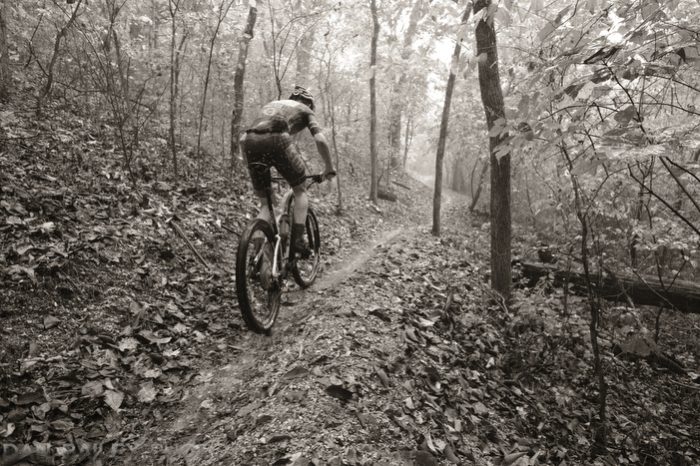
2. Shoot in Monochrome
Here’s a technique I like to use with my Fujifilm cameras. Often times when I’m shooting at very high ISO settings, I’ll use the monochrome film simulations.
For some reason, the image processor is better able to reduce ISO noise and make it look even more like film grain when you’re shooting in black and white.
You’ll find this to be especially true with ACROS. It’s designed with a very complex grain structure that holds together extremely well and actually looks great at the higher ISO. I love shooting ACROS at ISO 3200 and 12,800.
In addition, black and white photos just look cool. They carry a strong, timeless representational feel that gives them extra power. Even if you don’t have bad light, and even if you’re not a Fuji shooter, I highly recommend shooting in B/W, or at least processing some of your color image to B/W when you get home. I think you’ll be impressed with your results.
I especially love using the new BW Warm/Cool adjustments, which is a brand new setting found on the X-T3, they let you add an additional element of style to your images.
The first two images below were made with varying degrees of adjustment using the “warm” setting. The third one is straight ACROS.
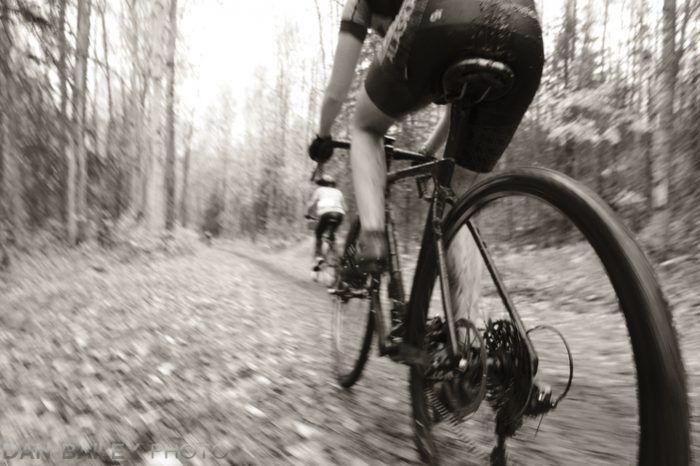
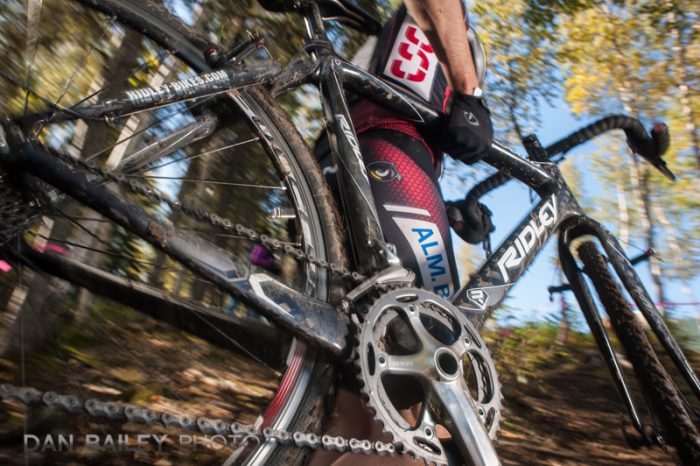
3. Use Your Widest Lens
Usually when shooting action, you want fast shutter speeds so you can get sharp subjects. By the nature of their design, wide angle lenses let you get sharper images at lower shutter speeds than you would normally be able to get with telephoto lenses.
As you move further away from your subjects and decrease their relative size in the frame, your chances of getting them sharp increase even more.
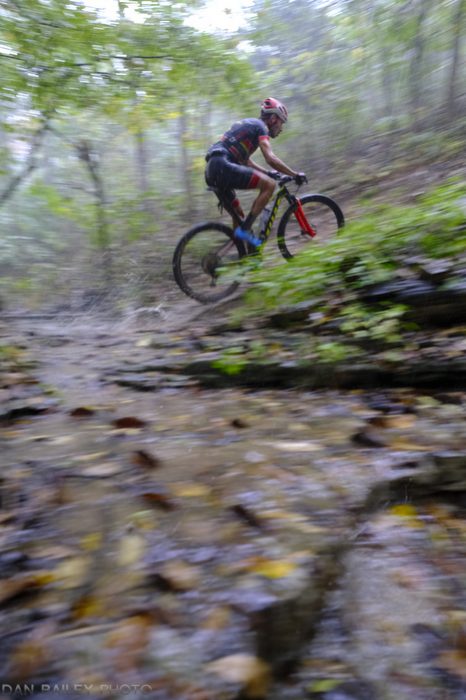
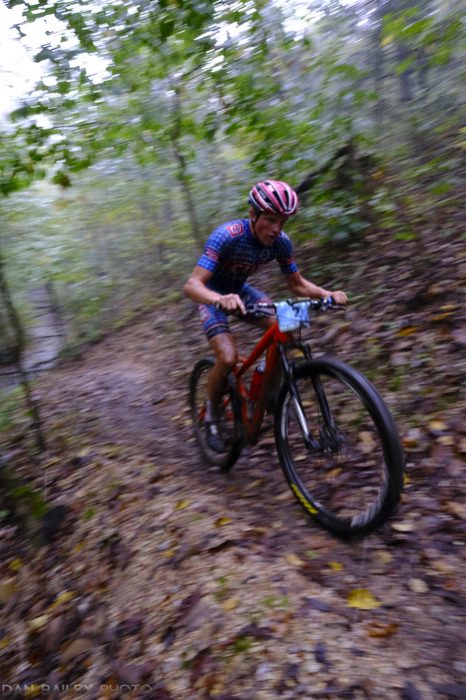
Earlier this month, I was shooting a mountain bike race inside a dark forest during a heavy rain storm, so my ambient light was very dim. My only hope was using my ultra-wide XF14mm f/2.8 lens and opening my aperture all the way up. With a telephoto, things would have been way too dark to get really crisp frames.
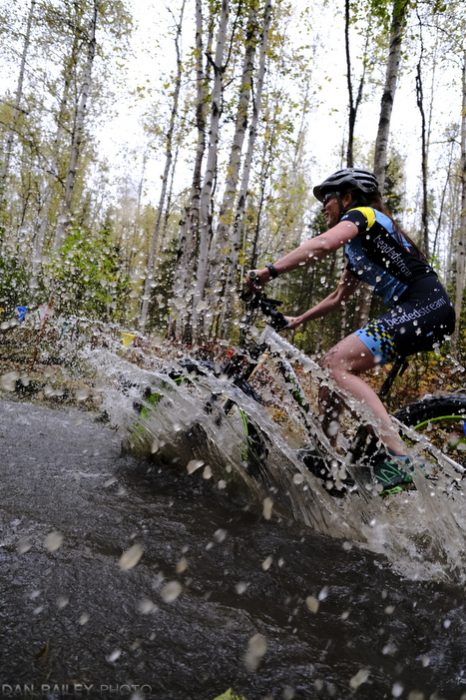
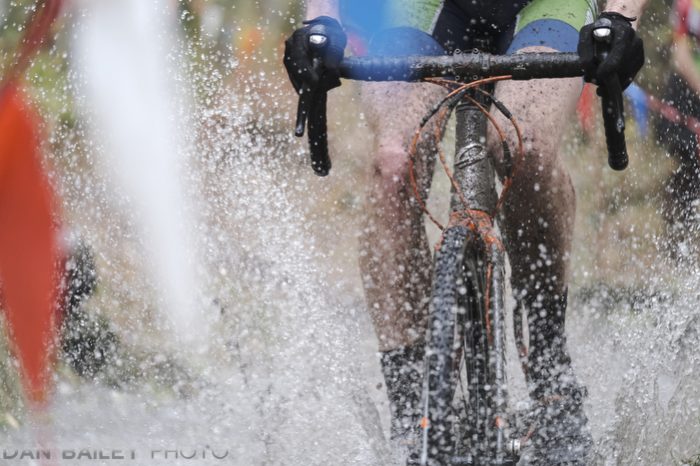
4. Use Slow Shutter Panning Techniques
Panning is an essential technique that should be in every action photographers bag of tricks. In situations like this, it can make all the difference between nailing exciting shots and getting an entire card full of throwaways.
To get the best results, you simply lock onto your subject and follow it with steady camera motion while clicking away with a relatively slow shutter speed. The trick is to move your camera at the same speed as your subject as they pass by. Your background will be blurred, as will part of your subject.
However, any part of your subject that’s moving at the same speed as your camera will be rendered with varying degrees of sharpness in your frame. If you’re able to match the motion perfectly, then that part of your subject will end up being wonderfully crisp, although a nice combination of crispness and blur usually makes for the most dynamic shot.
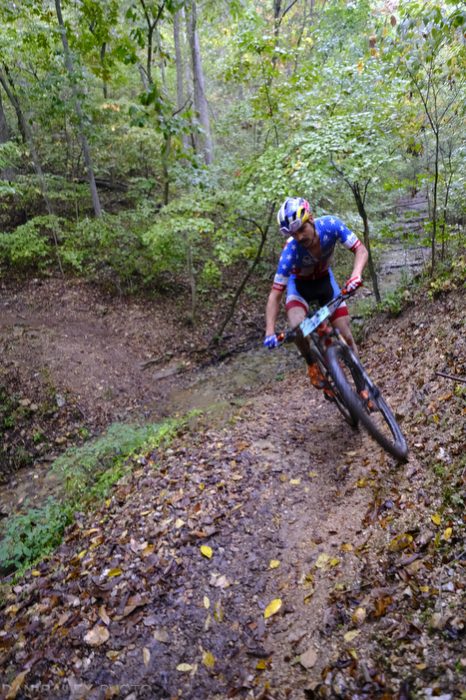
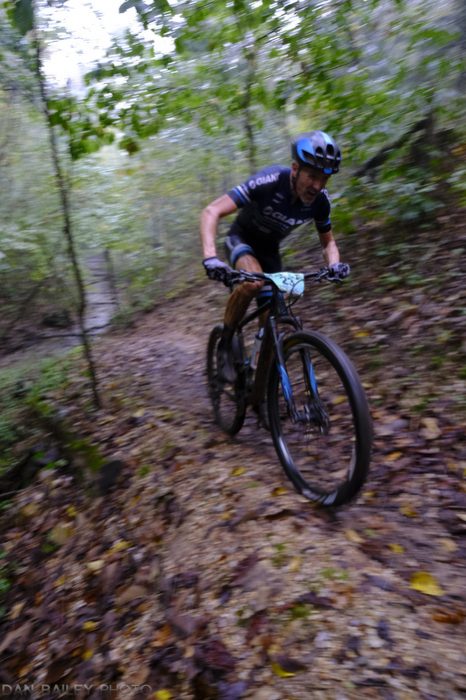
What speed works best? That depends on your lens and how fast the subject is moving. These photos below were shot with my XF14mm wide angle lens between 1/30 and 1/50 second.
It will take some experimentation to figure out what speeds give you results that match the look you’re going for. In adding to side-to-side panning, I often use front-to-back panning, which gives a different feel.
5. Use a Flash
Bringing a flash into the mix can add a whole new dimension to your action photos. When I’m shooting sports with flash or battery powered strobes, I usually combine it with my regular slow-shutter panning techniques. Although off-camera flash is my preferred method, using the pop-up flash on your camera can work just as well.
A quick blast of light at the end of your shutter cycle will illuminate your subject and create a “ghost-like” motion blur where you have a prominent, sharp subject against a blurred background. In order for this technique to work, you’ll want to make sure your flash is set to “Rear Curtain Sync.”
In addition, by slightly underexposing your camera exposure, you can create effects where your subject is lit even more prominently against a darker background. You can see more examples of my flash/panning technique in action here.
One thing I didn’t cover in this tutorial is autofocus. That’s a whole different beast. To brush up on your AF skills, read my post 10 Essential Autofocus Tips for Sports and Action Photography.
Did you use your 14mm f2.8 Fuji lens while it was raining?
Any thoughts about using the attachable flash supplied with the XT-2, or is it just not strong enough for this kind of situation?
Peter, if you’re shooting relatively close up with the little EF-X8 flash, say within 10 feet at f/4 or wider, you should be able to get visible results. Beyond that, you’ll definitely see the light level decrease.
Yes, Joe. During the heaviest downpour, I kept the camera covered inside my jacket in between racers and kept a lens cloth on hand in case the glass got wet. I would whip it out, shoot, and quickly shove it back inside my jacket. The non-WR lenses do ok in the rain, you just don’t want to expose them to prolonged water. The reality is that if it’s raining that hard, your biggest issue is keeping the front element dry. In a heavy rain, that can be quite challenging!
Thanks Dan. That is good to know.