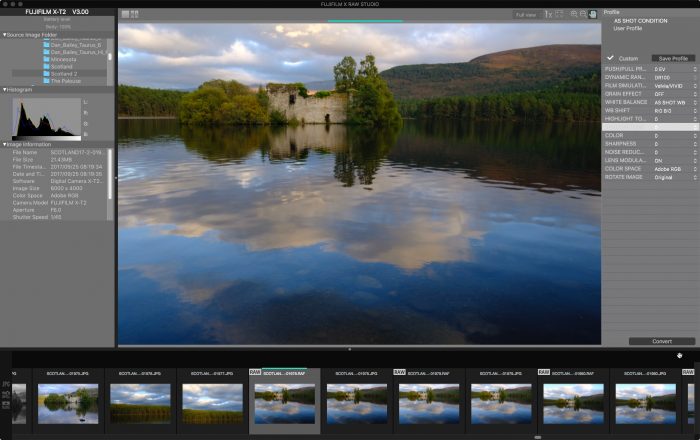
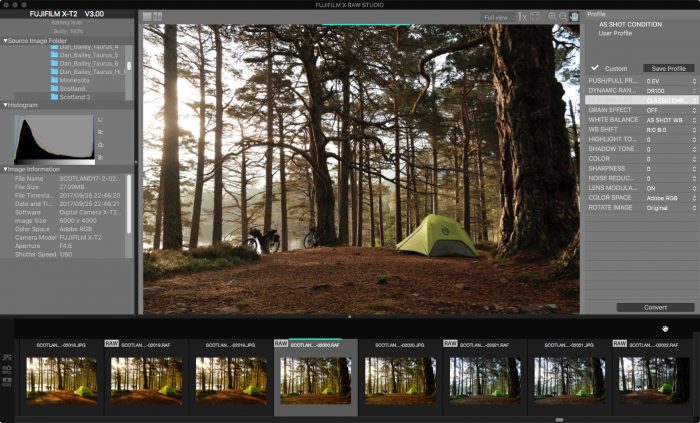
 Fujifilm has created their own free RAW Conversion software program called FUJIFILM X RAW STUDIO. Designed as an alternative to the many existing RAW converters out there, Fuji’s new app takes an entirely different approach.
Instead of using the processing power of your computer to perform the conversions, you connect your camera via USB cable to your computer and use the camera’s image processor to do the work. Essentially, it’s just like doing your conversions in the camera, (found in the Playback Menu), except you’re converting RAW files that are already on your computer and using the computer screen instead of the camera LCD.
This means you can adjust the following parameters, which match exactly with what you have available when you do your in-camera conversions:
- Push/Pull Processing
- Dynamic Range
- Film Simulation
- Grain Effect
- White Balance
- WB Shift
- Highlight Tone
- Shadow Tone
- Color
- Sharpness
- Noise Reduction
- Lens Modulation Optimizer
- Color Space
- Rotate
If you’ve done any in-camera RAW conversions with your Fuji, you’ll recognize all of these settings. They appear in X RAW STUDIO exactly as they do in the camera. This gives you a lot of flexibility for adjusting your captures before exporting them to JPEG.
What you don’t get, are sliders. For better or worse, X RAW STUDIO doesn’t have any sliders, which means you can’t make fine tune adjustments like you can in other programs. In addition, aside from the film simulations, there are no presets or tool palettes. However, it does have batch processing and it lets you create and save Custom Conversion Profiles.
This mean you’re options are limited. However, this might appear to some people who get bogged down and find themselves spending lots of time sliding sliders and trying to choose the right preset. There’s something to be said for opening a RAW file, making a few simple tweaks and calling it good.
This is especially true for Fuji users who might already be happy with their images and colors, and who only want to change the film sim or make adjustments to things like HIGHLIGHT and SHADOW TONE or WHITE BALANCE. This offers an easy way to do that.
With this in mind, and given the fact that there are numerous, high quality RAW converters on the market, why might you choose FUJIFILM X RAW STUDIO? Let’s take a brief look at what it offers:
The program works with both Mac and Windows, and the the current list of compatible cameras includes the X-T2/3/4, X-Pro2/3, X100F/V, X-T20/30 and GFX models.)
With the three newest models, the X-T4, X-Pro 3 and X100V, you even have the option to save your current adjustment recipe as a preset within the program, and also save it as one of the CUSTOM presents inside the Q Menu.
1. Processing Power
RAW files from the newest X Series cameras and the GFX are quite big. They contain a ton of color and tonal information, and if you don’t have an extremely fast computer, it can take awhile to open and convert, especially if you’re editing lots of images or doing batch conversions.
By taking advantage to the powerful X Processor Pro chip inside your camera, you can offload the work to your camera and potentially decrease the time needed to perform your conversions. The Fuji cameras already have the capability to convert RAW files, and unless you have the newest, fastest machine, your camera may actually be able to do it faster.
I haven’t conducted any scientific benchmark tests, but in my quick and dirty view, once you connect your camera, open the app and choose your desired folder of images, X RAW STUDIO opens the file remarkably fast.
It only takes a minute or two to load an entire folder of 1,000 RAW files into the browser, and only 3 seconds per image, from the instant you click on a RAW file to the moment it’s ready to make adjustments.
Compare that to the latest version of Luminar, which takes about 20 seconds to open a RAW file on my Mid 2010 Mac Pro, or the time it takes to import a large number of RAW files into Lightroom, which could take as long as a decent coffee break with your New York Times app.
2. FUJI-Specific Adjustments
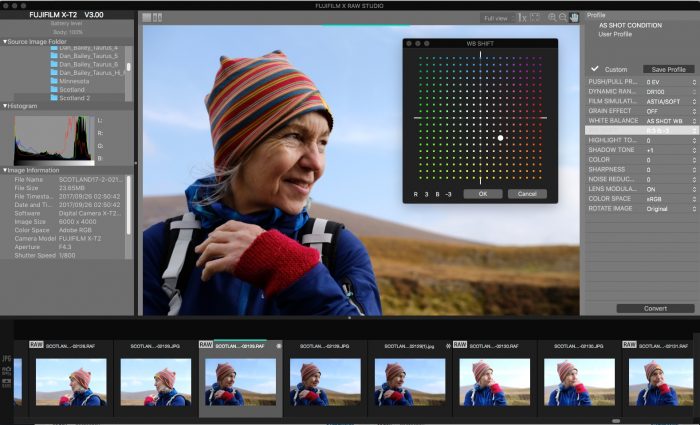
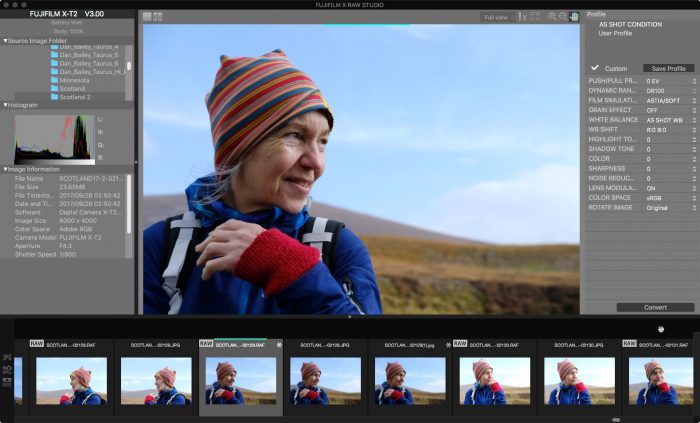
As I said, X RAW STUDIO doesn’t have sliders, but it does have those Fuji-specific adjustments, like HIGHLIGHT and SHADOW TONE, WB SHIFT, and all the Film Simulations. If you find yourself using those adjustment on your X Series camera or GFX, or if you like to do your RAW Conversions in-camera, then X RAW STUDIO will let you create a workflow that looks very similar to what you’re already used to.
In a way, those adjustments are like presets, they’re Fuji presets, and although they’re limited, they still give you a lot of flexility with regards to adjusting your images.
3. Fine Detail Reproduction
As many Fuji photographers have discovered, not all programs do an excellent job demosaicing the X-Trans files. While most RAW conversion programs do a decent job, some shooters are unhappy with the way that programs like Lightroom “smudge” fine details like foliage, skin and hair.
X RAW does a fantastic job here. I’ve been impressed with how good Luminar 2018 does with regards to sharpness and fine details on the X-Trans RAW files, but in a side by side test at 100%, X RAW STUDIO is noticeably shaper right out of the box.
This doesn’t mean that it’s “better.” Extreme pixel peeping is never the measure of what makes an image great, and while I’m very happy with how good X Trans files look when processed in Luminar, some more “critical” photographers may find that X RAW STUDIO give them the sharpness they desire with regards to fine details.

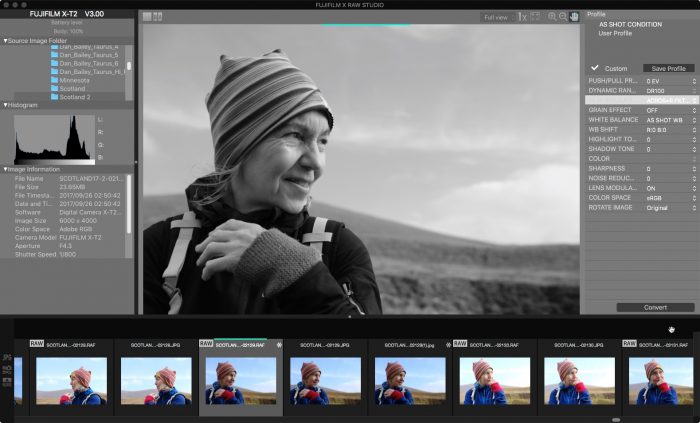
4. Oh… Those FUJI Colors
This is perhaps the main reason that many X Series photographers my decide to use X RAW STUDIO. As we all know, the Fuji colors are awesome, but not every software gets is right. If you shoot RAW, you’re at the mercy of Lightroom, Photoshop, Capture One, Luminar, Iridient Developer, etc… to demosaic your X-Trans sensor RAW file and try to match your Fuji colors.
Color is a very subjecting thing and there will always be differences when you cross devices. RAW conversions are also quite subjective. Extrapolating sensor data and converting it into an image is not a perfect process. There’s some “interpretation” going on there, especially when it comes to color.
And when it comes to the Fuji colors… between the inconsistencies of color reproduction and demosaicing the X-Trans RAW files, nobody gets it perfect. This fact leaves many Fuji photographers frustrated by the color inconsistency between what they saw in their camera and what they see on the screen.
This is where X RAW STUDIO has a serious advantage. A Fuji-designed software program demosaicing a RAW file from a Fuji sensor and reproducing the Fuji color profiles, using the Fuji-designed image processor in a Fuji camera to perform the conversion gives you as close a consistency as you’re every going to find.
Who knows the Fuji colors better than Fuji? Since X RAW STUDIO effectively keeps all of the work “in house,” you’re going to see the colors of the Fuji film simulations match from camera to screen with a degree of exactness that you’ll never see with any other software. This is compounded by the fact that when you open up a RAW file in any other program, it trashes your film simulation profile, and you can’t get it back.
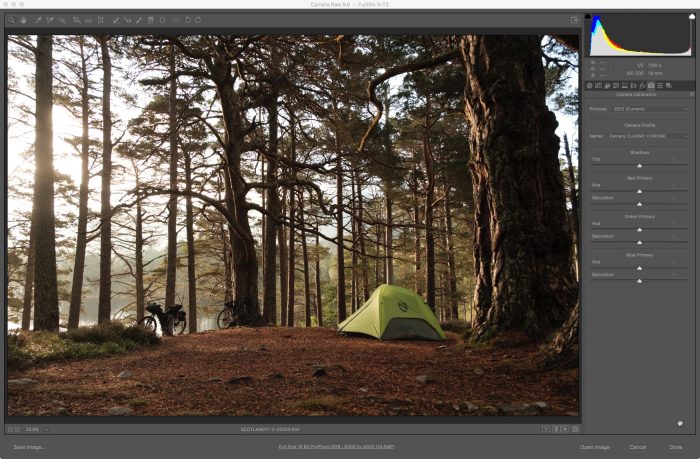
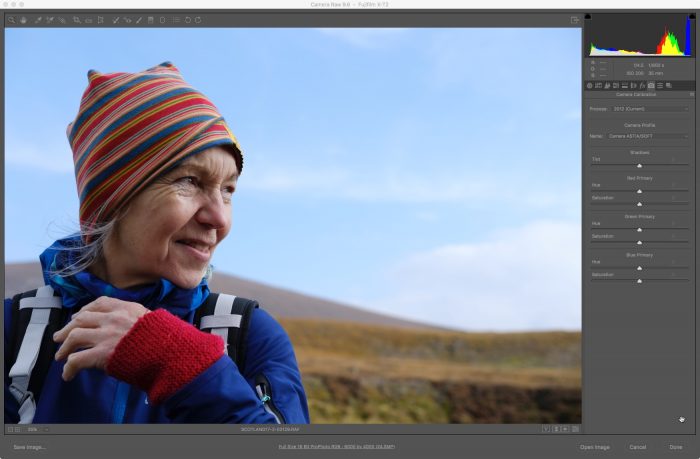
Lightroom has their own Fuji Film Sim profiles in the Camera Calibration tab, and Iridient Developer has a pack of Film Sim profiles you can get, and while they’re all very close, they’re not perfect. With any other program you have to start from scratch if you want to try and reproduce those Fuji colors.
With X RAW STUDIO, VELVIA looks like VELVIA, ASTIA looks like ASTIA and ACROS looks just like ACROS. That said, programs like Luminar and Lightroom do a pretty good job. Also, not every Fuji shooter who shoots RAW cares about the Film Simulations, so this issue becomes a moot point.
However, if you crave those Fuji colors and haven’t been able to get the consistency you desire between camera and computer, this might be your solution.
The best thing is that FUJI X RAW STUDIO is a free program, so you don’t have to make any hard commitments. You could download it and only use it as needed. If you’re having issues with a specific image and can’t seem to get the color or sharpness you desire from your main RAW conversion software, you’d have this as an alternative solution, which is just how Fuji is describing it.
You can read more about the program and download FUJIFILM X RAW STUDIO here. You can also watch my video tutorial here:
Will there be one for X-T20.
Hi Dennis, I don’t know. The X-T20 has the X-Processor Pro chip, but it may not have enough onboard memory to perform this function. If that’s not the case, perhaps they’ll included this capability in a future version of the software.
[…] you can make Highlight and Shadow Tone adjustments when shooting in RAW and adjust them further in Fujifilm X RAW Studio Software, they’re ideal when shooting in JPEG. They allow you to, in effect, process the scene right […]