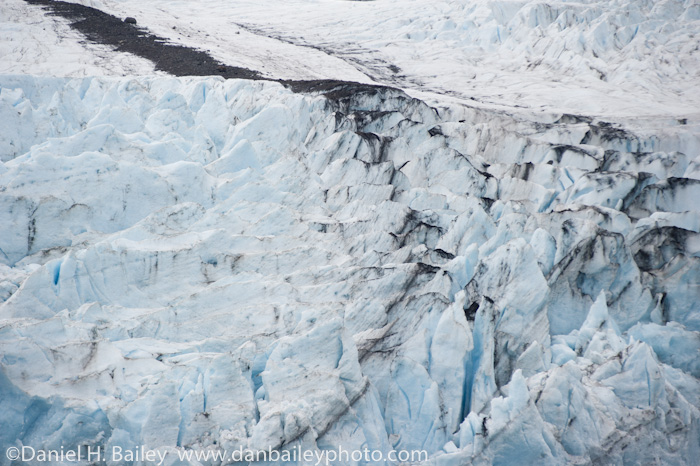
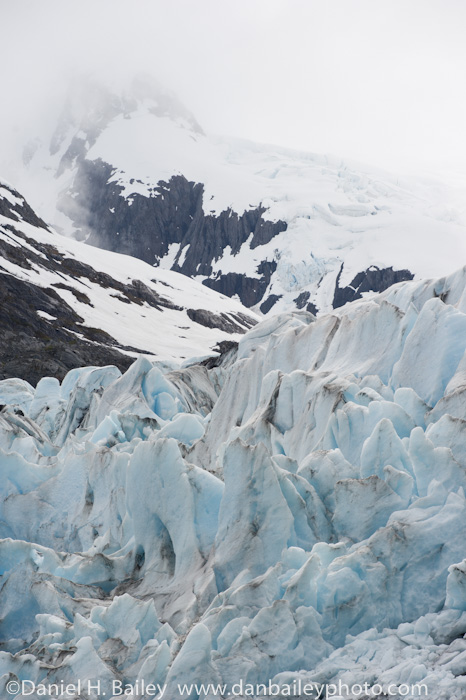
 Portage Glacier, Southcentral, Alaska.
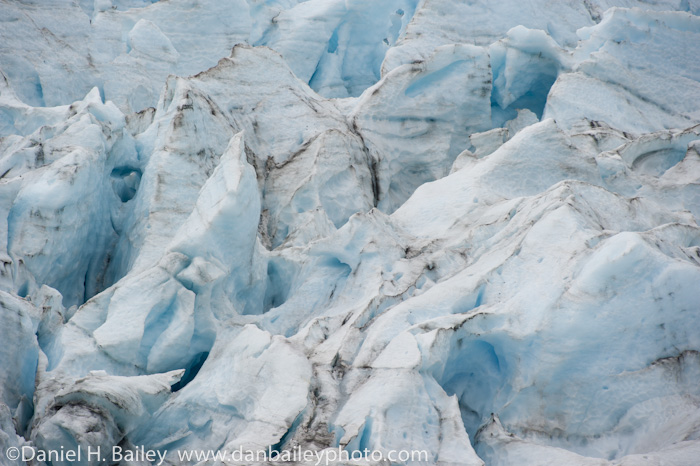
Shot with the Nikon D700 and the Nikon 80-200mm f2.8ED lens.
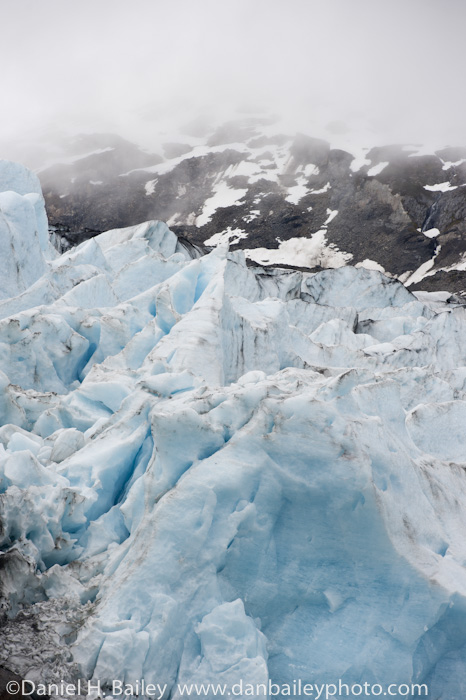
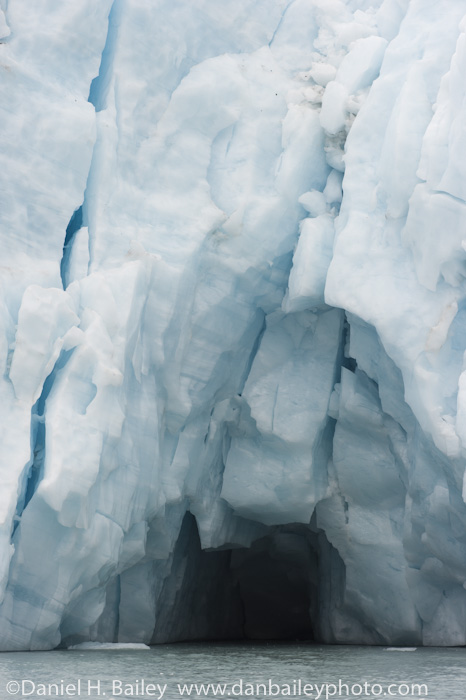
Portage Glacier, Southcentral, Alaska.
Shot with the Nikon D700 and the Nikon 80-200mm f2.8ED lens.
 Digital Imaging Tips by Dan Moughamian
Most photographers and photo buyers will tell you that they love black and white images. There’s just something about them that speaks to people in a different way.
This tutorial will show you some of the techniques you can use with the most powerful Black & White plugin available in my opinion, which is Silver Efex Pro 2 from Nik Software. It’s a great way to expand Photoshop’s capabilities without greatly expanding the learning curve (not to mention it will help you take your favorite shots and make them even better!).
http://vimeo.com/24591479
Working with Silver Efex Pro 2 for Photoshop from Colortrails on Vimeo.
————–
Dan Moughamian is an experienced photographer and educator, and has worked
with Adobe Photoshop since the early 1990s. He also has extensive
experience with Photoshop Lightroom, Photoshop Elements, plugins from Nik
software, and many other digital imaging products. As a long-time member
of their testing programs, Dan has collaborated with Adobe Systems to help
enhance many of the core functions in Photoshop, Lightroom, and Elements.
As an educator, Dan’s focus is to help photographers at all levels get the
most from their digital workflows. Tips on raw editing, layer masking,
alpha channels, image adjustments, HDR photography, focus and lighting
effects, and perspective correction, are just a few examples of the topics
he covers. To learn more, you can visit Colortrails.com, and follow Dan on Twitter, and on Google Plus.
He is the Author of Adobe Digital Imaging HOW-TOs- 100 Essential Techniques for Photoshop CS5, Lightroom 3 and Camera RAW 6, and his work has been also been published in Photoshop User Magazine and Photo Techniques Magazine.
Just got this tearsheet from a client. It’s the poster advertising the 2011 Bike MS Alaska Ride For A Cure. I shot the photo on assignment for MS last summer. I’m looking forward to working with them again during this year’s event!


June is just around the corner and that means the season for hiking, biking, trail running and summer mountain photography in the high country is finally upon us. It’s definitely my favorite time of the year and… ok, I know what you’re thinking, “why does a dude who likes summer so much live in Alaska?” Good question. Not sure. Maybe it’s got something to do with the whole 24-hour daylight thing. Or else it’s because I like to “binge” my way through things like summer.
Anyway, while running the other day over rocks and tundra on on snow-free mountain trails, I started thinking about what it is in life that drives me so much. What I came up with is that I like to see stuff.
Yes, sounds pretty simple, doesn’t it? Almost too simple. Well, I guess I’m easy. I just like to see stuff, especially from different vantage points. I think that’s why I like to climb, hike long alpine ridges, ski and even fly airplanes, because activities like those put me in places where I can look down upon the landscape from above, or look across the rows of mountain ridges and summits from a similar height.
And that’s obviously what drives my photography. I’m compelled to capture scenes that require a certain level of physical, and often mental effort in order to see them from the viewpoints that excite me the most. I seem to get immense joy and satisfaction from letting my visual sense run wild. For me it’s as much about the activity as it is about the view. I know this because of the fact that I don’t enjoy hiking in the deep forest nearly as much as I like ambling across a broad ridge between peaks.
My energy level and excitement begin to spike whenever I pop above treeline and enter the alpine environment. And when I have a camera and I see some kind of cool photo opportunity start to unfold as I ascend into areas that offer vast views, I go into total overdrive with these photo-inspired bursts of adrenaline that give me the energy to get to that great vantage point that I might see over there.
They’re always temporary, though, because at some point, I run into temporary oxygen depletion and lactic acid buildup in my muscles. Then it’s rest for a minute or two, and continue on until I see another great image making opportunity off in the distance. Repeat.
What simple concept or mantra describes your photography and your drives in life? Love to hear. Share you comments below.
 Ok, so I borrowed the theme of this blog post from Chase Jarvis and his Best Camera idea, but the guy is right on about this. The best thing is always the one that’s with you, whether it’s a camera, a beer, companion of the opposite gender, a bicycle or a pizza. Or a tripod.
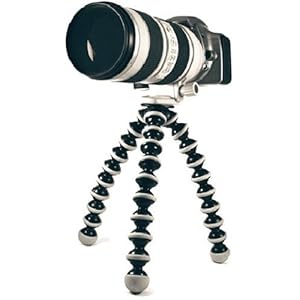
Sure, we’d all love to own the Gitzo GT1542 Traveler, which provides rock solid support, even though it weighs as much as a feather and folds up so small that it fits inside a matchbox, or the Manfrotto 161 MK2 Super Pro Tripod, which extends to 17-feet and supports a camera lens combination of 239 lbs.
However it means nothing to having the world’s most bitchin tripod if you don’t have it with you all the time. You can’t shoot steady, sharp landscape photos or nighttime street shots if your tripod is in the car or at home because it’s too heavy, too big or too nice to drag into the dirt.
The reason that Chase’s Best Camera idea is so successful is that we all have our camera-equipped smartphone with us at all times. In this day and age, we’re never without a camera when creative moments strike. Can you say that about your tripod? Probably not. I know you don’t keep one in your pocket but, you can at least get yourself a small, compact set of legs for those moments when you don’t have your bigger tripod with you.
For years, I’ve always had a couple of Bogen 3001’s, (now the Manfrotto 190X Pro) but for running around outside in the mountains or heading off on the bike with minimal camera gear, I take small, lightweight units that I can strap onto the side of a small backpack. They’re not the sturdiest support, but I have them, and that’s what counts.
So, whether you get yourself a Gitzo Mountaineer, the super light, ultra compact Tamrac ZipShot, or a Gorillapod, anything will be better than nothing when it comes to going light and fast, (and here’s the kicker) as long as you have it with you at all times. Even if you already have a good tripod, you should seriously consider getting yourself a second lightweight model. I guarantee, it will pay off.

Ok readers, I’m looking for some participation on your part today with a simple two-part question: What lens do you use the most in your photography, and which lens do you use the least?
Even if you think you know for sure, open up Lightroom or Aperture, or whatever software you use to manage your images, and dig into the metadata. With a quick search, you can quickly see the exact breakdown of your lens use for whatever time frame you specify.
Plug in the past month. The past six months. The past year. Plug in your entire catalog and see what comes up. The results might surprise you. Then again, they might not.
The purpose of this question is not just for me to find out what type of gear you use. It’s actually to get you to see what lenses you use most often, and also see which lenses you don’t use very often. You’ll probably find that a large percentage of your imagery is shot with just one or two lenses, and you’ll also see which lenses sit unused in your bag each week and month.
Since one of the best ways to spark your creativity is to break out a lens that you don’t normally use, this exercise might help your photography by providing you with some valuable insight into your own style.
After you vote, leave a comment below and share why you typically use or don’t use a certain type of lens. Love to hear your thoughts on this!
My results- Most used: Zoom telephoto (Nikon 80-200mm f2.8ED), least used: Normal (Nikon 50mm f1.8D)
[poll id=”2″]
[poll id=”1″]
 With each new Photoshop release, the engineers at Adobe pack more powerful features into the program. Of course, this means a flood of new books that are designed to help you get a handle on all the new features.
However, not all of the Photoshop books on the market really teach you how to use the software to its full potential.
Enter the Adobe Photoshop CS5 for Photographers: The Ultimate Workshop, a complete tutorial for Photoshop CS5, written by two world renowned Photoshop experts Martin Evening and Jeff Schewe.
Billed as “the must have companion for any serious Photoshop user,” this is not just a book, it’s a total multimedia workshop training package. I got my hands on the book a couple of months ago and so here’s my review.
Unlike many of the other other CS5 books out there, this one doesn’t just cover what’s new, and in fact, it doesn’t even teach you the basics of how to use Photoshop. Instead, it shows you in-depth how to master the features of CS5 so that you can use the take full advantage of the program and produce the highest quality imagery possible.
The book is broken down into 13 topic-based chapters, each of which are designed to simulate an actual workshop session. It shows you the specific methods, tips and techniques that are needed to complete each process, and explains, in detail, how it all fits into your complete workflow. Here’s the complete chapter list and what’s covered.
The chapters are well written and clearly notated whether they’ve been written by Martin, Jeff or both, and every single page features screenshots and photographic examples to illustrate the topic or method that’s being explained. There are also tons of sidebar tips and explanations that help you better understand just what you’re doing and why.
Adobe Photoshop CS5 for Photographers: The Ultimate Workshop also comes with a DVD that contains over 26 tutorial videos, (over 3 hours of movie content) as well as help guides, multiple page PDF tutorials, all the sample images for each chapter, extra actions, styles and other goodies. The DVD alone is well worth the price of the book, so including with the price of the book makes this package an incredible value.
If you’ve read Martin Evening or Jeff Schewe’s books before, you know that they’re both excellent, no nonsense writers and teachers, so having a book that’s written by not just one expert, but two, means having one of the best, if not the best Photoshop CS5 reference book around. Whether you’re looking to become an expert at retouching, or if you want to be more efficient at outputting professional quality digital image files for print or for commercial clients, this book will advance your skills to a new level of mastery and Photoshop expertise.
The bottom line is this: if you’re a professional photographer, then you’ll definitely want Adobe Photoshop CS5 for Photographers: The Ultimate Workshop. I’d also highly recommend it to amateurs and hobby photographers, because you’ll learn a whole lot in 426 pages from a pair of experienced experts.
However, if you’re totally new to Photoshop and Adobe digital imaging software, I might recommend Adobe Digital Imaging HOW-TOs: 100 Essential Techniques for Photoshop CS5, Lightroom 3 and Camera RAW 6, as it’s geared more towards helping new users get up to speed with the basics.

When it comes to adventure photography, Alexandre Buisse is the read deal. He gets himself into some of the most extreme and majestic places in the world and brings back truly stunning imagery.
His brand new eBook, Extreme Perspectives: An Introduction to Mountain Photography is the latest release from Craft and Vision, who we all know has set the bar for the rest of us visual content publishers to follow, and it’s not only a beautiful collection of breathtaking mountain sports imagery, it’s a concise and well written manual on adventure photography.
A condensed version of his latest book, Remote Exposure: A Guide to Hiking and Climbing Photography, Extreme Perspectives explains the equipment, the technical and creative considerations and the vision that he employs when he’s shooting in these awe-inspiring locations. He not only takes you there, he walks you through the methods that he uses to create his imagery.
However, Buisse clearly understands that not everyone is going to find themselves on some remote alpine ledge in the middle of a thousand-foot wall of ice and snow. What makes him such an effective teacher is that he presents his material with the mindset that great outdoor imagery is something that everyone is capable of doing, whether you’re an extreme athlete or not. It’s all about finding your own creative vision and applying what skills you do have to your own photography in the world that surrounds you. Hmmm, sounds like someone I know… 😉 Maybe that’s why I like this book so much!

Extreme Perspectives is broken up into three sections, I – Gear and Technique, II – The Vision and III – Image Studies, where he shows a number of images and explores the specific elements that make a each shot work, or even better, why they DON’T work. You only get so far by only studying the good shots. I find this to be a very effective teaching tool. This section takes up the majority of the book and it’s filled with both visually stunning photographs and clearly explained visual, aesthetic and technical concepts.
Reading this eBook, I’m intrigued to check out his more indepth book, Remote Exposure, but for only $5 Extreme Perspectives: An Introduction to Mountain Photography is definitely an worthwhile and inspiring 33-page title that is sure to awaken the adventure photographer in you, whether you like to shoot extreme mountain sports or hiking on the trails in your neighborhood park.

I’ve got a special treat for you today, a feature interview with landscape photographer extraordinaire, Ian Plant.

Ian’s work is simply outstanding and his beautifully designed instructional photography eBooks are definitely some of the best looking and most informative titles around. If you love landscape photography, you’ll definitely want to check them out or look into attending one of his workshops.
It was a pleasure to speak with him on the phone and I’m looking forward to meeting him the next time he visits Alaska. Check out Ian’s website at www.ianplant.com and read my review of his latest eBook, Patagonia: Behind the Lens.
First of all, where do you live and how old are you?
I’m 39 and I live in Virginia.
How did you get started and when did you turn pro?
I like to think that I took the scenic route to my nature photography career. I’ve always been involved in outdoor activities like backpacking and rock climbing, and always had a love of the outdoors. I picked up photography during my first year in law school and was immediately hooked. I started taking my camera along with me during my outdoor adventures and instantly knew that I wanted to try to make my living with photography somehow.
As soon as I started law school, I realized that I had made a mistake, but I stuck with it and ended up working for eight years as an antitrust lawyer in Washington DC to pay off my debt. Essentially, I helped big companies buy other big companies and become even bigger companies. It was soulless work.
Then one day, I got up and quit and went full time with my photography.

What gear do you use?
I use Canon cameras and lenses. My main body is the Canon 5D Mark II, but lately my favorite lens is the Nikon 14mm-24mm f/2.8G ED AF-S that I use on my Canon bodies with a special adaptor made by Novoflex. I’m able to please people on both sides of the aisle, especially when I give talks and workshops. (Laughs)
I’m definitely a wide angle shooter; I like to get in close and juxtapose the foreground against background elements. I’d say that 60-70% of my images are made with the Nikon 14-24mm f/2.8. Other lenses in my bag include the Canon 24-105mm f/4 USM, Canon 100-400 f/4.5-5.6L IS USM and Canon 500mm f/4L IS USM.
Who are your biggest influences with photography?
My biggest influences are the traditional landscape shooters like David Muench, Jack Dykinga and Tim Till. I always looked towards the large format masters instead of the 35mm guys like Galen Rowell and Art Wolfe. In fact, I started out as a large format shooter, but I switched to 35mm about five years ago when the quality of digital improved.

Are there any contemporary photographers that you admire?
There are definitely a lot of really good shooters out there. However, I find that I look at other people’s work less and less these days. I’m very busy with my own projects, and I find that if I’m spending lots of time online, I don’t have time to get everything done that I need to do. I try to be focused on working on my own style and I don’t want to be too influenced by other people as I continue to dig down into my own creative process.
Tell me about your photo workshops.
I’ve been doing my Creative Vision Photo Workshops for about 3-4 years. One day, I put together a few photo workshops and promoted them on my website and through the camera club circuit where I did slide shows and presentations. The first one only had three people. These days, I promote them on my blog, my Facebook page and on other social media. (Follow Ian on Twitter @ianplantphoto.)
I often work with two other photographers, Joe Rossbach and Richard Bernabe. We team so that we can ration the number of people per instructor. Typically, we’ll have 12-14 students and two instructors in a workshop, which allows no about 6-7, no more than 8 students per teacher.

I try to run no frills workshops. I’ll travel to a new place to scout locations and figure out the best places to go for photography. Then I look at options for lodging and logistics. Generally, everyone shows up with their own cars and we take them around to the best places to shoot. Of course, when I run workshops in places like the National Parks or in international locations like Patagonia, obtaining permits and figuring out the logistics and travel becomes a much bigger issue.
The workshops are the most profitable aspect of my photography and they’re definitely growing more than other areas of my business. The unfortunate reality is that while I certainly enjoy doing the workshops, teaching all the time is not exactly how I ultimately want to make my living.
Do you shoot assignments or license your images as stock?
I haven’t had any really big stock sales or photo assignments, at least not in the traditional manner. When I first turned pro, I went into business with another photographers. We started a publishing company called Mountain Trail Press, where we self published our own calendars and books. Eventually, we reached out and started publishing books by other photographers as well.
I actually left the company last year to focus on my own photography. It was never really a big part of my business, but it has produced a small portion of income each year.
What I’ve found, at least for me these days, is that the only way to make money with nature photography is to teach workshops and be an educator. Unfortunately, all the old ways of making money have all but disappeared. Stock sales and editorial assignments are virtually non-existent these days.
The interest in digital photography has exploded during the past few years, and right now there is a growing supply of nature photographers. The amount of great imagery has exceeded the demand, and so prices have dropped. Digitization has changed our world and the traditional outlets for nature photos have been scaling way back. Everyone is moving towards web content and less on print media. Demand and prices are falling as magazines find ways to get cheaper images with more constrained budgets.

And what about your eBooks and articles?
I currently have 6 eBooks and a number of other titles in the works. They’re another growing aspect of my business. They’re doing quite well. I don’t see gangbuster sales, but it’s a significant supplement to my income. Promotion is definitely the key. I’ve been experimenting with some different promotional ideas; lately I’ve bought advertising space on some other websites.
Occasionally, I’ll get discovered by another website or forum, and suddenly I’ll see a spike in sales that month from the members of the site. It really varies from month to month, but at this point, it’s steady enough to pay my mortgage every month.
 How did you get started writing articles?After I published my book, Chesapeake: Bay of Light, I contacted Outdoor Photographer, and they did a profile on me. Then I pitched them some article ideas, but I didn’t hear back. A couple of years ago, they came back and did another profile article on me, which they called “Dreamscapes.” I like the name so much that it became my brand name for my photography business. I changed my entire website and identity around.That article garnered some more attention, and so I began to pitch articles to them on a monthly basis. Recently, they brought me on as a contributor to the Outdoor Photographer Blog and I had an article in the Landscape issue as well.

Where do you see yourself in 5-10 years?
Filthy rich from my photography. Actually, it would be nice to make enough money so that there are no concerns about travel and expenses. I really want to be able to be a photographer, find a way to go the places I want to visit and strike that balance between being a businessman and being an artist. Unfortunately, you can’t pursue the artistic side unless you have the money, so I hope to keep growing so that I can do this for the rest of my life.
What are you plans this summer?
I’m coming up to Alaska this summer for a workshop that I’m doing with Richard Burnabe at Redoubt Mountain Lodge in Lake Clark National Park and Preserve. After the workshop, we plan to do some sea kayaking around some of the Fjords and glaciers up there.
 Visual Flow eBook
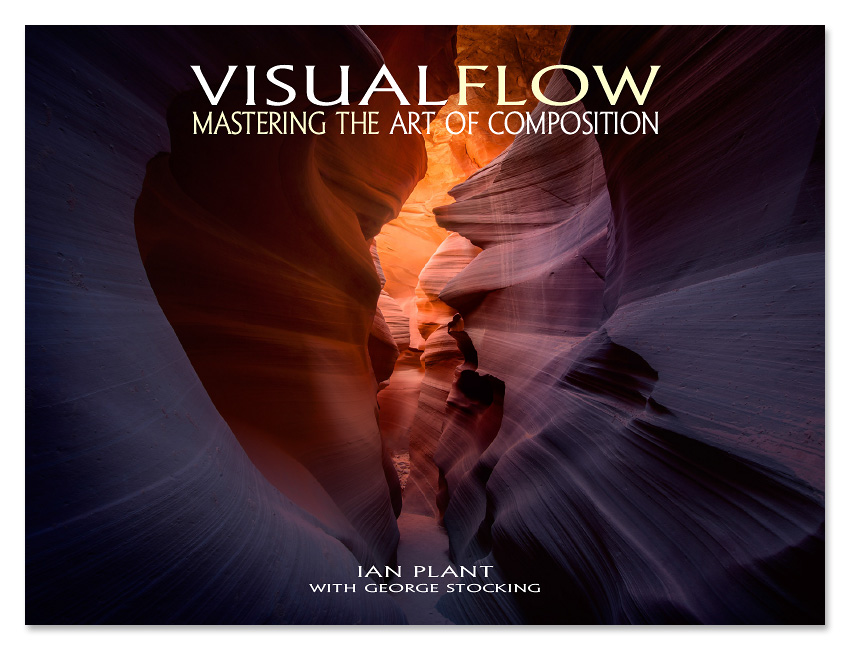
Check out Ian’s highly acclaimed, best selling eBook, Visual Flow: Mastering the Art of Composition. This 287-page PDF book is the comprehensive manual on how Ian creates his imagery.
Any nature and landscape photographer who is looking to take their creativity to the next level would do well to study the techniques and compositional processes that Ian describes in this book.
Check out Ian’s complete collection of eBooks and tutorial videos in his Dreamscapes Store.


Last year was my first time going to the May Day Fly-in down in Valdez, Alaska.
If you’ve never been, it’s basically this: Beavers, Otters, Super Cubs, Cessna 185s, 35-inch bush wheel tundra tires, STOL kits, beach landings, tricked out bush flying mods and guys who can take off and land an airplane in a space that’s shorter than my driveway. Yea, I burned through multiple cards shooting airplanes, airplanes and more airplanes.
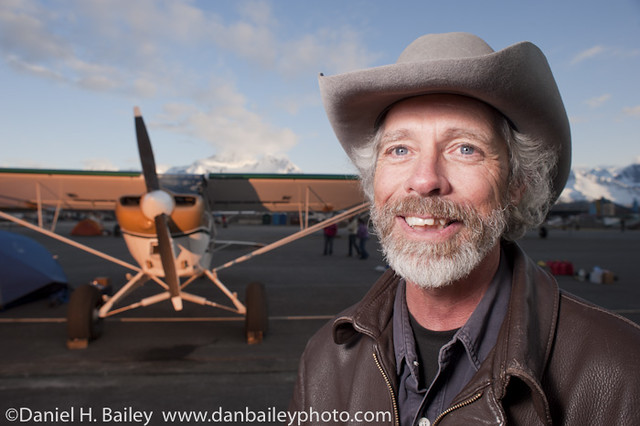
However, for this year’s Fly-in, I wanted to push myself with a different creative eye and shoot something besides just more airplanes. Fresh off The Flash Bus and armed with twice as many Speedlights as I had last year, I felt that shooting a series of bush pilot portraits would be the perfect opportunity for me to put to use some of the new gear and off-camera flash techniques that I’ve acquired lately.
My goal was to use a simple setup and go Hobby style, all light, fast and mobile so that I could make my way around the tarmac quickly and shoot as many portraits as possible on Friday night, when everyone is hanging around their airplanes and having a great time.
For lighting gear, I packed a single Manfrotto 6-ft Nano Stand, a Manfrotto 175F Justin Clamp, a Manfrotto Super Clamp, and a Lumiquest Softbox III, along with my 3 Nikon SB-800s, the SB-900, the Nikon SU-800 Wireless Commander, a Nikon SC-28 9′ TTL Remote Sync Cord and three Pocket Wizard Plus II Wireless Transceivers. (All of this fits in or on my LowePro MiniTrekker AW camera backpack with the rest of my camera gear.) I figured this would give me enough options for placing, holding, clamping, aiming and diffusing the light that I’d need to light up pilots and their planes.

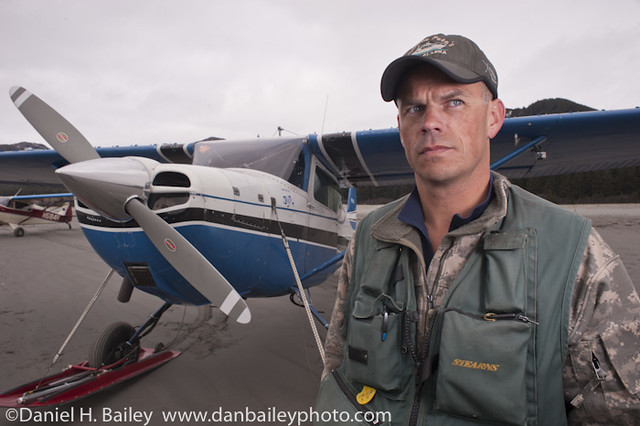
Since this is what I had to deal with, (see photo right) I knew that for each shot, I’d need at least two different light sources- one for the pilot, and one for the plane, if not more, although one light on the plane often did the trick.
With the stiff breeze that blew across the airport, I decided not to use the light stand, #accidentwaitingtohappen and instead just shot one-handed with the camera while holding a single flash off to the side with my left hand. For exposure, I used Manual mode with matrix metering to get light off of the sky, usually 1/160-1/250 at around f/9, and kicked the EV on the camera down about 2/3 stop to give a bit more drama to the background. TTL flash compensation to make up for the drop in exposure was tweaked, often +2/3 to +1, to get the desired light on my foreground subjects.
For diffusion on the pilot, I used the my new favorite tool, Lumiquest Softbox III, (attached to the flash with the Lumiquest Cinch Strap) which softens the light in a really nice way at close range and does a great job with head and partial body shots, which is what I wanted for these images. The closer you get, the softer the light is, so I tried to hold it as close as possible to the pilot while keeping out of frame. Having never used these kinds of on-flash diffusers before, I’ve quickly fallen in love with this great little diffuser. It gives exceptionally good results and folds up to fit right inside my camera bag.
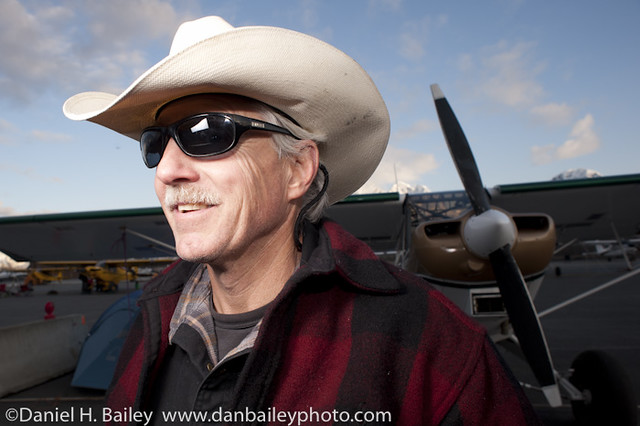
Then for the plane, I typically set my SB-900 and maybe another SB-800 on the ground with their included stands, placed them about 20-30 feet away, (or clamped them to something nearby) pointed them at the plane, making sure that the optical sensors were pointed back at me, and zoomed the flash heads anywhere from 70mm to 200mm. For some of the shots, like the first one above, I stuck on the CTO warming gel to add extra warmth. Lens choice was usually the 24mm or the 50mm.
To trigger all the Speedlights, I used an SB-800 as a commander on the camera, with the dome diffuser on, and the head rotated and pointed in the general direction of the ground flashes. The hand held flash was close enough that it picked up the signal no matter where the commander was pointed.
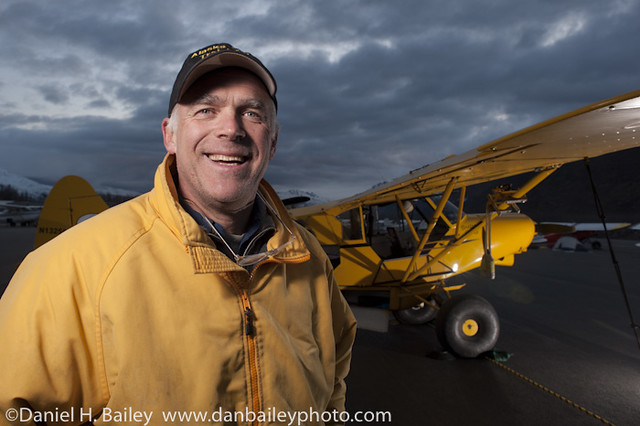
For some setups, especially during the daytime, (bottom shot) where I was just shooting pilots with a single softbox flash I just connected the Speedlight to the camera via the Nikon SC-28 9′ TTL Remote Sync Cord. This two-piece rig turned out to be light and compact enough to carry around all the time for quick people shooting. Remember, though, when you connect a single flash with the TTL cord, you need to change it from Remote to TTL mode.
Of course, the most important ingredient for shooting great location portraits is the rapport that you establish with your models. During the course of the evening, I didn’t shoot as many different people as I might have wanted to, mostly because I ended up striking up rather lengthy conversations with all the pilots that I photographed. I showed them the results as I went shot and explained my methods for constructing my imagery with all those cool looking flashes.
Not only did this make for more comfortable and relaxed models and better looking portraits, I ended up learning more about flying and Alaska aviation, I made some great new friends and contacts and even got signed model releases from everyone.
Looking back, I’m really happy with my imagery. In fact, I think it represents a new level of confidence, style and skill for my photography. Did everything work perfectly that night with all the flashes and my lighting technique? Yea, right, that’ll be the day! Did I learn and see things now that I could have done differently? Absolutely, but that’s all part of the learning process.
The exciting thing for me with this shoot is that I went in with an idea, did a whole lot of experimentation and walked away with some photographs that I’m really proud of. See more photos in my Flickr stream.
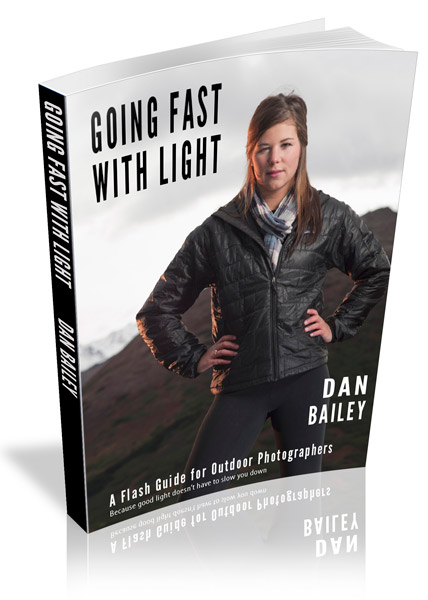 I detail these lighting techniques and many more in my 83 page off-camera flash eBook, Going Fast With Light.
For other off-camera flash resources, check out The Hot Shoe Diaries: Big Light From Small Flashes by Joe McNally (I’ve learned a TON from this book) and Speedliter’s Handbook: Learning to Craft Light with Canon Speedlites by Syl Arena.
Page [tcb_pagination_current_page] of [tcb_pagination_total_pages]
available now
Bestseller!

How to guide

Video Lesson Bundle - Special Offer!
