Last week I had the chance to attend The Flash Bus workshop in Denver, and I can say without a doubt that it was well worth my time and money. I even got to meet one of my Twitter friends face to face for the first time, Breckenridge shooter Daniel Dunn. And, I even won a Lumiquest Softbox III for being the guy who traveled the farthest to see the show.

So, what did I learn from a day spent watching two very talented, creative and technical photographers? Well, let’s see: I learned that no matter where he goes, McNally carries WAY more gear than Hobby, as was clearly seen by the enormous array of Lastolite gear, Justin Clamps, C-Stands and SB-900s that were all lined up next to the stage, almost all of which belonged to Joe.

I also learned that you can get great results from both Manual flash and TTL, and of course, I learned that whenever you get a couple of longtime Nikon Speedlight users in the same room, they can’t help but make jokes that are aimed at the Canon people. They’re all in fun, though, because when asked about Canon, David confirmed that at one point, he had been very close to switching.

During the presentation, I took lots of notes, drew lots of little diagrams, and listened intently as each one shared their tried and true methods and techniques with the audience. Although I’m still digesting the material, and probably will be for months to come, I did take a couple of things away from the workshop that I think clearly sum it for me.

First of all, it’s not about how much gear or what kind of equipment you use, it’s about HOW you use it. Like I pointed out above, David and Joe have a VERY different styles, backgrounds and methods, all of which are reflected in nearly every aspect of their approach to photography.

Hobby goes light and fast, McNally, needs a truck to carry all his gear. Hobby shoots Manual, McNally shoots TTL almost exclusively. Hobby always wears shorts, McNally, jeans. Hobby comes from a newspaper editorial background, McNally from a commercial and magazine background.

Yet, they both produce beautiful, expressive and dynamic imagery, which yet again proves that there is no “One Right Way” to do anything, even when it comes to photography. You need to figure out what works for you, which, of course, may involve years worth of trial and error. However, in the end, if you’re able to produce the type of photograph that you set out to make, then you’re doing it the right way for you, and that’s all that matters.

And secondly, I learned that no matter who you are and how much experience you have, lighting, much like any other aspect of photography, involves experimentation, pushing your boundaries and a great deal of saying “let’s try this,” or “oops… that didn’t work like I’d hoped, let’s try something else.”

Even the masters continue to try things that may or may not work in their quest to capture a great image. And just like you and me, Hobby and McNally screw up plenty of times and make lots of mistakes. They just keep going until they get it right.

Obviously, experience and techniques like the ones that they teach help you get there more quickly, but the point is, if you’re not making mistakes, or if you’re always playing it safe with the same setup that you always use, then you’re not trying hard enough. If you don’t push yourself, then eventually, all your photos will look the same. Do you really want that? Didn’t think so.

I have an inside assignment later today, which will be the perfect opportunity to try out some of the things I learned last week. I’ll let you know how many mistakes I make.

March 29, 2011
See this post
What Did I Learn from The Flash Bus?

The Flash Bus rolls into Denver today on their 29 city lighting workshop tour.

Since I’m in Colorado right now, I’m excited to be able to catch this stop and learn from two lighting ninjas, Legend Joe McNally and fellow strobist David Hobby.

Having read Joe’s excellent book about using remote flash, The Hot Shoe Diaries, and having been a big fan of David Hobby very informative Strobist website, I’m especially interested to see what kind of techniques are covered.

Although many of the cities are sold out, it might be worth trying to get on the waiting list if The Flash Bus is coming to your city.

It’s not often that two such experts team up to share their photography knowledge and techniques with the masses, and according to reviews, the tour has been a great success so far.

March 22, 2011
See this post
The Flash Bus- Denver, Colorado
Alpenglow on the summit of Gasherbrum I, 8,068 M, Baltoro Glacier, Karakoram Himalayas, Pakistan

I licensed this image to a client for stock usage yesterday. It was one of those perfect sales; where they called with the request, I had the exact shot they needed for their project, we agreed on a price, and I delivered the hi-res file and the invoice, all within about two hours.

I shot this photo in 1994 during my trek to the Baltoro Glacier in the Karakoram Himalayas of Pakistan. It just goes to show you that photos in the archive still sell.

Also called Hidden Peak, Gasherbrum 1 (26,470 feet) is the 11th highest mountain in the world. Lying on the Pakistan-China border on the Baltoro Glacier. It was originally designated as K5 during the Great Trigonometric Survey of India in 1892, and it was first climbed in July 5, 1958 by Pete Schoening and Andy Kauffman as part of an American expedition.

The name, Gasherbrum means “beautiful mountain” in Balti, which is the language of the people who live in the region of Northwest Pakistan known as Baltistan.

March 16, 2011
See this post
Gasherbrum 1, Karakoram Himalayas, Pakistan

Turning photography from a hobby into a professional career requires a different set of skills than does actually making imagery.

As an artist, you’re used to using your creative skills and the right side of your brain, which is geared more towards visual and intuitive functions. You’re used to looking at the larger scene as a whole and breaking it down into smaller, subjective pieces that suggest and incite emotions and imagination.

Business, on the other hand, is focused on the details, analytical and verbal elements, which are all left brain functions. This not to say that you can’t be good at both sides of the equation, but if you’re like many creative types, there’s a good chance that you need a little more help with the business part than the photography part.

And even if you are good at balancing your left and right brains, running a successful photography business requires a great deal of knowledge and information, which you need to pick up somewhere along the way. Even if you’re an established photographer, chances are you could use a little brushing up on a few of your business and marketing skills. (Couldn’t we all?) At the very least, it wouldn’t hurt to get a few new ideas.

Here are 5 great books that will teach you how to run a successful photography business in today’s highly competitive and changing photo industry. They’re all excellent resources and each one contains a wealth of pertinent and up-to-date information that can help you get your business on track and make it shine. Whether you’re a long time pro or a budding amateur who’s just starting out, you should have at least one, if not all of these on your bookshelf.

1. Best Business Practices for Photographers

This book by veteran shooter and Black Star conributor John Harrington is one of the best and most relevant book on the subject. A comprehensive guide that covers any type of photography business, it contains everything you need to know, from pricing, copyrights, IRS, to contracts. John has even written a chapter on how to balance the professional and personal aspects of a life as a photographer, which is something we probably all need help with.

If you want to make your living as a self employed freelance photographer, you should have this book. Or the next one. Or both.

2. ASMP Professional Business Practices in Photography

Considered the pro photographer’s bible, this excellent guide by the American Society of Media Photographers contains everything you need to know about how to negotiate prices, write contracts, handle rights and ethics, develop profitable marketing strategies and choose the right technologies from capture to archive.

This updated version also covers on electronic media, digital asset management, metadata standards, ftp, and how the current trend of media consolidation has affected the stock and assignment photography business models.

Also, I’d highly recommend checking out the ASMP Guide to New Markets in Photography. This is an awesome, up-to-date look at what it takes to succeed in TODAY’s world.

3. The Linked Photographers Guide to Online Marketing and Social Media

Written by two industry veterans, Rosh Sillars and Lindsay Adler, this very up-to-date book that shows you how to create a successful online marketing campaign. We all know that social media is here to stay and that it’s quickly becoming a huge force in the world of marketing and professional networking, so knowing how to take advantage of this new outlet is key if you want to be competitive in this industry.

Chapters include blogging, websites, how to use Facebook and Twitter to your maximum advantage, and SEO, which will show you how to make sure that your website gets found. (Just so you know, typing the word “photographer” in Google brings up 135 million sites.)

4. The Photographers’s Guide to Marketing and Self-Promotion

Written by Maria Piscopo, a former photographers’ rep, this is a excellent guide to marketing and networking that I’d highly recommend to anyone who wants to ramp up their photo marketing plan and get more business.

It shows you how to define the type of work you do, how to create and present an effective portfolio, and then outlines how to build and run a successful marketing campaign that includes a variety of different mediums, including print, email, newsletters and more.

Also recommended by Popular Photography Magazine and Photo District News, this book is definitely worth checking out.

5. The Fast Track Photographer Business Plan

A companion to Fast Track Photographer, the groundbreaking book and photography career self help guide by Dane Sanders, The Fast Track Business Photographer Business Plan: Build a Successful Photography Venture from the Groud Up continues by showing you how to build a solid business plan that’s relevant in today’s fast paced digital world.

Dane’s approach works so well, because it gets you thinking about how to dispel the potential roadblocks to success and actually make them work to your advantage. The book helps you analyze and rethink your marketing, negotiating and sales strategies so that it reflects the realities of the 21st century.

I’ve been working with Fast Track Photographer for a few months now and it’s helped me come up with a host of new ideas, many of which have already paid off professionally for me this year, so I can easily recommend both of his books to any photographer who wants to shake things up and bring a fresh approach to their business. For how little they cost, they carry a tremendous impact.

———–

For related reading, check out my How to Become a Pro Photographer eBook, a 27-page guide that’s filled with essential information and tips for the aspiring or emerging pro.

[iframe]<iframe src=”http:///e/cm?lt1=_blank&bc1=FFFFFF&IS2=1&bg1=FFFFFF&fc1=000000&lc1=0000FF&t=danhbaisadvph-20&o=1&p=8&l=as4&m=amazon&f=ifr&ref=ss_til&asins=1435454294″ style=”width:120px;height:240px;” scrolling=”no” marginwidth=”0″ marginheight=”0″ frameborder=”0″></iframe><iframe src=”http:///e/cm?lt1=_blank&bc1=FFFFFF&IS2=1&bg1=FFFFFF&fc1=000000&lc1=0000FF&t=danhbaisadvph-20&o=1&p=8&l=as4&m=amazon&f=ifr&ref=ss_til&asins=1581154976″ style=”width:120px;height:240px;” scrolling=”no” marginwidth=”0″ marginheight=”0″ frameborder=”0″></iframe><iframe src=”http:///e/cm?lt1=_blank&bc1=FFFFFF&IS2=1&bg1=FFFFFF&fc1=000000&lc1=0000FF&t=danhbaisadvph-20&o=1&p=8&l=as4&m=amazon&f=ifr&ref=ss_til&asins=1435455088″ style=”width:120px;height:240px;” scrolling=”no” marginwidth=”0″ marginheight=”0″ frameborder=”0″></iframe><iframe src=”http:///e/cm?lt1=_blank&bc1=FFFFFF&IS2=1&bg1=FFFFFF&fc1=000000&lc1=0000FF&t=danhbaisadvph-20&o=1&p=8&l=as4&m=amazon&f=ifr&ref=ss_til&asins=1581157142″ style=”width:120px;height:240px;” scrolling=”no” marginwidth=”0″ marginheight=”0″ frameborder=”0″></iframe><iframe src=”http:///e/cm?lt1=_blank&bc1=FFFFFF&IS2=1&bg1=FFFFFF&fc1=000000&lc1=0000FF&t=danhbaisadvph-20&o=1&p=8&l=as4&m=amazon&f=ifr&ref=ss_til&asins=0817400001″ style=”width:120px;height:240px;” scrolling=”no” marginwidth=”0″ marginheight=”0″ frameborder=”0″></iframe><iframe src=”http:///e/cm?lt1=_blank&bc1=FFFFFF&IS2=1&bg1=FFFFFF&fc1=000000&lc1=0000FF&t=danhbaisadvph-20&o=1&p=8&l=as4&m=amazon&f=ifr&ref=ss_til&asins=081740001X” style=”width:120px;height:240px;” scrolling=”no” marginwidth=”0″ marginheight=”0″ frameborder=”0″></iframe>[/iframe]


March 15, 2011
See this post
The 5 Best Business and Marketing Books for Photographers

I’ve made the first two chapters of my conceptual photography eBook, Making The Image available as a free download.

The excerpt contains the Introduction, as well as the chapters Light and Color, which begin the exploration of how the human visual system perceives and responds to the world, and how you can use this information to help create stronger imagery of whatever subjects you like to shoot.

Making The Image explores the methodology of creativity as it applies to different types of images and to the image making process. The goad of the book is to help you take a more active role in your photography. Good photography isn’t just about randomly taking pictures and hoping they come out, it’s about perceiving and anticipating the right moment and going through a process of evaluating the scene and the light, and working through the solutions needed to render it with as much visual power as possible.

Illustrated with full page imagery, Making The Image is horizontally formatted, so it’s optimized for computer monitors and the iPad. If it were counted like most vertically formatted books, the page count would number 100 pages, since it’s essentially 50 full page spreads.

Making The Image contains ideas that I’ve been thinking about and utilizing in my imagery for over over two decades, and I’m really excited to finally have them all down in one place. I consider it the defining guide on my own photographic style, as it accurately represents how I see and compose my imagery.

It lays out a clear and concise approach to more effective composition. Since the concepts are universal, the techniques outlined in the book are sure to inspire you create photos that will capture both you and your viewer, no matter what style or subject matter you shoot.

Click here to get the first two chapters for free

That’s it, there’s no other obligation. Of course, if you want to continue with the rest creative concepts in the book, or if you think my time, effort and photography is worth a few bucks, you can always purchase the full version.

March 14, 2011
See this post
Get The First Two Chapters of “Making The Image” for Free
John Shafer aka @Photo_John

Size, weight and packability are always issues for outdoor and travel photographers. Some people choose to leave their digital SLRs behind in favor of point-and-shoot or high-end compact camera, even though that means compromised image quality and performance.

Working pros usually suck it up and pack their digital SLR gear, maybe compromising on the lenses they carry. But when you make your living with your camera, you can’t really compromise on image quality. Now, there’s an alternative for photographers who want DSLR performance in a smaller package.

“EVIL” (Electronic Viewfinder Interchangeable Lens), “compact system” and “mirrorless” are names for a new class of compact cameras with interchangeable lenses, large sensors and near-DSLR performance.

The compact system camera movement began in the fall of 2008 with the introduction of the first Micro Four Thirds camera. The Panasonic Lumix G1 was a ten-megapixel camera with an electronic viewfinder (EVF) and tilt-swivel LCD display. The Panasonic and Olympus Micro Four Thirds cameras are about the size of a Canon G-Series compact but that’s where the similarity ends.

Olympus PEN E-PL2 12.3 MP Micro Four Thirds Interchangeable Lens Digital Camera with 14-42mm

Micro Four Thirds cameras have interchangeable lenses and a much larger sensor than even the best compact camera. And bigger sensors mean better image quality – way better. Current Micro Four Thirds cameras, the Olympus E-PL2 Pen, Panasonic Lumix GH2 and the Panasonic Lumix GF2 have 12 or 14-megapixel sensors and capture HD video as well as stills.

A few months later, in the spring of 2009, Samsung introduced an EVIL camera, the 14-megapixel NX10, as well as their own line of Samsung NX lenses. The APS-C sensor is about 60% larger than the Four Thirds sensors used in the Panasonic and Olympus Micro Four Thirds cameras so the Samsung NX cameras should have even better image quality. As I write this, there are two Samsung NX cameras available, the NX10 and the NX100, both of which have 720p video as well as still shooting.

Sony NX5

Last year, Sony joined the EVIL camera party with the NEX-3 and NEX-5, arguably the most innovative of the compact system camera designs. The Sony Alpha NEX cameras are currently the smallest of all the EVIL cameras and look sort of like a lens mounted on a smart phone. They use a 14-megapixel Sony Exmor APS-C CMOS sensor developed specifically to support still and video capture in the NEX cameras and Sony Alpha digital SLRs.

All three of these camera systems represent a smaller, lighter alternative to digital SLRs. Because the lenses are also smaller, a multi-lens camera kit could be easier to fit in a pack or travel with than a digital SLR with one zoom lens.

Last spring, for the sake of a review, I left my digital SLR at home and took the Olympus E-PL1 Pen camera and two lenses on a vacation to Mazatlan, Mexico. I was able to take one carryon bag for my laptop and all my camera gear instead of the laptop case and bulky camera backpack I usually carry on the plane. The E-PL1 performed great and I had zero regrets about my decision. You can read more about my Mazatlan Micro Four Thirds camera experience in my Olympus E-PL1 Pro Review

If you’re a serious photographer looking for a packable alternative to a digital SLR, I recommend you take a look at the EVIL camera systems. My experience has mostly been with the Olympus Pen Micro Four Thirds cameras so I don’t have strong opinions about the other options or about which system is best. However, I have been hearing very good things about the Sony NEX-5 and it’s at the top of my list of cameras to test next.

For more information on EVIL cameras, check out PhotographyREVIEW.com’s EVIL & Micro Four Thirds Cameras Forum, as well as our EVIL Cameras Articles & News section.

________

Photo-John is John Shafer, Managing Editor of PhotographyREVIEW.com since 1999 and a sometimes published, totally addicted mountain bike and ski photographer.

March 11, 2011
See this post
Compact System Cameras For Outdoor & Travel Photographers

Lets face it, flash is quickly becoming a necessity in todays world. Whereas many photographers shied away from flash photography in the past, (including me) these days if you want to remain competitive, or just expand your creativity, you need to learn how to use these things.

Fortunately, with awesome resources like David Hobby’s Strobist website and Joe McNally’s own blog, his excellent book “The Hot Shoe Diaries“, and of course, their Flash Bush Tour which rolled through 29 cities this past Spring, the prospect of using flash has become much less scary for many photographers.

Since Nikon has discontinued the SB-800 Speedlight, that leaves two new choices in their current flash lineup: the SB-700 and the SB-910. Both are excellent units, and they each have their own strengths, so deciding which one to buy may prove a little challenging to some photographers. Let’s quickly review each one.

The SB-910 Has Been Updated to the SB-5000

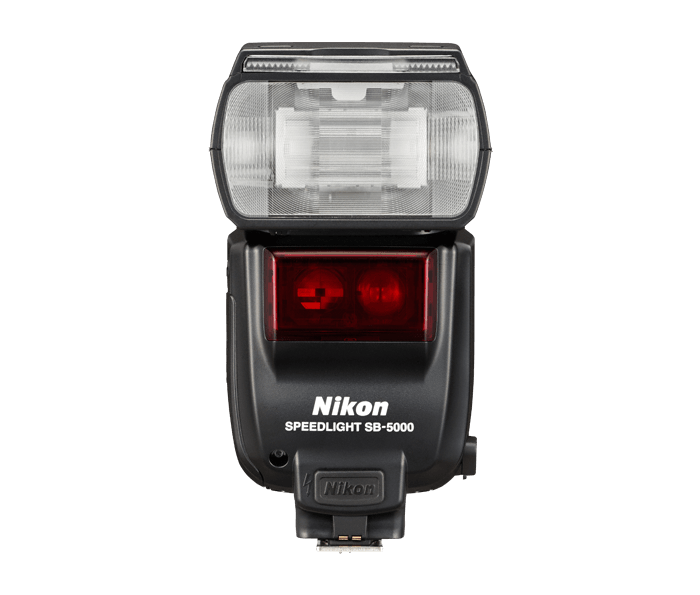
Editor’s Note: The Nikon SB-5000 has replaced the 900 Series flashes. It’s the new top of the line Speedlight in the Nikon lighting system.

It has many of the functionalities of the SB-910, with the added benefit of a built-in wireless communication system. This allows for wireless off-camera flash, without needing a separate trigger like a PockerWizard or Cactus setup. In this mode, you can control up to 6 groups of flash at a distance of up to 98 feet. (Why couldn’t they just make it 100?)

Please note, however, the new wireless radio functions on the SB-5000 only work with the D5 and D500, when using the WR-A10 Wireless Remote Adaptor. With other Nikon DSLR cameras, you can still use the standard optical wireless flash functions, just like always.

As a Master Flash Commander, you can control up to 3 Groups and 4 Channels, using either the SB-5000 as a commander, another Nikon Speedlight or the SU-800 Wireless Speedlight Commander. You can even control the flash from a computer for shooting in the studio.

Current street price on the SB-5000 is about $595. Ouch. Add tax and/or shipping, and you’re well over six bills for a flash.

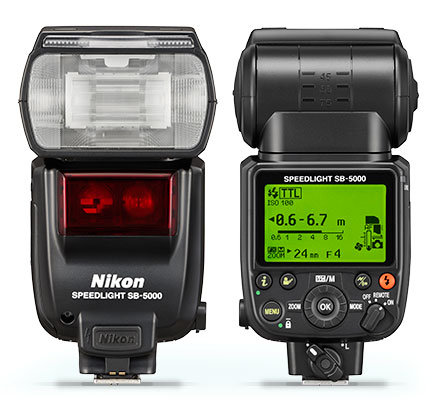
However, the SB-5000 is an awesome flash. For one thing, it zooms to 200mm. If it were a guitar amp, it would go to 11. That alone gives you some amazing creative options for shining strong, eye catching directional light on your subject, especially if you’re using it as an off camera, remote flash.

It also has a new cooling system which lets you fire up to 100 consecutive shots without the flash overheating. This was a big problem on the original SB-900 units, and in fact, many flashes will overheat with a large number of consecutive fires.

The SB-5000 also lest you select one of three illumination patterns for the flash: Standard, Center weighted and Even. This allows you to direct and fine tune your lighting quality depending on your subject.

It also comes with a brand new color gel system that automatically detects and tells the camera which gel you’re using and what while balance to set. And for anyone who’s ever used the SB-800, there’s no more navigating inside the menus to select “Master” or “Remote,” you simply flip a switch and select wither the unit is a master or a slave. Brilliant.

Also, those flimsy little colored gels that are such a pain in the butt to handle (ever dropped them outside in the dark or lose them in your camera bag?) have been replaced by the same hard plastic filters that the SB-700 uses. Big win there.

There’s plenty more to be said about the SB-5000, but what you really want to know is it worth $595? If you’re an experienced flash user, or someone who is serious about learning how to use flash, then yes, it’s worth it. It’s a tool, just like your Gitzo tripod or your expensive lenses.

When you consider that the average fast fixed lens costs around $400-500, with zooms being two to three times that, then again, yes. It’s worth it.  I’ve made heavy use of my SB-900, and it rocks. The SB-5000 gives you even more performance and it still plays nice with other flashes.

The SB-700

However, if you’re on a budget or if you are new to flash photography and have only begun experimenting with Nikon’s Creative Lighting System and off camera flash, then the SB-700 might be the way to go.  It’s smaller, more compact, and certainly more affordable. 

At $329, it costs less than the SB-800 did and in many ways, it’s a better flash than the 800. Essentially the little brother to the SB-900, the 700 contains many of the same features as the 900, including the thermal cutoff control that prevents the flash from overheating and the fast, 2.5 second recycle time. (3 sec with alkaline batteries.)

Where it lacks is that it only zooms to 120mm, although that’s not bad when you consider that the SB-800 could only zoom to 105mm. It’s a little less powerful than the 800 was, but for most uses, you probably won’t notice much of a difference.

The SB-700 can only control up to 2 groups of remote flashes, while the 900 will control 3 groups. However, if  you’ve got enough flashes to control 3 groups, then you’re probably not too worried about the extra 130 bucks. Also, like the SB-600, the SB-700 lacks a PC-sync port.

That said, with wireless remote capabilities of Nikon’s Creative Lighting System, this probably won’t be an issue for many photographers. That said, the SB-700 actually has a couple of plusses over the SB-910.

Instead of using flimsy colored gels that you insert into the plastic holder, and which are really hard to deal with when you’re outside in the cold/rain/snow/wind/dark, the 700 comes with two colored filters than snap right on the head of the flash, one for tungsten, one for fluorescent. (I can just imagine the Nikon design team coming up with that idea right after the 900 was released.)

Finally, the SB-700 reportedly runs a little cooler than the SB-910 when it’s used as a main, on camera flash. So, if you’re anticipate using the unit on your hotshoe most of the time, then save yourself some money, get the SB-700 and fire away.

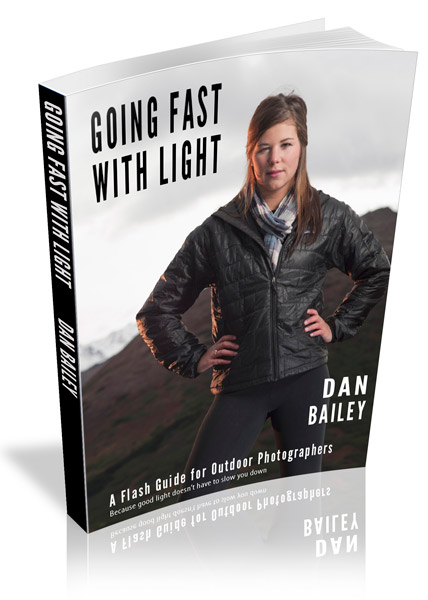
If you’re interested in learning and becoming more proficient with Nikon flash, I’d strongly consider checking out The Hot Shoe Diaries. It’s a great book and… well, you can read my review here. Also, check out my 83-page eBook, Going Fast With Light. It covers effective off-camera flash techniques and lighting gear that won’t slow you down.


See the Nikon SB-5000 AF Speedlight i-TTL Shoe Mount Flash at B&H Photo See the Nikon SB-700 Speedlight Shoe Mount Flash at B&H Photo


If you still want the Nikon SB-910, you can find them here: See the Nikon SB-910 AF Speedlight i-TTL Shoe Mount Flash at Adorama See the Nikon SB-700 Speedlight Shoe Mount Flash at Adorama

Support this site: If you’re in the market for new gear, please consider visiting and purchasing gear through these links. This help cover the costs, effort and time that it takes to run this site and produce these reviews and articles. As always, thanks for reading! [iframe]<iframe width=”120″ scrolling=”no” height=”240″ frameborder=”0″ style=”border:none;” border=”0″ src=”http://mer54715.datafeedfile.com/widget/aff_widget_prdt_generate-2.0.php?aff_num=6746&aff_net=1&widget_num=4766&sid=” marginheight=”0″ marginwidth=”0″></iframe><iframe width=”120″ scrolling=”no” height=”240″ frameborder=”0″ style=”border:none;” border=”0″ src=”http://mer54715.datafeedfile.com/widget/aff_widget_prdt_generate-2.0.php?aff_num=6746&aff_net=1&widget_num=4767&sid=” marginheight=”0″ marginwidth=”0″></iframe>[/iframe] [iframe]<iframe style=”width:120px;height:240px;” marginwidth=”0″ marginheight=”0″ scrolling=”no” frameborder=”0″ src=”//ws-na.amazon-adsystem.com/widgets/q?ServiceVersion=20070822&OneJS=1&Operation=GetAdHtml&MarketPlace=US&source=ss&ref=ss_til&ad_type=product_link&tracking_id=danhbaisadvph-20&marketplace=amazon&region=US&placement=B0050YG3CU&asins=B0050YG3CU&linkId=RTHEHJMMCVUNWQSZ&show_border=true&link_opens_in_new_window=true”> </iframe><iframe style=”width:120px;height:240px;” marginwidth=”0″ marginheight=”0″ scrolling=”no” frameborder=”0″ src=”//ws-na.amazon-adsystem.com/widgets/q?ServiceVersion=20070822&OneJS=1&Operation=GetAdHtml&MarketPlace=US&source=ss&ref=ss_til&ad_type=product_link&tracking_id=danhbaisadvph-20&marketplace=amazon&region=US&placement=B0042X9L6A&asins=B0042X9L6A&linkId=EWSJ7LJHGTCJTDED&show_border=true&link_opens_in_new_window=true”> </iframe>[/iframe]  


[wpc_table id=1]


March 9, 2011
See this post
Comparing Nikon Speedlights: The SB-700 vs. The SB-5000

What to do on a Sunday afternoon in Alaska when we have increasing daylight, sunshine and a day with no wind? How about a little adventure… I know, let’s take a leisurely ride out to the Knik glacier on our bikes!!

Actually, it was about a 20 mile round trip ride on snow, frozen river, gravel and of course, flat, smooth bare blue water ice. It was no “gimme,” but it was certainly worth the effort. In a way, riding down the wide Knik River, with its scattered islands of cottonwood trees, reminded us of riding in the Canyonlands of Utah, just white instead of brown and orange.

For camera gear, I took my Nikon D700, along with my two favorite lenses, the Nikon 14mm f2.8D ultra wide angle lens and the Nikon AF Zoom 80-200mm f2.8ED lens, and carried them in my LowePro Mini Trekker AW camera backpack.

The Mini Trekker worked great, because in addition to the two other lenses that I took along with me, (24mm f2.8 and 85mm f1.8) I was able to fit all my extra clothing and food right in the pack, and keep everything handy, except for my water, which I kept in an insulated case attached to the handlebars. After many excursions on foot and bike, I’m really sold on this pack!

Once we got up and over the moraine, riding on the ice was very surreal. And, of course, it made for some great photography around the icebergs and ice caves. The 14mm worked so well to give the scene a dynamic, three dimensional look to the scene, and the telephoto always gives such great isolation to subjects against a suggestion of the background. They’re both relatively heavy lenses, but well worth the effort to carry with me on adventures like this.

We didn’t have tons of time out there, so it was an exercise in forced creativity and focus. I almost felt rushed trying to capture as much as I could before the sun dipped behind the mountains and it was time to start heading back, but overall, I’m really excited with the shots that I got.

March 7, 2011
See this post
Glacier Mountain Biking, Alaska

In yesterday’s post, I ran a practical comparison of Nikon’s current Pro level DSLR camera lineup. Today we focus on the new D7000 and how it compares to the older D90. If you’re like many D90 users out there, you’re probably wondering, should I upgrade? Is the D7000 that much better than the D90? The short answer, is yes, it is, but from a practical standpoint, let’s review both cameras.

Note that this post was written before the new Nikon D7100 was announced, so really, if you were considering upgrading from the D90 to the D700, then you’ll want to look at the D7100.

The D90

The D90 is a great camera. It’s a lightweight 12.3 MP DX sensor body that shoots 4.5 fps, which is certainly fast enough for many applications. When it came out, it was basically the little brother to the D300 and the two bodies shared much of the same technology.

For two years, it was the top model in the so called “entry level” lineup, although I know of at least a handful of outdoor pros who used the D90 because it’s lighter than the D300 and it shoots video. (The D300 was eventually upgraded to the D300s, which also shoots video.)

Image quality is certainly good enough for professional work, and there are many pros, semi pros and serious enthusiasts out there who use the D90 for their portrait, wedding, location, landscape and commercial work.

With it’s 11-point area AF and 4.5 fps, it’s not the ideal camera for sports and action, and it’s certainly not as tough or weather sealed as the cameras in the Nikon’s pro line, but if you generally shoot subjects that don’t move very fast and if you don’t abuse it, the D90 will get the job done.

The D7000

EDIT: The Nikon D7100 is out now, and it’s a fantastic upgrade to the D7000 in every way. So, read what I think the D7000 and then take a look at the new D7100.

14 Bit RAW: Enter Nikon’s newest camera, the D7000. For a camera that’s only two years newer than the D90, it offers a surprising array of new features and technology. A 16.2 MP body, with dual SD card slots, it will shoot either 12 or 14-bit RAW images at up to 6 fps. That’s HUGE.

I use the D700 and I just leave it on 14-bit RAW mode all the time. Why? Because shooting in 14-bit RAW gives you the maximum amount of pixel data, the highest possible image quality and the most amount of shadow definition. (Here’s an example.)

Why wouldn’t you want that for all your imagery, whether you’re a pro or not? Not taking advantage of that capability would be like owning a Ferrari and only driving it in second gear all the time. Score big on the D7000 for this capability in the image quality department.

Low Light/High ISO: And double score with its excellent high ISO sensitivity, which allows for incredible detail, and very low noise when shooting in low light environments. Put simply, shooting with the D7000 opens up a multitude of new picture taking opportunities. With this new technology, you will no longer shy away from shooting inside. That means you can take on new types of assignment work with confidence.

Metering, AF & Video: When it comes to metering and exposure, the D7000 is light years ahead of the D90. Whereas the D90 has a 420-pixel RGB 3D Color Matrix Meter, the D7000’s meter operates with  a 2,016-pixel system, which offers way more accuracy in difficult lighting situations.

Also, the D7000 has a 39-point AF system. It’s not quite as advanced as the 51-point AF system that the upper level bodies have, but it’s still a big improvement over the D90, which only has 11-point autofocus, and it will handle sports and action much better than it’s predecessor.

Finally, when it comes to HD video, the D7000 leaves the D90 in the dust. Props to the D90 for being Nikon’s first HD DLSR, but two years has seen a huge jump in technology. The D7000 offers 1080 HD video with built in stereo sound and full time autofocus.

Again, HUGE. I could go on, but I’d start to sound too much like a Nikon rep, which I’m not. I’m just a regular user who puts my Nikon camera gear through professional use week in and week out.

So to sum it up, I’ll just equate this with my own experience upgrading camera bodies. As a D300 user (remember, same generation as the D90), I asked myself the same question when the D700 came out. “Should I upgrade?” Well, I did and I’ve never looked back. After all these things are just tools for us to practice our craft and why not take advantage of the incredible advancements that are available?

The Lowdown- Should you upgrade?

If your question is “Should I buy the D90 or the D7000?” then the answer is absolutely clear. Get the D7000, especially when you consider it’s only a $300 difference in price.

If your question is “Should I upgrade?” then unless you just bought a D90 and aren’t ready to spring for another new camera just yet, then I’d say yes, upgrade now, or at least start thinking about upgrading soon. I guarantee, you won’t look back either. And even if you did just buy a D90, well, it never hurts to have a second body…

Note: Right now, D700 bodies are $100 off: Buy it at B&H Photo or Amazon and , you’ll be helping support this site. Think of it as giving me a virtual thumbs-up that you found this review useful.

[iframe]<iframe src=”http:///e/cm?lt1=_blank&bc1=000000&IS2=1&bg1=FFFFFF&fc1=000000&lc1=0000FF&t=danhbaisadvph-20&o=1&p=8&l=as4&m=amazon&f=ifr&ref=ss_til&asins=B0042X9LC4″ style=”width:120px;height:240px;” scrolling=”no” marginwidth=”0″ marginheight=”0″ frameborder=”0″></iframe><iframe width=”120″ scrolling=”no” height=”240″ frameborder=”0″ style=”border:none;” border=”0″ src=”http://mer54715.datafeedfile.com/widget/aff_widget_prdt_generate-2.0.php?aff_num=6746&aff_net=1&widget_num=1295″ marginheight=”0″ marginwidth=”0″></iframe><iframe width=”120″ scrolling=”no” height=”240″ frameborder=”0″ style=”border:none;” border=”0″ src=”http://mer54715.datafeedfile.com/widget/aff_widget_prdt_generate-2.0.php?aff_num=6746&aff_net=1&widget_num=3178″ marginheight=”0″ marginwidth=”0″></iframe><iframe src=”http://rcm-na.amazon-adsystem.com/e/cm?lt1=_blank&bc1=000000&IS2=1&bg1=FFFFFF&fc1=000000&lc1=0000FF&t=danhbaisadvph-20&o=1&p=8&l=as4&m=amazon&f=ifr&ref=ss_til&asins=B00BI9X7UC” style=”width:120px;height:240px;” scrolling=”no” marginwidth=”0″ marginheight=”0″ frameborder=”0″></iframe>[/iframe]

March 3, 2011
See this post
The Nikon D90 vs. the D7000: Should You Upgrade?

Deciding which camera to buy can be a no-brainer for some people; for others, it can be a rather daunting process. For example, if you’re a top pro looking for a body to take on assignment to Afghanistan or to photograph the Olympics, then you simply grab the top of the line model and head out the door to catch your plane.

However, if you’re a working pro who doesn’t necessarily need the top shelf body, an enthusiast who may have the income to spend on a higher end model, or a beginning photographer, it can be difficult to narrow down your selection.

There are many factors to consider when shopping for a new camera, and price is certainly one of them, but so are the real life considerations of how you’ll use the camera. These are often just as important.

To help put these considerations in perspective, here is a practical comparison and review of the current Nikon Pro DSLR Camera line, minus the slick copy and gorgeous photographs that the product catalogs and advertisements use to sway you. If you’re in the market for a new camera, hopefully this can help you with your decision making process.

Nikon D3x Street Price: $7499.95

Nikon’s top of the line model. At 24.5 megapixels, the D3x boasts the highest resolution of any camera that they’ve made to date. It shoots Full Frame (FX sensor) at 5 fps at full resolution and can capture subjects with absolutely incredible detail and low light sensitivity.

It’s designed for full time, working pros who demand maximum image quality.

If you’re a high end studio, assignment or stock photographer who uses your camera in every type of environment and who needs the absolute best, or if you simply have discernible taste and the right income, then the D3x is for you. (It’s great for the retired doctor who’s planning that trip to Denali National park.)

Bear in mind, though, that the D3x a fairly heavy camera. If you’re a highly mobile shooter who likes to go light and fast in the outdoors, or are prone to elbow tendonitis, then you’ll feel the weight of this thing pretty quickly.

Nikon D3s Street price: $5199.95

Also a Full Frame FX sensor camera, the 12.1 megapixel D3s shoots up to 9 fps (11 fps in Crop DX format) and it’s expanded buffer allows continuous capture of up to 36 RAW or 85 JPEG images.

This one’s pretty straightforward; you get the D3s if you’re a full time pro sports and action photographer, or, like the D3x, if you’ve got the type of income to afford it.

Hey, if you have the cash, there’s nothing wrong with being an amateur photographer who likes to shoot the kids’s soccer games with your D3s. Photography is an equal opportunity activity and if you’ve got the money you can play the game however you want.

Nikon D700 Street price: $2399.95

At 12.1 megapixel, the D700 is a Full Frame FX body that shoots 5 fps with excellent low light, high ISO sensitivity. It’s basically the little brother to the D3x.

It’s a full-on pro quality body won’t weight you down as much as the much heavier D3x. It has many of the same features but since it doesn’t have the built in vertical grip, it’s considerably lighter, which makes it great for all around use and for carrying into the backcountry for landscape photography, or for hiking, biking or skiing shoots.

The D700 is my main camera body and I use it all the time for everything: sports, action, travel, landscapes, people, lifestyle and portraits. It’s solid, highly durable and the image quality is fantastic. Plus, I like the fact that it shoots 14-bit RAW at the full 5 fps.

Of all the cameras that I’ve ever used in my fifteen year career, this one is my favorite. Ergonomically, it fits perfectly in my hands and everything about it just works the way I need it to.

And if it’s not as fast as you need for action, you simply slap on the MB-D10 Multi Power Battery Grip and you’ve got 8 fps. If you want a solid, all around, pro quality Nikon camera, you cant go wrong with the D700. It’s the choice of professional adventure and outdoor photographers all over the world.

Nikon D300s Street Price: $1499.95

The 12.3 megapixel D300s is pro quality camera body with a DX format crop sensor that also shoots 1280 x 720 HD 24 fps video with a stereo audio input. It also shoots at 7 fps, and it has an advanced, very fast 51-point 3D autofocus tracking system, which makes it ideal for sports and action.

I’ve got a non “s” version D300 that I still use quite often. It’s the backup to my D700, although for some applications, it’s my first choice. Since it’s a crop sensor body, it’s great for telephoto work; my 200mm lens effectively becomes a 300mm f/2.8 lens when I stick it on the D300, so use it for sports and during those times when I want to zoom in close.

The D300s is plenty durable for just about any condition you throw at it. I’ve dropped mine on rocks with no ramifications other than a scratch on the paint, and for a number of years, it was my main DSLR body. If you’re looking for a rugged all round pro quality camera that’s great for shooting sports and people, then the D300s might be a good choice for you.

Nikon D7000 Street Price: $1,199.95

The Nikon D7000 took the photography world by storm when it was announced last fall, and since then it’s been the number one choice for many pros and amateurs alike.

A DX body that shoots at 16.2 megapixel, 14-bit RAW images at up to 6 fps, the D7000 is an awesome camera that’s perfect for just about every kind of photographer. I know full time action and adventure shooters who use this thing because it’s lighter than both the D700 and D300; it’s great for taking into the outdoors because it won’t weigh you down.

Image quality is excellent on the D7000; with it’s 2,016-pixel RGB 3D Color Matrix Metering, advanced processing, and A/D conversion, it will produce photographs that are certainly good enough for professional publication. It also shoos 1080p HD video with full autofocus, which is something the D300s can’t do.

The D7000 is a great choice for working photographers who want a lightweight body and pro quality features and who don’t need the more advanced autofocus (i.e. more cross type sensors) or the extreme durability that Nikon’s higher end models offer. If you shoot in all but the worst conditions, the D7000 will get the job done and it will get the job done well.

It’s also one of the best cameras for the beginning and enthusiast photographer. It costs less than half as much as the D700, but it’s my no means half the camera. Essentially, the D7000 is a solid camera choice for just about anyone who is serious about their photography.

I didn’t include the D90 on this list, but here’s a post that compares the D90 to the D7000.

March 2, 2011
See this post
A Practical Comparison of The Nikon Pro DSLR Camera Line