Aeria photo of Mt. Yukla, Eagle River Valley, Chugach Mountains, Alaska
Aeria photo of Mt. Kiliak, Eagle River Valley, Chugach Mountains, Alaska

This morning Chase Jarvis posted a very short piece on his blog, titled It Ain’t All About You. He basically points out that we should remember to focus our efforts on trying to be a better person, and not just a better photographer. By doing so, we’ll inherently end up being better creative type anyway. His article proposes that we strive to make somebody else’s life better each day.

Well said, Chase. Right on. Words we should all live by.

I’d like to add one thing to this, though, which is that we need to remember to be good to ourselves as well.

Sure, we all know how to focus on ourselves, which is the gist of his piece. We know how to work on our techniques, our portfolio, our marketing efforts, our blog posts, our tweets, but how often are we genuinely good to ourselves? How often do we take time out of our day to visit with a friend, play an instrument, take a walk, a bike ride or a cross country ski? How often do we make a good meal for ourself or get a massage, or try something creative that’s not geared around photography?

By remembering to get up and away from your computer, camera and iPhones and really treat yourself to the joys of what life has to offer, you’ll increase your own sense of happiness and self satisfaction. This in turn will inspire you to be more creative and more willing to give back to others, just like Chase advised in his post.

Of course, as with many of my blog posts, I’m writing this as a reminder to myself as much as for you. Don’t think I’m not just as guilty as anyone of pounding away at the business so much that I’ll let nearly an entire week go by without picking up my guitar or heading out for a quick skate ski. That’s bad, because the closest guitar is only 24 inches away from my computer, and the trails are only 3 blocks away from my front door.

So, do something a little different today, even if it’s for just a short amount of time. Take yourself out to lunch. Pick up a pencil and draw a picture. Go outside and smell some flowers. (I’d do that, but they’re still covered in a foot of snow.) Yourself will thank you.

March 1, 2011
See this post
What Chase Said, But Remember to Be Good To Yourself Too
2011 "Fur Rondy" World Championship Spring Sled Dog Racing, Chester Creek Trail, Anchorage, Alaska

Here’s a photo I shot last weekend during the 2011 Fur Rondy Sprint Sled Dog races here in Anchorage. Fortunately, the races go down the trail right by my house, so finding a good vantage point is as easy as hopping on my bike and pedaling for about five minutes.

I really like the image for a number of reasons. The near-perfect synchronicity of the two lead dogs is something you can only hope to capture by firing off a burst of images as the team rockets on by. It’s the kind of shot that happens so fast in a flurry of snow and motion that you don’t know if you actually got it until you look at the preview.

It’s the kind of shot that, when I look at it later gets me thinking about what it takes to make a great image. Then I ran across a great post by Utah photographer Bret Edge this morning that pretty much says it all. It doesn’t correlate perfectly to this kind of action shot, since Bret is primarily a landscape photographer, but it’s pretty universal advice with some, well thought out points. It can certainly put you on a path to making better images and improving your photography.

Read Bret’s post The Best Photography Advice I’ve Ever Received, and then if you have some time, be sure and poke around this site for some of my own creative tips.

Happy shooting!

February 28, 2011
See this post
Great Advice for Outdoor Photographers

Digital Imaging Tips by Dan Moughamian

For this second HDR tutorial we’ll take a look at the color workflow with Topaz Adjust 4 by Topaz Labs.

If you enjoyed these these tutorials, please head over to Colortrails.com to see more free tips and learn about my Photoshop and Lightroom book. Also feel free to post suggestions below!

And in case you missed it, here’s Working with HDR Efex Pro.

Background

Topaz Labs is the creator of numerous popular Photoshop plugins, ranging from noise reduction software to black and white processing and everything between. For this segment though, we’ll show you how easy it is to create HDR looks using Topaz Adjust 4.

Ease of Use

If you’re a Mac user, the Topaz plugin interface may take a little getting used to but it’s easy to use and offers a lot of control over the creative process. Similar to what you find in other plugins from Nik, Topaz plugins use a list of presets (left side), tabs for displaying the original image and preview image (center), and a collection of collapsible control “panels” (right). You can use the menu at bottom left to specify preferences, access online help, check for updates, and more.

Topaz Workflow

For HDR, we already have a couple of presets made for us, and one of them makes it very easy to create an HDR look from a single photograph. My recommendation is to use an exposure that is slightly over-exposed so that you have more data available for the plugin to work with. You shouldn’t have any issue recovering the highlights in most cases. Once you’ve processed the raw file and opened it in Photoshop, choose Filter > Topaz Labs > Topaz Adjust 4. Next choose your preset (HDR – Pop in this case).

To start the edits, open the panel that says Exposure. Experiment with the Adaptive Exposure and Regions controls, which work together to modify brightness and local contrast. The higher the values, the more illustrative and painterly the look, the lower the values the more natural looking a result you’ll tend to get. Note that will all of the controls in Topaz Adjust, if you mouse over them you will get detailed help text, which is useful since there are only subtle differences between some controls. Below I reduced the default values of both to get closer to the original look of the scene. Here as with the prior example [link to Method 1 article], I paid attention to the highlight details in the clouds to avoid clipping them.

Next, as you boost the Contrast setting, you will notice the stark halos and other characteristics of over-cooked HDR shots will decrease. It will also tend to sharpen the edges of your subjects, which is usually desirable to maintain an element of realism. In the screenshot above, I also increased the Highlight value (which protects the lightest tones from clipping) and decreased the Shadows value (which prevents them from clipping). I did this to make the scene more realistic — the trees were not that bright and the clouds were not pure white. The final steps involve tweaking the details and colors.

Open the Details panel. Generally, if you took the shots with a tripod and have sharpened the details from of your raw editor, only modest amounts of change are needed to the Strength, Boost and Sharpen sliders IF the objective is to maintain realism, as it was here. The Strength slider and Boost slider work together to enhance both global and localized (or small detail) contrast. Zoom in again and experiment by moving both sliders to extremes (individually) and watch what happens to various areas of detail. For Boost, a very small change will go a very long way! Below I increased the values of each control only slightly.

For the color enhancements I like to zoom back out to get a feel for the overall look of the photo. Here again we have an Adaptive control and a Regions control for handling saturation on a localized basis. As with the prior controls you’ll find a small change can make a big difference so don’t over-do it! What I typically find with shots that were taken under relatively darker light, is that a modest adjustment to Adaptive Saturation, Regions and Saturation Boost will achieve the look I want. (Note at lower magnifications, the previews can be a little blurry with this plugin; at least that seems to be the case on recent versions of Mac OS X.)

When finished, click OK and the image will process and open in Photoshop. Within the span of 8 or 10 minutes, you should be able to create realistic and dramatic HDR looks from a single well chosen photograph using Topaz Adjust 4.

————–

Dan Moughamian is an experienced photographer and educator, and has worked
with Adobe Photoshop since the early 1990s. He also has extensive
experience with Photoshop Lightroom, Photoshop Elements, plugins from Nik
software, and many other digital imaging products. As a long-time member
of their testing programs, Dan has collaborated with Adobe Systems to help
enhance many of the core functions in Photoshop, Lightroom, and Elements.

As an educator, Dan’s focus is to help photographers at all levels get the
most from their digital workflows. Tips on raw editing, layer masking,
alpha channels, image adjustments, HDR photography, focus and lighting
effects, and perspective correction, are just a few examples of the topics
he covers. To learn more, you can visit Colortrails.com, and follow Dan on Twitter, and on Google Plus.

He is the Author of Adobe Digital Imaging HOW-TOs- 100 Essential Techniques for Photoshop CS5, Lightroom 3 and Camera RAW 6, and his work has been also been published in Photoshop User Magazine and Photo Techniques Magazine.

February 25, 2011
See this post
HDR Quick & Easy, Method 2 – Using Topaz Adjust 4

Nothing excites my own photography mindset like a good book. I’ve always loved poring through the photo department in the book store or the local library, picking up tips and inspiration from the masters, especially from those titles that are geared towards travel photography.

Even today, I still get giddy with excitement when I find a good one that I haven’t yet seen. I literally devour it, usually two or three times, and take notes as I read, hoping to transfer some of that creative inspiration to my own shooting style.

Want to bring some of the magic to your own work? Here are 3 great books that can help you learn to become a better travel photographer. Any one of them is sure to light a spark in your creativity and make you want to venture out into the world with your camera and follow in the footsteps of those National Geographic legends that we all revere so much.

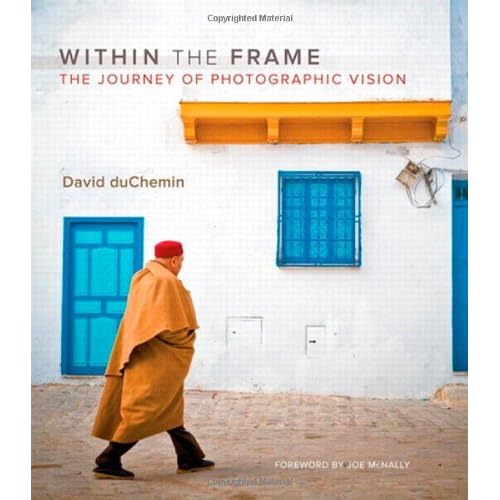
1. Within The Frame by David DuChemin

In his forward, legend Joe McNally writes, “This book is like a great photograph.” He’s right on. Travel and humanitarian photographer David DuChemin is indeed a master visual storyteller and anyone who’s read his books and eBooks knows that he has not only a wonderfully creative eye, he’s also an awesome teacher who does a great job helping you find and express your own photographic vision.

Full of beautiful and compelling imagery, Within the Frame explores the personal journey that’s involved in creating better photographs of the places and people that excite you. It not only shows you what goes into making a meaningful image, it inspires you to start telling your own visual stories with the camera. If you love travel photography, you simply can not go wrong with this book.

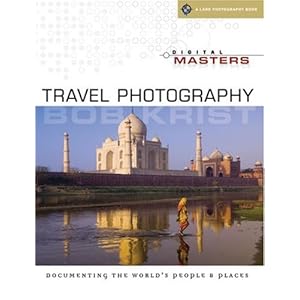
2. Travel Photography: Documenting the World’s People and Places by Bob Krist

One of the Digital Masters series titles, this book by award winning National Geographic photographer Bob Krist is a great comprehensive travel photography manual. With its beautiful aesthetic design and easily understood topics, it does a great job exploring the concepts of what makes a truly great photograph.

Then it goes into depth on how to create great images, from choosing the ideal photography equipment, to visualizing and composing your subjects, and all the way to executing an efficient digital photography workflow and backup once you’ve made them. It’s relevant, up to date with the current technology and filled with great advice. Overall, it’s a great starting point for someone who is relatively new to travel photography.

Advanced shooters may find it a little too basic, but you’re still sure to be inspired by Bob’s great imagery, especially since it’s a relatively low priced book.

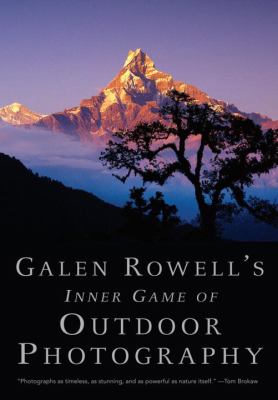
3. Galen Rowell’s Inner Game of Outdoor Photography

We all know that Galen Rowell is the undisputed father of the modern day adventure and participatory photographer, but let’s not forget how truly stunning his travel imagery is. Remember his Rainbow of the Potala Palace Image and his photos of the Dalai Lama?

Of course, Galen was also brilliant writer and teacher. I took one of his Mountain Light workshops back in 1993 and I’ve read just about every word that he ever put into print. He’s without a doubt my biggest influence, and I don’t know of anyone who can explain the craft and methodology of photography better and more intelligently than Galen could. (David DuChemin certainly comes to mind, though, as one of today’s top instructional visionaries.)

This book is a compilation of articles that he wrote for Outdoor Photographer magazine and it’s broken down into four sections that deal with cognition and the creative process, technique and practical advice, first person narratives that describe his own creative process, and the effects of photography and travel on the environment.

As with all of his books and essays, Galen Rowell’s Inner Game of Outdoor Photography is incredibly well written and thought provoking. If you’re looking for a simple how-to manual, this may not be the book for you, but if you want a smartly composed exploration into the deeper aspects of travel photography, then you definitely want to put it on your list.

Honorable Mention: Adventure Travel Photography: How to Shoot Great Pictures Off The Beaten Track by Nevada Wier

I list this one as an honorable mention, not because it’s any less of a book than the other three, but because it’s out of print and somewhat hard to find. I remember reading this book when I first started out and I loved it! Nevada Wier is an incredible photographer, certainly one of my all time favorites, and I continue to find great inspiration from her work even today.

If you get your hands on a copy of this book, buy it. You will not be disappointed.

Like what you see here? Subscribe to my blog and never miss a post.

[iframe]<iframe style=”width:120px;height:240px;” marginwidth=”0″ marginheight=”0″ scrolling=”no” frameborder=”0″ src=”//ws-na.amazon-adsystem.com/widgets/q?ServiceVersion=20070822&OneJS=1&Operation=GetAdHtml&MarketPlace=US&source=ss&ref=ss_til&ad_type=product_link&tracking_id=danhbaisadvph-20&marketplace=amazon&region=US&placement=0321605020&asins=0321605020&linkId=2675XO2K2IFCZJLL&show_border=true&link_opens_in_new_window=true”>
</iframe><iframe style=”width:120px;height:240px;” marginwidth=”0″ marginheight=”0″ scrolling=”no” frameborder=”0″ src=”//ws-na.amazon-adsystem.com/widgets/q?ServiceVersion=20070822&OneJS=1&Operation=GetAdHtml&MarketPlace=US&source=ss&ref=ss_til&ad_type=product_link&tracking_id=danhbaisadvph-20&marketplace=amazon&region=US&placement=1600591108&asins=1600591108&linkId=QPOKVE3PHGCUJYPN&show_border=true&link_opens_in_new_window=true”>
</iframe><iframe style=”width:120px;height:240px;” marginwidth=”0″ marginheight=”0″ scrolling=”no” frameborder=”0″ src=”//ws-na.amazon-adsystem.com/widgets/q?ServiceVersion=20070822&OneJS=1&Operation=GetAdHtml&MarketPlace=US&source=ss&ref=ss_til&ad_type=product_link&tracking_id=danhbaisadvph-20&marketplace=amazon&region=US&placement=0393338088&asins=0393338088&linkId=TLGUOGLT6SQJZ25G&show_border=true&link_opens_in_new_window=true”>
</iframe>[/iframe]


February 24, 2011
See this post
The 3 Best Books for Learning Travel Photography

I’ve never been much of an organized events guy. That’s not to say that I’m not competitive, it’s just that throughout much of my life, I haven’t felt compelled to enter established endurance races. I’ve just always made up my own endurance events that usually involve just me and one or more partners, a climbing rope, a pair of skis or a bicycle and a few mountains in between.

This past weekend, however, I completed the Susitna 100 winter endurance race on my bike in 25 hours, 56 minutes. It was my first 100 miler and in fact, my first race that was longer than a half marathon. It was also the first time I entered an official bike race since my 7th Grade BMX days. Don’t get me wrong, I’ve had many a long sufferfest in the outdoors, just not quite like this.

I actually did the race with my wife Amy. It was our Valentine’s date, and we managed to stay together pretty much the entire time. She’s an experienced ultra runner and although I’m generally a much stronger biker, I found myself struggling to keep up with her during the night. After 12 hours or so, she’s just getting warmed up and can keep plodding along without much rest.

Having had no prior experience “racing” for that amount of time, I really had no idea what to expect regarding how my body would handle the sustained physical exertion of pedaling and pushing the bike on frozen swamps and rivers, my caloric needs, and the cold, which I’m told dipped to -16 during the night. It was probably colder down on the river.

Although I took a wide variety of food with me, what seemed to get me through was my half frozen homemade pizza, a box of Little Debbie Swiss cake rolls and those PowerBar gummy chews. Fat, sugar and more sugar. Fat at the checkpoints and sugar on the trail.

Me, pushing early on in the race.

Overall, it was an immensely satisfying race and I feel great about the accomplishment, the new friends that I made during the event and the chance to ride my Fatback snow bike up and down frozen rivers and through the Alaskan wilderness in the dead of winter, and for over half of it, through the dead of night.

Oh and what about all the photos that I shot? If you read last week, you might remember that I had planned to take my Nikon D700 and two lenses on the race with me and document the experience. I had grand visions of capturing all these great images of human struggle in an amazing environment and…

Well, what can I say. I got so excited racing that I only shot 40 frames. I even stowed my camera into my backpack at the halfway checkpoint, where it lived until I got home the next day.

I guess that I was in “race mode” and not “photography mode.” I’m ok with that, because it was such a new type of experience for me, and after all, it was primarily a race, not a photo shoot anyway. Interestingly enough, this is probably one of the main reasons that I’ve rarely entered official races in the past, but I suppose that it’s good to do different things in life, right?

At any rate, here are just a few of the shots I took during the first half of the race. If I do the race again next year, I’ll leave my big camera behind and maybe just take a point and shoot, which is what I considered doing in the first place. Oh well, you live and you learn.

Also, here’s a great narrative from one of my new friends Danielle Coffman who entered the Su 100 this year on foot. She does an awesome job of telling it like it is, especially for those who brave the race without skis or bicycle.

February 22, 2011
See this post
My Photos (or lack thereof) from the 2011 Susitna 100 Race
Fatback Snow Bike with a Photoflex Galen Rowell Chestpouch

This weekend, I’ll be doing the Susitna 100, which is a 100 mile winter endurance race that’s held out on the lands and frozen rivers west of Anchorage, Alaska.

Of course, as an adventure photographer, I’ll be taking along my camera with me on the snow bike. After deliberating whether to buy or borrow a nice light point and shoot like the Nikon P7000, or the Panasonic Lumix LX-5, I’ve decided to go with what I know and take my DSLR for maximum versatility.

At this point, the plan is to take the D700 and two lenses, the 24mm f/2.8 wide angle and the 85mm f/1.8 short telephoto. Both area relatively light and compact.

However, the D700 is not very light, but hey, that’s the way it goes. Sure, it will probably slow me down a bit, but how is that different from anything else that I’ve ever done in the past fifteen years?

I’ve rigged up a very simple system in which to carry the camera when it’s not slung over my shoulder. It will live in my Photoflex Galen Rowell Chest Pouch attached to the handlebars, just above the handlebar bag, where I’ll keep most of my food, including 8 slices of homemade pizza, which I will certainly enjoy eating in the middle of the night when it’s dark and cold and and I’m tired of cliff bars, GU and trail mix.

The photography part should be fairly straight forward, including the obligatory “how to keep your batteries warm and keep condensation off of the camera and the lenses.” I’ll keep spare batteries inside inner pockets and use hand warmer packs if it gets too cold.

Hopefully, the conditions and weather will be favorable, hopefully I’ll even be able to finish the race, and hopefully I’ll get some great images, although I guess we’ll see how that goes. Depending on the snow, I’m thinking that it will take around 24 hours go complete the race.

If… (Big IF!) I get some photos worth sharing, I’ll post them here next week. Until then, wish me luck!

Have a great weekend.

-Dan

February 17, 2011
See this post
Preparing For The Susitna 100 Winter Endurance Race
Nunez de Prado olive oil, Baena, Spain

It’s my birthday today, (Feb 16) so to celebrate, I thought I’d dig down and remember one of my past birthdays.

In the winter of 2003, I did a six week solo bicycle tour in Southern Spain. Getting off the bus in the Castillan city of Ciudad Real with a pack full of camera gear and film, I put the bike together, strapped on the panniers and started riding south.

For the next two weeks, I wound up and down through the arid, olive groved hills of Andalucia and through the cities and towns of Cordoba, Baena, Zuheros, and Antequera, before hitting the coastal city of Malaga, where I caught my firsts glimpse of the Medeterranean Sea.

From there I pedaled back inland through El Burgo and picturesque Ronda before turning south and ending up at the industrial city of Algeciras, but not before taking a short detour to catch a glimpse of the Rock of Gibraltar.

All along the way, I fueled myself on photography, fresh bread, the finest olive oil I could find, delectable strips of cured Jamón Serrano, and whatever traditional Spanish fare was served each night at a new hotel. It was my own Andalucian food pilgrimage and I had a blast.

The "Puebla Blanca" (white village) of Zuheros, Andalucia, Spain

My goal had been to dip down into Morocco and explore the roads of north Africa on my bike for perhaps a week, and so on Feb. 12, I caught the ferry from Algeciras to Ceuta, where I got off and rode the 20 miles into the massive and dirty city of Tetuan.

I spent my first evening in Morocco wandering through the narrow maze of the Medina, trying hard not to be sold a carpet by the relentless salesmen and their accomplices who befriend you and rope you into the shops, hoping to get a commission on the sale.

The old city was filled with the smoke and stench of burning sheep heads. Apparently it was a big important festival in which all the Berbers celebrate by killing and eating sheep. In fact, I was told was that it was “just like Christmas in your country.” After eating a bowl of “what used to be in the sheep’s stomach stew,” I somehow found my way back to the hotel and prepared for a long ride in the morning, hoping to keep my dinner down.

The next morning, while the rest of the city slumbered in their burning sheep hangover, I hit the bike and rode toward the hill town of Chefchouen. The ride started out well, but I soon grew tired of little kids throwing rock at me, dogs chasing me and nearly everyone else trying to sell me either a carpet or hash as they passed me on the road.

While I was certainly no stranger to enduring the hardships of traveling in less developed countries, (I’d done my India bike trip the previous year) I was already missing the good life that I’d been enjoying every day in Spain. Perhaps it was because I knew my birthday was approaching and I’d had visions of enjoying tapas, sherry and flamenco music instead of spending my energy fending off rude children, rabid animals and tireless merchants.

Boats in the seaside town of Cadiz, Spain.

So, not ten miles out of Chefchouen, I impulsively swerved to the other side of the road, got off the bike and stuck out my thumb. Within minutes, I was picked up by a man who spoke almost no English. I threw my bike in the trunk of his Mercedes and rode a silent 40 miles back to Tetouan, where I stopped in a store to buy a bottle of Moroccan olive oil, before racing the 20 miles back along the coast on my bike to Ceuta in time to catch the last Ferry back to Spain.

The next day I rode the bus up to the wonderful seaside town of Cadiz, where I enjoyed a fun-filled weekend spent sitting on the beach, riding in one of the enormous anti Iraq war rallys that took place around the globe, and sipping sherry with a blonde haired, blue eyed German exchange student, who was perhaps the most beautiful woman to ever entertain my company. That definitely set the tone for the rest of the trip.

Happy Birthday to me.

Bottles of olive oil and sherry that I bought along the way and carried on my bike.
February 16, 2011
See this post
A Tale of Birthday Adventures Spent Cycling in Spain and Morocco

Now that the rest of the country is in post Super Bowl letdown, up here in Alaska we’re well into our own national sport, Sled Dog Racing. (I say this like I grew up with it, but actually, I used to love watching the Super Bowl as a kid in the lower 48.)

Anyway, with regular weekend races and Fur Rondy and The Iditarod just around the corner, there are lots of great opportunities for photographing the unique and exciting sport of sled dog racing.

I like shooting it because it’s, well, exciting and different. And because it’s an interesting mix of outdoor, adventure and action photography all rolled into one.

During my shoot last Saturday, I thought about some of the challenges that I was dealing with, besides the usual cold weather concerns of how to stay warm and dry. It occurred to me that despite the fact that sled dog racing is completely unlike any other sport, in order to successfully capture compelling images of this subject, I was calling on the regular, tried and true methods that any action and sports photographer needs to use in order to create compelling imagery. Here are 3 tips that came to mind.

1. Get a Good Tripod.

We know that a sturdy tripod allows you to shoot sharper, more well composed photos, especially at slower shutter speeds. However, with sports photography and fast breaking subjects, using a tripod gives you one huge advantage: It allows you to shoot more easily with two camera bodies.

You can leave one camera fixed to the tripod and trained on a point where you know your subjects will appear. The other camera goes around your neck. Then, when the subject comes into the frame, you fire away, for example, with the telephoto while they’re still far away.

As they get closer, you can switch to the wide angle camera and fire off even more shots as they go by. Or vice versa. That way, straps, bodes and lenses don’t get tangled or weigh down on your neck. A couple of good sturdy tripod choices include the Manfrotto 055XPROB, (formerly the Bogen 3001) and the Manfrotto 190CXPRO3. For even more rock solid support if you’re using big glass, you might want to check out the Gitzo GT2530 Mountaineer. In these situations, you’re generally more concerned with sturdiness than lightweight, but these options offer a good blend of both.

2. It’s All About Vantage Point.

The nice thing with shooting outdoor sports is that you often have much more flexibility with your locations.

You can pretty much roam wherever you want to with your camera in search of the right spot to capture the action as you see it.

For this shot, I knew that I wanted to capture the dynamic excitement of a sled racing around a curve, so I scoped out a few possible locations that would give the right combination of sunlight angle and a relatively clean background.

After tromping through the snow for awhile, I settled on this particular vantage point, which allowed me to get the focused and highly trained chaos of the sled team racing around the curve.

3. Create the Shot in Your Mind Before You Start Shooting.

This is an image that I had in my mind before I even raised my camera. In fact, I prepared and set up just to get this particular shot.

I’d come up with the idea while watching the path that the dog teams took as they raced through the open terrain.

Fortunately, the sun was just right for a backlit photo telephoto shot, and so while I waited for the next team to arrive, I set up my composition, my exposure and the point at which I’d start my focus tracking, thus saving the camera the time and work of finding the subject as it entered the frame.

This is actually the same team as the one in the first shot above. By thinking ahead and planning both the wide angle approach shot and this telephoto departing shot, I was able to take advantage of a great subject in great light and produce two completely different series of images as they went by.

Sometimes photography is all about reacting to the unfolding situation, but there are times when a little planning can make a huge difference. Try it.

February 14, 2011
See this post
3 Tips for Shooting Sled Dog Racing… or Any Action Photos
Wildflowers and Twin Crater Lakes, Rawah Wilderness, CO
White Marsh Marigolds, Twin Crater Lakes, Rawah Moutains, Colorado

Here’s an image that I shot a few years ago while on a backpacking trip in the Rawah Mountains of Northern Colorado. It’s always been one of my favorite summer “flower pictures.”

I love the way the green foliage so boldly emerges from the ground in late spring next to alpine ponds and streams that are still filled with snow and ice. It blooms with petals that almost seem like they’re stealing the last of the white from the snow around them before summer gets underway in the mountains.

This image was handheld at 1/50 sec. at F7.1 with a Nikon D200 and my 14mm f/2.8 ultra wide lens, which I love for landscapes because it can accentuate the foreground that’s extremely close to the camera so nicely and still show a expanded view of the background to give the shot a sense of place.

February 11, 2011
See this post
Wildflowers, Twin Crater Lakes, Rawah Mountains, Colorado