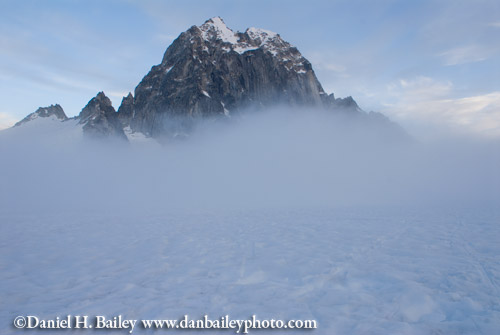
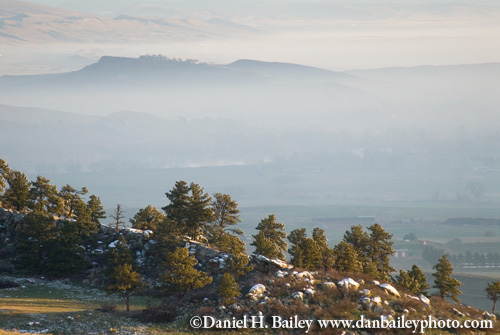
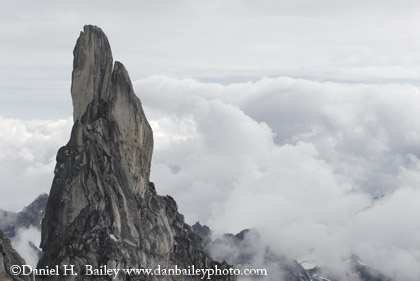
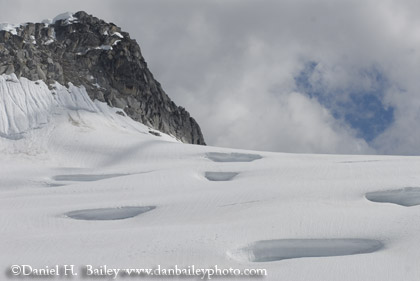
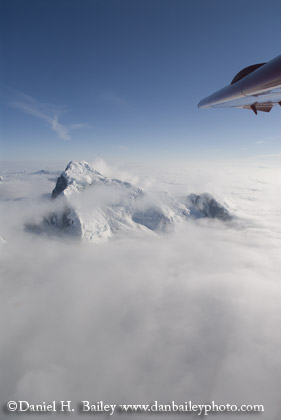
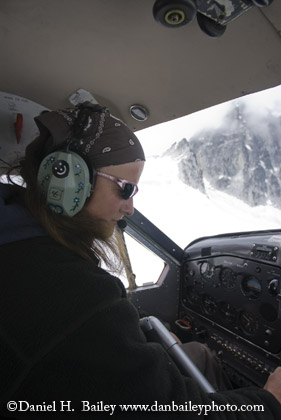
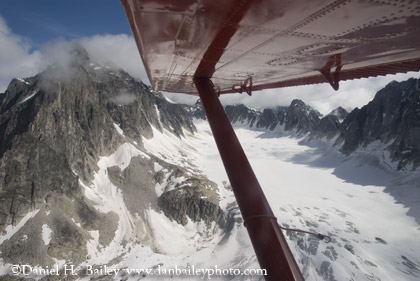
On July 22, Eric Parsons and I flew into the area known as Little Switzerland, which is located on the Pika Glacier in the Alaska Range, about 35 miles southwest of Denali. First discovered and named by legendary bush pilot, Don Sheldon, Little Switzerland features many high quality moderate rock climbing objectives on granite towers in an incredible environment. Unfortnately, days of heavy fog over the Pika caused us to wait at the airstrip in Talkeetna and watch our number of possible climbing days diminish. Eventually, though, a clear window presented itself and we were able to fly in and land under blue skies, although we did constant battle with rain and fog over our entire week in the Pika.

Flying into the Pika Glacier
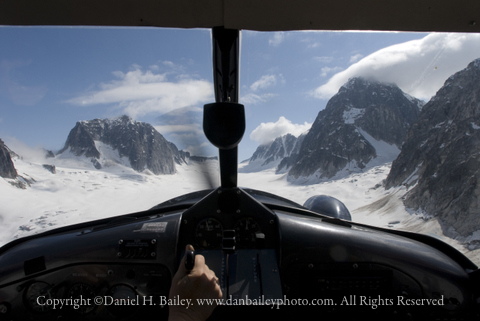
(Flying into the Pika Glacier)

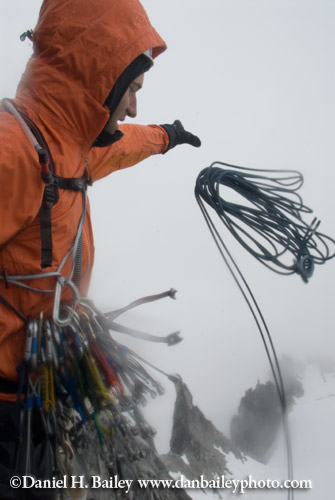
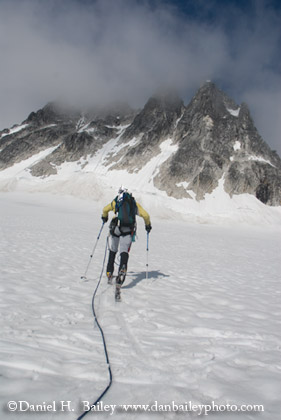
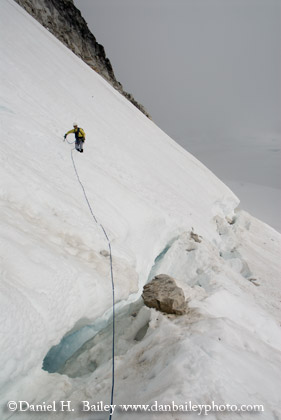
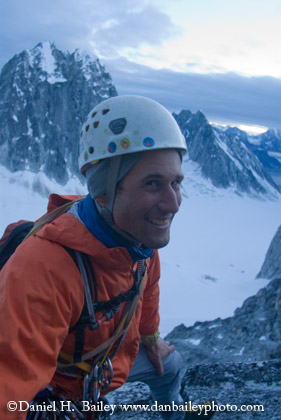
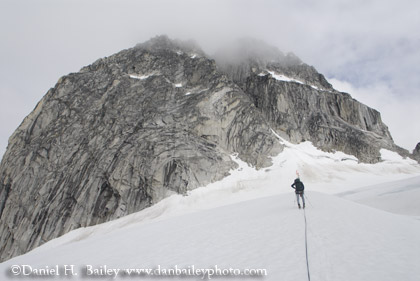
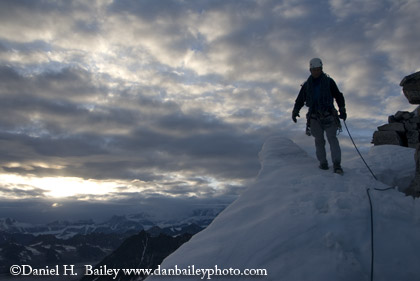
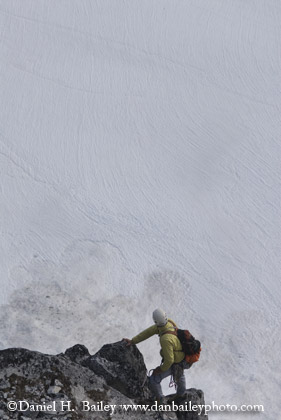
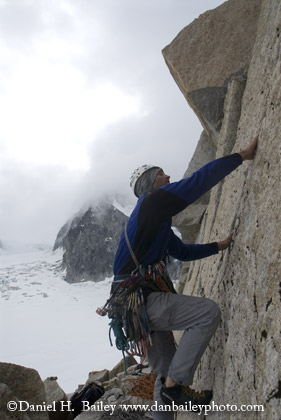
Wasting no time with the weather window, Eric and I dragged our gear across the glacier, set up a quick basecamp, donned our harnesses and immediately began skiing towards the formation known as The Trolls, which are three very prominent towers located on the eastern side of the upper Pika Glacier, with our sights on the Middle Troll, the tallest peak in the group. (1,300 feet III, 5.8) The weather held and after some very enjoyable crack climbing, we summitted at 1:00AM, under the midnight sun in 24-hour Alaska daylight, which at times can be a bit strange. Experience being “darked on” a few times in my climbing career has taught me that when you see the sun heading towards the horizon, you don’t keep going up, you start going down. Of all the ojbective hazards and obstacles in the Alaska range, darkness is simply not one of them and you can literally climb at all hours of the day or night.

The Trolls

Approaching The Trolls Approaching The Trolls Eric Parsons climbing The Middle Troll Eric Parsons on top of the Middle Troll

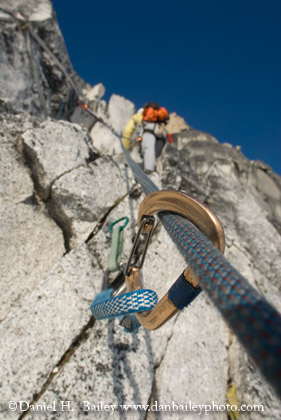
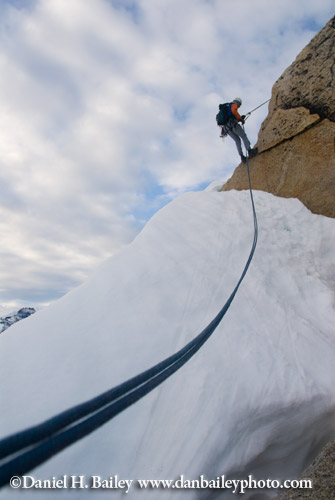
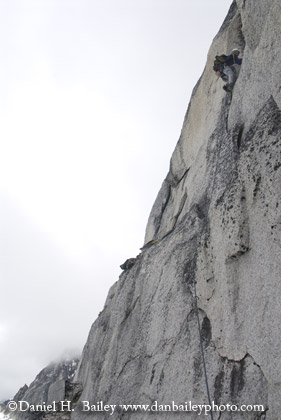
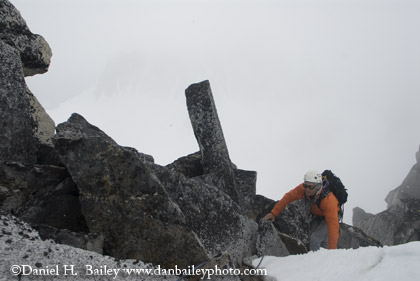
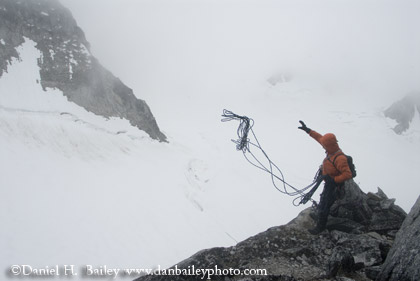
Our second objective was “The Lost Marsupial” route, which is the prominent rounded ridge on the south face of The Throne. (III, 5.8) Unfortunately, we were rained off on our first attempt, but went back the next day to finish the route and reach the summit. The knife edge summit ridge on The Throne offers some very interesting climbing over steep snow and wet rock, which made for an exciting descent as well.

The Throne Eric Parsons climbing The Throne Eric Parsons climbing the Throne Eric Parsons climbing The Throne Descending the Throne summit ridge descending the Throne Descending The Throne

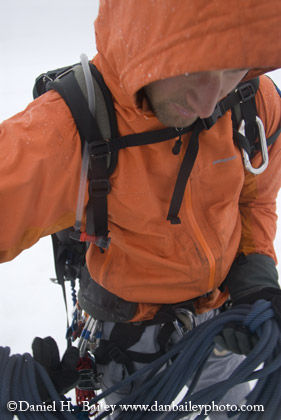
My photo gear weathered the rain with no problems, and I kept a cotton bandana in my pocket at all times to wipe water off of the lenses. I climbed with my Nikon D200 camera and two lenses (17mm and 85mm) every day, usually keeping the gear in my pack for the vertical climbing sections and using my chest pouch or around my neck while skiing around the glacier and walking on summit ridges. While on the Pika, I experimented with some time lapse interval photography, a feature that’s built into the D200. I plan to combine the images into a short time lapse video and post here at a later date.

The Plunger, Little Switzerland, Alaska Little Switzerland Landscape Eric Parsons climbing Middle Troll Eric Parsons coiling ropes Eric Parsons climbing on the Pika Glacier Eric Parsons at basecamp Flying over the Alaska Range Bush Pilot Danielle Flying over the Pika Glacier N8190Y on the Pika Glacier

Although the weather prevented us from climbing anything else during this trip, our week in Little Switzerland has definitely inspired us to go back. There is certainly enough rock there to satisfy many trips into this incredible area.

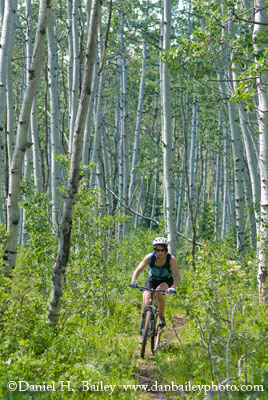
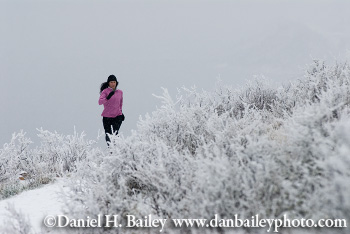
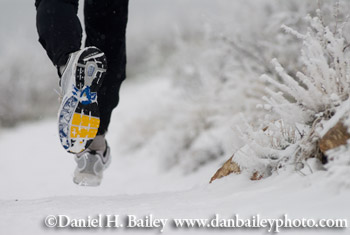
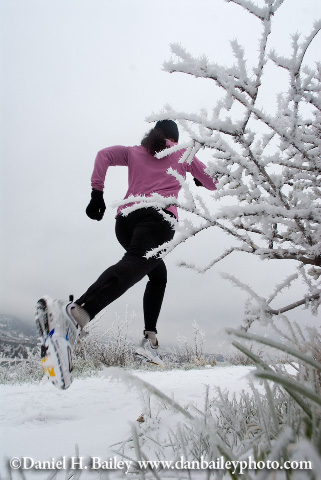
Here are a few more images from my 2007 Pika Glacier trip. Also, check out the REAL Story of our Little Switzerland alpine climbing trip! Finally, here is a video that Eric shot of our exploits on (and off) the Pika Glacier.

Alaska Climbing by Joe Puryear

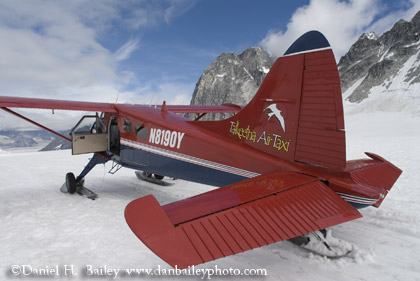
Special thanks to all the pilots and crew at Talkeetna Air Taxi for the incredible flights and for putting up with our shenanigans during our three days of waiting out the weather.

And finally, if you’re planning a trip to this region and you don’t already have Joe Puryear’s Alaska Climbing guide book, you’ll want to pick up a copy. It’s got topos and route maps for all the classic climbs in the area.

August 14, 2007
See this post
Little Switzerland, Alaska 2007 Trip Report

The Alaska Range is kind of like a box of chocolates: You never know what you’re going to get. I’m speaking of the weather, of course. Being right in the middle of three major weather flow patterns that blow in from the Bering Sea, the Gulf of Alaska and the East, it’s pretty much a target for any kind of possible weather, just about any time of the year. During our eleven day trip, which was cut down to seven days due to three and a half days of unflyable weather, we experienced fog and rain every single day, with scattered patches of sunshine and blue sky, otherwise known as “Sucker Holes,” and even some snow.

I’ll post a complete trip report here in a few days, but for now, here are a few shots to entice.

Eric Parsons throwing the rappel rope- Descending from The Throne, Pika Glacier, Alaska
(Eric Parsons throwing the rappel rope- Descending from The Throne, Pika Glacier, Alaska)

Eric Parsons rappelling from the top of The Throne, Pika Glacier, Alaska
(Eric Parsons rappelling from the top of The Throne, Pika Glacier, Alaska)

Fog rolling into the Pika Glacier past The Royal Tower, Little Switzerland, Alaska
(Fog rolling into the Pika Glacier past The Royal Tower, Little Switzerland, Alaska)

Here is the full account and more photos of our 2007 Little Switzerland trip. Also, here’s a video that Eric put together of our trip.

Zoomify Panorama

Below is a near 360 degree panorama taken from the top of The Throne. This image was stitched together in Adobe Photoshop CS3 from five individual images using the “Photomerge” command, and then exported using the “Zoomify” command.

Click on the image to scroll through the high resolution panorama.

Panorama, Little Switzerland, Pika Glacier, Alaska

July 23, 2007
See this post
Alaska Teaser: Little Switzerland Images

Just a brief entry to recount the week’s adventures and share a few fun images. First, three days mountain biking in the areas around Steamboat Springs, Colorado. Biking around Steamboat usually involves riding through lots of thick and very picturesqe aspen groves. Note to self: Go back in the fall. Another note to self: Make sure you follow the correct trail so that you don’t end up getting lost on crisscrossing game trails deep in the forest and have to bushwhack through the woods in order to find your way back again…
Mountain biking through aspens

Since Northern Colorado is a big ranching area, it can also mean having to wait while some cowboys herd a couple hundred head of cattle down through the forest and across the forest road that you’re trying to ride on.
waiting for the cows

Then I enjoyed two days of lightweight backpacking through beautiful mountain terrain of the Rawah Wilderness area, which lie about 50 miles west of Fort Collins. The weather was great, the wildflowers were out in full bloom and the mosquitos were relentless; just like early summer backpacking is supposed to be.
hiking in the Rawahs

As soon as I got back from that trip, I made a quick diversion to go white water rafting with my good friend and raft guide Christy Gigliotti, who had one extra space in her boat. What a great way to begin a 100-degree day and end a week of fun in the mountains of Colorado.
whitewater rafting

Now I’m off on my next adventure: two weeks of alpine rock climbing on the Pika Glacier in Alaska with my long time adventure buddy Eric Parsons. We’ll fly in and get dropped off right on the glacier, and then enjoy days and days of climbing thousand foot plus foot granite peaks in 24-hour daylight.

Be sure and come back in a couple of weeks to see photos from that trip!

July 2, 2007
See this post
A Week of Summer Fun…

Beginning in September, I will be teaching courses for The Compelling Image, an online school that specializes in photography and video instruction. With classes taught by top working professionals around the world, The Compelling Image provides a diverse cirriculum of subjects for students of all abilities and interests. Some of the class offerings include travel, outdoors, photojournlism, people, flowers and macro.

Students who are enrolled in classes with The Compelling Image will receive in-depth weekly lessons that are ready for download or printing. Each lesson will focus on a specific skill, technique or topic and will be illustrated with clear, detailed images or video clips. Assignments will be given that will allow the students to practice the concepts they learn in the lesson, and after they complete the assignment, students will then upload their images for comments and professional critique.

With flexibilty, personal instructor feedback and a money back guarantee, The Compelling Image offers an excellent method for learning the craft and skills of photography.

The two classes that I’ll be offering in Setpember are Step into Outdoor and Adventure Photography, a basic four-week class that focuses on shooting more dynamic landscapes and exciting shots of outdoor sports and activities, and The World, The World- Through Your Lens, an eight-week class that is designed to help students create more stunning images of their travels. I also intend to follow up the outdoor/adventure class with a more advanced course in the future.

Prospective students should click the link below to visit The Compelling Image and to read more about the courses that I’ll be teaching. Those with questions about my classes can post them as comments on this blog.

The Compelling Image

June 13, 2007
See this post
Dan Bailey Teaching Online Photo Classes at The Compelling Image

I remember going to the 1990 Boston MacWorld Expo, and being blown away by a demonstration at the Adobe booth of a relatively new program called Photoshop. My own Mac at the time was a black and white Classic that had 2MB RAM, which, I’m pretty sure, wasn’t even enough memory to allow for the display of a real photograph on the screen. Needless to say, I was very intrigued by this new software, that could not only disply images on the computer, but edit them as well.

Now, seventeen years later, Photoshop v.10, better known as CS3 has just been released and I am as impressed by this version as I was when I saw it for the first time. Having been a Photoshop user ever since I got my hands on version 3, I have seen the product go through an amazing evolution. Over the years, Photoshop has not only allowed photographers to edit and adjust their images with more advanced tools and features, it has singlehandedly defined photography in the modern era. Photoshop is a household word, synonimous with the concept of digital photography itself, and for pros, there is simply no substitute.

With CS3, Photoshop has finally arrived and matured for the professional digital photographer. With the release of CS2, pro digital photography was still in somewhat of a developing stage and many shooters were still adapting to the new medium and establishing their own workflows. In some ways, they didn’t know exactly which new software features would proove the most beneficial in their workflow, because they were still figuring out what they needed. Back then, there were still photographers who had not yet made the transition from film to digital.

Now, as with many of us well along in the learning curve of digital photography, and with camera technology being where it is, we have a much better idea of we want and what we need in an image editing program. We have learned which features will make our workflow run more smootly and Adobe not only listened, they delivered.

CS3 is loaded with an array of new features which are sure to provide tremendous time saving benefits to the digital photographer. Starting with a complete redesign of the workspace, Photoshop’s new palette system is designed to allow for customized organization of the tools you use the most, and with its docking features, it allows you to condense the palettes you aren’t currently using into small icons so that they aren’t taking up valuable space on your expensive monitior.

Perhaps the first feature that most of us will benefit from is the updated Adobe Camera Raw window. With the ability to more finely adjust the levels and color of your RAW images (as well as JPEG’s and TIFF’s now), before opening them up in Photoshop, CS3 allows you to take even more advantage of the high dynamic range of shooting in RAW, with the addition of three great new exposure sliders: recovery, fill light and vibrancy, in addition to a host of new secondary adjustments. Lightroom users will recognize these new sliders, as Photoshop and Lightroom share the same raw conversion technology. Having tried out the beta version of CS3 for a couple of months, I became spoiled by the updated ACR and am excited to have it back now that I’ve gotten the full version.

My favorite so far is the dust spotting feature that’s built right into the ACR window. Now, if you have a batch of images that suffer from sensor dust, instead of having to open and clean the dust from each image in Photoshop, you can now simply dust spot one image and then synchronize those adjustments to all your other images from the same shoot. This feature could proove to be one of the biggest time savers in the entire program and its one that Adobe really delivered on in terms of features that make sense to the working pro. As with all other raw edits, this one is non destructive and can be modified at any time.

Other advancements include new selection tools and the introduction of non destructive smart filters that allow you to continue to adjust the parameters of any filter in a layered image right up until you flatten the image. Also, the curves dialog has seen a major overhaul, as has the functionality of the print dialog.

Bridge has seen a considerable boost in speed and it is also packed with some great new features. I’ve never really used Bridge much before, mostly due to the fact that it took forever to load images into its window. In some ways, it resembles an abbreviated version of Lightroom and it allows a photographer to use it as such. Although I use other programs for my image search, sorting and keywording, I can see myself using Bridge on occasion now that it’s gotten faster.

It will certianly time to fully explore all the great new features that CS3 has to offer, but having only used the full program for a day, I can already see the immediate effects that it will have on the quality of my digital images and the efficiency of my workflow. CS3 is a definite step forward and I look forward to putting it to very productive use in my photography business. If only I could go back to 1990 and tell myself, “You think that’s cool? Just you wait…”

For those curious about Photoshop’s history, here’s an interesting link.

Rock climber's hand

May 10, 2007
See this post
First Impressions of Photoshop CS3: A Big Step Forward

Once you learn the ins and outs of digital imaging, and establish an efficient workflow, digital photography works great. Until it doesn’t. As I recently learned, a corrupt memory card can turn the entire process into a complete nightmare.

Last week, we had an interesting pattern of cold fog here in the foothills of Fort Collins that left a layer of rime ice on everything. In over eleven years of living here, I’ve never seen anything like it. I knew that it wouldn’t last more than a day, though, so I recruited my faithful running model and went up to Horsetooth Reservoir to shoot some trail running photos.

Trail Running

We had a great shooting session and as I previewed the shots in the camera onsite, I knew that I had gotten some great images. So, when I sat down at my computer to load the card on Monday morning, excited to edit the shoot, imagine my frustration when I was faced with error messages that told me again and again that the card was unreadable by the operating system or any of my imaging software.

I yelled. I swore. I swore some more and then I got on the phone with Nikon tech support. Although the rep was very supportive, none of his suggestion worked, so I swore even more. The most frustrating thing was that compact flash cards are actually quite durable- I have two pro friends who have sent cards through the washer and drier, and I’ve even heard of cards being run over by cars, and one that ended up hundreds of feet below the ocean in a plane wreck. In any of these cases, there were no lost images.

For whatever reason, though, cards can become corrupt. It’s problem that most digital photographers either have faced, or will face at some point in their careers. Fortunately, there are solutions.

Through Sandisk’s website, I found software made by LC Technology called RescuePRo, one of a few different recovery programs out there. I downloaded and ran the demo, and to my relief, all of my lost images immediately began showing up in the window. So, I puchased and downloaded the full version for $40 (minus a discount for having Sandisk cards) and in a few minutes, I was up and running again, happily editing all the recovered shots from the previous day’s shoot. Crisis solved.

Usually, when memory cards become corrupt, the problem is not that the data is lost, it’s often an error in the pathway to the data. Put simply, the bridge is out, which means that your software is unable to make the cross between computer and card and access the images that are stored on the card. Recovery software works essentially by bypassing the destroyed bridge and airlifting the images back over to your computer. Problems can arise for a number of reasons, like not turning off your camera before removing the card, or having batteries die in the middle of the writing process. Sometimes they’re formating problems. You should always reformat your cards after you’ve loaded your images onto the computer and you’re ready to stick it back in the camera and resume shooting.

In some cases, recovery software isn’t able to recover the information, and the only option is to send the card in to a company that specializes in data recovery. These companies are equipped with all kinds of high tech machines and gadgets that are probably similar to the stuff that they use on the show “24.” The cost is usually higher than the software, but how much are your lost images worth?

RescuePro software worked for me. I hope that I never ever have to use it again, but if I do, it was $40 very well spent and now I have it.

closeup of feet trail running

April 17, 2007
See this post
The Digital Photographer’s Nightmare- Memory Card Corruption