One year ago this month, Macphun released a brand new Mac photo editing app called Luminar. It was designed to offer photographers the powerful creative tools they need and the simplicity they desire from their software. And although the program functions as a Lightroom & Photoshop plugin, the standalone version gave photographers a viable photo editing alternative to the complex, and often frustrating subscription based model that Adobe software has burdened us with.
Not surprisingly, Luminar turned out to be a huge hit. Photographers loved the simple, adaptive user interface and the wide range of creative filters, presets and customizable workspaces. They also won numerous awards for best photo editing app, including a Lucie Technical Award for Best Software Plugin for 2017. (Fun fact: Many of the USA Luminar people came over from NIK software when NIK was acquire by Google.)
During the next few months, Macphun, who just changed their name to SKYLUM Software, (“The SKY is the limit” plus part of the word “LUMinosity”), put out a handful of updates and performance upgrades. They also spent a lot of time listening to peoples’ concerns and wish lists, and now they’re about to release Luminar 2018, which offers significant performance enhancements, new filters and a Windows version.
Today I thought I’d review the program, show you what’s new, and let you know what’s been improved in the new version.
Note: The Preorder period for Luminar 2018 has now ended, so the bundle deals are gone, but you can still save $10 on the program by ordering here and using discount code DANBAILEY.
User Interface
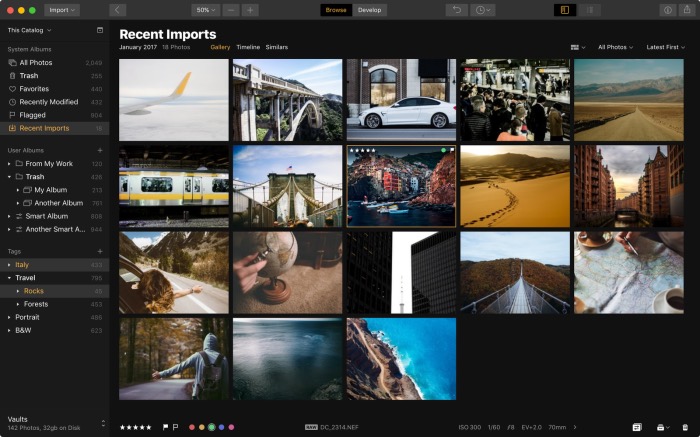
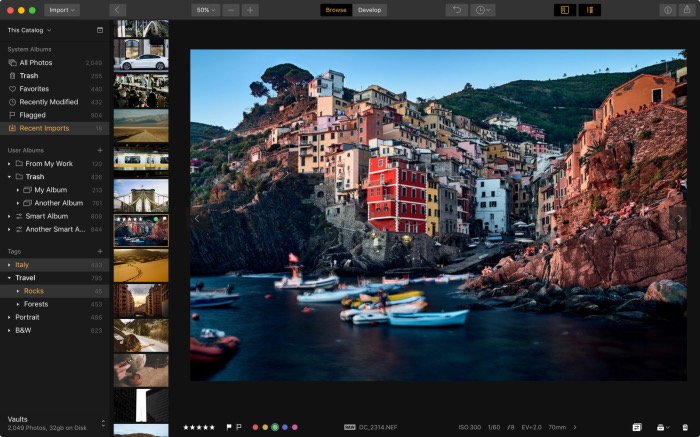
Luminar is based on a very simple, yet highly customizable interface, which allows you to edit in a way that matches your own preferred workflow. You get a main image window, which can be resized to full screen, a Tool Panel on the right and a Preset Panel at the bottom. Both the Tool and Preset panels can be collapsed so you can view the image in the entire window.
Customizable Workspaces
One of the best features about Luminar is that you can easily customize your workspace. The program gives you a number of possible starting points: Quick and Awesome, Essentials, Aerial Photography, Black and White, Landscape, Portraits and Street, each of which gives you a selection of tools and filters that are generally applicable to working with that type of photo.
For example, Essentials gives you Color Temperature, Accent- AI Filter, Tone controls, Saturation/Vibrance, Polarizing Filter and Clarity. From there, you can add any of the other 40+ tools and creative filters to your workspace, and if you tend to use the same tools in your workflow, you can save that combination as a custom workspace.
Powerful Creative Tools & Filters – Plus 3 New Tools
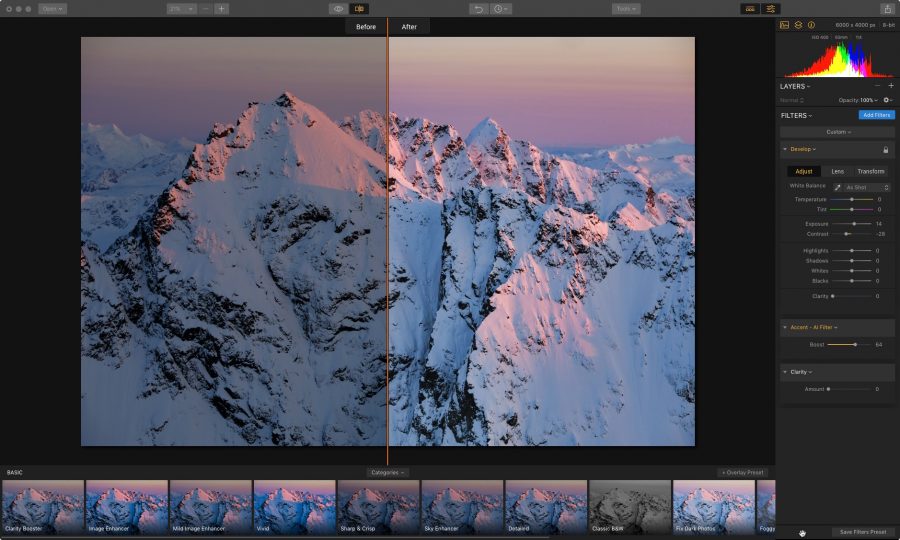
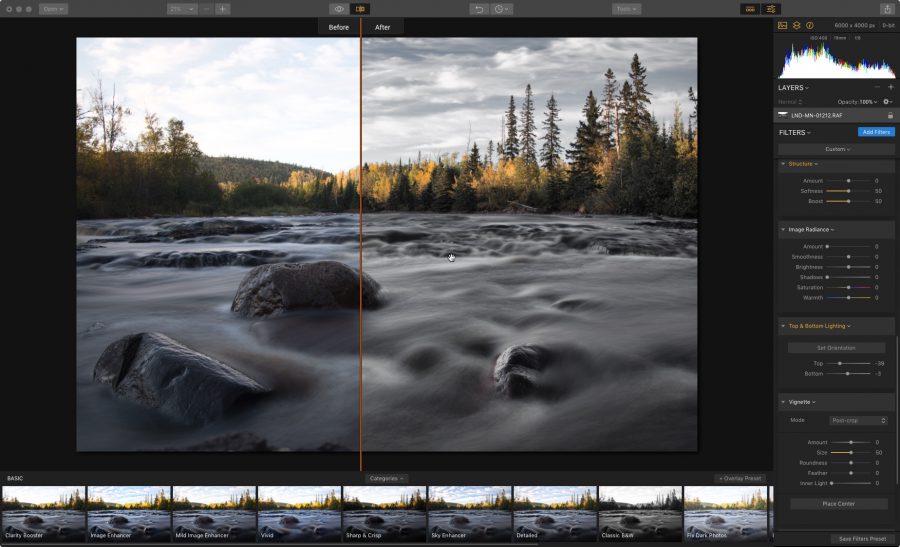
The tools in Luminar 2018 have all been optimized for both speed and performance, and there are a number of new tools in the collection. One noticeable addition is the new RAW Develop toolset, which gives you all the basics for adjusting White Balance, Exposure and Clarity, in addition to a Lens tab for correcting for Distortion, Chromatic Aberation and Lens Vignetting, and a Transform tab.
In addition, color handling, sharpening and noise reduction have all been optimized so you get very high quality RAW Conversions.
One interesting note, if you’re processing JPEGs, the RAW Develop panel is simply called Develop, and you get the same tools. That’s a nice touch.
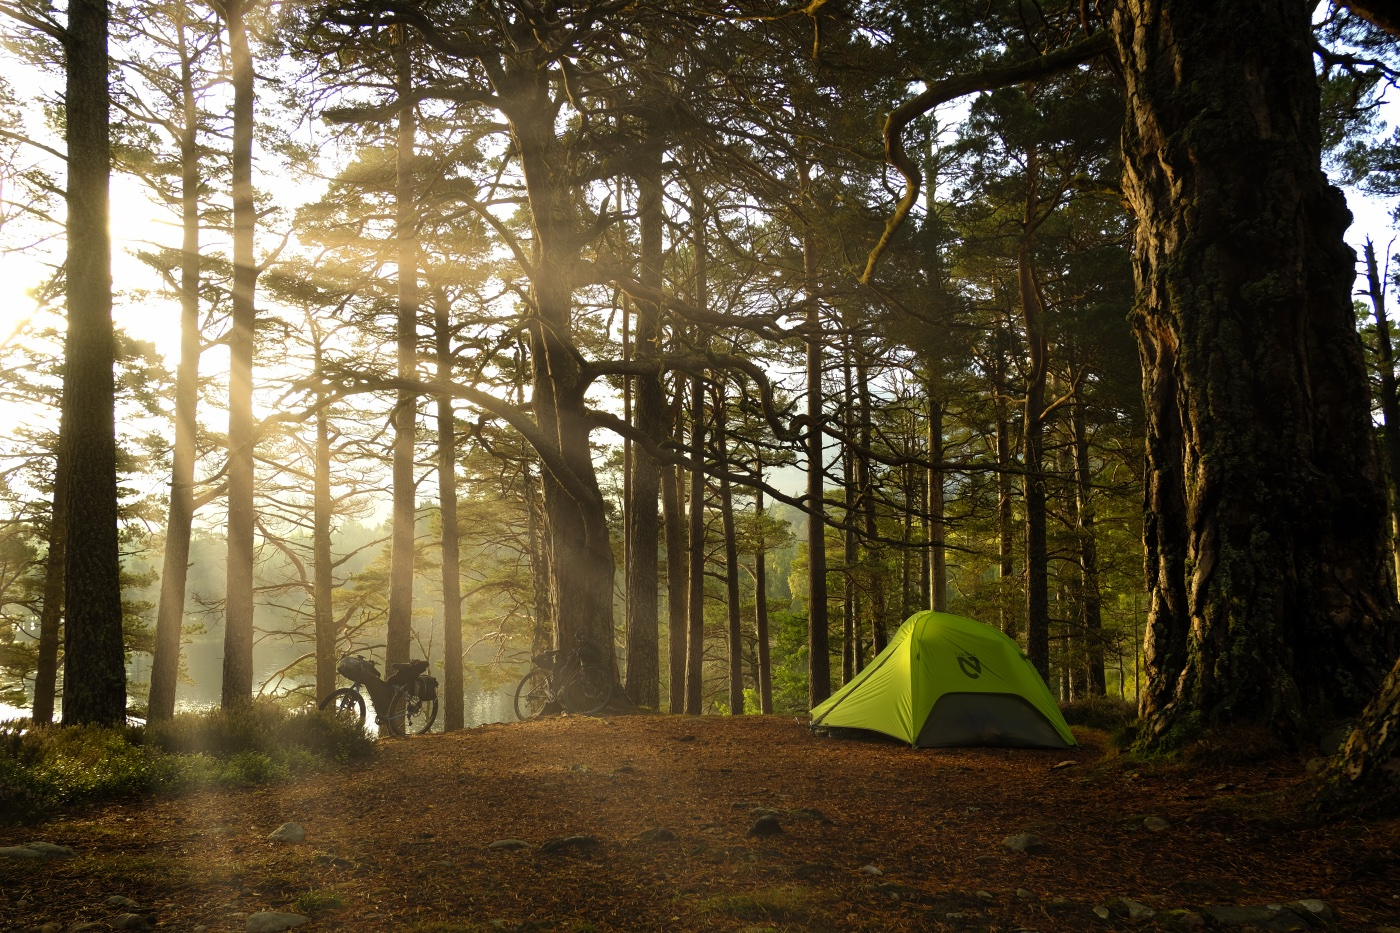
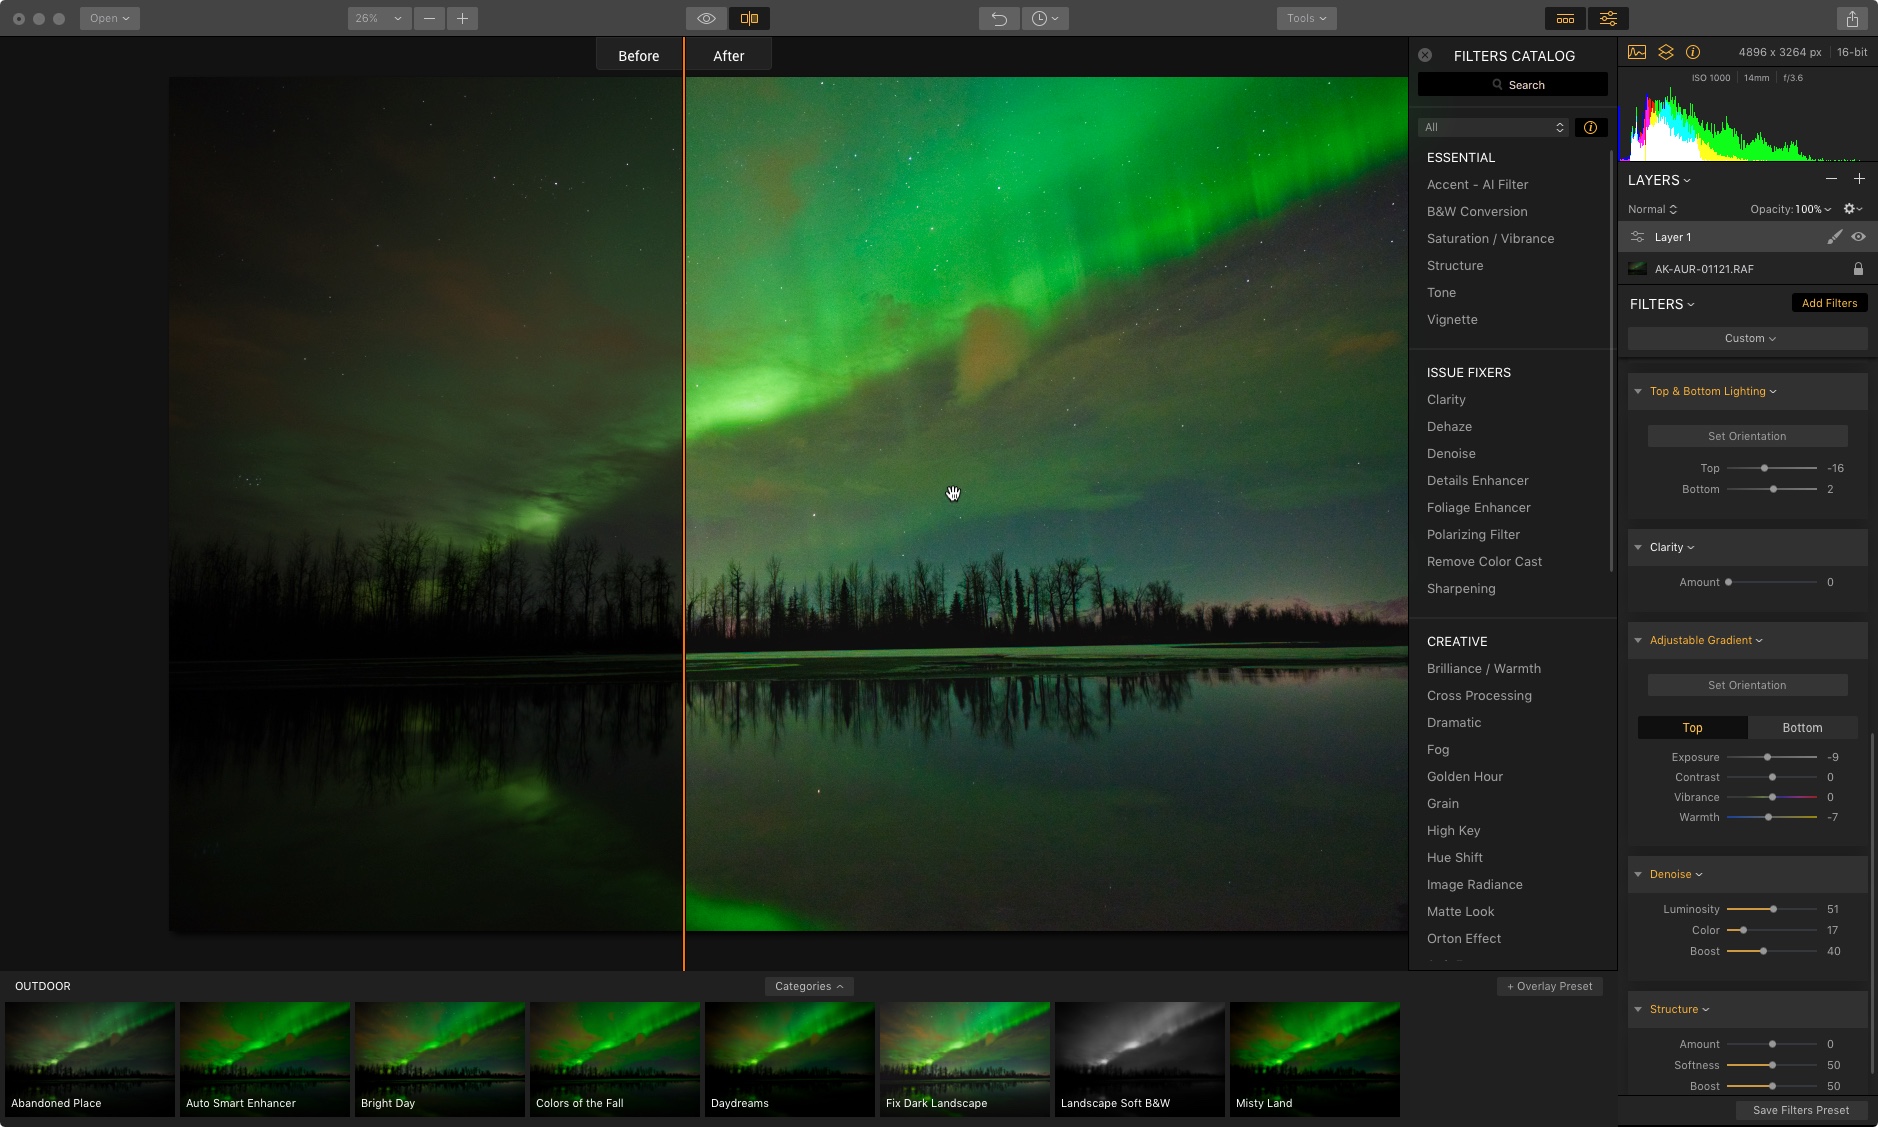
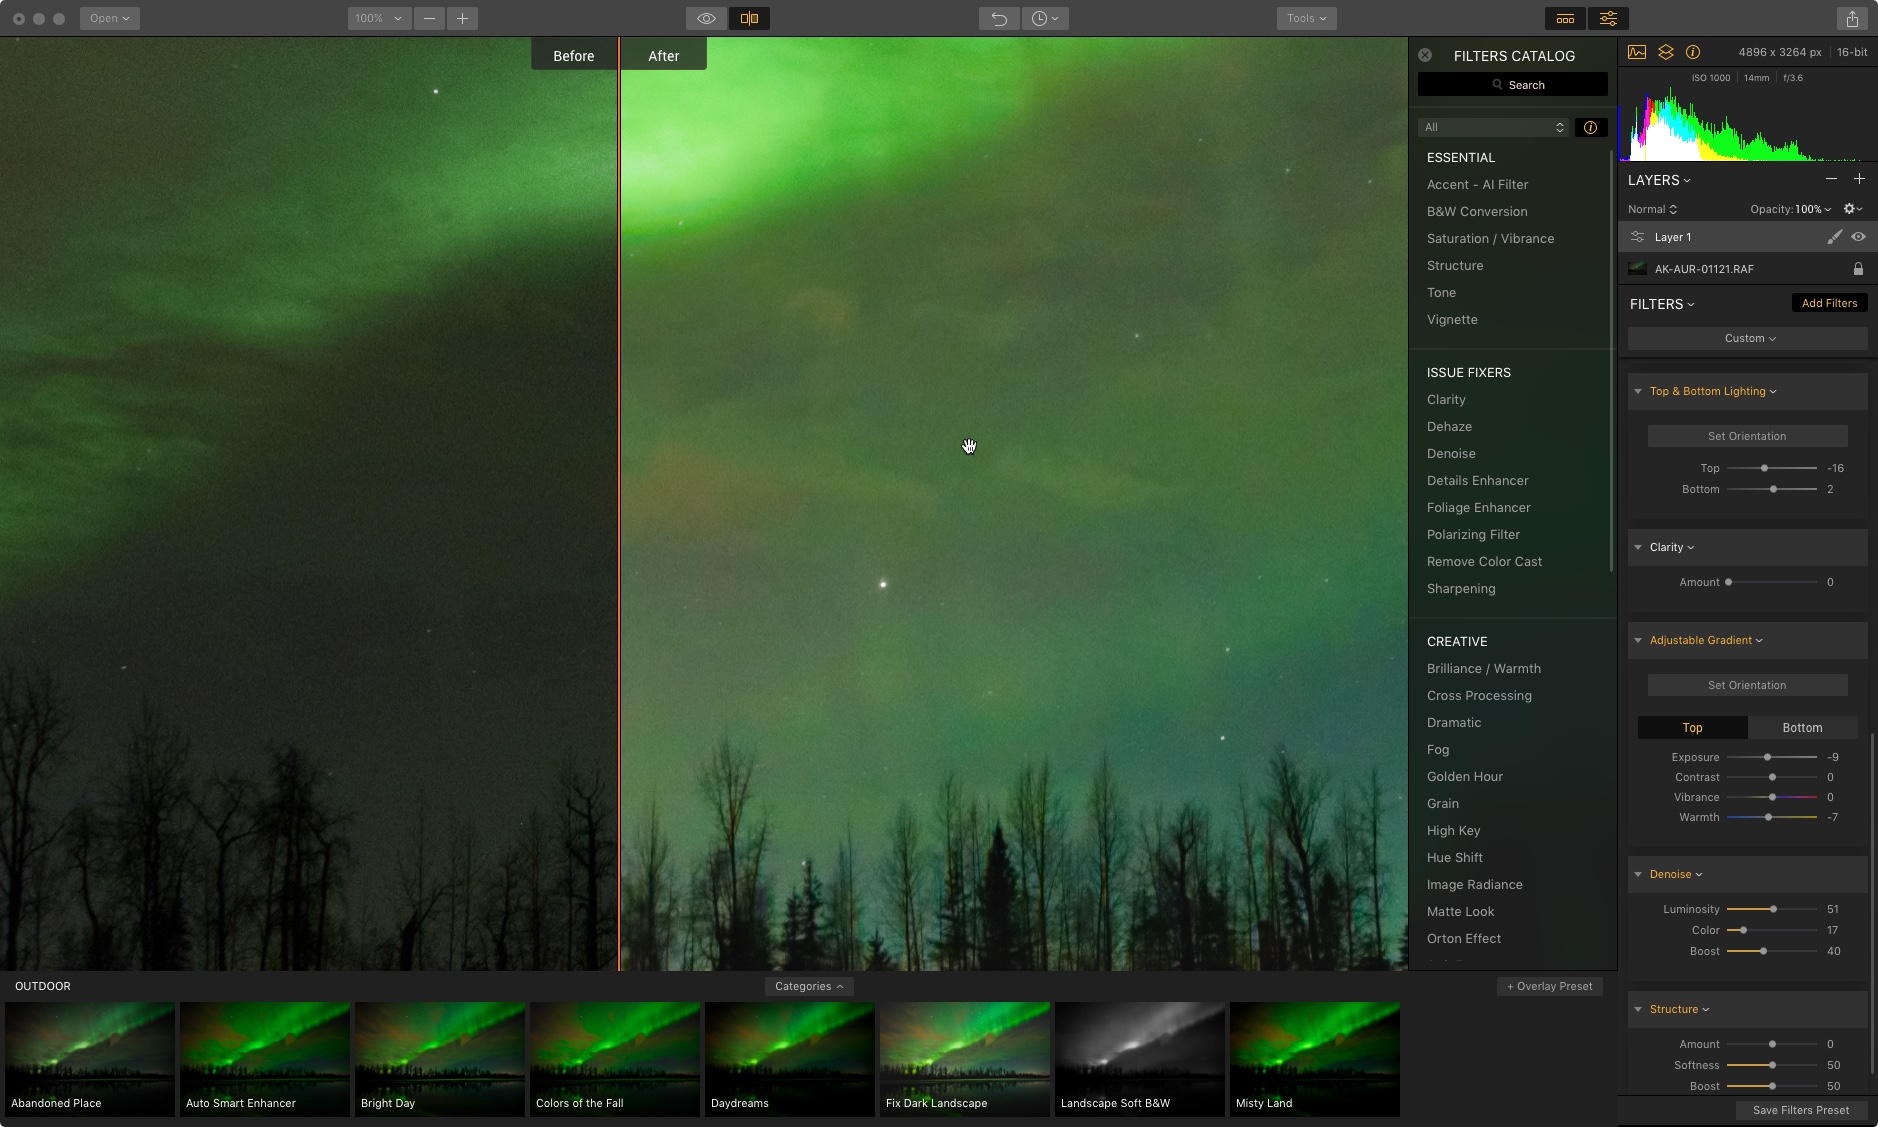
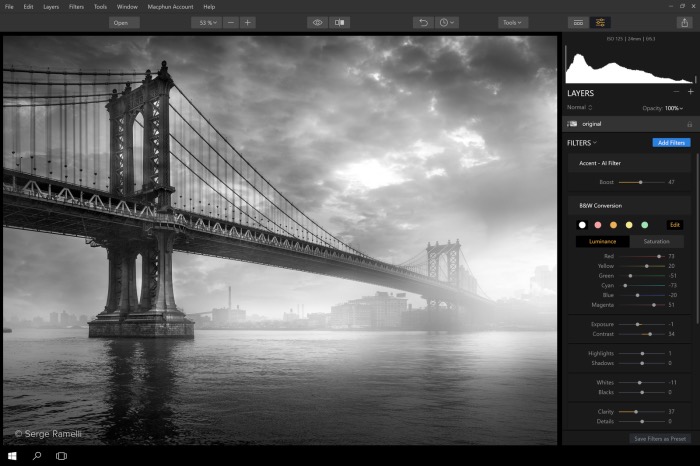
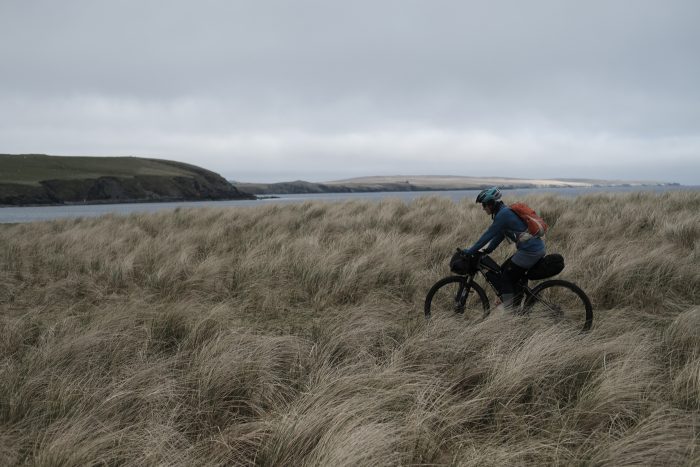
- The Accent – AI Filter, which does an amazing job of giving you a “Quick Fix” with a single slider. I’m amazed how well the slider works, and I find myself using it all the time. The lead off photo on top is nothing more than a quick slide of the AI Filter.
- Dodge & Burn lets you selectively refine the light and shadows on your subject. Just as in the darkroom, you choose a brush size, “paint” whichever part of your subject you want and then adjust the lighting parameters and amount.
- Hue Shift is another new filter that lets you eliminate wanted color tints or roll it all the way for dramatic, stylistic shifts.
- Brilliance/Warmth adds richness and warmth to your image. Dial up to make your photos really pop, or dial it back to tone down your image and create a more subtle look.
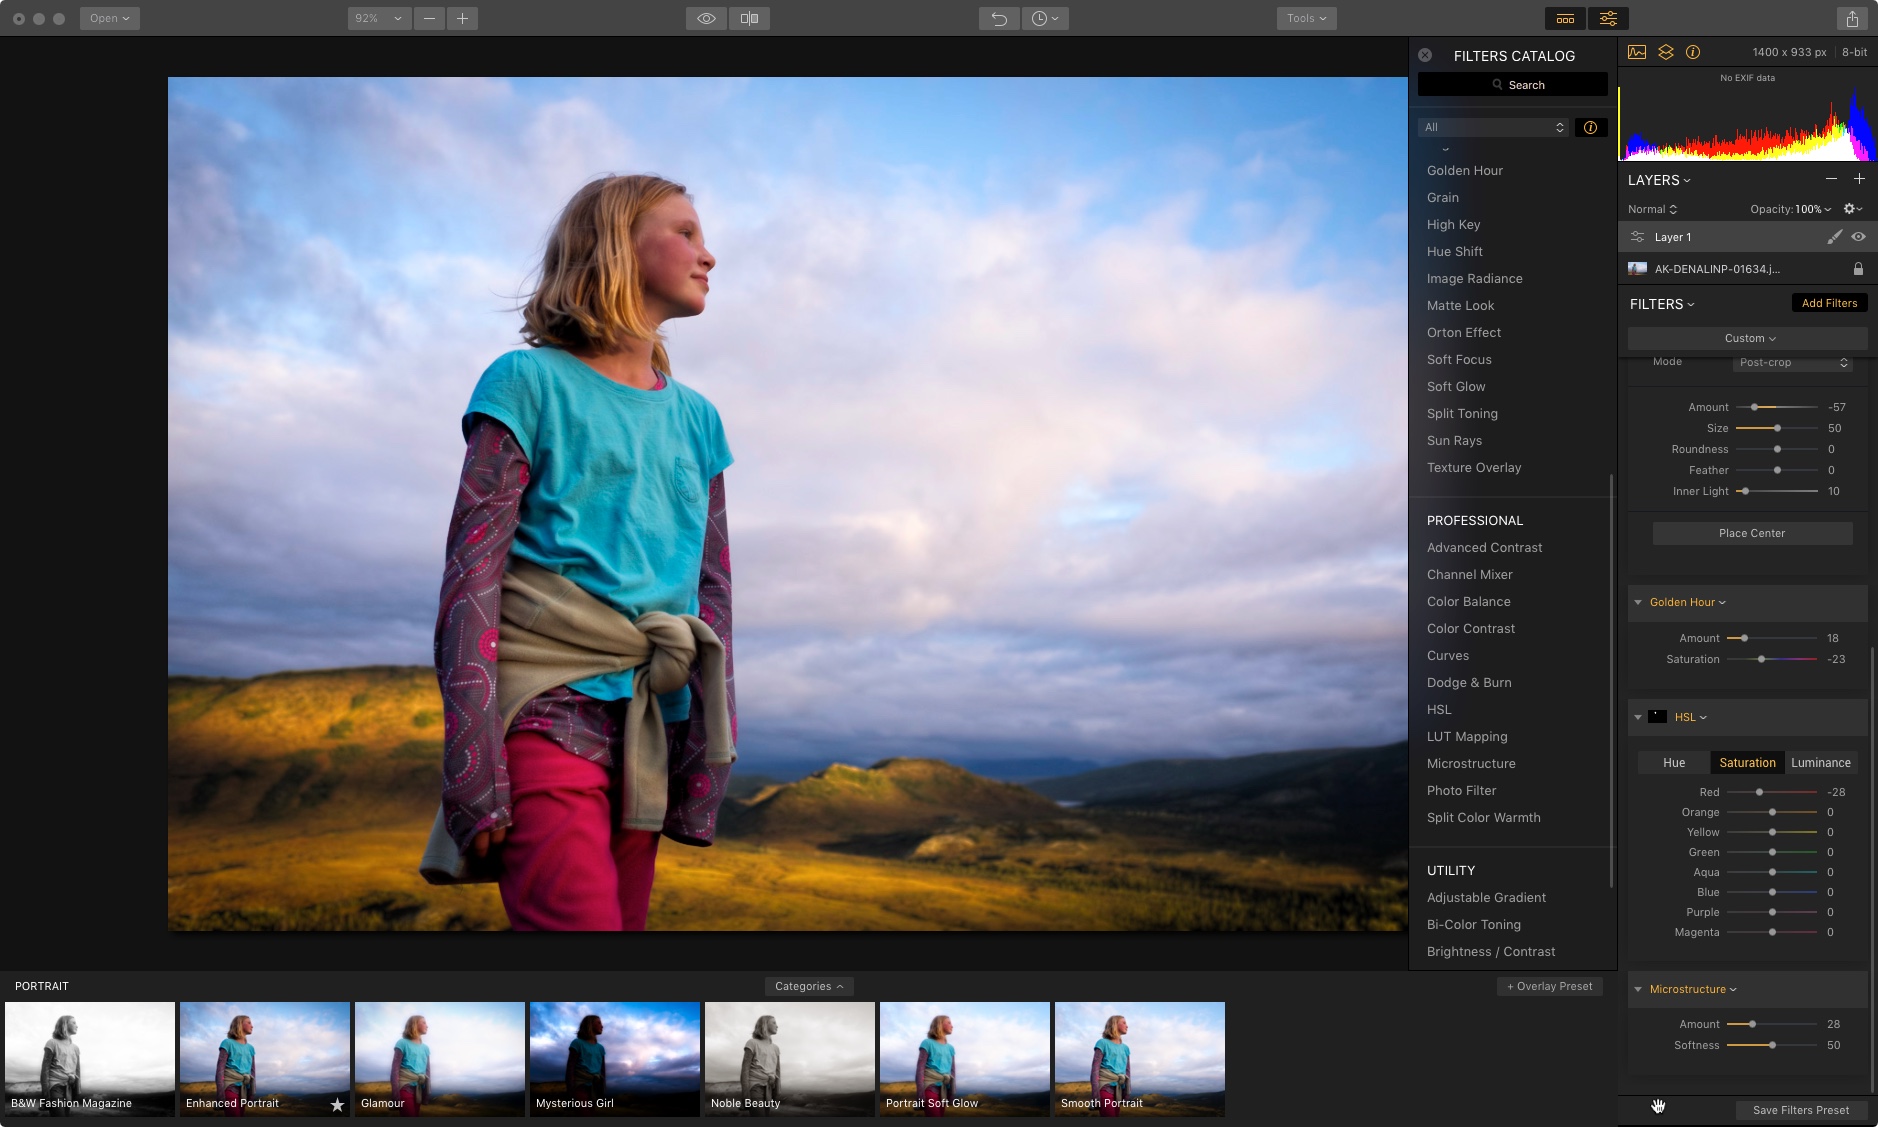
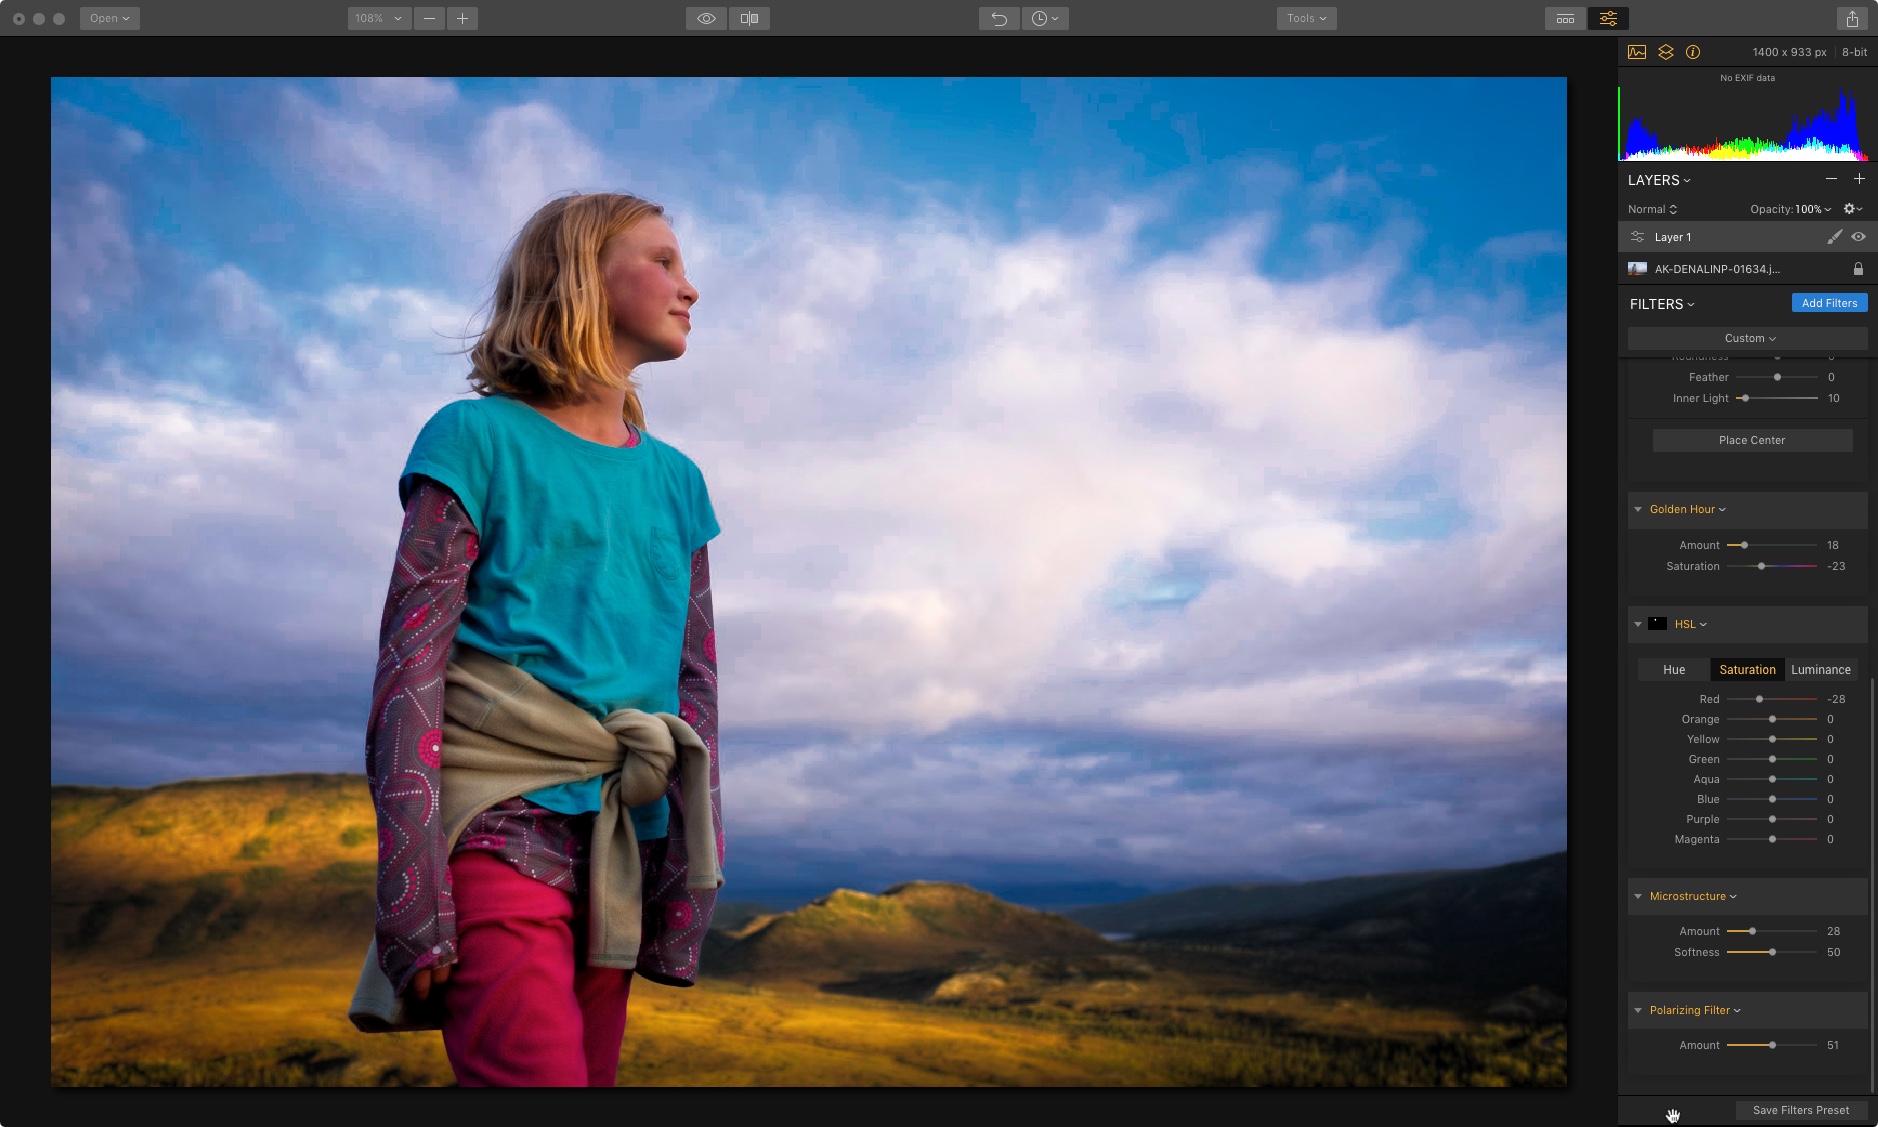
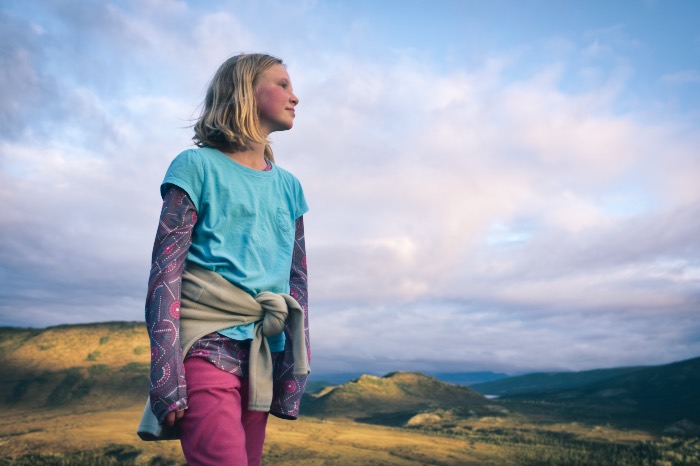
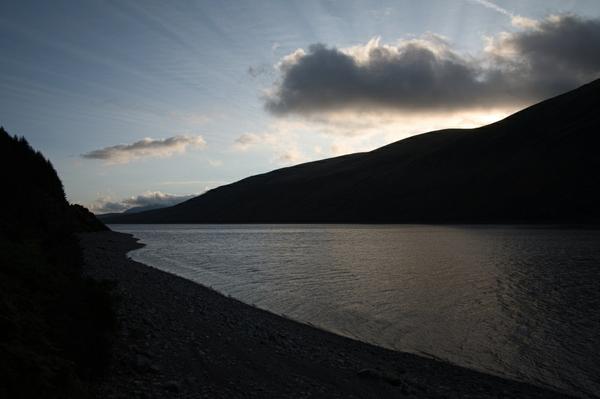
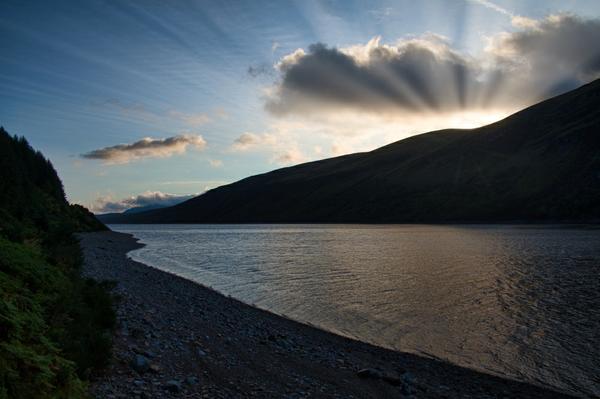
- The Polarizing Filter adds contrast and increased depth to blue skies, just as if you were using the real thing on your lens. Again. I’m quite impressed at how smart this filter is. I’ve also used it to deepen shadows on distant mountain peaks to give the shot more depth.
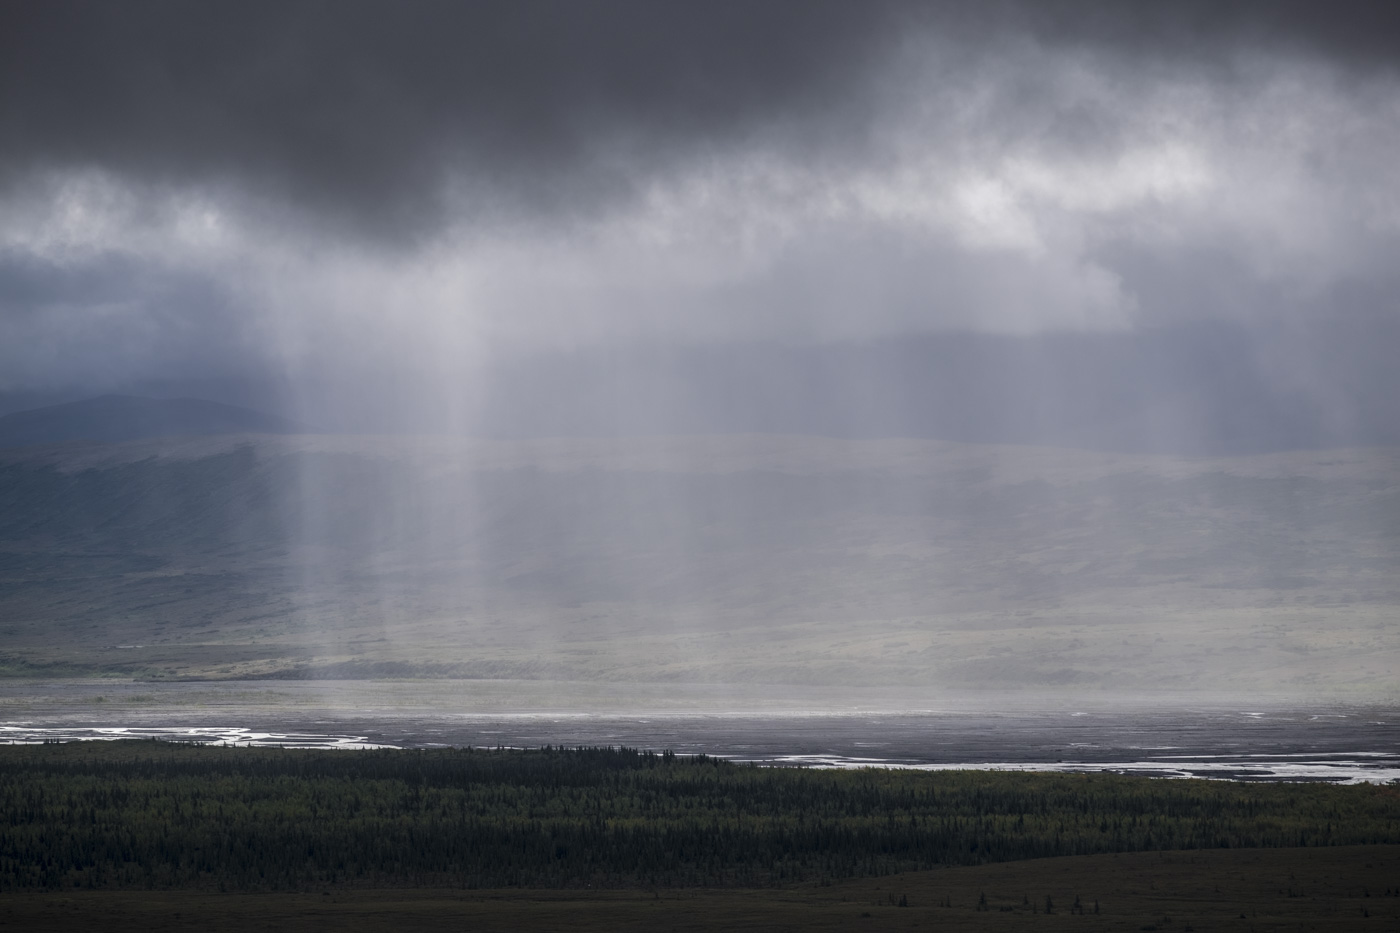
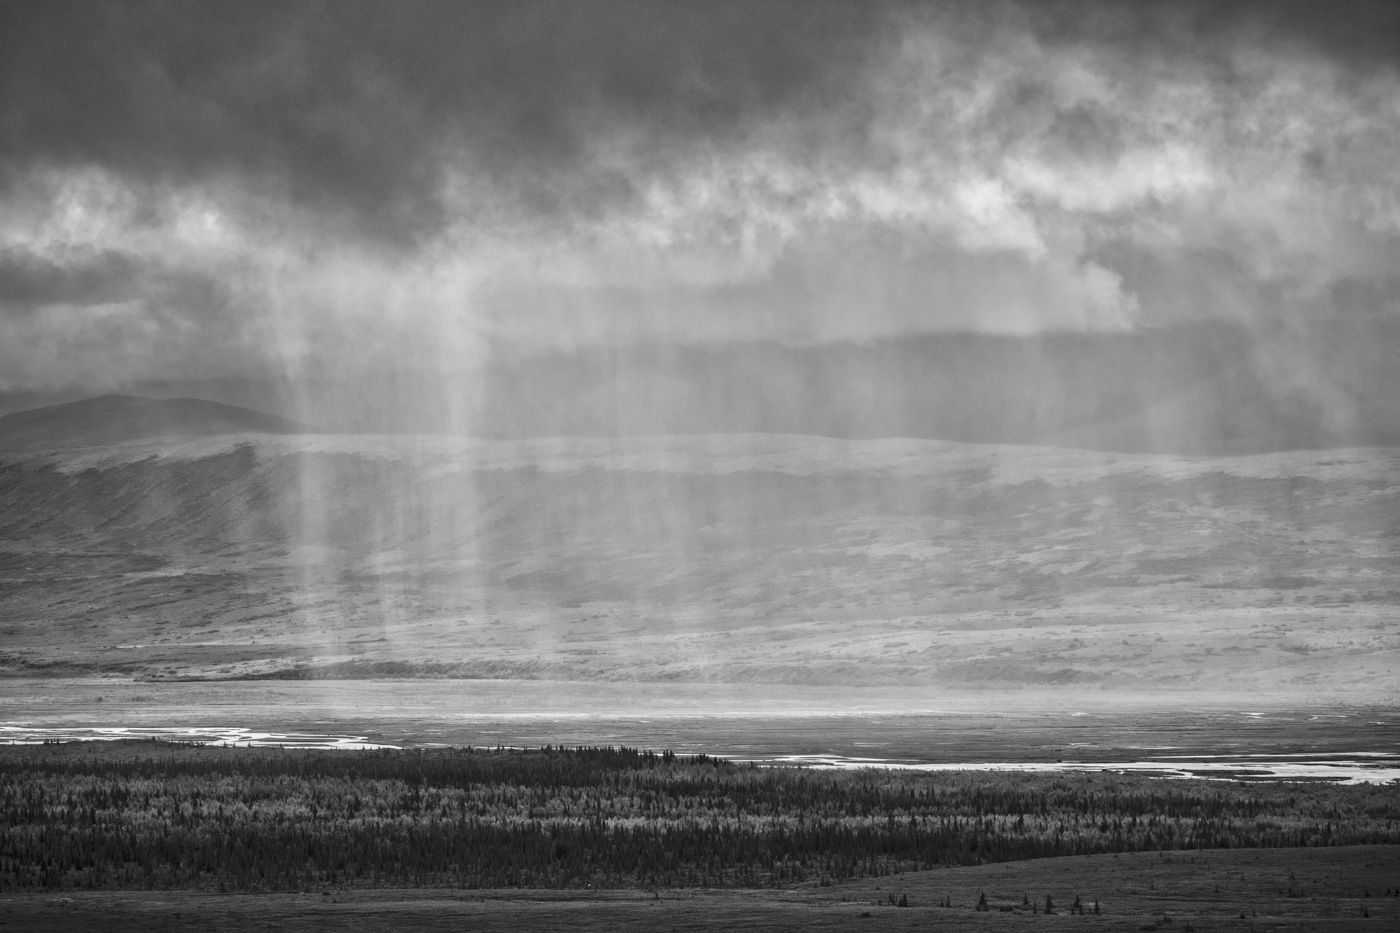
Below is an example of a straight image, a processed image, and a processed image using the Polarizing Filter.
- Matte Filter Lets you quickly tone down your photo and give it a vintage look. Think portraits, wedding photos, street photography and any other subject where you want add a more muted style to your images.
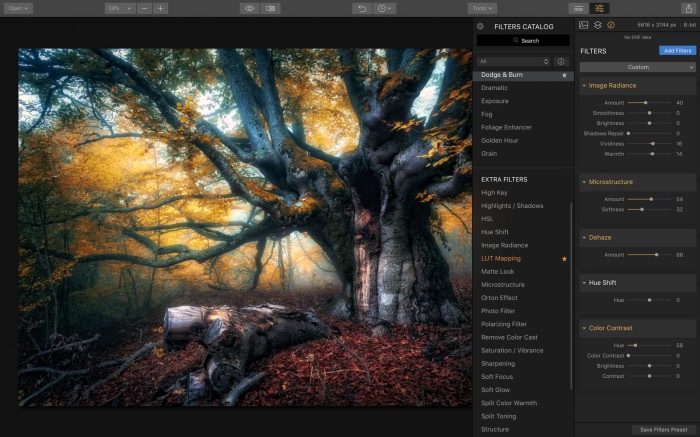
- LUT Mapping is another new tool that’s been added to Luminar 2018. This means that Luminar now supports Look Up Tables and brings pro-quality color grading for emulating classic film styles and giving your photos a cinematic look.You can download free LUT files from numerous sites around the web.
- The New Sun Rays filter lets you add volumetric lighting to your image and create beams of light in your image. You can use the X and Y Axis controls to fine tune exactly where your sun appears in the frame, and you can control the intensity and look of the God beams.
Ok, before you roll your eyes, I’ll be the first one to admit that Sun Rays is not going to the filter choice for many (most?) serious photographers. It’s essentially cheating and adding a fake sun to your image.
However, when used with discretion, you can use it to enhance images that already contain a hard sun in the frame. Plus, it’s kind of fun to see what it does to your image, especially when you drag the X and Y sliders and watch the sun move through your frame with a surprising level of realism. Either way, it’s an intriguing effect.
Here are a couple of examples of how I’ve used the Sun Rays Filter. You won’t use it very often, but with the right image, it can be a highly creative tool.
And c’mon, we’ve already lost the battle that photography has to be 100% Real. HDR? I rest my case. Why is this any different? As I said, it’s fun, and it’s an impressive testament to how good the Luminar engineers’ coding skills are. If they can do this, then that says a lot about the quality of their “Serious Filters,” Like RAW Develop.
Highly Adjustable, Non Destructive Editing
All of the Filters and tools in Luminar are highly adjustable and they offer non destructive editing. They’re also very well thought out and well executed.
Each tool does one of three things: It either solves a very specific problem you’re likely to face with certain types of imagery, whether it has to do with tone, color, sharpness, noise, it gives you an easy way to quickly adjust and refine your photos or it offers your a highly creative effects you can add to your photos in order to give them the style and look you’re going for.
Your tool choices are categorized in five sections, based on type. Here are all the tools contained in Luminar 2018: (Click each heading to see the full tool menus.)
[reveal heading=”%image% ESSENTIAL“]
- Accent – AI Filter
- B&W Conversoin
- RAW Develop
- Saturation/Vibrance
- Structure
- Tone
- Vignette
[/reveal]
[reveal heading=”%image% ISSUE FIXERS“]
- Clarity
- Dehaze
- Denoise
- Details Enhancer
- Foliage Enhancer
- Polarizing Filter
- Remove Color Cast
- Sharpening
[/reveal]
[reveal heading=”%image% CREATIVE“]
- Brilliance / Warmth
- Cross Processing
- Dramatic
- Fog
- Golden Hour
- Grain
- High Key
- Hue Shift
- Image Radiance
- Matte Look
- Orton Effect
- Soft Focus
- Soft Glow
- Split Toning
- Sun Rays
- Texture Overlay
[/reveal]
[reveal heading=”%image% PROFESSIONAL“]
- Advanced Contrast
- Channel Mixer
- Color Balance
- Color Contrast
- Curves
- Dodge & Burn
- HSL
- LUT Mapping
- Microstructure
- Photo Filter
- Split Color Warmth
[/reveal]
[reveal heading=”%image% UTILITY“]
- Adjustable Gradient
- Bi-Color Toning
- Brightness / Contrast
- Color Temperature
- Exposure
- Highlights / Shadows
- Top & Bottom Lighting
- Whites / Blacks
[/reveal]
Creative Presets
In addition to all of the powerful, professional quality image editing tools, Luminar comes with a selection of highly creative and well-designed presets. This give you the option of working with an extremely easy “One-Click” workflow, where you can simply choose a preset and then dial it anywhere from 0-100 and fine tune the image to your liking.
Having never been a preset guy before, I love using the Luminar presets. Not only do they make for a very fast photo editing workflow, they actually inspire my creativity in a big way. With a variety of different and unique looks, I often find myself opening an image, quickly browsing the choices and finding one that takes the image in a creative direction based on my ideas in that particular moment.
Sometimes it’s a direction I night not have thought of, but that’s the beauty of it. Sometimes the best idea is the one that comes from spontaneous creative decisions, as opposed to agonizing over your adjustments and endlessly sliding sliders and second guessing yourself.
With the nice diversity of the Luminar presets, I like to pick one that inspires me in the moment, dial it to my liking and call it good. Open, click, slide, done. That’s liberation. That’s efficiency. That’s trusting your own creative impulses.
Luminar comes with a selection of presets organized by category: Basic, Outdoor, Street, Portrait, Travel, Dramatic and Aerial, and you can download additional presets from the SKLYUM website. You can even create and share your own presets. If you come up with a really cool look through a combination of tools and settings, you can hit the Create Preset… menu item and save it as a user preset.
Powerful, Professional Tools
In addition to the tools and presets, Luminar 2018 comes with an impressive and full-featured selection of professional editing tools, including Layers, Blending Modes, History Panel with Unlimited Undo, Curves, Adobe Plugin Support, Opacity, and Native File Format, which means you can save all your edits and open later with full non-destructive editing.
You also get a selection of image tools, including Crop, Transform, Clone & Stamp and Erase. (The Erase tool is where do your dust spotting.)
Multiple Export Options
The Luminar Export Panel lets you save your image to your desired folder, you can export to Mail, Messages, Twitter, Facebook, Flickr, SmugMug or 500px, or you can Open In and send your image to any of the other Macphun/SKYLUM apps like Aurora HDR, Tonality CK or Snapheal CK or to any other Image editing software on your system.
In short, Luminar 2018 has just about everything you would need for all of your image editing needs from start to finish, no matter if you want to make quick changes that help your image pop, or make complex, professional edits to your photography.
It also has Batch Processing, you can save/export to JPEG, PNG, GIF, TIFF, PSD, JPEG 2000, PDF, and you can choose from three color spaces: sRGB, Adobe RGB and ProPhoto RGB.
Performance and Speed Enhancements
Much of Luminar 2018 has been re-written from the ground up so that they could optimize all of the tools and make the program run faster. For starters, it has a vastly improved RAW engine. Along with the new RAW Develop panel, RAW images now open up to 200% faster than they did in previous version of Luminar.
To give you an example, on my 7-year old Mid 2010 Mac Pro with 24MB RAM and a Solid State Hard Drive, Luminar Neptune, which was the most recent version, would take about 50 seconds to open a RAW file from my Fujifilm X-T2. It takes just over 20 seconds in Luminar 2018.
While at PhotoPlus Expo, I saw the guys at the booth open RAW files on brand new MacBook Pros laptops and it barely took a few seconds.
All of the tools, like Crop, Erase and Transform function much more quickly and and they’ve been refined for increased image quality performance. Advanced noise reduction and sharpening algorithms produce better quality photos and new masking options let you blend filter and layers for even more precise control.
Compared to the previous version, Luminar 2018 contains 24 new features. If you look at the program side by side with Lightroom, Luminar 2018 has well over 30 tools and function that the new Lightroom CC Cloud version doesn’t have.
I’ve been using Luminar for a year now, ever since the first version, and I can attest that Luminar 2018 is WAY faster, more comprehensive and more user friendly. The user interface has a more refined, professional look, and yet it still retains the very easy and simple form factor which has made Luminar so appealing to a large number of photographers.
As a RAW Processor, Luminar 2018 does an exceptional job, especially when it comes to demosaicing the Fuji X-Trans sensor RAW files. As we all know Lightroom isn’t the best Fuji RAW converter. In my tests, Luminar 2018 renders find details with sharpness that compares WAY closer to Iridient Developer than Lightroom, and Iridient is definitely one of the best, if not one of the best RAW converters out there.
RAW and PSD Support
Luminar 2018 supports RAW files from just about every camera on the market, including the new Nikon D850, and the Fujifilm GFX. In fact, the Head of Product Development is a Fuji X-T2 user and when I met with the team in person last month at PhotoPlus, both he and SKYLUM’s CEO, confirmed that they’re committed to providing full support for Fujifilm X-Trans sensor cameras and the GFX.
This was welcome news, since Adobe has left many Fuji users disappointed and frustrated by their unimpressive support for the X Series cameras, and also for Capture One Pro users, since Phase One has said that they won’t support the GFX.
Luminar will open PSD files and it will also open TIFF files that have been saved with multiple layers in Photoshop. However, it won’t save the layers; instead the image will open as a single layer that combines the layers as you had previously set in Photoshop.
This is hardly a deal breaker, and in fact, Photoshop won’t even open Luminar’s equivalent of a PSD file, with has the .lmnr extension. So there.
Upcoming DAM Catalog Module
The Luminar developers are currently working on a Digital Assent Management Catalog feature they plan to add to Luminar in early 2018. The timing of this couldn’t be better, since so many Lightroom users find themselves frustrated by Adobe’s recent moves.
These are the only glances we have of their new catalog system, but it appears to be a very good start. Looking at the interface, they support star ratings, color label and even the “pick & flag” system that Lightroom uses, which most catalog software doesn’t support.
The system also appears to run on a very straightforward and user friendly model, with a simple folder structure, grid and full size window option. No word yet on things like keywording and metadata or export/share options, but we do know that it will works seamlessly with the Luminar Develop tools and with their other photo editing apps like Aurora HDR.
Also, no word yet on when this will come out, but I think they’re hoping to get it out before the middle of 20118, if not sooner. They’ve also said that if you preorder Luminar 2018, you’ll get the catalog module for free when it comes out.
For how well they’ve done with Luminar in the past year, I’m banking on it being a great system and I can’t wait to see it.
 My Overall Thoughts
I am so impressed with how Luminar 2018 looks and functions, and I’m excited about all the changes, tweaks and refinements they’ve made to the program. I’ve been using the new 2018 version exclusively for nearly a month now and it seems like a night and day difference over the previous version.
What’s missing?
As good as it is, Luminar isn’t quite perfect. As of right now it doesn’t do text. Then again, neither do Lightroom or Capture One, so is that really a thing? Probably not.
It also lacks a fast, workable watermark function. This is a big one for me. Yes, it’s totally possible to embed a logo or watermark on your image using Layers, but they need to have a fast solution like Lightroom. This would really help speed up the workflow.
I brought this to their attention recently, and the response I got was “I know and agree. We are already working in this direction.” So, yea… expect to see this feature added soon. Again, the Luminar team is very open to suggestion and they’re committed to making Luminar a full-featured professional quality photography workflow and editing solution.
Overall, Luminar 2018 is an excellent update to an already great program. Their slogan is “Everything you need to make perfect photos in less time.”
I wholeheartedly agree with that sentiment. Having used the software extensively, I think it’s an ideal solution for just about any kind of photographer; it’s fun, easy to use, it offers extremely flexible workspace options that can be customized to your own workflow style or mood, or you can even set it up to give you multiple workspaces for editing different types of images or if you just like to vary your editing approach.
SKYLUM has already won numerous awards for Luminar and they have demonstrated a commitment to giving photographers the best program they can. They keep tweaking and streamlining the software and making it perform better with each update.
And unlike some software, which requires the fastest computer and most up-to-date OS, Luminar works on a wide variety of machines and operating systems. Like I said, I’m running it on a 7-year old Mac on OS Sierra, and their specs say that it will run all the way back to Mac OS Yosemite.
The new Windows version will run all the way back to Windows 7 and it just needs an Intel Core i3 Processor or better. (Note: when Luminar 2018 launches, the PC version will be missing some of the tools and features, but they will be added through a number up updates in the next few months.)
And, you can install Luminar on up to 5 computers, even if you run both Mac and PC with a single activation code. This is Huge. Adobe only allows 2.
Photography should be fun, and therefore photo editing should be fun. It’s doesn’t need to be complicated and it doesn’t need to be overly time consuming, if you don’t want it to be.
Luminar gives you that. It’s fun, easy to use, efficient and powerful enough to do just about anything you need or want with your photos. I’ve enjoyed using it during the past year, and I’m even more excited about this latest version. The bottom line is that I love the images that I’ve processed with Luminar and I love the efficiency it offers, since I don’t want to spend tons of time at my computer edging photos.
No matter what kind of photography you do, I can highly recommend Luminar and I think that once you try it out and get a feel for how it works, you’ll like it as much as I do. And remember, it works as a standalone or as a plugin for Photoshop or Lightroom.
If you have question about the program, you can read their FAQ page here.
Luminar 2018 has now been released. You can order the program here, and remember, if you use discount code DANBAILEY, you can get a special $10 savings on the software.
Just gone with Luminar, working through the tutorials etc, got to say I am impressed!
Thanks for your continued hard work in bring us mere mortals great information, help and advice.
Thanks Dan for going the extra mile to answer my question. Based on your review and answers I am going to try Luminar and explore a new workflow.
My pleasure, John! I hope you like the program.
Hi Dan,
Thanks for the great in depth review , I installed luminar today and will be familiarizing myself with it’s capabilities over this weekend. I am a lightroom 6 user and also using On 1 Raw so it will be interesting to see what the luminar presets and tools can do to my X trans XT2 pictures I took in Scotland last month. Great blogs and your Xt2 eBook I have referenced many times in my travels .
Nice 🙂
Thank you for your review of the new software. All news that can save my time I think is welcome. In fact, I bought licenses for Luminar 2018 and Aurora HDR 2018 a week ago. Aurora is very nice to use and it’s easy to make realistic photographs with it. My next post on Instagram (@irjalca) will be made with Aurora HDR 2018.
It was nice to hear from you again. Thank you for giving us your time, publishing useful information!
Greetings from Finland
Carl
PS. Changing to Luminar and Aurora gives me a saving of 744 € / year, so I save money too, not just time.
Great review Dan! Very helpful as i’m Looking for a LIghtroom replacement. I’ve used Lightroom for years, so it’s difficult to learn new software. But I’m not happy with the way it handles Fuji raw files, and not happy about the change to subscription only. I like ON1 2018 and am also excited to try Luminar. I just wish they had the DAM functionality now instead of waiting until next year.
Wow, that’s a considerable savings!!! I haven’t tried Aurora HDR, I’ll look for your next IG post to check out how it looks in real world use. And thanks of your comment, Carl, glad you enjoy the review. Enjoy your new post processing life and take care! -Dan
Luminar 2018 is amazing.
However, you need a powerful system to process RAW files. My system has an Intel i5-6200U CPU, with an SSD drive and 8G of RAM, and it simply cannot take on Luminar 2018. Topaz and Affinity is doing just fine on this system when processing the same RAW files.
Thanks much Dan, Not a fan of Adobe so am going to try this on my Windows 7 machine..
Hi Randy, let me know how you like the program! And since you’ll be using the PC version, you might want to check this doc to see the schedule of when new features will be added to the Windows version.
Interesting. I’m running a 7 year old Mac and Luminar 2018 runs fine on my machine, as does Affinity. Haven’t tried Topaz on this Mac. I have 24GB of RAM, though. Adding more RAM is the best, and least expensive way to make your computer run faster, and nearly all modern software will benefit from more RAM. That said, if you’re happy running Topaz and Affinity, then at least you have capable photo software. However, as you probably know, at some point, you’ll need to either upgrade your machine or add more memory. Thanks for the comment!
Hello Dan, based in your excellent review I decided to buy Luminar 2018. My OS is Windows 10.The version for Windows is far from being as the Mac’s version. It has been released and still needs a lot to be considered as an option. I believe that Macphun has made a mistake releasing a product full of bugs.
Hi Dan! Thanks for the review. Does Luminar “import” (sorry, I don’t know the correct term) the camera profile in RAW images from fuji? One of the things I liked from LR was that even if I shot a photo in RAW, I can easily re-create the film simulation I used when I took the shot by adjusting the Camera Calibration profile. Is there a similar feature in Luminar or do you need to use LUT’s for this? Cheers!
Thanks for an excellent review. I have for long now been tired of the subscription plan that Adobe has been forcing its users on to. Luminar looks like a potential replacement for Lightroom and I certainly want to give it a try.
Hi Otto, Luminar is definitely worth a try, it’s a great program. If nothing else, it’s about time that Adobe had some competition!
Hi Ennio, I can’t speak for the Windows version, but I do know that Skylum has a schedule for Windows updates and bug fixes, the first of which should come this week. I’m told that by February, the Windows version should have all of the features. If you’re experiencing bugs, I would encourage you to submit your concerns to the support people, as the developers are very interesting in hearing feedback.
Hi Dan I have a Mac Pro 17,one of the last ones made. Been an Aperture user for many years.
Had a virus and had to upgrade to Sierra,and no longer have the use of Aperture. I purchased Luminar 2018 and going through tutorials trying to get a handle on usage. There is a library with Aperture to import and export images. What is the procedure for Luminar? I am not a Computer whizz by any means,retired 77 years young and appreciate any help!
Thanks Ted
Hi Ted, As of right now, Luminar does not have a library/catalog aspect, but they will be introducing this feature to Luminar early this year. Hopefully we’ll see it by March. Currently, I use Photo Mechanic to import, edit, caption, keyword and tag my image. It’s a relatively inexpensive, but excellent and high performing photo browser. It’s worth a look; I’ve been using it for many years. You can read more about Photo Mechanic here: https://danbaileyphoto.com/blog/4-reasons-why-im-in-love-with-photo-mechanic-software/
[…] You can check out my full review of Luminar 2018 here and, if you decide to purchase the program, be sure and use coupon code DANBAILEY and you’ll save $10 on the software. […]
Hello, Dan, thank you very much for your posting and review, I am a long time Lightroom user, I am using LR 5 at the moment and thinking of upgrading to Lightroom CC just for the “dehaze” feature, even though I relying heavily on their catalog, flags, color rating system to evaluate and organize my files, still I hate to pay the annual fee for the software, is that possible that I can use Luminar 2018 as a LR plugin for all the editting or developement work, yet till using my LR 5 for file management purpose?
Thanks
Danny
HI Danny- Thanks for your comment. Yes, there’s no reason you couldn’t use LR5 for your catalog and Luminar for all of your processing needs, at least until they come out with their own asset management system. That’s pretty much what I’ve been doing for the past few months.
Luminar has some great tools, and they certainly have something similar to LR’s Dehaze feature. If you quit paying for LR, you’ll still be able to use the basic organization functions, although I don’t know exactly what you can and can’t do without a subscription. I know you’re limited, but you still retain your basic catalog capabilities.
[…] you haven’t seen my full review of Luminar 2018, you can read it here. And again, if you don’t have Nicole’s Parchment presets included in your version, you […]
Hi Dan,
Wonder if you can shed any light on my problem, I have been using Luminar 2018 since it came out on Windows, I just can’t get consistent colour using it as a plugin with Photoshop CC.
When in Luminar the colours are much more saturated, then when back in Photoshop the colours are less saturated and vice versa. I have tried every colour space, but no difference.
Hi Douglas, a big thing to remember is that no two software programs will reproduce color exactly the same way, even if you were to use the same color space. This is especially true with RAW files. So, it’s kind of a futile exercise to expect perfect consistency between Photoshop and Luminar. That said, I can totally understand your concern, since you’re using Luminar as a plugin with Photoshop CC. I’m not sure there is a calibration solution that will ensure perfect color accuracy.
There might be a workaround. It’s not a perfect solution, but it may at least get you part way there. Open an image in Luminar and in Photoshop, then adjust it to try and match the color and saturation levels in Luminar so that it looks as close as possible to the Photoshop version. Then, save your current adjustment settings in Luminar as a new Preset. Or, if there are specific adjustments you often use to make the colors match, you could save that setup as a New Workspace. I’ll see if I can find any addition information regarding how to calibrate Luminar, but try this in the meantime.
$10 discount didn’t work
[…] You can check out my full review of Luminar 2018 here, and during the next four days, you can get the special $49 price on Luminar here and ensure that you get the catalog module for free when it’s released. (Please note, my special $10 DANBAILEY coupon code won’t apply during this sale.) […]
Anyone know anything about Luminar’s Web Design Suite (which is apparently Mac compatible as well as PC)?