 Digital Imaging Tips by Dan Moughamian
For photographers who want a stand-alone application to handle their HDR workflow, you may want to consider HDR Efex Pro from Nik Software. In part 1 we will take a look at the process of merging our bracketed exposures into a single 32-bit preview and then tone-mapping the full range of tones to create a pleasing contrast.
For part two of this series, here’s a tutorial on using Topaz Adjust 4 software from Topaz Labs.
Background
Despite great technological advances in areas like high ISO performance and resolution, today’s DSLRs are not yet capable of fully capturing scenes that contain a wide range of light-to-dark tones (for example, a scene that contains both brightly lit clouds and details in a dimly lit alley). We can use HDR software to work around that limitation, by capturing an exposure for each part of the scene, and then combining them into a single picture.
After working with several different products throughout 2010 and 2011, there are two options that –while not perfect- do a great job of quickly creating a pleasing HDR look. HDR Efex Pro from Nik Software, and the brand new Color Efex Pro 4 Complete, also from Nik, are two products that you’ll want to consider. This article focuses on HDR Efex Pro, which can be used standalone with JPEG or TIF images, or if you want to work with raw images, you can invoke the plugin from Photoshop, Lightroom or Aperture.
East of Use
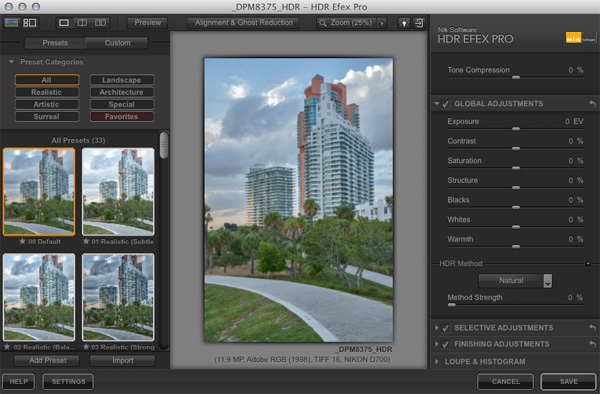
HDR Efex Pro is built on a foundation that will be familiar to you, if you’ve ever used Silver Efex Pro 2 or other newer Nik Plugins. Seen below, it combines basic preview controls (top), a collection of “Presets” for getting a quick start (left), and a panel of adjustments that the presets are based upon and which can be used to customize the HDR “look” (right).
The Workflow
If you want to start with raw images as the basis of your HDR photograph, from Photoshop choose File > Automate > Merge to HDR Efex Pro. This opens a small window where you can select the files to be merged, as well as apply ghost reduction and alignment options. It’s generally best to leave Alignment active, to ensure the edges of your subject don’t become blurred. For shots with small details that move small relatively distances across the frame (water, leaves, clouds) use the Adaptive ghost reduction method; for larger objects moving across the scene = use the Global method.
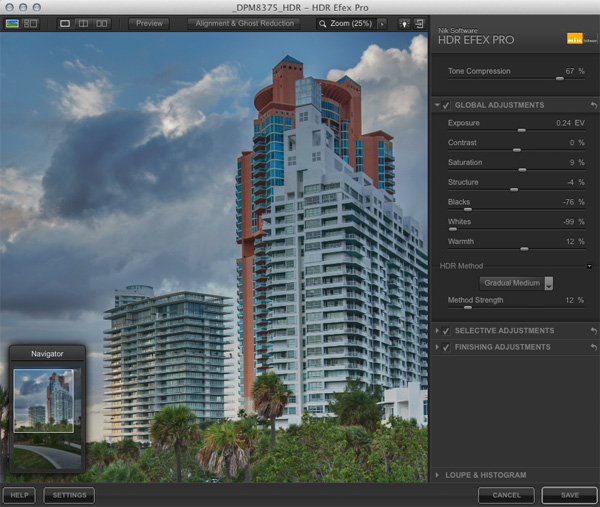
Once inside HDR Efex Pro, click on the category of presets that are applicable to your subject. Typically, I find the most compelling results start with presets in the Realistic category, but there are useful options in each category. For this example I decided that the “Realistic Gradients 1” provided the best starting point, because it brought back the details in the clouds and added a nice contrast. All I needed to finish the shot was tweak a few of the exposure-related settings and then apply some color and contrast accents. Note that many times, your image will start out looking fairly dark if you take this realistic approach. However, as long as you captured enough data in your original exposures, you should be able to brighten things up without losing highlight details.
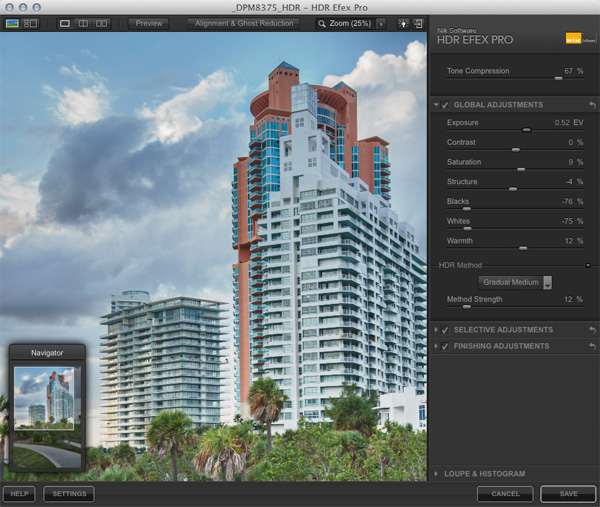
The first thing I needed to do for this merged exposure was boost the overall brightness a bit. The goal was to mimic the actual light of the waning sunset, while revealing more details in the scene. This was accomplished by boosting the Exposure setting and then pulling back on the preset’s default Whites, setting until the clouds couldn’t be pushed further without turning pure white.
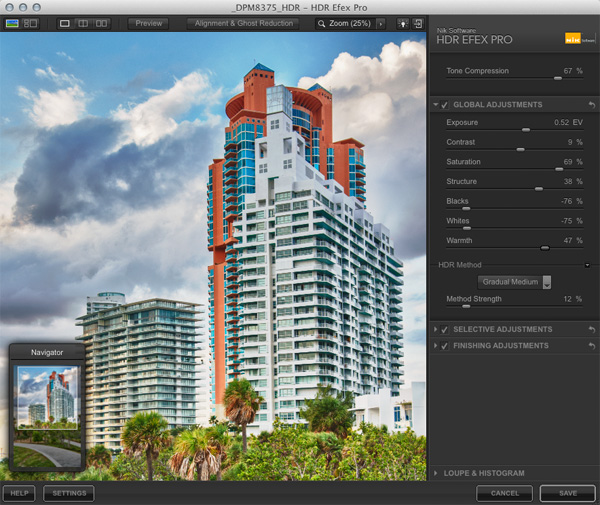
The final steps were to add Saturation and work with the Contrast and Structure settings (the latter of which works a bit like Clarity in ACR or Lightroom, and like Definition in Aperture) so that the scene “popped” a bit more, without taking on a phony appearance that you sometimes see in HDR shots. Typically I find that it is both necessary and useful to go back and forth between each type of setting (those that brighten and maintain highlight details, those that add color and contrast) until you get just the right combination.
Experimenting with HDR Efex Pro is a breeze and once you get the feel for how the different Methods and settings work together, it’s very easy to pinpoint a look you will like. There are also several ways to add “finishing” touches such as borders and vignettes in the “Finishing Adjustments” settings, although none were needed here. I hope this quick look at HDR Efex Pro will convince you to give it a try. There are also similar workflows that you can use in Photoshop, even with 32-bit data, but you’ll have more creative options if you use both methods.
——–
Dan Moughamian is a photographer and published author, focused on digital imaging technology from Adobe Systems and other developers. A veteran of the Adobe alpha and beta testing programs, Dan has more than 16 years of experience with Photoshop and has been using Lightroom since its inception.
He is the Author of Adobe Digital Imaging HOW-TOs- 100 Essential Techniques for Photoshop CS5, Lightroom 3 and Camera RAW 6, and his work has been also been published in Photoshop User Magazine and Photo Techniques Magazine.
Visit his website at www.colortrails.com, and follow Dan on Twitter @Colortrails.


[…] This post was mentioned on Twitter by Dan Moughamian, Daniel H. Bailey. Daniel H. Bailey said: A Look at HDR Expose from Unified Color- Video tutorial @Colortrails http://bit.ly/hoQVHE […]
[…] And in case you missed it, here’s Working with HDR Expose- Part 1 […]
Great tutorial. Learned several useful things I did not know. Thanks Dan!
Mark
Thanks Dan. Your tutorial explained more about using HDR Expose than I’ve gained from Unified Color.