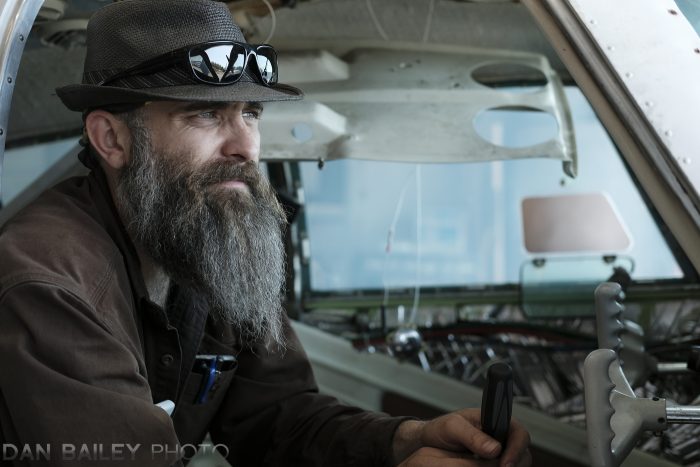
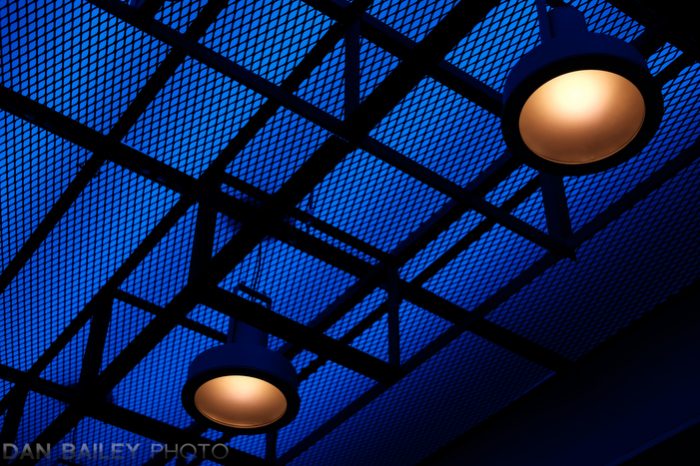
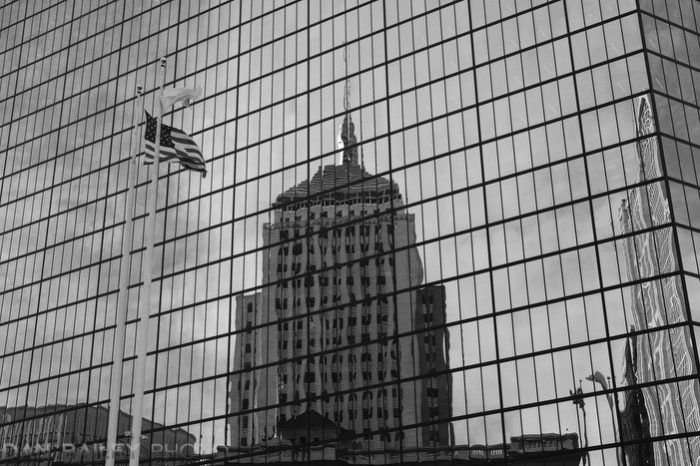
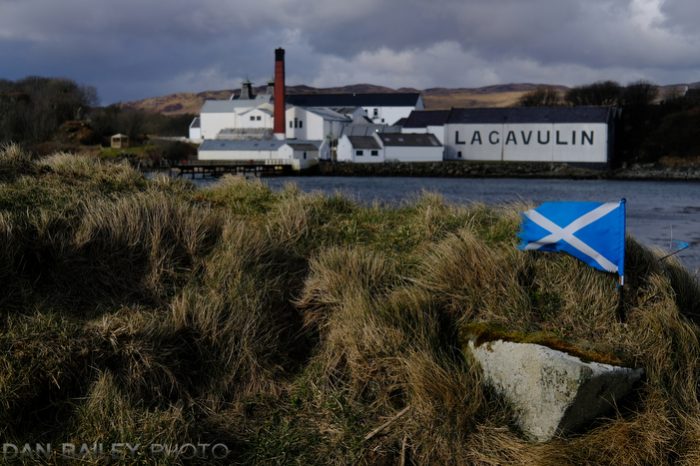
I knew this day would come, and I’ll be honest, I’ve been a little nervous. I knew that Fujifilm would eventually release the successor to the X-T2, and I’ve been concerned that it wouldn’t live up to my expectations, or that they might change something about the way it handles. Move a button. Modify the layout. Tweak the body in such a way to make it feel different in my hands. Who knows?

You see, the Fujifilm X-T2 has been my favorite camera ever since it was released back in 2016. No, not just my favorite Fuji camera, my favorite camera EVER.

In my 28 years as a photographer, no camera has offered me as much technical capability, creative inspiration and overall fun as the X-T2. No camera has ever fit so well in my hands, and no camera has ever made me so excited about photography as the X-T2 has.

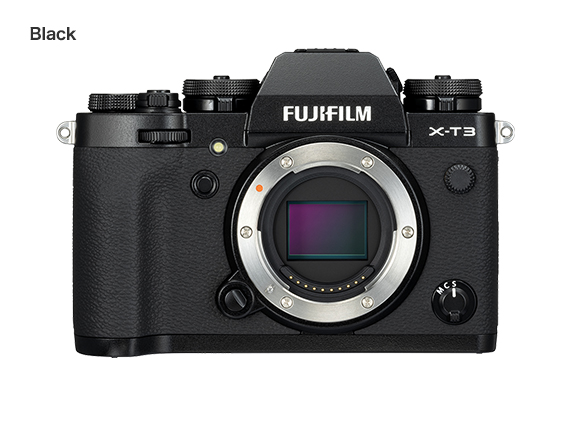
Well, Fujifilm has officially announced the X-T3, and I’m happy to report that my fears were totally unfounded. While some very slight changes have been made, the body is nearly identical to the X-T2. It’s so close, they could have called it the X-T2s, or the X-T2 Mark II, but thankfully, Fuji doesn’t do that.

Essentially, the X-T3 is very much a hot-rodded X-T2, and it has some remarkable new features under the hood, including faster continuous shooting, faster autofocus, new image quality settings and radically updated video capabilities. In short, the X-T3 brings 4th Generation performance to the X Series.

And before you ask, no, the X-T3 doesn’t have an IBIS Stabilized Sensor. That would just add size and weight. That would make it an X-H1. It does have the same 100 fps EVF as the X-H1, though.
It does have a brand new 26.1MP BSI (Back Side Illuminated) X-Trans sensor and a brand new X Processor 4 image processor,  well as a brand new shutter type, high speed continuous frame rates up to 20 and 30 fps and updated AF algorithms.

Add in some new creative controls, dramatically improved video shooting, bluetooth connectivity and new touchscreen controls, and you have an X Series camera that’s been tweaked for maximum performance.

I got to test the X-T3 for a couple weeks last month, so I was able to get a solid feel for what it can do. In this post, I’ll review some of the new features and show you how the camera performs in real life shooting situations.
Faster Image Processor

Everything in the camera is affected by the speed of the image processing chip: AF tracking, fast frame rates, image quality and color clarity, noise reduction, the complex grain structure found in ACROS film simulation, reduced startup and blackout time, etc….

The X-T3 is built with a brand new Quad Core X Processor 4 chip that’s even faster than the X-Processor Pro chip found in all the current models. This gives the X-T3 even better color clarity, as well as more speed and high-end capabilities than the X-T2, including the ability to shoot at an impressive 11 fps without needing the battery grip and up to 30 fps using the Electronic Shutter.

New 26.1MP BSI Sensor

The X-T3 is built around the new APS-C 26.1MP BSI X-Trans CMOS 4 sensor, which makes this the first Fuji to feature a Backside Illuminated sensor. Yes, the pixel count is slightly higher than the X-T2, but that only tells a small part of the story.

Without getting too technical, (you can google it after you’re done reading this review), a BSI sensor offers improved low light performance and faster read rates, which translates to faster frame rates, especially when using the electronic shutter. I’ll cover this in more detail further down.

In addition, the new sensor gives the X-T3 improved high ISO performance and the ability to utilize Phase Detection autofocus down to -3EV at f/2, compared to -1EV on the X-T2. ISO now starts at 160, and extendable down to ISO 80.

This is significant because the new sensor has over 2.16 million Phase Detect AF pixels that cover 100% of the frame. (By comparison, the X-T2 has half a million PDAF pixels, and they only cover about 40% of the frame.) This leads us right into the next section…

Improved Autofocus

Since Phase Detect AF offers faster, more precise focusing, especially when shooting moving subjects, this is one of the feateries which makes the X-T3 an even more capable action camera.

Also, with the increase in PDAF pixels, the number of focus points has gone up from 325 to 425 on the X-T3. This allows for even more precise, pinpoint focusing when using Single AF mode, and more AF Points when using Zone AF.

Having photographed action extensively with the X-T2, I can definitely see a jump in performance with the X-T3, especially when using the Electronic Shutter. It’s quite impresssive how capable this camera is for shooting sports and capturing lightning quick moments.
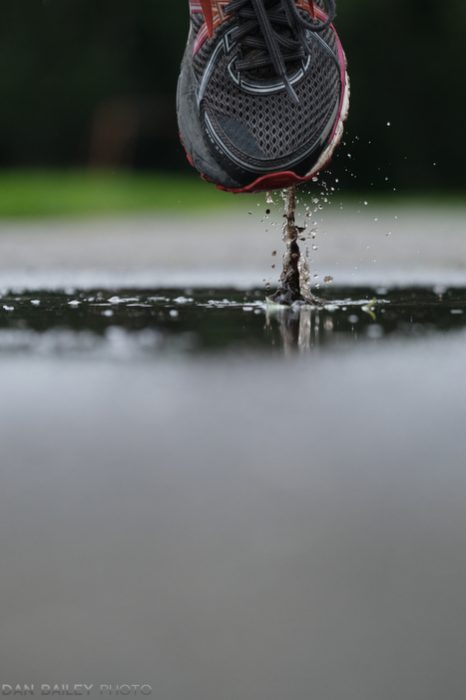
Keep in mind, no matter which camera you’re using, I can still takes a huge amount of practice and knowledge of how the camera’s autofocus system works in order to nail really difficult action shots. A new user, or someone who doesn’t regularly shoot fast action might not see much of a difference, but an experienced sports shooter will definitley see and appreciate the bump in AF performance.

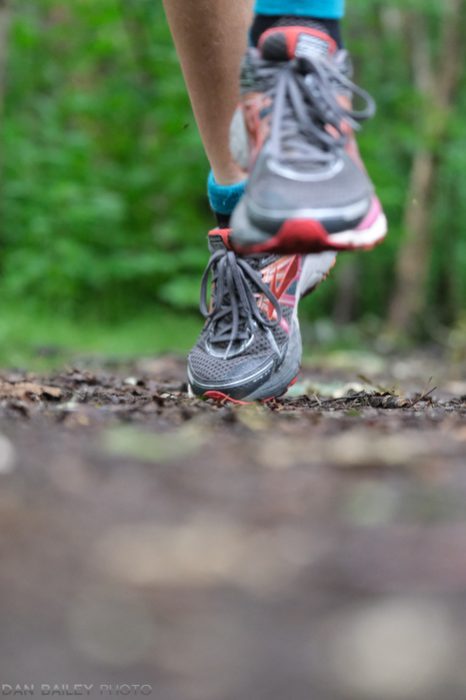
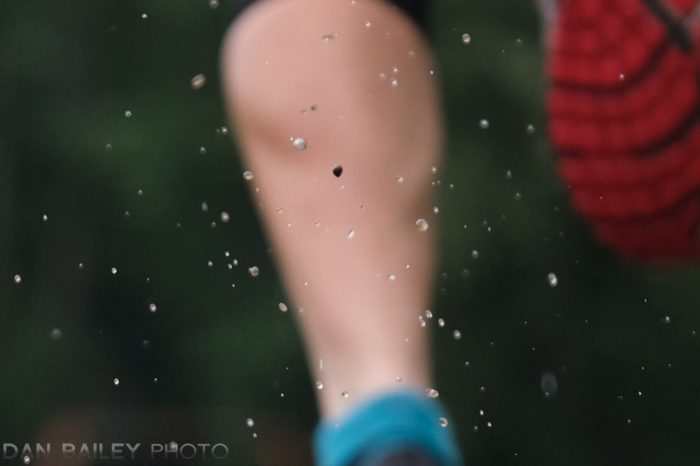
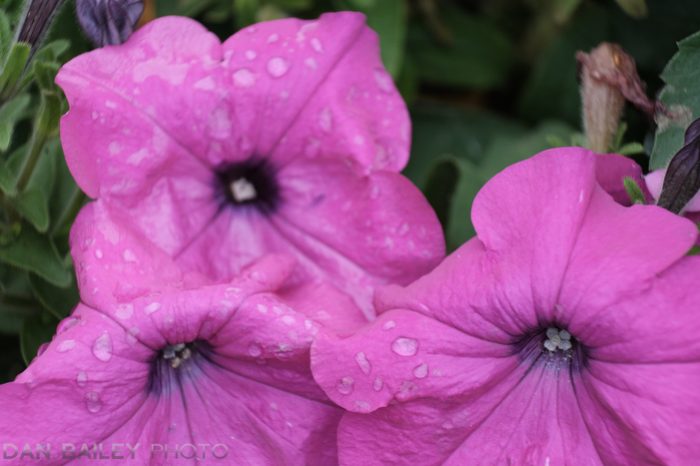
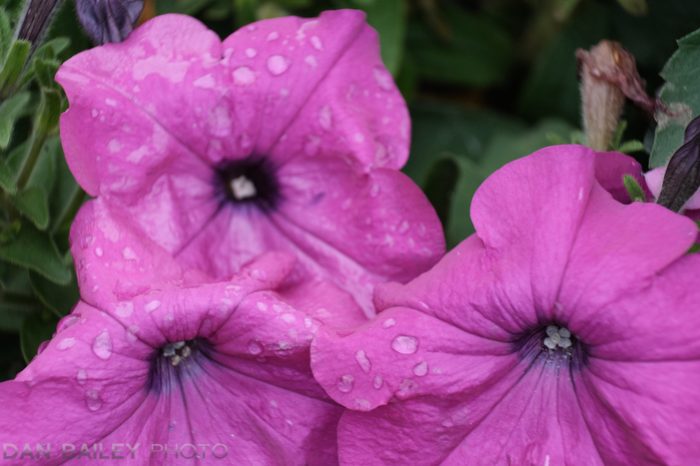
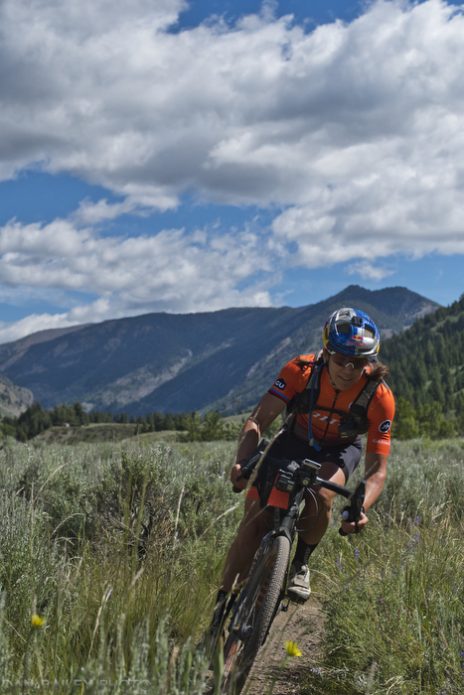
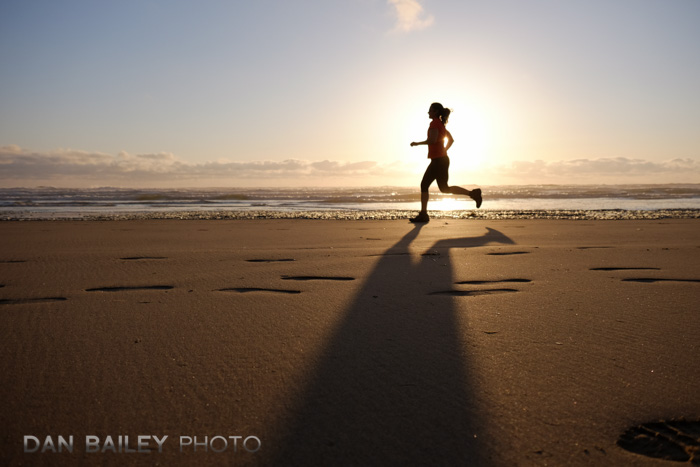
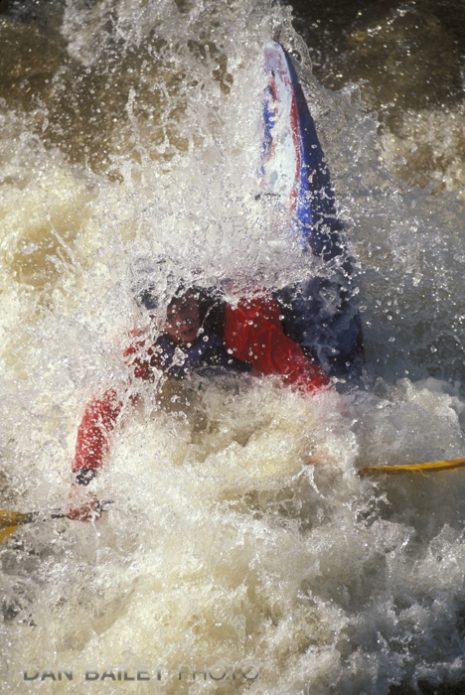
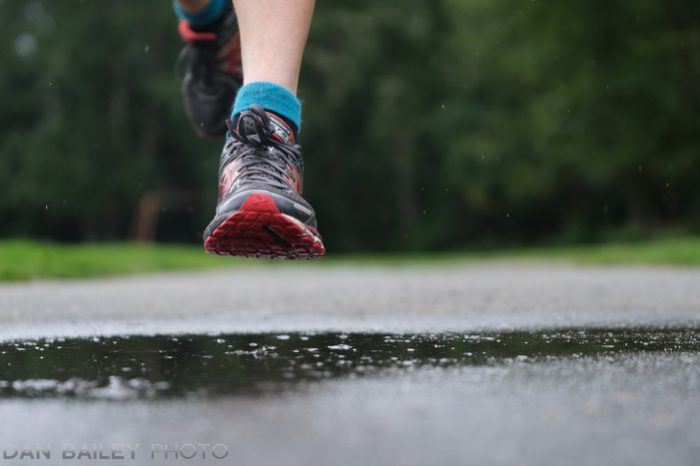
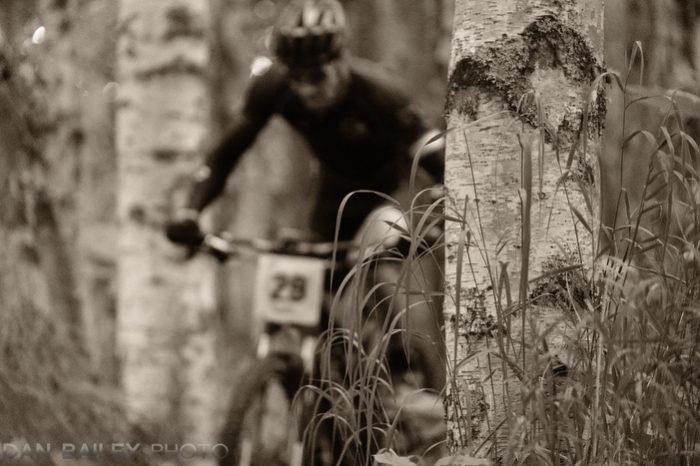
Scenes like this can be incredibly difficult to capture, but the improved AF system of the X-T3, combined with the higher frame rates makes it a little bit easier. The first two running photos above were shot at ISO 1600, while the second pair on the dirt trail were shot at ISO 6400.

In addition, the AF algorithms have been tweaked for even more speed an accuracy. The X-T3 analyzes 4X the data as the X-T2 does when performing focus and tracking calculations.

I’ve been told by a number of the Fuji tech reps and product managers that above all, autofocus performance is the number one priority for constant improvement by the Fujifilm engineers. Each model has received significant AF updates, and the X-T3 follows in this trend.

PRE SHOT ES

There’s also a new features in in the SHOOTING SETTINGS MENU called PRE SHOT ES, which is useable when you’re using the Electronic Shutter.

When you enable PRE SHOT ES, the camera will start tracking at high speed as soon as you press the shutter halfway down. You’ll hear the ES clicking, which, is actually the camera recording images into the buffer. As long as you keep the shutter halfway down, the camera will continue to refresh, so that you always have up to 20 stored in the buffer.

Then, when you’re ready to capture, you press the shutter all the way down and the camera will actually write the most current buffer images onto the memory card. It took me a while to figure out how this works. At first, I thought it captured frames as soon as you pressed the shutter halfway, but nothing was going to the card.

You have to press all the way down to actually get the shots. What the PRE SHOT ES seems to be doing, is giving you a head start, so that when you see the right moment, you’re already about 75% there.

Essentially, PRE SHOT ES enables you to nail the sequence and capture image, even if you end up pressing the shutter a little bit late. It’s a little tricky to explain, but having tried the setting out a few times, I can confirm that it can be a pretty useful tool when shooting extremely fast breaking scenes.


Improved Shutter Performance

In addition to the regular Mechanical and Electronic Shutters, the X-T3 has a brand new shutter, called EF, which stands for Electronic Front Curtain Shutter. Originally introduced on the GFX and also used in the X-H1, this mode is designed to reduce “shutter shake,” and reduce blackout time.

With the EF, the camera starts the exposure by using the Electronic Shutter, then finishes it by manual closing the Mechanical Shutter. This means you’ll get less chance for vibration when using slower shutter speeds, and it reduces the lag between when you press the shutter button and when the camera starts making the exposure.

So, when you combine all of the possible shutter types, you end up with 5 different options the X-T3:

  • MS – 1/8000 sec. max, all the way down to 15 minutes.
  • ES – 1/32,000 sec. max, all the way down to 15 minutes
  • EF- 1/8000 sec. max, all the way down to 15 minutes. Recommended max for best image quality is no faster than 1/2000 sec.
  • M+E – MS up to 1/8000 sec., ES above 1/8000 sec.
  • EF+MS – EF up to 1/2000 sec., MS above 1/2000 sec.
  • EF+M+E – EF up to 1/2000 sec., MS above 1/2000 sec., ES above 1/8000 sec.


Faster Continuous Shooting

The X-T3 has 6 options for shooting in CH HIGH SPEED BURST MODE. This means when you put the camera into CH mode, you have the option to shoot anywhere from 8-30 fps. Using the mechanical shutter, you can shoot at either 8 fps or 11 fps.

When using the Electronic Shutter, you now have the option to shoot at either 10, 20 or 30 fps, and you don’t even need the vertical battery grip to use these modes. Again, this is due to the new BSI sensor and the new image processor.

However, even with the upgraded hardware, in order to get the highest number of frames at these speeds, the X-T3 defaults to its new SPORTS FINDER MODE. This puts the camera into 1.25X crop mode, which effectively gives you a Medium sized JPEG image at 4992 x 3328 pixels. (Full res is 6240 x 4160.)

You can shoot at full res images @ 20 fps, but you’ll only get 79 JPEGs or 34 RAW frames max before the buffer fills up vs. 114 JPEGs frames in the new 1.25X crop mode.

To compare, when shooting at 30 fps, your maximum burst is about 60 JPEGs. At 10 fps with the ES, max burst rate is 500 JPEGs.

The addition of these new shooting modes means that the X-T3 is not only more action ready than any other Fuji, it performs as well, or better than any other camera out there.

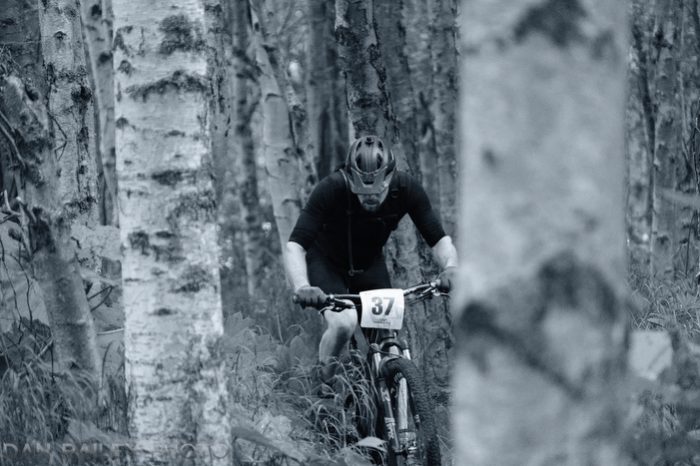
Here’s another series. These three images below were shot at 30 fps using the Electronic Shutter. Again, at this high frame rate, the camera defaults to the new 1.25X Crop SPORTS FINDER MODE.

The photos are still 4992 x 3378 pixels, so they’re still quite large and totally useable for just about any kind of enlargement or publication you would ever need.


New Image Quality Menu Options

The X-T3 adds two new options inside the IQ MENU: BLACK AND WHITE ADJ and COLOR CHROME EFFECT. They’re also available as adjustment options inside the RAW CONVERSION menu.

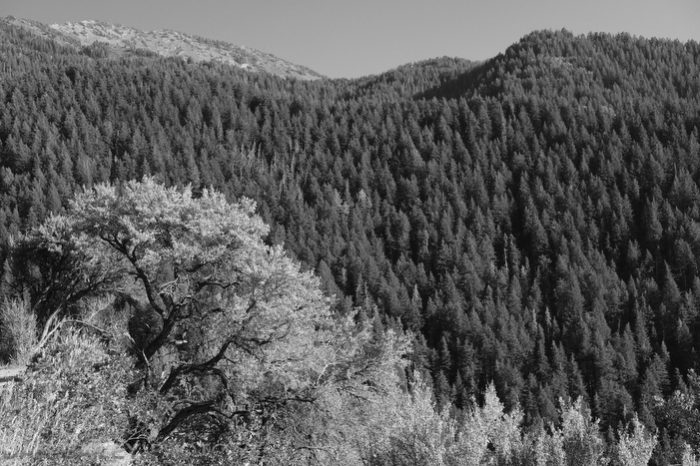
The BLACK AND WHITE ADJ menu lets you add a warm or cool tint to your ACROS or MONOCRHOME photos with 9 steps of adjustment in either the yellow or blue spectrum. You’ve just seen it in use in the series above.

I LOVE this new features because it gives you a new way to customize and add additional style to your BW image, right inside the camera, without needing to resort to processing later. It’s another tool in your creative bag of tricks that lets you explore your creativity right there on location. I played around with this setting quite a bit during my brief test with the X-T3 last month.
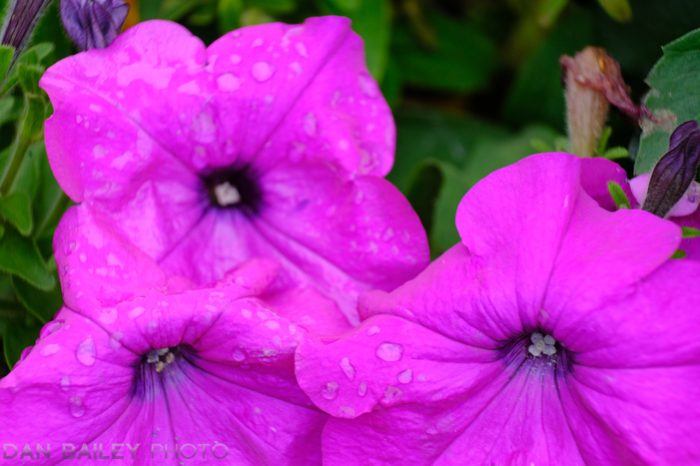
COLOR CHROME EFFECT is a bit more subtle, but it’s still pretty cool. First intruduced in the GFX, this setting replicates the look of fortia film, which was a short lived Fuji slide film from the early 2000s. It was touted as having even more contrast and vibrancy than Velvia; it added tonality, without oversaturating the colors.

COLOR CHROME EFFECT works with any of the color film simulations, and your options are STRONG, WEAK and OFF. It adds just a bit more richness to your color images. It’s hard to see when you’re shooting, but when comparing images side by side, you can definitely see the bump.

Again, it’s just another way to add personal style to your images right inside the camera, and with the new processor, it’s available in both single and continuous shooting.
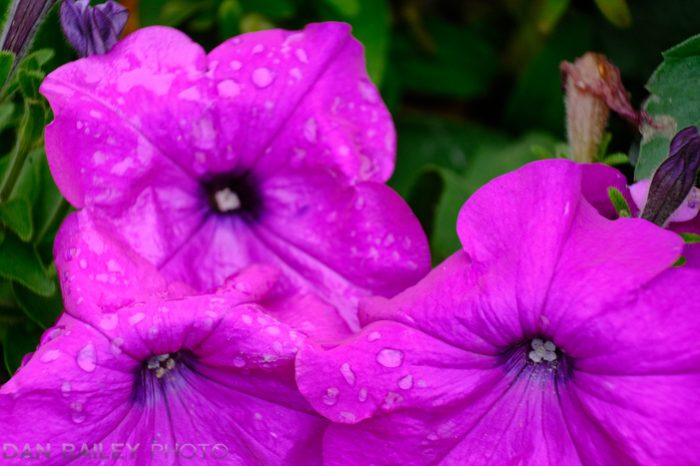
Veliva with COLOR CHROME EFFECT – OFF
Veliva with COLOR CHROME EFFECT – STRONG
CLASSIC CHROME with COLOR CHROME EFFECT – OFF
CLASSIC CHROME with COLOR CHROME EFFECT – STRONG

New Touch Screen and Bluetooth Image Transfer

Where touchscreen LCD’s were used to be found on only the entry-level and consumer-grade models, Fujifilm has now embraced the touchscreen for high-end models. The GFX has a touchscreen; the X-H1 has a touchscreen, and now so does the X-T3.

With this latest generation of touchscreen, Fuji gives you multiple options. You can tap to focus, tap to shoot, and swipe to scroll through your shot images, but you can also select your focus points/zone by dragging your finger around the screen.

With a little practice this method offers lighting quick movement around the frame, way faster than you could accomplish with the AF Joystick, although that’s still my preferred method. At least for now.

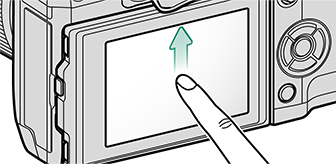
In addition, the touchscreen can operate as another Fn button array. You can assign four camera functions/settings to the screen and access them by flicking up, down, right or left with your finger. Add in the 9 regular Fn buttons found on the X-T2, and you suddenly have a total of 13 Fn assignable controls available to you.

This new style touchscreen was first introduced to the X Series on the X-E3, and I was blown away by how well it works when I first tried it out. It works just as well on the X-T3 and after a few days with the X-T3, I became a convert.

Yes, it takes a little getting used to, and there are times when you may want to turn it off (you can turn off/on selective screen functions), but this is a feature I will definitely embrace, because it offers yet one more lighting quick way to access commonly used camera settings.

And, like all of the new models, the X-T3 has Bluetooth image transfer capabilities, in addition to regular Wi-Fi image transfer using the mobile app.

Vastly Improved Video Capabilities and ETERNA Film Sim

The X-T3 has vastly upgraded video features that actually surpass the performance of the X-H1 and make it a full-on professional-grade video camera. In fact, the X-T3 is the world’s first APS-C mirrorless video camera capable of shooting 4:2:2 10-bit 4K/60p with full HDMI Output.

The video/movie features on the X-T3 include 10-bit video capture with both H.264 and H.265 video coding, Time Code Setting, Full HD High Speed Recording, Peripheral Light Correction, Tally Light, Full HD Movie Output, and Zebra Highlight Warning, which at this time, is not yet found on the X-H1.

The X-T3 also has Fujifilm’s new “cinematic” ETERNA film simulation, which was intruded on the X-H1 earlier this year. Designed with low tonality, low saturation and a 12-stop dynamic range, ETERNA mimics Fujifilm’s classic motion picture film of the same name. It’s great for video storytelling when you don’t want your scene to overpower the story, and it’s also highly suitable for color grading.

New Screen Settings

The X-T3 has a couple of new features tucked inside the SCREEN SETTINGS menu. In addition to the new “Large Indicators” that were introduced into the X-T2 a few mon the ago, you’ll also find a setting called INFORMATION CONTRAST ADJ. 

This setting give you four different options for how you want the LCD screen menus to look, based on the kind of light you’re working in. Your choices are HIGH CONTRAST, STANDARD, LOW CONTRAST, and DARK AMBIENT SETTING (RED) which gives you red text on a black background. Will you use this very often? Probably not, but the X-T3 gives you yet another tool that could come in handy for the right situation. Hint: Astro?

Creative Features

You’ll be glad to hear that all of the fun creative features found in the X-T2 have been brought to the X-T3, including Panorama Mode, and the ADV. FILTER EFFECTS, like Toy Camera, Miniature Mode, Partial Color and Dynamic Range. In fact, every single X-T2 feature I cover in my X SERIES UNLIMITED book are present inside the X-T3 as well, so moving from the T2 to the T3 should be a totally seamless transition.

You also have the new FOCUS BRACKETING feature, which was introduced earlier this year. (I explain how to use this feature in detail here.)

Final Thoughts

Now that you’ve gotten this far, the question you want to know, is should you buy the X-T3?

There’s no question that the X-T3 is a considerable upgrade to the X-T2 with regards to the new sensor & processor, faster frame rates and increased capability for shooting action and fast moving subjects.

With the new BSI sensor, the faster chip and the upgraded electronic shutter options, the T3 now stands at the top of the Fujifilm lineup for performance and speed. It’s a very impressive upgrade.

However, as I indicated above, it’s not so much a new camera as a turbo charged X-T2. Fujifilm knows that people love the X-T2, but they need to make sure they’re keeping pace with their competition when it comes to technology.

If sports and action is your thing, or if you shoot video, then the X-T3 is definitely worth considering.

Even if you just want the best possible performance from an X Series camera, and you love the form factor of the X-T2 over the X-H1, then yes, the X-T3 is your logical choice.

However, if you’re a happy X-T2 user and you don’t necessarily shoot video or fast action, or if you recently bought an X-T2, (especially at the heavily discounted price), then I’d say there’s no real need to rush out and buy an X-T3 yet. Save your money, or get some new glass instead. However, those new B/W Tints are pretty awesome…

Even though the X-T3 does have a couple of new creative features, you won’t see a night and day difference between the two with regards to image quality. The X-T2 is still an awesome, incredibly powerful camera that will give most people all the quality and performance they will ever need.

The two cameras are so close in nearly every respect, they can work extremely well side-by-side if you like to shoot with two bodies. They pretty much feel the same, and aside from the new touch screen, they function exactly the same.
I began this review by telling you how much I love the X-T2. With this announcement, I’ll say that nothing has changed. With the X-T3, the form factor hasn’t really changed. It still feels the same in my hands. It’s still the same rugged, compact X-T2 style body, but I suddenly have more speed, more AF accuracy, more creative options and more ways to control all of the features I use on a daily basis in my photography.

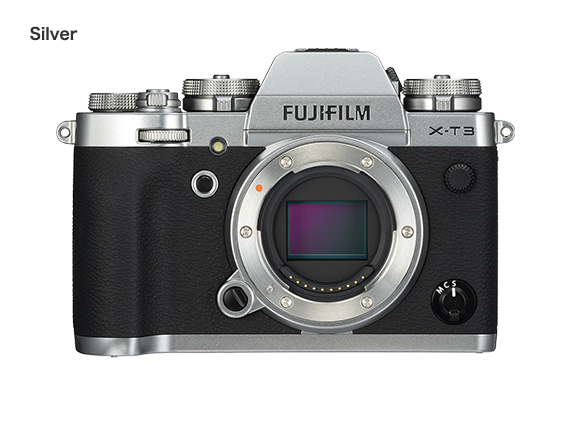
Oh yea, and it comes in silver too. If any of that appeals to you, then you have your answer too.

The Fujifilm X-T3 is now shipping. You can preorder here.

Read more about the X-T3 here and see more of my own full-res image examples in this post.

[iframe]<iframe width=”120″ scrolling=”no” height=”240″ frameborder=”0″ style=”border:none;” border=”0″ src=”https://mer54715.datafeedfile.com/widget/aff_widget_prdt_generate-2.0.php?aff_num=6746&aff_net=1&widget_num=8183&sid=” marginheight=”0″ marginwidth=”0″></iframe><iframe style=”width:120px;height:240px;” marginwidth=”0″ marginheight=”0″ scrolling=”no” frameborder=”0″ src=”//ws-na.amazon-adsystem.com/widgets/q?ServiceVersion=20070822&OneJS=1&Operation=GetAdHtml&MarketPlace=US&source=ss&ref=as_ss_li_til&ad_type=product_link&tracking_id=danhbaisadvph-20&language=en_US&marketplace=amazon&region=US&placement=B07H49QWN4&asins=B07H49QWN4&linkId=44560257fbad0490c02345157d9d0a9e&show_border=true&link_opens_in_new_window=true”></iframe><iframe style=”width:120px;height:240px;” marginwidth=”0″ marginheight=”0″ scrolling=”no” frameborder=”0″ src=”//ws-na.amazon-adsystem.com/widgets/q?ServiceVersion=20070822&OneJS=1&Operation=GetAdHtml&MarketPlace=US&source=ss&ref=as_ss_li_til&ad_type=product_link&tracking_id=danhbaisadvph-20&language=en_US&marketplace=amazon&region=US&placement=B07H5HW3CR&asins=B07H5HW3CR&linkId=d3fa2345b7ca75208d052be5399b1bb6&show_border=true&link_opens_in_new_window=true”></iframe>[/iframe]
August 28, 2018
See this post
4th Generation X Series – My Full Review of the Fujifilm X-T3

August can be a tough time in Southcentral Alaska. By then, the days are getting shorter, and it’s usually the wettest of the summer months. August rarely sees the kinds of long, glorious sunsets that June tends to bring.

During the past three weeks, we’ve had a steady bout of clouds and rain here in Anchorage, especially over the mountains. Despite the occasional peeks of blue sky over town, the Chugach Mountains have largely remained socked in, which means I’ve had very few opportunities to get good photos around the glaciers and surrounding peaks.

I missed the last really good day. I sacrificed a beautiful clear evening on Aug. 3 by going to a friend’s party. I really like the guy, but looking back, I’m not sure I made the right decision. Oh well. Live and learn.

The weather finally broke yesterday and we had our first big sunny day in weeks. After taking a nice warm, dry bike ride and relaxing in the sunshine in my yard for a good half-hour, I grabbed my flight bag and my camera gear and headed over to the plane, looking forward to a few hours of flying and photography.

The mountains weren’t totally cloud-free, but there was more than enough visibility to safely navigate my little Cessna. Also, it made the scenery look more dramatic.

I puttered around for a good hour soaring over the vast landscapes of rock and ice, shooting aerials in the vicinity of the Lake George Glacier and Peak 7460. (This is one of my favorite areas to shoot in the wintertime.) After that, I landed on the Knik Glacier gravel bar, grabbed my pack and hiked over the moraine to photograph glacier scenics.

By then, the glacier itself was already in the shade, although the sunlight was getting pretty good on the higher terrain. I always get lost in the scenery when I’m here. Even if I’m not shooting photos, it’s so much fun to just walk around and look at the icebergs and enjoy the quiet mountain solitude.

At one point I heard a large ‘berg calve off one of the bigger blocks, although I didn’t see where it was. A few minutes later, I saw all the ripples it caused the propagated throughout the entire lagoon. I also saw a moose tromping around in the brush.

Eventually, it started to sprinkle, so I packed up my gear and started making my way back to the plane. As I got higher on the moraine, I saw an orange tinge in the light up in the sky to the northwest, which is where the sun was about to set.

My heart started to race, because I suddenly had a feeling that the light was pretty good on the other side of the hill.

I quickened my pace and climbed higher, and when I reached the crest of the moraine, I looked out and saw this:

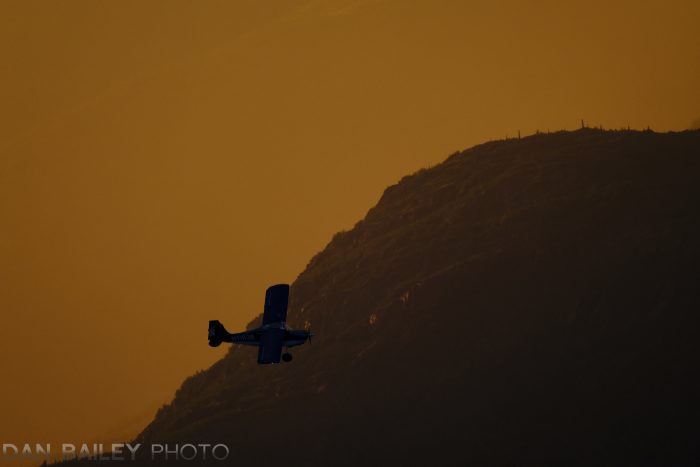
I dropped the pack and pulled out my Fujifilm X-T2 (which are currently $500 off), and was suddenly glad I had brought along the XF100-400 super telephoto zoom lens. As soon as I clicked it on the camera, I heard another airplane coming in low right behind me. Instinctively, I reached down and quickly configured the camera for shooting fast moving subjects, just in time to grab a few frames of the Citabria as it flew right overhead and circled around in front of the mountains.

It was such an amazing scene that I wished he’d done more than one pass. I only had a chance to grab a few frames, and then he was gone. No big dial, because I still had that orange light on the hillside, which was only getting stronger.

I shot a few different compositions, making good use of those bold Veliva colors, which has been my go-to color palette for scenes like this for 25 years. Another plane flew by a few minutes later, and although it wasn’t very close, I was still able to capture him high in the sky above the orange landscape.

The light kept going for a few more minutes before it begun to fade from the distant hillside. It was the kind of light that we outdoor photographers dream about.

The show ended with a brilliant ray above the ridge on the other side of the valley. I shot until it too faded, then walked back to my little Cessna, elated that I finally had the evening I’ve been waiting for.

I hope you get some truly magical light soon, wherever you are. Have a great weekend.

August 23, 2018
See this post
Finally, The Evening I’ve Been Waiting For…

The May 2018 firmware updates added the new Focus Bracketing feature to the Fujifilm X-T2 (which is currently $500 off) and X-H1. First introduced in the GFX earlier this year, and [now included in the X-T3 and X-T30], Focus Bracketing has been one of the most talked about and alas, one of the most confusing features since it was released into the two top shelf X Series models.

I’ve gotten quite a few emails from readers asking how it works. I finally had a chance to try it out myself, so in this post, I’ll give you the basic rundown on how the Fuji’s Focus Bracketing feature actually works and how to put it to practical use in your own photography.

First, a little background. Focus Stacking, is often used in closeup and macro photography, when you’re already dealing with extremely shallow depths of field. That said, you can get great results when shooting traditional landscapes at more “regular distances.” Either way, the technique involves creating a series of photos shot at slightly different focus distances, then combining, or stacking them in Photoshop or Lightroom.

All of the extremely narrow focus slices are added together, which results in an final image that a much wider depth of field than you’d normally be able to get with a single frame. The restyle can be pretty dramatic. Even if you don’t have an X-T2, X-H1 or GFX, you can still do Focus Stacking, you just need to put your camera on a tripod and perform your focus adjustments manually.

Step 1: Set Up The Focus Bracketing Menu

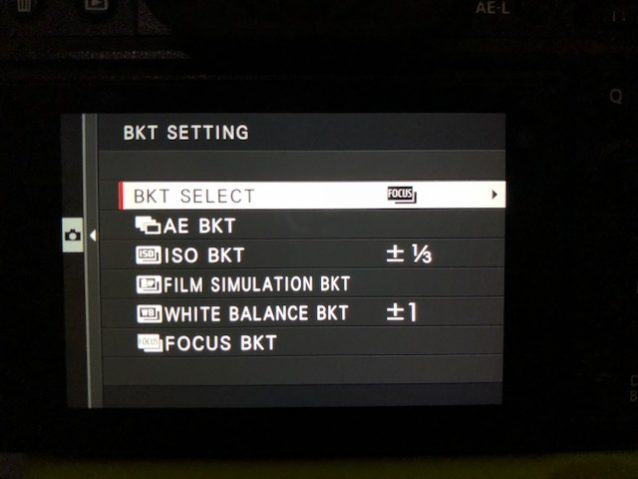
The new Focus Bracketing menu lives inside the Bracketing Menu. The easiest way to get there is to set the DRIVE DIAL to BKT and press the Fn Button that’s tied to your DRIVE SETTINGS. On both the X-T2 and X-H1, the default setting has the front Fn button assigned to DRIVE, although you can change this to any Fn button if you like. Otherwise, you can access DRIVE SETTINGS at the top of the SHOOTING SETTINGS MENU.

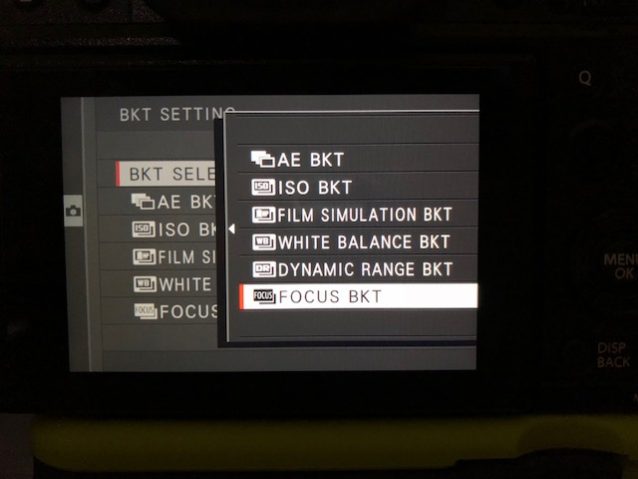
Once you bring up your DRIVE SETTINGS menu, the first step is to go to BKT SETTING —> BKT SELECT —> and choose FOCUS BKT at the bottom of the menu. This is actually the most important step; you need to select which kind of BKT you’ll be doing. It’s easy to miss this step.

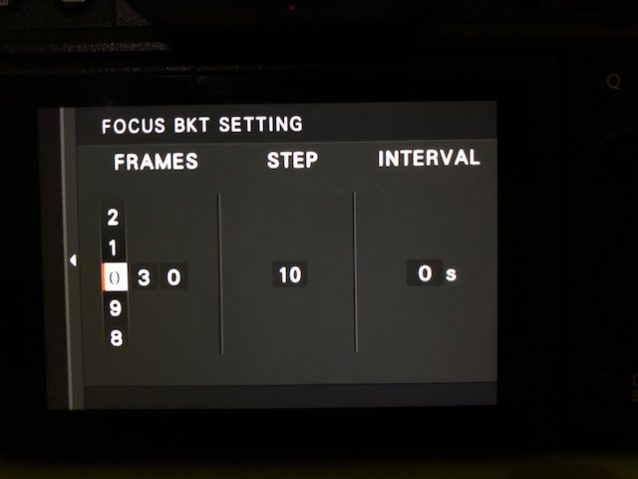
Once you choose FOCUS BKT, hit OK and you’ll be taken to the FOCUS BKT SETTINGS page. Here you choose the number of frames you’ll shoot, your STEP, which corresponds to the difference in focus distance for each shot, and your INTERVAL, which is how many seconds between each frame.

For FRAMES, I’ve experimented with anywhere between 10-60. For the example above, I had it set to capture 50 frames. If you have very shallow subject matter, you can easily get by with less. If you’re trying to show an extremely wide range of focus, you might want to choose a higher number of frames. The max setting is 999 frames. I can’t imagine how long it would take to load 999 images into Photoshop.

With regards to the STEP setting, 1 is the smallest focus distance difference between frames, from front to back, and 10 is the highest. It’s not an exact number, though. Fujifilm hasn’t provided any specifics on how far this is, so you’ll have to experiment and see what works for you. In my own tests, I’ve tried 3, 5 and 10, and I’ve found that 10 seems to work pretty well. For extreme macro, you may want to use a smaller number.

For INTERVAL, I just use 0 and let the camera fire the entire series in quick succession.

The nice thing is that once you’ve set up your Focus Bracketing preferences, and as long as the DRIVE dial is set to BKT, you don’t have to go through all the other steps again. The next time you hit the DRIVE button, you’ll be taken right to the FOCUS BKT SETTINGS Page. Unless, of course, you choose a different type of bracketing.

Step 2: Take Your Shots

Once you have your BKT SETTINGS all configured the way you want them, it’s time to shoot your series. You’ll probably want to use a tripod, and you probably want to get as close as possible with your lens. You can use any lens, but for super close macro, I recommend using a dedicated macro lens like the XF80mm f/2 Macro lens, or XF60mm Macro lens. This will give you the best edge to edge sharpness.

Another alternative is to use one of the Fuji MCEX extension tubes. I use the MCEX-11 with a variety of lenses. The general rule is that the wider the lens, the closer you can get, which means the more shallow your depth of field will be.

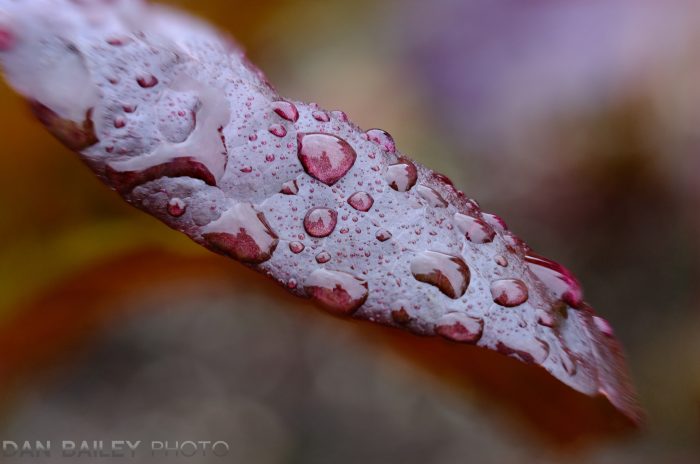
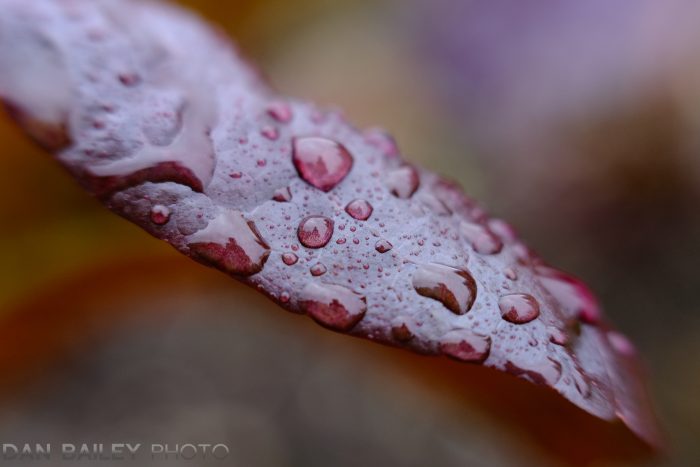
For this “Red Lettuce” image, I used the MCEX-11 in conjunction with the XF35mm f/2 lens. One of my favorite lenses for macro with the MCEX tube is the XF23mm f1.4, although I’ve used quite a few of my lenses with the MCEX, including the XF100-400. The nice thing about using long lenses, is that you have an easier working distance and increased DOF.

The technique for shooting is to set your focus on the closest part of the image you want to be sharp. For this example, I started with the very front edge of the lettuce leaf, which you can see in the shot above.

You can either focus manually or use autofocus to set your focus point. If you’re using AF, I recommend using Single AF and setting the green focus box to a relatively small point for the most accuracy. If you’re focusing manually, you’ll want to use FOCUS CHECK so you can zoom in and make sure you’re hitting the right spot. After you’ve got your focus nailed, you can go ahead and press the shutter. The camera will shoot the number of frames in the interval you specified.

When shooting macro, I usually set the camera to ELECTRONIC SHUTTER. This helps prevent any camera shake that may occur from the shutter slamming up and down inside the body. With the ES, there are no moving components during capture, it’s just individual pixels turning on and off.

The last thing to do be fore you hit the shutter is to pray that the wind doesn’t blow during your series. This is easily the most frustrating thing about shooting macro. It’s nearly impossible to shoot closeups if there’s even a slight breeze.

Step 3: Stack Your Frames

Once you’ve got all your shots, it’s time to combine them into a single image. The most common way is to select all of the frames you want to use and open them in Photoshop. (If you don’t use Photoshop, there are other programs that do Focus Stacking, including Affinity Photo, HeliconSoft, Zerene Stacker

Once they’re loaded, you need to set it up so that each frame is a separate layer. Go to FILE —> SCRIPTS —> Load Files into Stack… If you’re opening from Lightroom, you can bypass this by selecting all your images in LR, then doing EDIT —> Open as Layers in Photoshop…

Once they’re all loaded, you’ll have a single, multi-layered image. Now, you choose EDIT —> Auto Align Layers… This step automatically adjusts all your frames so that they match with each other, in case there are slight differences between frames. Like if the a slight breeze blew while you were right in the middle of shooting. That happened with my example, and it turned out OK.

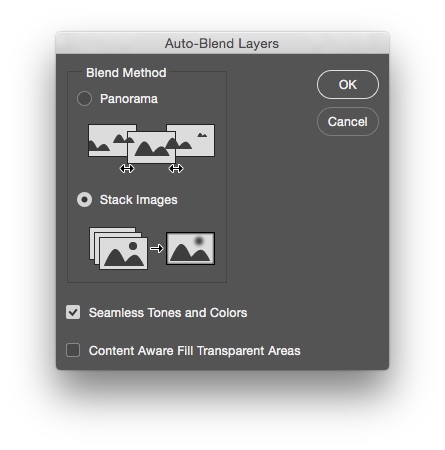
Next step is to do EDIT —> Auto-Blend Layers…, making sure you have the “Stack Images” box is checked. Hit OK and wait for it to finish.

As with the above, step, it can take a few minutes if you’re running a lot of images.

When it’s done rendering, you’ll have your stacked image, with all the focus layers combined. Chances are, it will look pretty cool.

You may need to do a slight crop to clean up the edges from when it auto-aligned. After that, you can save or export your final, finished, stacked image.

Finished, Stacked Image!

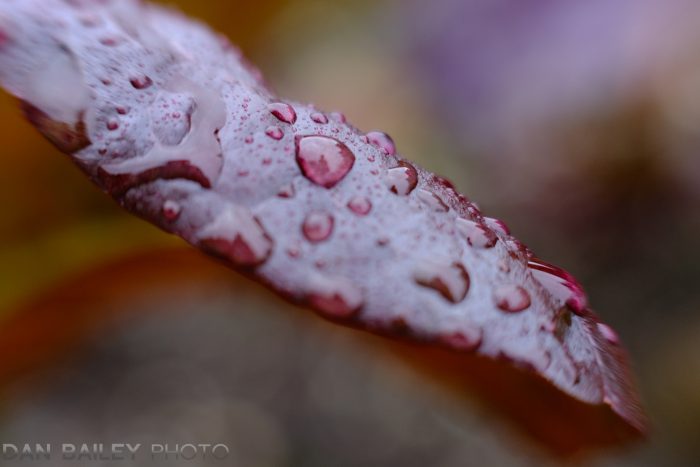
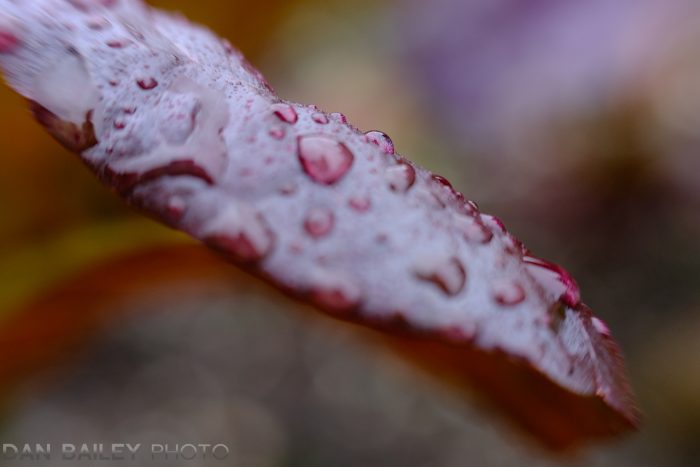
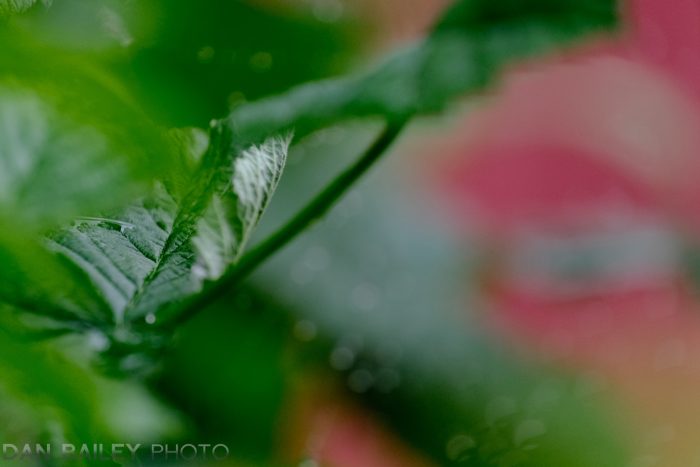
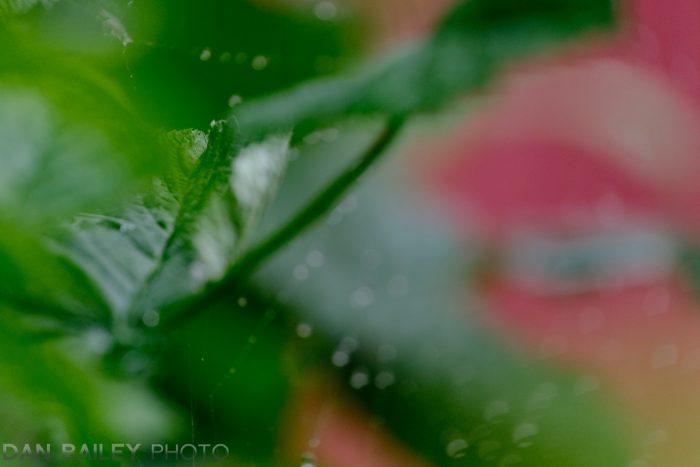
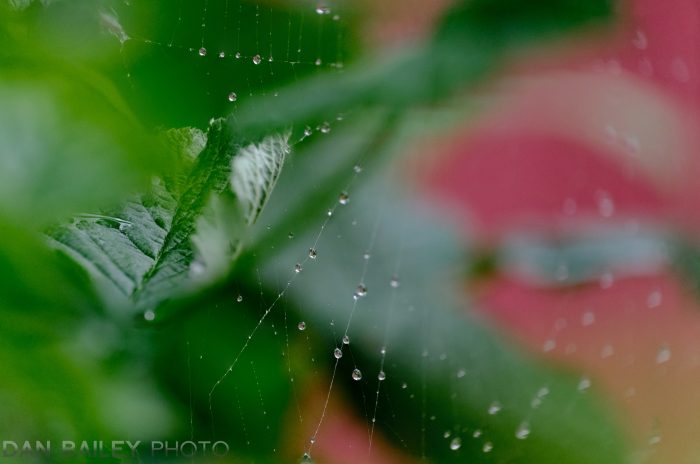
Here’s another example below. This was shot with the XF100-400mm lens and MCEX-11. It was made from 60 frames, set at STEP of 10 and INTERVAL of 0, using a 2-second self timer and the Electronic Shutter. Fist, three random images from my series, showing some of the different focus points used, and then the fourth, final stacked image.

Once you get the hang of it, Focus Stacking is pretty easy to do. The new Focus Bracketing feature on the two high end Fuji’s makes it even easier. You probably won’t use it all the time, but it can be a fun technique that opens up a whole new world of photography for you. I guarantee, once you open this box, you’ll start scanning your world for potential macro scenes. You might start seeing your subject matter in a whole new way!

Have fun!

Final Stacked Image!


August 16, 2018
See this post
How to Use Fujifilm’s New Focus Bracketing Feature

The Fujifilm X Series cameras have a variety of creative controls that allow you to vary the look of your subjects, right “in-camera.” This allows you to explore your creativity with a variety of different image styles right there on the spot without having to go process your photos later.

The huge benefit of shooting in this style is that you can walk, ride, or sometimes fly away from your scenes with finished images that match your own personal artistic vision of the subject. In my mind, this is often better than walking with a bunch of files that all but guarantee you more time at the computer.

Don’t you spend enough time at your computer already? I know I do, which is one reason I try to get it right “in-camera” as often as possible. Plus I like the challenge and mentality of shooting like film.

It’s often better to go with your on-the-spot creative ideas, rather than deferring a significant aspect of your creative process until later, when you’re far removed from the experiences and emotions you felt when you stood there watching the light and actually captured the photo.

Between all the different Film Simulations, the in-camera processing tools, like the Highlight & Shadow Tone controls, the Custom Settings, and the super fun Advanced Filters, you have a lot of options to vary and refine the look of your images without the need for additional processing.

Whether you just want to make slight tonal adjustments to your scene or experiment with radically different looks, the X Series has you covered. Let’s explore a few possible ways you can use these tools:

Peak 7460, Chugach Mountains, Alaska

Peak 7460 is one of my favorite mountains to photograph in the Chugach. I’ve captured it from various vantage points during numerous aerial photography flights. This past March, I flew closer than I ever had before, which gave me a very dramatic view of this impressive peak and the knife edge ridge that leads up to the summit.

I already had amazing sunset light, so I was doing my normal method of shooting Velvia JPEGs on my X-T2. All of my aerials are straight JPEGs, because with this kind of rich, direct sunset light, the camera is able to nail all of my tones. Also, and this is the main reason, I absolutely LOVE the vivid and dramatic color profile of Fuji’s storied Velvia, and I’d never be able to match it 100% in any software.

However, if I do want different looks, I can always vary them right in-camera. It only takes a few seconds to switch the camera from one setting to another, so during one particular pass, I shot one using the Velvia Film Sim, one using the ACROS Film Sim, and a third with the camera set to “Miniature Mode,” which is one of the Adv. Filters.

The result is that I get to fly away with a trio of very different looks, all of which I love, and which I feel need no additional processing. Mission accomplished.

Cessna on the Gravel Bar

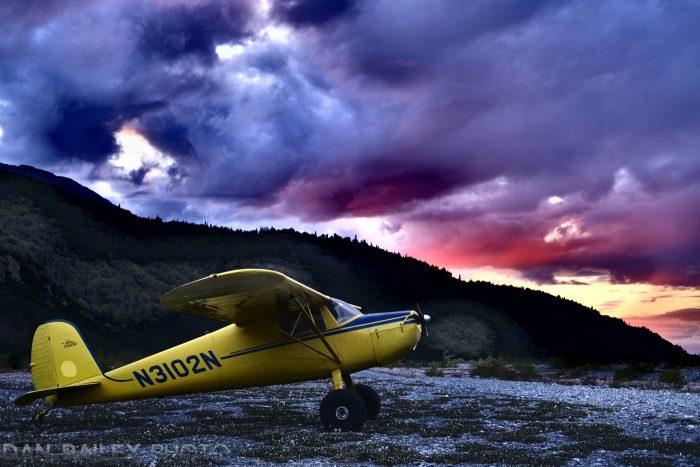
Here’s another example: My little yellow Cessna 120 in all her glory, parked on the gravel bar of the Knik River, about 40 miles east of Anchorage.

For this set, I shot four different images, just to illustrate the variety of looks you can get using the Film Simulations and a very simple adjustment found inside the Q Menu. The first photo is straight Velvia, the second is using the Classic Chrome Film Sim, the third is Classic Chrome with a Shadow Tone adjustment of +2 and the fourth is shot using Miniature Mode.

Sure, you could achieve these kinds of different looks by shooting a RAW photo and then adjusting the exposure and vibrance sliders in Lightroom, Photoshop or even Luminar. However, getting them in-camera saves you time later and it keeps you creative ideas right there in the moment.

Shot using the Velvia Film Simulation
Shot using the Classic Chrome Film Simulation
Shot with Classic Chrome and +2 Shadow Tone
Shot using the “Miniature Mode” Adv. Filter

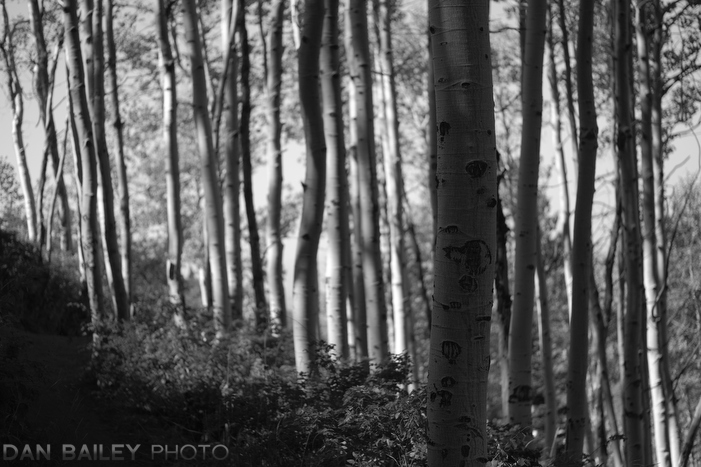
Aspen Forest, Wasatch Mountains, Utah

Last week I went down to Salt Lake City to teach classes at Pictureline. Since I was there for a few days, I took my mountain bike with me and did a few rides in the Wasatch Mountains in my down time.

During one ride, I found myself deep inside a picturesque aspen forest late in the afternoon. Shooting in the forest on sunny days can be tricky, since there’s so much contrast. In fact, this might usually be a time when you’d opt to shoot RAW, so you can try to reign in the extreme highlights and shadows.

You can get around this by using the Highlight and Shadow Tone controls in the X Series cameras, which are found inside the Q Menu. These controls allow you to rescue some of those difficult tones, which in many cases, might be all you need to walk away with a workable shot. Or, as we saw in the previous scene, you can use them to create more contrast in your shot.

Whether you’re making subtle changes or going in a totally new direction, between the different Film Simulations and the H/S Tone controls, you have some very powerful tools at your disposal that can help you control the scene and achieve the look you’re going for.

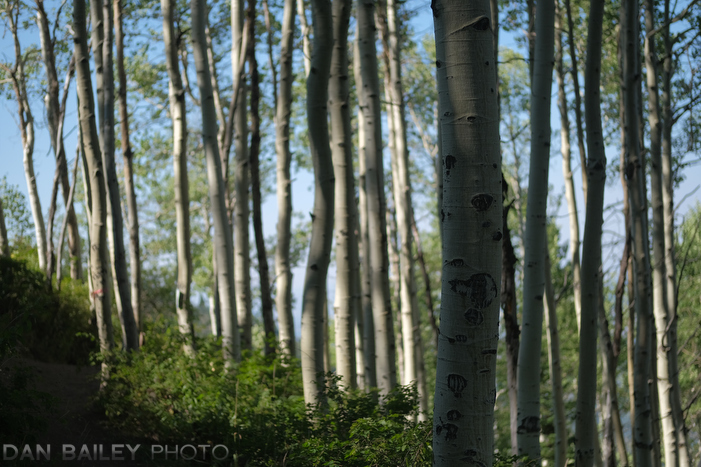
In this first shot, I used PRO Neg Std., which has the lowest contrast of all the Fuji Film Simulations. I then reduced both the Highlights and Shadows to reduce contrast even more, and boosted the Color control to bring the vibrance of the scene back up.

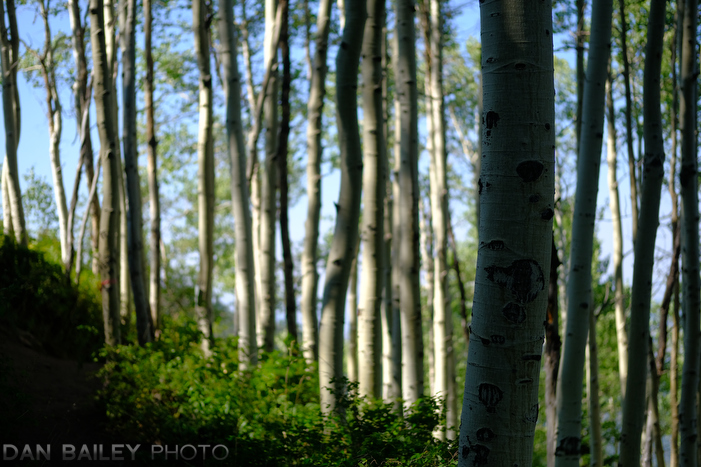
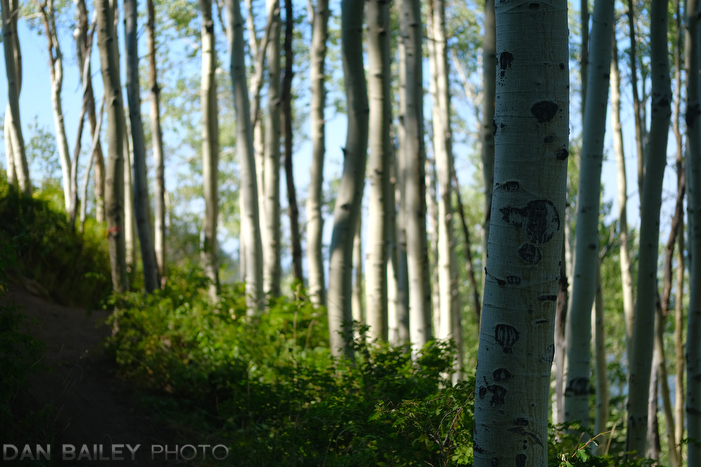
The other examples show the wide variation that’s possible for adjusting or changing the look of the scene. You can make subtle moves, or entirely change the look of the scene. When using the H/T Tone and Color controls, it’s important to remember that a “+” adjustment always gives you more contrast, while a “-” adjustment always gives you less contrast. 

PRO Neg Std. Film Simulation, with -2 H-Tone, -2 S-Tone and +4 Color
Velvia Film Sim, with -2 S-Tone
ASTIA Film Sim, with -2 S-Tone and +4 Color
ACROS Film Sim, with -2 H-Tone and -2 S-Tone

I encourage you to play around with some of the different controls of your Fuji and see if they help you better nail your scenes as you see them in your mind. At the very least, they can offer you a wide array of creative possibilities.

For more X Series tips and techniques like this, check out my bestselling ebook, X SERIES UNLIMITED, or the new paperback version, which was recently published by Rocky Nook.

August 13, 2018
See this post
Playing With The Creative Controls On the Fujifilm Cameras

I’m excited to be one of the guests on the latest B&H Photography Podcast! The title of this episode is Why Do You Love Photography, and it’s timed to coincide with the FUJIFILM X-H1 Sweepstakes they’re running right now.

In this week’s podcast, Alan and Jason, who are the hosts of the show, talk to three Fujifilm X-Photographers: street shooter, author and podcaster Valérie Jardin, landscape photographer Bryan Minear, who is one of my favorite shooters today, and me.

Each of us shares our own insight about the sensation, joy, satisfaction, challenge and love of photographing, as we partake in our endless search for light, subject matter and compelling moments.

I loved talking with the hosts about my love affair with photography and how it shares similarities with some of my other passions like music and cycling. They asked some great questions and it was fun to contribute my thoughts and ideas about my style and what the craft of photography means to me.

Thanks to B&H Photo for having me on the show, it was a great honor to participate with two other awesome photographers. You can listen below, or find the episode on Apple iTunes.

Also, take advantage of the X-H1 Sweepstakes; it’s going on through August 15. The grand prize is a Fujifilm X-H1 and XF 35mm f/2 WR lens. Second prize is a Fujifilm X-E3 and XF35mm f/2 WR lens. Click here to see how you can enter to win.

August 3, 2018
See this post
I’m a Guest on the B&H Photography Podcast This Week!

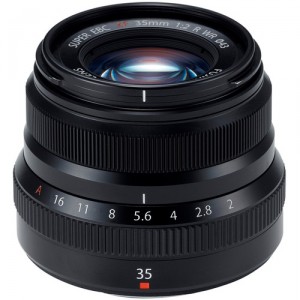
A little over a year ago, I wrote a blog post called Why I Love the Sweet Little Fujifilm XF 35mm f/2 WR lens, where I extolled my extreme fondness for this small, sexy weather sealed prime. Designed to resemble Leica’s Summicron 50mm f/2, Fuji’s 35mm f/2 is great take on the ultra classic “Nifty Fifty.”

Back in the day, long before digital photography and the advent of “kit lenses,” the unassuming 50 used to be the most popular lens. A 50 was most likely the lens you bought with your first camera, (it was my first lens) and although it’s not as cool as an ultra wide or a long telephoto, there’s something special about that normal 50mm focal length.

It’s called “normal” because the view angle of a full frame 50mm (35mm for APS-C sensors) closely matches the normal non-periferal view of the human eye. So, when you use a normal lens, you’re essentially capturing what you see with regards to focal length and depth of field.

Up close, it’s quite shallow, just like your eyes, but when you move out to any distance, depth of field pretty much drops to infinity. It’s never a factor when you get past about 20-30 feet.

I’ve been using the Fujifilm XF 35mm f/2 WR lens for nearly two years now, and my excitement for this awesome little lens has not faded one bit. It pretty much goes everywhere with me.

I love the small, sexy form factor, the fast f/2 aperture, and the fact that it’s weather sealed. I love how it looks so classic (there’s that word again…) on my X-T2, but most importably, I love the images I make with it.

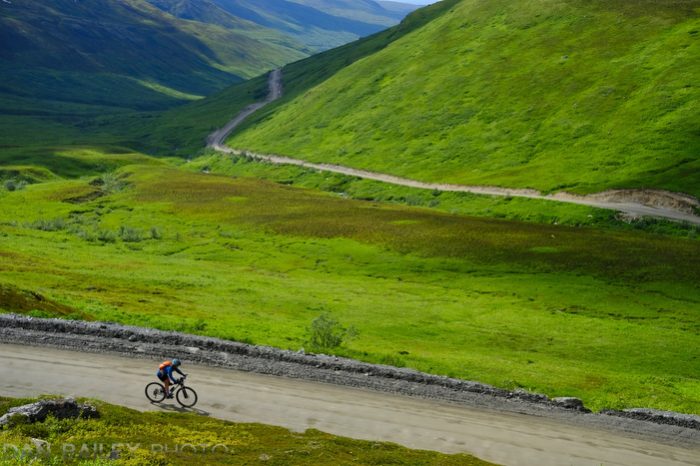
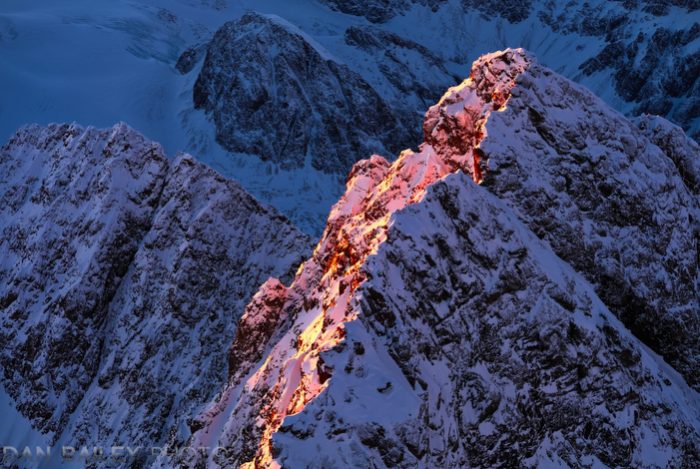
I use my 35 f/2 for just about everything – landscapes, travel, details, people, aerials, and even some action and sports. I find it to be an incredibly versatile lens, and of all the Fuji lenses I own, this one is in my bag more often than any other.

Here’s a selection of images I’ve made during the past few months with my 35 f/2. Hopefully this will give you an idea of just how capable this awesome little lens is. If you’re in the market for a do-anyting lens, or if you’re looking for a small prime for a “walk around” or travel lens, or if you simply want a great little piece of glass to ramp up your photographic inspiration, I cannot recommend this lens enough to all Fuji users.

profile-pic

@Danbaileyphoto @FujifilmX_US Couldn't agree more! This has been my favorite lens pretty much ever since I first attached it to my XT1!

Kyle Wurtz

[iframe]<iframe width=”120″ scrolling=”no” height=”240″ frameborder=”0″ style=”border:none;” border=”0″ src=”http://mer54715.datafeedfile.com/widget/aff_widget_prdt_generate-2.0.php?aff_num=6746&aff_net=1&widget_num=6949&sid=” marginheight=”0″ marginwidth=”0″></iframe><iframe style=”width:120px;height:240px;” marginwidth=”0″ marginheight=”0″ scrolling=”no” frameborder=”0″ src=”//ws-na.amazon-adsystem.com/widgets/q?ServiceVersion=20070822&OneJS=1&Operation=GetAdHtml&MarketPlace=US&source=ss&ref=ss_til&ad_type=product_link&tracking_id=danhbaisadvph-20&marketplace=amazon&region=US&placement=B016S28I4S&asins=B016S28I4S&linkId=AMVBUCWOXZ5BCM2B&show_border=true&link_opens_in_new_window=true”>
</iframe><iframe style=”width:120px;height:240px;” marginwidth=”0″ marginheight=”0″ scrolling=”no” frameborder=”0″ src=”//ws-eu.amazon-adsystem.com/widgets/q?ServiceVersion=20070822&OneJS=1&Operation=GetAdHtml&MarketPlace=GB&source=ss&ref=as_ss_li_til&ad_type=product_link&tracking_id=danbaiphoblo-21&marketplace=amazon&region=GB&placement=B016XNJ2JM&asins=B016XNJ2JM&linkId=10230e6a3946d97c2de5a2a4d4e2484e&show_border=true&link_opens_in_new_window=true”></iframe>[/iframe]
Support this site. Buying anything through these links helps support this blog and allows me to keep providing you with this content. It’s like giving my site a virtual thumbs up and it doesn’t cost you a cent.

July 30, 2018
See this post
More Reasons Why I Love the Fujifilm XF 35mm f/2 Lens

It’s summertime, and we all know that summer is the time for adventure and lots of outdoor sports, right? Ok, so maybe there are lots of good sports to photograph in the spring and fall too. And of course, there’s snow biking and skiing in winter…

I guess what I mean to say is that any time of year is a great time for shooting action. In today’s post, I thought I’d give you a quick primer on how to approach trying to capture fast moving subjects. Keep in mind, these tips all apply, no matter if you shoot mountain biking, snowboarding, flying birds, (also known as FB’s), fleeing wilderbeasts, your kid who’s about to score the winning goal, your hyperactive grandchildren, or your new puppy.

After all, action is action, and the same camera and photography tips apply, regardless of what happens to be moving in front of you.

My Fast Action Camera Workflow

Although you don’t need top-of-the-line camera equipment to make jaw-dropping action photos, in this genre of photography, the gear does make a difference.

Higher end cameras and lenses have faster, more precise autofocus motors, more advanced AF algorithms and higher frame rates. In addition, faster lenses let in more light, which lets you use faster shutter speeds without having to crank up the ISO dial when the light gets dim.

That said, here are the four steps that will set your camera up for shooting fast action. They’re universal steps, but since every camera has a slightly different layout, you may need to refer to your manual to find the specific controls to set these parameters.

Practice these steps so you can do them by feel in about three seconds with your eyes closed. That’s what it will feel like when some amazing moment is unfolding right in front of you. If you have this stuff down, you shouldn’t even have to think. It should be second nature.

Rebecca Rusch, the Queen of Pain.

1. Set Your AF Selector Switch to AF-C

On many cameras, (except for Canons) you’ll find the AF Selector switch on the front left, and there are usually three choices: S, C and M, for Single Servo, Continuous Servo and Manual Focus. You want C, which puts your camera into Continuous-Servo AF Mode. If you don’t want to sound too nerdy, you can just call it Continuous, or AF-C. Also, it doesn’t matter if you like to use back button focus or do it the regular way, you’ll still want to be in AF-C.

AF-C mode sets it up to track moving subjects, and it’s optimized for the predictive AF algorithms that are programmed into your camera. Doesn’t matter what you’re shooting. If it’s moving, and especially if it’s moving directly towards or away from you, this mode is essential to helping you nail it. (Note: On Canon cameras, AF-C is called AI-SERVO mode. This is changed via the top deck LCD or inside the menus.)

2. Set Your Drive Control to CH

Often times, the key to grabbing that one awesome moment is to shoot a quick burst as your subject is flying by. It can be hard to know just when the exact right moment is when the entire scene is exploding in front of you, and it’s even more challenging to time it perfectly with your finger.

Shooting a sequence at 6, 8 or 10 fps will help you grab that perfect moment, even though you might not recognize it right when it’s happening. Sometimes you won’t know until you review the individual shots later.

Most cameras have the Drive Dial right on the top left. Find it with your finger and learn how to set it to CH without looking. If your camera requires you to go into the menu to access Drive Mode, learn where that is, and if possible, set it to a quick menu or a Function button.

3. Set Your Focus Mode/Pattern to Zone or Tracking

Even though your camera might be set up for tracking, you need to make sure your autofocus mode is set for tracking as well. Most cameras have a variety of autofocus patterns, so you probably want to refer to your manual to see which one will work best of the kind of subject you’re trying to capture.

With the Fujifilm X Series camera, I use Zone-AF as my default mode when shooting any kind of action. I prefer this mode over WIDE TRACKING, because it allows me to change the size of the zone to better match my subject matter.

With the Nikon cameras, you have Dynamic Area AF, which is similar to Zone-AF on the Fujis. You set the point where your subject starts, and it will continue to track, even the subject moves unpredictably around the frame, or briefly leaves that selected area. Auto Area on the Nikons is like Full auto autofocus. If you don’t know where the subjects will enter/move around the frame, then this is a good choice.

3-D Tracking on the Nikons allows you to change your composition and still keep your subjects in focus. It’s similar to selecting the largest zone in Zone-AF on the Fujis.

If you use Canon, I recommend using either Zone AF, Large Zone AF. You should experiment to see which of the two modes work best in different situations.

Some higher end cameras have an AF-C Custom Settings menu. This allows you to further optimize the cameras autofocus system for the particular type of subject movement you’re trying to capture. See my primer on using the AF C Custom Settings on the Fujifilm cameras here.

4. Set Your Desired Shutter Speed

Once you have your AF system set up and your camera set to Continuous High shooting mode, the last thing you’ll need to set is your shutter speed.

Of course, your desired shutter speed depends on a number of factors, including how fast your subject is moving, the focal length and speed of your lens, and what kind of creative look you’re going for. Do you hope to get a razor sharp subject in the frame, or do you want to capture the action with a motion blur technique?

Depending on these factors, you’ll probably need to make an adjustment to your aperture (open up for a fast shutter speed, stop all the way down for a slower shutter speed), and you may want to change your ISO to compensate for the light or for the speed of your lens.

With this in mind, STEP 4 might actually be a multi-threaded task, which is why it’s so vital to set the first three as quickly as possible. In some situations, you might decide to make this your STEP 1. If you already know what kind of look you’re going for, or how you’ll compensate for your light and equipment, it might make sense to get this stuff out of the way first.

If you have an inkling you’ll be shooting some action in the next few minutes, you can go ahead and set your ideal shutter speed as you’re walking up to your scene. This is where anticipation and a little bit of forethought can help you be a much more proficient photographer.

OK, You’re Ready to Shoot!!

Now that you have your camera set, you’re ready to bring your camera up to your eye and nail some great action shots… that is, after you anticipate the potential movement of your subject, gauge the light, search for the right background, find the best vantage point, decide which lens you’re going to use…

Oh sorry, I didn’t mean to overwhelm you there. There are a lot of creative methods that go into action and sports photography, (here are 3 simple tips to get you started), but if you can get these four steps out of the way first, that gives you more time to focus on the rest of the process.

PRACTICE, PRACTICE, PRACTICE

No matter what, the best way to be a good action shooter is to practice. Shooting on a regular basis and becoming more familiar you become with your gear is the key to success. Technical ability and confidence comes from repetition, so get out there and photograph some action as often as you can.

Even if you’re just fooling around and trying to get a sharp photo of your puppy or if you’re walking around with your camera on lunch break, practice my Action Photography Workflow until it becomes second nature.

Further Reading

If you’re a Fuji shooter, you can get even more in-depth action tips and learn how to optimize the settings on your X Series camera with my bestselling eBook X SERIES UNLIMITED. (You can also order the paperback version of X SERIES UNLIMITED here, or grab it on Amazon.)

You can also check out my Behind The Action eBook, where I take you behind the scenes and walk you through the specific steps and technique I used to create 12 different action photos. I’ll even give you a special discount code. Order the eBook here and use coupon code BEHIND20, and you’ll get a 20% discount on the book.

I’ve also got my book, Outdoor Action and Adventure Photography, which details everything I know about shooting adventure and action subjects. Even if you don’t consider yourself an “action shooter,” the information in this book will help you become a more efficient and proficient photographer.

July 23, 2018
See this post
4 Essential Camera Tips for Shooting Fast Action Photography

NOTE: This sale has ended, but if you order here and use discount code DANBAILEY, you can still save $10 on Luminar and get the upcoming Catalog Module for free when it’s released later this year.

Skylum Software is running a special flash sale on Luminar right now. For the next 4 days you can get Luminar 2018 for only $49, which is the lowest price it’s ever been offered. (Only $39 to upgrade from the original version of Luminar.)

Launched back in the fall of 2016, Luminar is a powerful photo editing program offers a wide range of tools, presets, smart filters, layers, masking, customizable workspaces and a gorgeous, intuitive and very easy-to-use interface.

Built with the mindset that photo editing should be a fun, creative task, Luminar offers a distinct alternative for people who are frustrated with Adobe Lightroom and Photoshop, or who just don’t want to pay for an Adobe Subscription.

Since it was first introduced, Luminar has won many “Best Of” software awards, and it’s seen numerous updates, which have improved the overall speed and performance of the program by considerable amounts. Luminar 2018 is the current version, and in addition to the massive number of upgrades, new tools, faster RAW rendering, Luminar now fully supports Windows.

As of right now, the Windows version has mostly caught up with the Mac version. The only thing missing is support for a couple of 3rd party extensions, but those are coming soon.

Luminar’s Upcoming Catalog Module

Skylum has been working furiously on a brand new Catalog Module, which will be brought to Luminar 2018 later this year. This has been the topic of much speculation ever since it was announced last fall, and people are getting pretty antsy to see it released.

Scott Bourne, the President of Skylum Software, has stated that as soon as the catalog module is released, Luminar’s price will likely increase to reflect this major new feature. Everyone who bought or owns the program before that date will receive the catalog module for free.

Even if you’re not interested in the catalog module and you just want to use Luminar as standalone processor or a plugin for Lightroom, this means you’ll never get a better price on the program than you will with this current 4-Day deal.

I’ve talked with a few of the Luminar software engineers and their CEO about the catalog system, and I know they’re waiting to release it until they get it right. They’re building it from the ground up, and they want to make sure that it offers a fast, seamless way to organize your photos, and gives photographers a truly viable alternative to Lightroom.

The catalog module will be issued as a free update to Luminar 2018, so if you don’t already use Luminar 2018, you’ll want to take advantage of this special 4-day deal. This will give you the full version of Luminar at the best possible price, and it will lock you in to receive the free catalog update when it’s finally released.

As someone who’s used Lightroom for years, Luminar has now become my #1 photo editing program choice. I love how easy it is to use, and I love how it gives me options, no matter if I’m doing minor tweaks to my Fuji JPEGs, or if I’m processing RAW files.

If I want to go quick and easy, I can use the filters and presets and get a great looking image in a minute or two. Or, I can take advantage of the many powerful tools and go deeper with my processing. Both approaches will give you great looking photos and let you explore your photographic creativity in whatever way suits your style or mood.

You can check out my full review of Luminar 2018 here, and during the next four days, you can get the special $49 price on Luminar here and ensure that you get the catalog module for free when it’s released.

(Again, this sale has ended, but you use my special DANBAILEY coupon code to save $10 on Luminar, and you’ll still get the Catalog Module for free when it’s finally released.)

Here’s a video preview of the upcoming catalog system for Luminar.

July 19, 2018
See this post
Luminar 2018 Flash Sale – Save $20, 4 Days Only

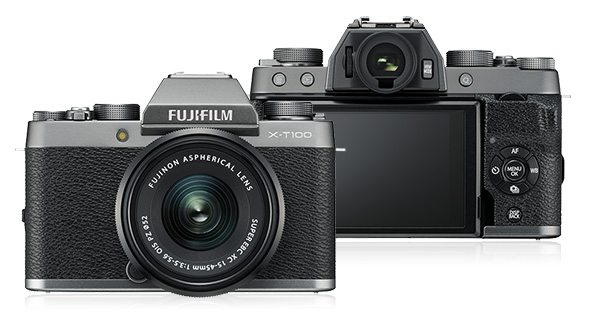
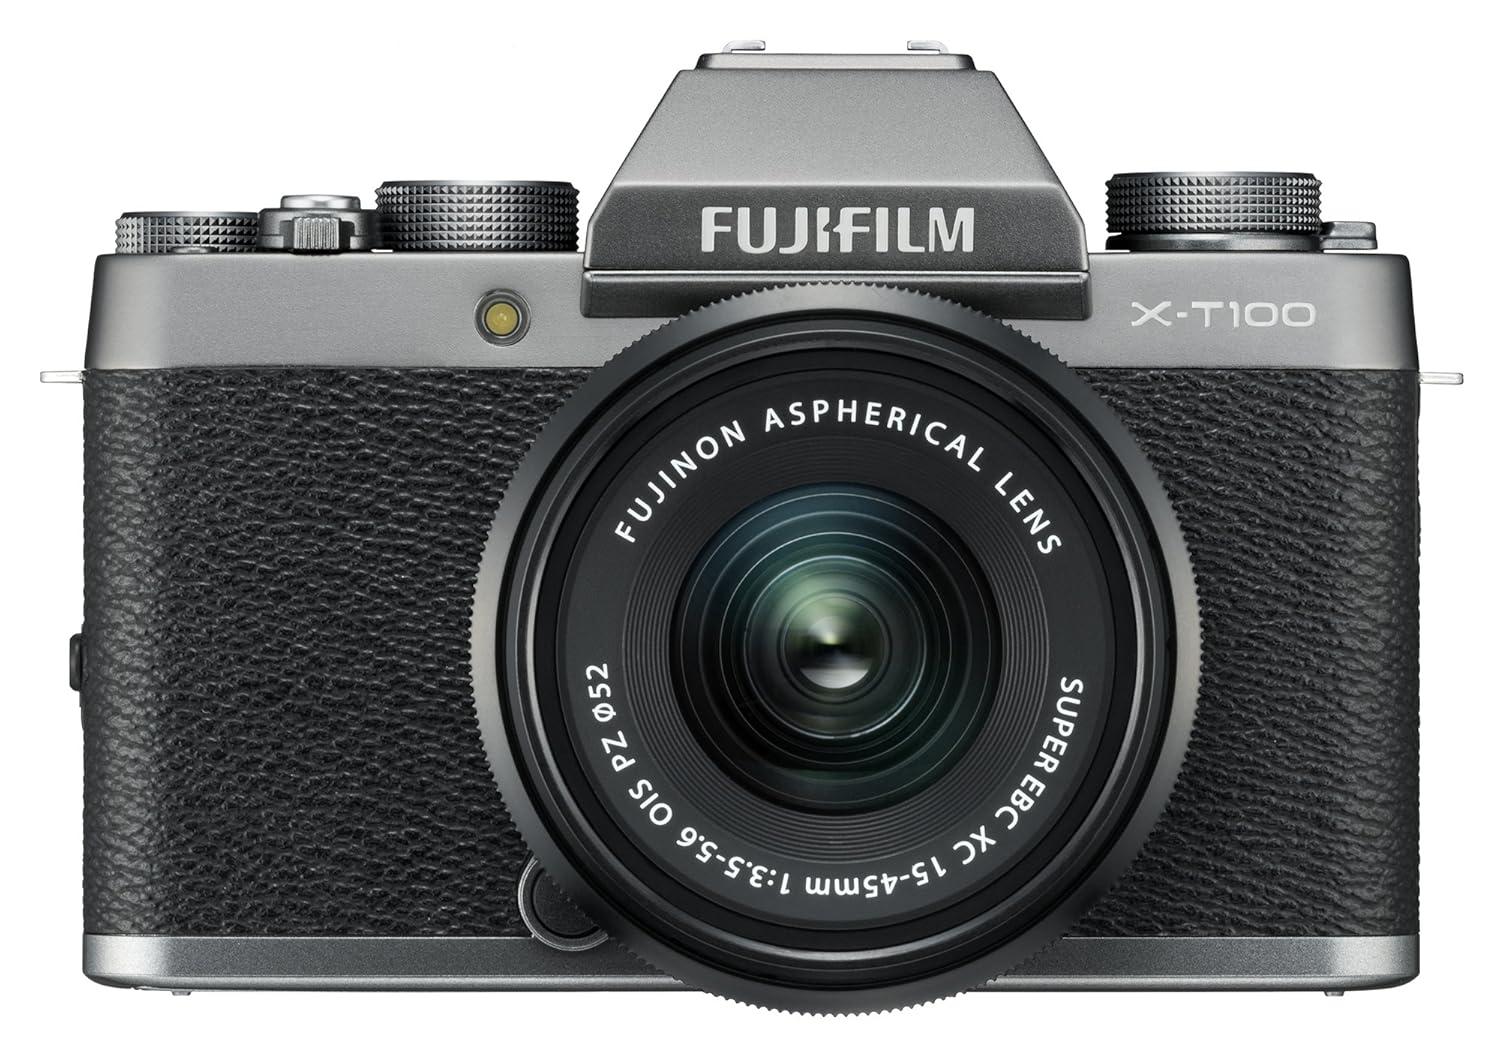
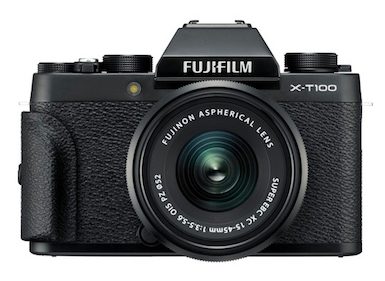
The Fuifilm X-T100 has just been released. It’s the new “entry level” X Series model, and it’s gotten a lot of favorable press, largely due to the fact that it’s a darling little camera. It also has many of the creative modes and features that are found on the higher end X Series cameras, which makes it the perfect introductory camera for budget minded photographers who want to get into the Fujifilm system.

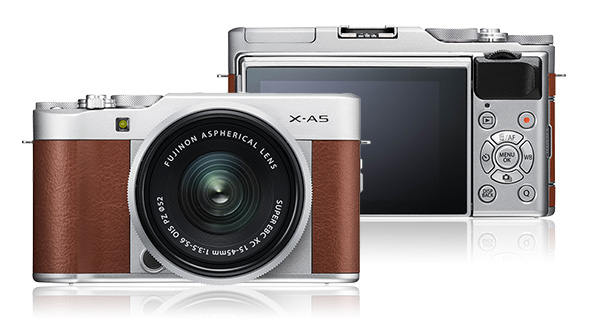
In my mind, the X-T100 is the camera that Fuji should have come out with a few years ago. I just think it offers photographers a better user experience than you get with the X-A5 and the previous X-A models

That said, the X-T100 and the X-A5 are very similar in many ways. In fact, with regards to specifications and performance, they’re nearly identical. So what’s different? What does the additional $100 get you on the X-T100?

Let’s do a quick comparison of the X-T100 vs. the X-A5 and see which one might be more suited to you.

Basic Specs

Both the X-A5 and the X-T100 have a 24.2 MP CMOS sensor that shoots 6000 x 4000 pixel images at full size, (they’re the only current models that don’t use the X-Trans sensor), they both feature 11 Film Simulation modes, (no ACROS), they both have focal plane and electric shutters that can expose from 30 seconds all they way up to 1/32,000 second and they have the same AF system, with Single, Zone AF and Wide Tracking.

Both cameras have a built-in pop up flash, EV+/- control of up to +/- 5 stops, ISO sensitivity from 100 all the way up to 12800, extendable to 51200, and both cameras have wi-fi and Bluetooth image transfer. In addition, both the X-A5 and the X-T100 have the same Fuji F mount, so they can use any of the Fujinon lenses, even the full-on pro glass like the 50-140 or the 100-400.

Both cameras have the ADV Filter modes, including Toy Camera, Miniature, Dynamic Tone and Partial Color, they have all the same exposure modes, including PSAM and Full Auto Scene Recognition, all th same menu settings and functions, and they can both shoot video in Full HD and 4K.

However, that’s where they break off. The X-T100 can record up to 30 minutes of 4K video at 3810 x 2160, and 30 minutes of Full HD at 1920 x 1080. The X-A5 can only record up to 5 minutes of 4K video, and only 14 minutes of continuous Full HD.

Performance

Both the X-T100 and the X-A5 have the same image processor, although it’s not the X Processor PRO chip that’s found in all the higher end models. However, the X-T100 is built with more internal memory, because not only can it record longer video clips, it has a larger buffer. 

This gives the X-T100 better continuous shooting performance. Where the X-A5 can capture about 10 frames at 6 fps and 50 frames at 3 fps, the X-T100 can capture about 26 continuous frames at 6 fps. In addition, there’s no limit to how many frames you can continuously capture at 3 fps. You can pretty much shoot until the card is full, or your battery runs out.

In addition, the X-T100 reportedly has a newly developed autofocus algorithm, which is said to offer faster, more precise focusing. Although I haven’t tried it yet, my guess is that autofocus on the X-T100 will be faster and more accurate than what the X-A5 offers.

With regards to image quality, both the X-A5 and the X-T100 will produce excellent photos. Since they utilize the same sensor and processor, there will be no difference in quality, color or sharpness. Slap one of the razor sharp Fuji primes on either body, and you’ll get even finer resolution and clarity.

Body Design

This is where the two cameras stand apart. Although the X-A5 is quite stylish with its rounded contours, silver chassis with either brown, black or pink faux leather trim, and the “selfie mode flip screen,” it still looks a little “consumer-ish.”

The X-T100, on the other hand, looks, feels and handles more like the upper level X Series models. The main difference is that the X-T100 has a viewfinder. The X-A5 doesn’t. Sure, this makes the X-A5 a little less compact, but I imagine that most photographers would find a an EVF to be a worthy tradeoff.

Being able to put the camera up to your eye and look through a viewfinder just feels more immersive. In addition, an EVF is much easier to see when you’re shooting in very bright sunlight.

Also, like the X-T20, the X-T100 has anodized aluminum top and bottom plates, and it comes with a small detachable grip that offers slightly better handling. The X-A5 also has a metal top plate, which is improved over the earlier X-A models.

LCD SCREEN

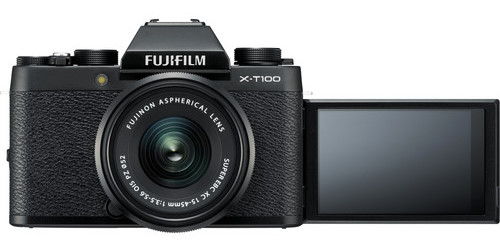
In addition, the X-T100 has a three-way tilting LCD screen that gives you much more flexibility when you’re shooing difficult angles. In fact, the screen on the X-T100 is much closer in design to the one used on the X-T2 than on the X-T20, which tilts, but doesn’t rotate.

DIALS

On the top deck, the X-A5 has an exposure mode dial and a “control dial,” which usually functions as an EV+/- dial. However, depending on what shooting mode you’re in, you also use this dial to choose your shutter speed, adjust Q Menu settings and scroll through pictures during Playback.

The X-T100 has the exact same setup on the left side of the top deck, but it also has an additional dial on the right side. This Fn (function) dial is used to control any number of shooting parameters, again depending on your currently selected shooting mode.

Or, you can chose from any one of 18 different functions to control with this dial, including film simulation and ISO. This lets you customize the operation of the camera to match to your own shooting style and subject matter.

Overall: X-T100 For the Win.

While the X-A5 is a decent little camera that will take great pictures, the X-T100 is just a better camera. The overall SLR-style body design, viewfinder, tilting/rotating LCD screen and the additional Function dial will likely appeal to most enthusiastic photographers over the more “consumer-ish” X-A5.

Add in the updated AF algorithms and larger buffer and this makes even easier to justify the extra hundred dollar price tag of the X-T100. It also makes the X-T100 a much more appealing choice as a backup or second camera alongside one of the higher end models.

Of course, if you already have some Fuji lenses, there’s no need to buy the kit version. You could save the $100, pick up the body only and have a sweet little backup camera to use with your existing glass.

Bottom line: If you’re looking for a serious budget X Series camera, whether you’re just getting into the system, or if you want an additional X Series body, or if you just want a great interchangeable lens camera at a very good price, the X-T100 is your best option out there right now. 

[iframe]<iframe width=”468″ scrolling=”no” height=”60″ frameborder=”0″ style=”border:none;” border=”0″ src=”https://mer54715.datafeedfile.com/widget/aff_widget_prdt_generate-2.0.php?aff_num=6746&aff_net=1&widget_num=8085&sid=” marginheight=”0″ marginwidth=”0″></iframe><iframe style=”width:120px;height:240px;” marginwidth=”0″ marginheight=”0″ scrolling=”no” frameborder=”0″ src=”//ws-na.amazon-adsystem.com/widgets/q?ServiceVersion=20070822&OneJS=1&Operation=GetAdHtml&MarketPlace=US&source=ss&ref=as_ss_li_til&ad_type=product_link&tracking_id=danhbaisadvph-20&marketplace=amazon&region=US&placement=B07D7BQXBW&asins=B07D7BQXBW&linkId=a52e9e118ee0df01eb679f1599a1f3ae&show_border=true&link_opens_in_new_window=true”></iframe>[/iframe]



July 17, 2018
See this post
Comparing the Fujifilm X-T100 and the X-A5
I don’t typically refer to myself as a portrait photographer, but I do enjoy shooting portraits on occasion. After all, I’m kind of a people person (at times), and as a photographer, I enjoy the challenge of capturing compelling images of an intriguing character in great light.

Usually they’re made during a shared adventure with one of my friends, when I’m drawn to capture a specific moment of determination, struggle or elation, under the peak of some magical display of sunlight. Or, they might be shots of someone I met during my travels to faraway lands.

Some people just have that look. You know what I’m taking about. Some people have a certain quality about them that begs to be photographed, whether it’s their magically engaging expression or a certain ruggedness that speaks a thousand stories about who they are and what they’ve done in life.

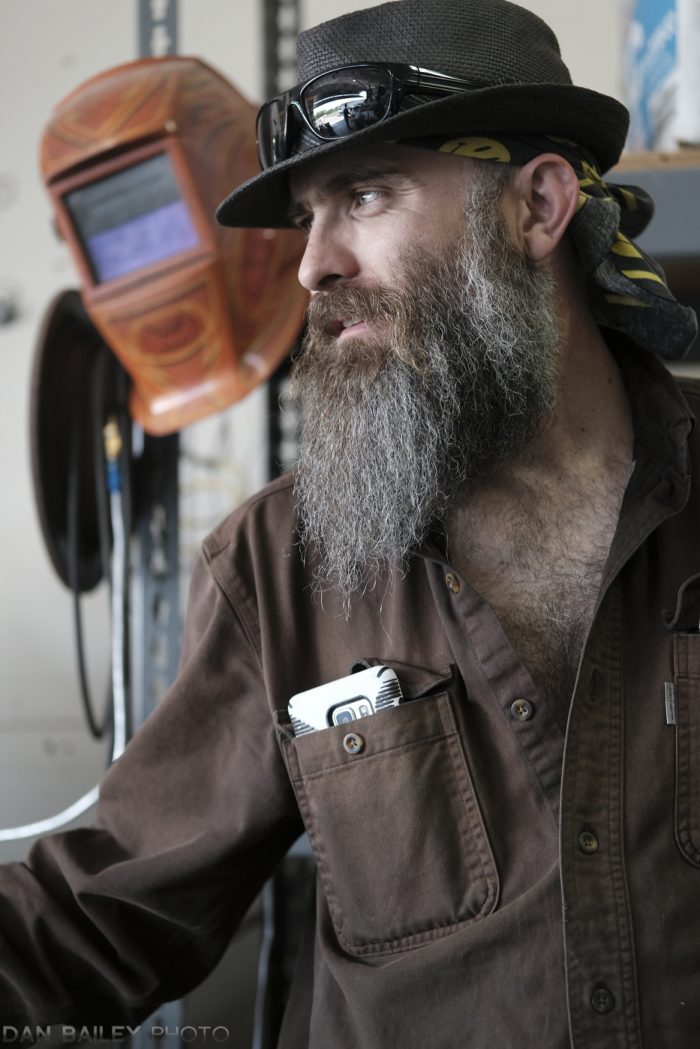
My airplane Mechanic, Mario Maccarone is one of those people. I met him seven years ago when I first bought my little yellow Cessna. He’s the one who rebuilt the plane after one of her wings was damaged in a wind storm. He found her sadly tucked away inside a hangar on the other side of his home airport, broken and battered, neglected after the insurance settlement had been paid out.

Mario saw the potential that lay before him and so he purchased the remains of N3102N, hauled her over to his own hangar and brought her back to life. He drove all the way to Whitehorse and back to get a new wing, and he spent many hours rewiring and renovating the interior.

Metal work is Mario’s specialty. He loves crafting, welding, cutting, fitting and fabricating not only parts and solutions for aircraft, he makes handmade jewelry as well. He rebuilt the entire interior of my C120 with pieces of specially cut pieces of lightweight sheet metal, which makes the plane considerably lighter than if it still had the stock upholstery interior. He even gave me a pair or skylights in the roof.




Growing up as a self proclaimed “poor kid in New Mexico,” Mario flew all the way up to Alaska and back in a small plane one summer with a friend when he was 15 years old. That trip sealed his fate, and he soon found his way back to Alaska. Eventually, he leaned to fly and work on small planes, and he’s now a full time A&P/IA mechanic and runs his own shop at Wolf Lake Airport, 50 miles north of Anchorage.

Those are just a bunch of facts, though. They don’t even being to describe the journey and events that have shaped Mario’s life, personality and appearance, any more than if I told you that I take pictures and ride bikes. That’s the wonder and mystery of humanity. That’s the magic we photographers hope to capture when we shoot portraits.

It’s amazing to think how my life is now intertwined with Mario. I only see him once or twice a year, but given how much I’ve done with my little Cessna, the places it’s taken me and the photos I’ve been able to get while flying her high above the mountains of Alaska, I can’t even begin to quantify the enormous impact that he’s had on my life.

I’ve wanted to photograph Mario for years, so when I picked up my plane from its annual inspection last week, I took my camera along with me. Since we’ve known each other for years now, it was a comfortable enough process to capture a few moments with my X-T2 and my Fujifilm XF 50mm f/2 lens while we talked. That tiny little 50 f/2 is such a great lens for portraits. It’s such a great lens for just about anything, which is why I pretty much take it everywhere with me.

All of these are straight JPEGs, shot with the CLASSIC CHROME film simulation on the Fuji, under natural light from the open hangar door. I hope you enjoy these photos and I hope they inspire you to go out and capture some portraits of some of the people in your own life.

You can follow Mario on Instagram to see what kind of work he does and see where he likes to fly.


July 10, 2018
See this post
Portraits of Mario, My Airplane Mechanic