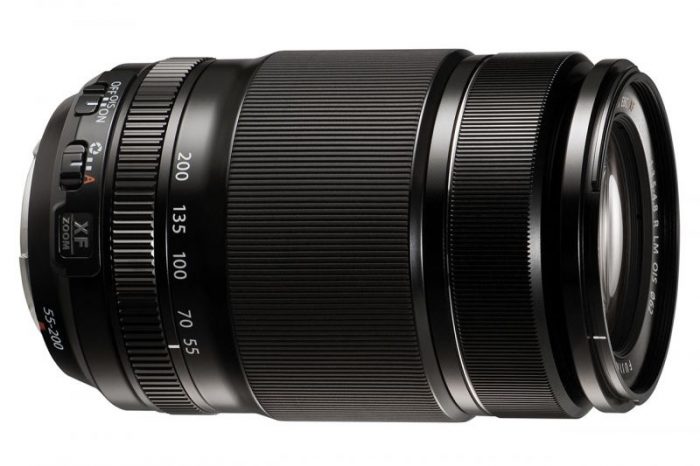
Back when I first started shooting full time with the Fujifilm X Series cameras, the XF 55-200mm was my go-to telephoto lens. At the time, it was Fuji’s longest focal length lens. They hadn’t come out with the high performance 50-140mm f/2.8 yet, so for long lens work, this was our only choice.

With a maximum aperture of f/3.5-4.8, the 55-200 ins’t an exceptionally fast lens, nor does it have the fastest AF motors. However, it has four things going for it:

  1. It has a nice long reach. (300mm view angle equivalent compared to full frame focal length.)
  2. It’s sharp as hell. (That Fuji glass, you know!)
  3. It has excellent OIS lens stabilization.
  4. It’s a nice size and weight for travel.


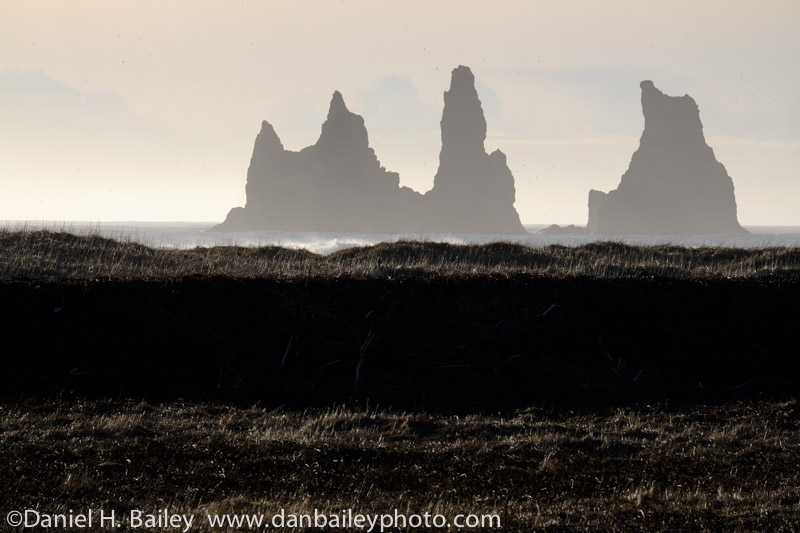
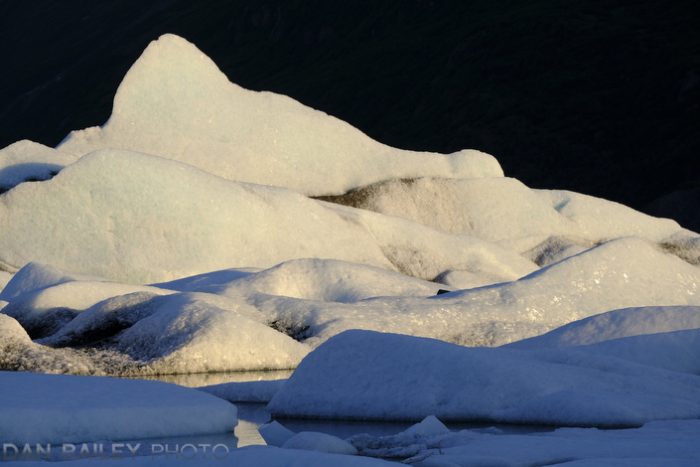
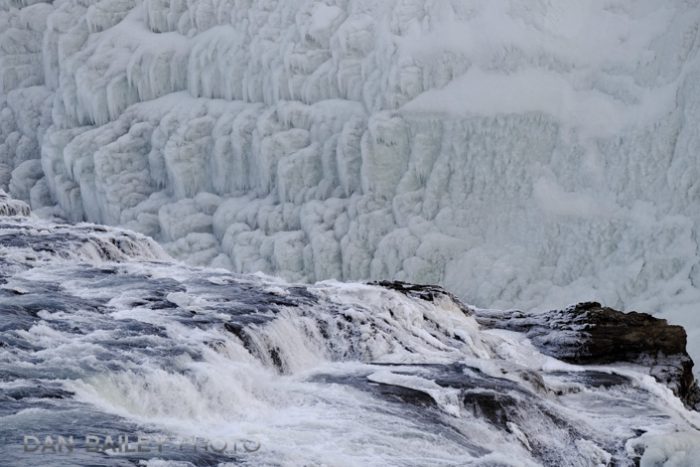
When I first got the X-T1 in February, 2014 and took it to Iceland for a week, the 55-200 went with me. I’ve always loved the photos I shot with it over there, and I remember being very impressed with how well it performed. I shot a bunch of photos of this frozen waterfall below, handheld at speeds between 1/25-1/60 sec., zoomed all the way out to 300mm, and they were all dead sharp. That’s how good Fuji’s OIS is.
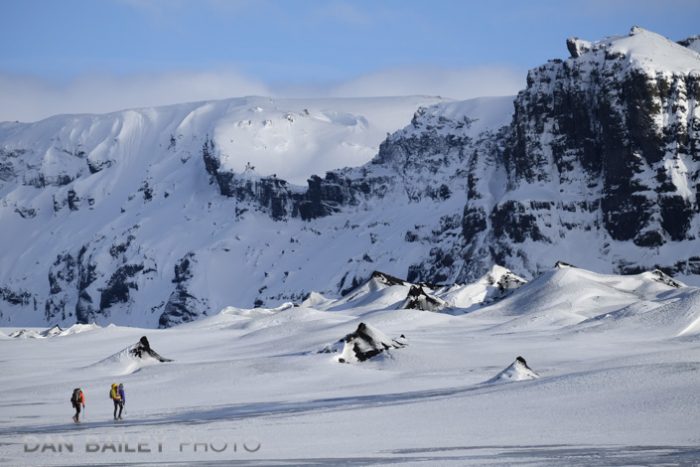
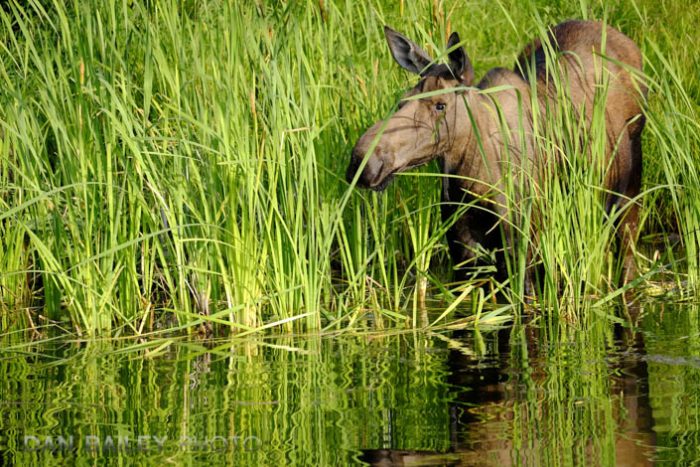
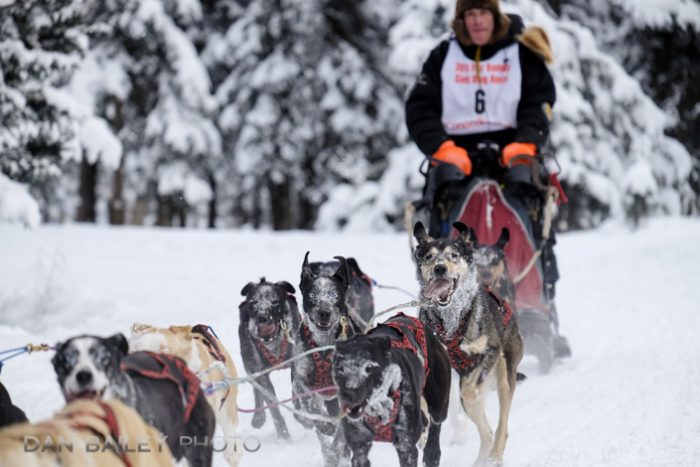
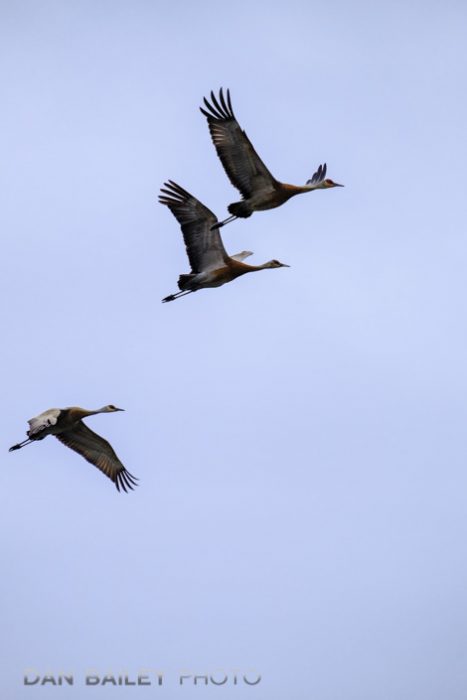
Also, while the AF isn’t as fast as some of the newer Fuji lenses, the 55-200 is no slouch. Over the years, I’ve used it to capture a wide range of action subjects, from sports to wildlife. On all the new Fujis, which have faster image processors, the AF performance is even faster than it was on the X-T1.

As I look back, quite a number of my favorite X Series photos from around 2013-2015 were shot with the 55-2200. In fact, with a few of them, I hadn’t remembered which lens I’d used until I looked at the metadata in my image catalog. I was pleasantly surprised by what I found.
As often as I used the 55-200, though, as soon as Fuji released their XF50-140, which is a full-on professional grade, fixed f/2.8 workhorse telephoto zoom, my 55-200 went back onto the camera shelf, where it sat unused for over three years.

Lured by faster glass, faster autofocus and a much beefier lens barrel, the 50-140 has gotten all the attention for a long time. Or at least most of it.

Sure, there have been plenty of times when I’ve left the 50-140 behind. After all, it’s a pretty big lens. I don’t often take it into the backcountry, and I rarely travel with it. That’s where the 90mm comes in. The 90 is so freaking sharp and it’s f/2, so it’s earned a special place in my heart.

However, a few weeks ago, I decided to pull the lonely 55-200 back off the shelf and give it some much-needed love. Using your least-used lens is actually a great way to shake up your creativity, so I figured why not? Let’s see what this thing can do.

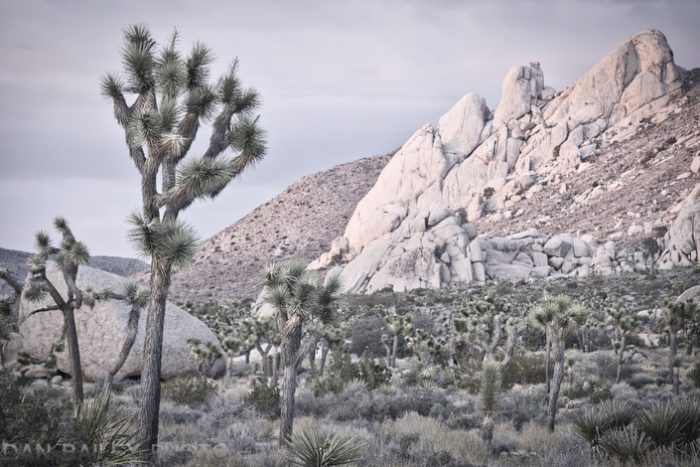
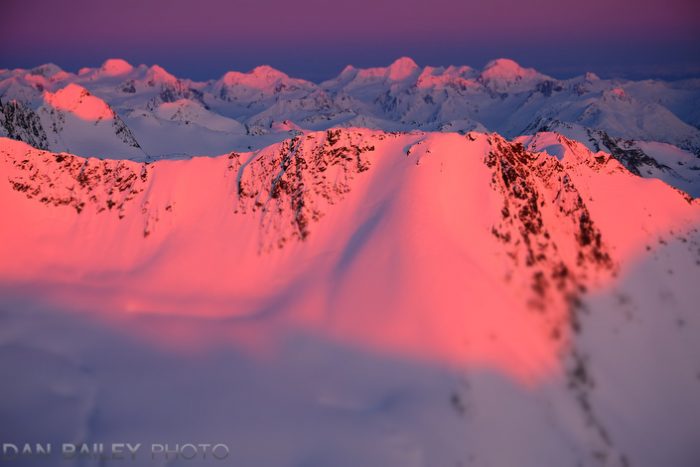
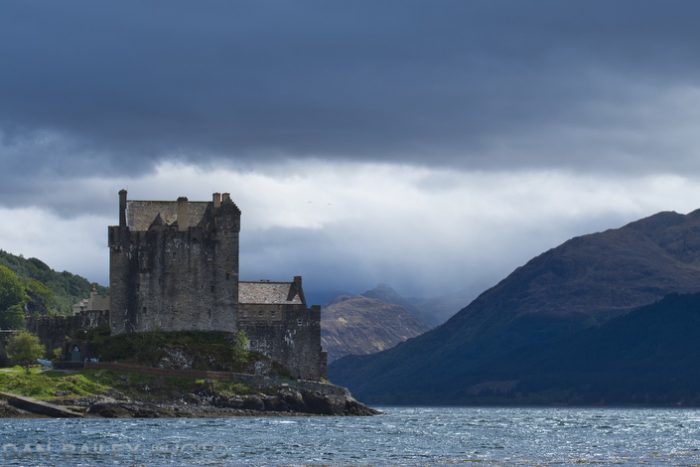
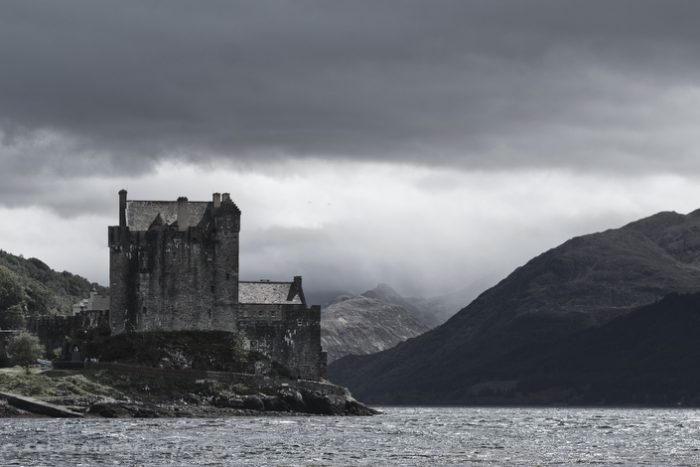
And guess what? I suddenly remembered that the XF 55-200 is actually a great lens! I’ve been having lot so fun shooting landscapes with it during the past month and I’ve found that nothing has changed. It has a nice long reach, it’s still razor sharp, it has excellent stabilization, and it’s so much more enjoyable to carry than the 50-140. It actually fits in my small hiking photo pack with no complications!
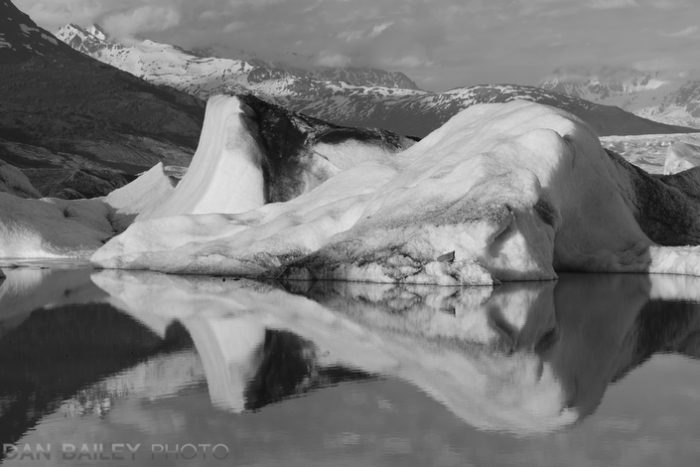

Lens choice is all about tradeoffs and it always comes down to a compromise between speed, weight, performance, and price. If you don’t want to carry a big heavy lens, and you don’t regularly shoot fast action, the 55-200 is an excellent telephoto for general photography, landscapes and travel.

It will still give you excellent image quality and color reproduction, and the extended focal length range will come in handy for a wide range of subject matter. For many subjects, you don’t need to worry about the slower aperture. Just crank the ISO dial up a few clicks or hold still and take advantage of the highly capable stabilization.

If you actually look at the lens design, the 55-200 is almost identical to the XF100-400, and that one is incredible sharp. Where do you think the Fuji engineers got the template for the bigger one? That’s right. They obviously did a lot right with the 55-200, which opened up the door to what is currently Fuji’s longest lens.
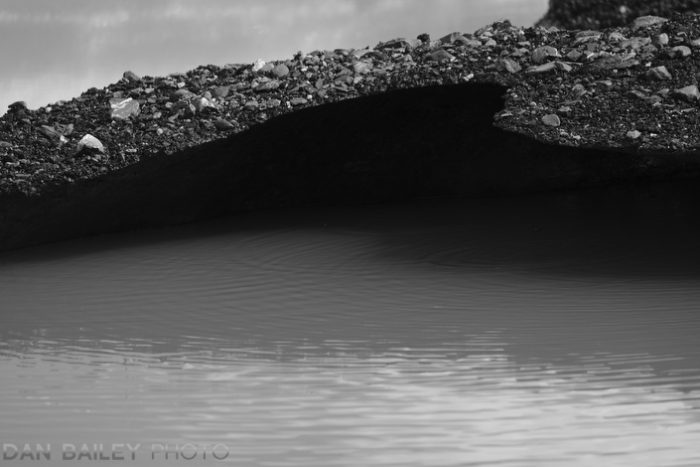
So, after 3 years of neglect, I’ve fallen back in love with the XF55-200mm. The romance has been rekindled. All the good things about this lens have earned it a regular place in my bag again and I’ve been impressed with the quality of the imagery I’m getting with it.

I’m usually a 3-lens guy, with an occasionally 4th, and these days, I’m often heading out with the wide angle 14mm, the sweet little 35mm f/2 for the middle range, and the newly 55-200 for the long end. If you’re looking for a versatile telephoto lens with a nice long range that’s easy to carry and that doesn’t have an enormous price tag, then look no further.

Give it a try and you may find yourself falling in love with the 55-200 too.

[iframe]<iframe width=”120″ scrolling=”no” height=”240″ frameborder=”0″ style=”border:none;” border=”0″ src=”https://mer54715.datafeedfile.com/widget/aff_widget_prdt_generate-2.0.php?aff_num=6746&aff_net=1&widget_num=8095&sid=” marginheight=”0″ marginwidth=”0″></iframe><iframe style=”width:120px;height:240px;” marginwidth=”0″ marginheight=”0″ scrolling=”no” frameborder=”0″ src=”//ws-na.amazon-adsystem.com/widgets/q?ServiceVersion=20070822&OneJS=1&Operation=GetAdHtml&MarketPlace=US&source=ss&ref=as_ss_li_til&ad_type=product_link&tracking_id=danhbaisadvph-20&marketplace=amazon&region=US&placement=B00CNZTPGA&asins=B00CNZTPGA&linkId=5efbd5413752ae5990988addedc3e2e2&show_border=true&link_opens_in_new_window=true”></iframe>[/iframe]


June 26, 2018
See this post
Falling Back In Love With The Fujifilm XF 50-200mm

Yesterday I did a webinar with Rocky Nook called 5 Things You Should Know About Your Fujifilm X Series CamerasI’m proud to report that we had a record breaking audience with the highest viewership of any of Rocky Nook’s previous web events.

In addition to talking about some of my favorite features about the X Series cameras and sharing tips with viewers, I answered questions that participants typed in the chat window during the presentation. I have to say, this was actually my favorite part of the webinar, and I wish I could have spent more time answer questions.

I’m pretty comfortable speaking in front of large groups and doing live presentations, but it’s a little weird just sitting there talking to the computer. 😀 Usually you interact and feed off of the people in front of you, which makes it more natural. Without that element, I was little nervous, but I got through it ok and had fun.

I could see the chat window while I talked, and it was cool to recognize some of the names that showed up in the message. Thanks to everyone who attended the live event and thanks for all of your questions. I hope you enjoyed it! Also, thanks to Rocky Nook for hosting the webinar.

Mercedes from Rocky Nook sent me the entire chat window transcript, so I have all of the questions you guys asked me during the webinar. I’ll go through them and answer as many of them as I can in a future blog post.

I’ll get that up soon, but you should know that many of the questions you had can be found in my book, FUJIFILM X SERIES UNLIMITED. You can purchase it directly through Rocky Nook. If you use discount code DANBAILEY25, you’ll get a 25% discount.

If you missed the live version, you can watch the entire video replay here on YouTube. Enjoy!

June 14, 2018
See this post
Watch the Video Replay of My Rocky Nook Webinar

I’m definitely a camera pack nerd. I own a closet full of packs in different shapes and sizes, partly because I’ve always been searching for the perfect pack, and party because there is no such thing as the perfect pack.

Camera packs started to get a lot better about 7 or 8 years ago. They got more technical and much more user friendly for outdoor and adventure photographers who wanted to cary more than just cameras.

We also need to carry food, water, extra layers and outdoor gear, and, more importantly, we need our camera gear to be easily accessible.

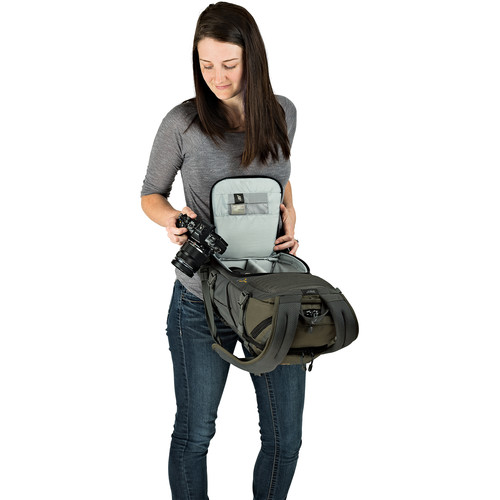
Ideally, you shouldn’t have to take your pack off and set it down in order to access your camera or grab a different lens. You’ll miss the shot if you spend too much time trying to dig your camera out. You should be able to just undo one or both shoulder straps, sling it around, reach into the dedicated compartment and get your camera into your hands in a few seconds.

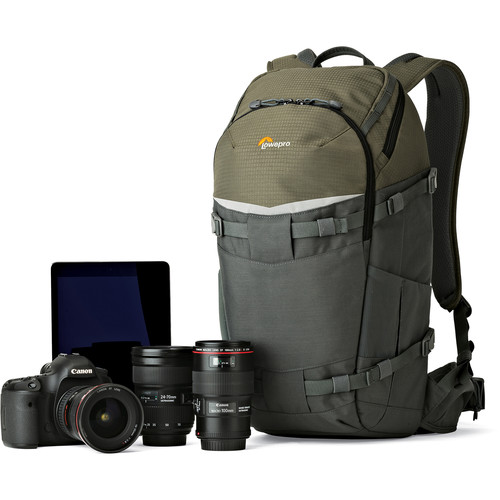
Lowepro was one of the main companies to design innovative adventure camera packs, and in my mind, for the size and technical features, they’re some of the best packs out there for going light and fast. The original top loading Photo Sport 200, which was my first awesome outdoor camera pack, is still being made. I still use it quite often.

Note: For photographers who need larger technical camera packs that will fit a full selection of gear, including your big glass, definitely check out the Athlete from Atlas Packs.

The Flipside Trek AW Series

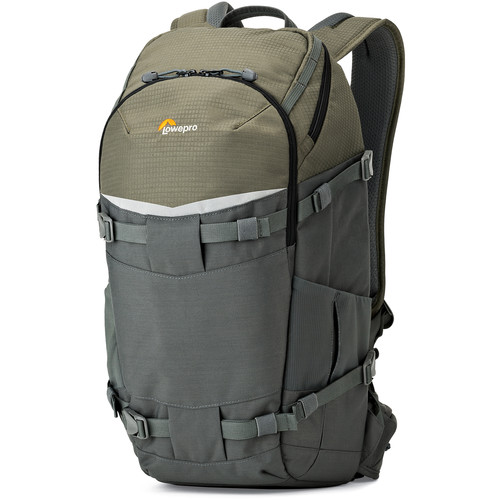
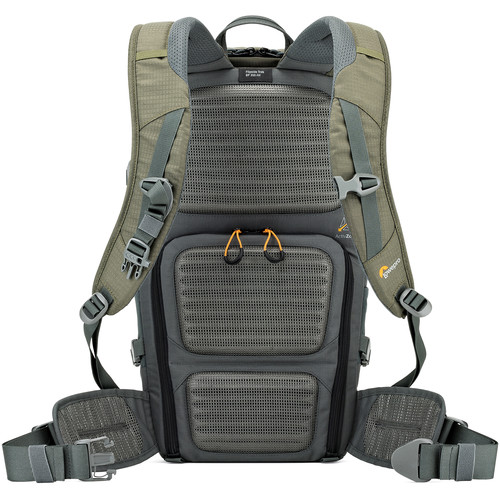
Sadly, my other favorite Lowepro pack, the Flipside Sport AW, is no longer being made, but Lowepro now has the long-awaited update, called the Flipside Trek AW, and they look awesome.

The Flipside Trek series takes what was great about the Flipside Sport packs and adds the thing that was missing, which was extra room for non-camera gear.

I still use my little 10L Flipside Sport all the time, but I can’t carry very much besides camera gear. There’s no place for something like a tablet, and it has very little room for extras. Often times, I cram a sandwich or a small 1/2 L water bottle into the main compartment, but this means using up one of the lens compartments. It works, but it’s not really an ideal situation. I’d rather have a separate compartment.

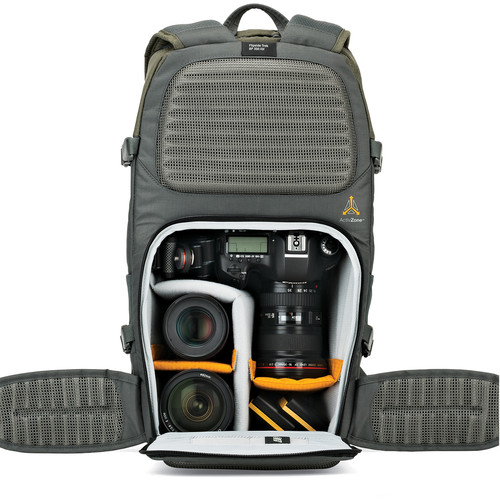
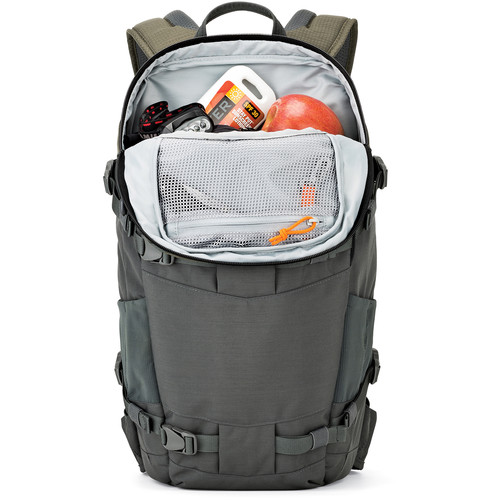
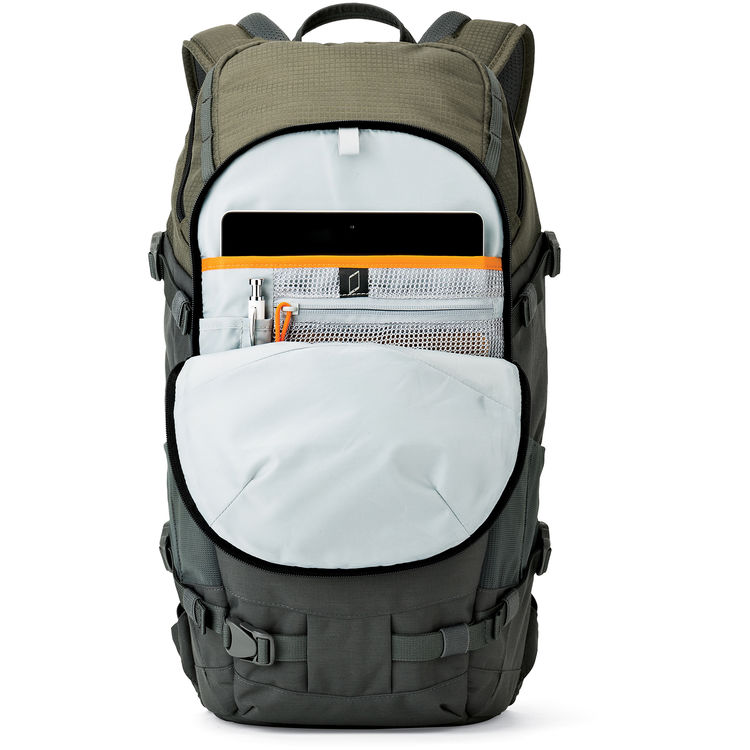
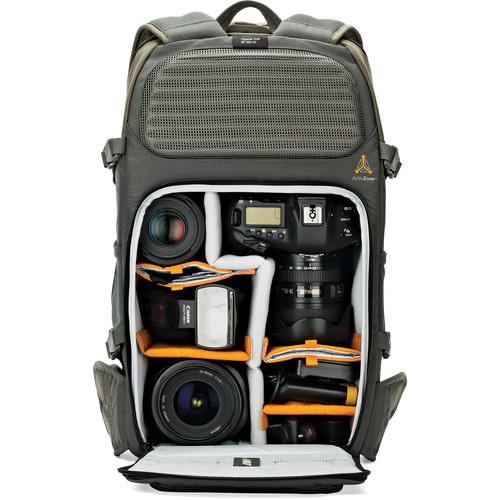
The Flipside Trek uses a similar back-loading camera compartment, but it adds a reasonably sized top compartment for outdoor gear and a small pocket designed to carry a tablet and other slim items, such as phone, hard drive, pens, notebook, etc…

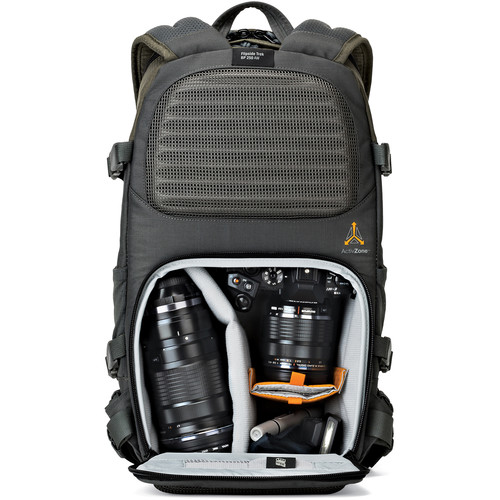
The tradeoff is that the camera compartment isn’t quite as big. In other words, you can’t carry a really big lens, but if you’re using a pack like this, chances are you’re going light and fast and leaving the huge glass behind. You can still fit a DSLR or mirrorless body and 3-4 lenses, depending on which model you’re using.

The Flipside Trek comes in 3 sizes: 250, 350 and 450. The basic design is the same, but they just have different size camera compartments. With the 250, you can carry a small DSLR or mirrorless camera and 2-3 lenses plus some small accessories, while the 450 is more suited to carrying a larger camera and 3-5 bigger lenses or flash units.

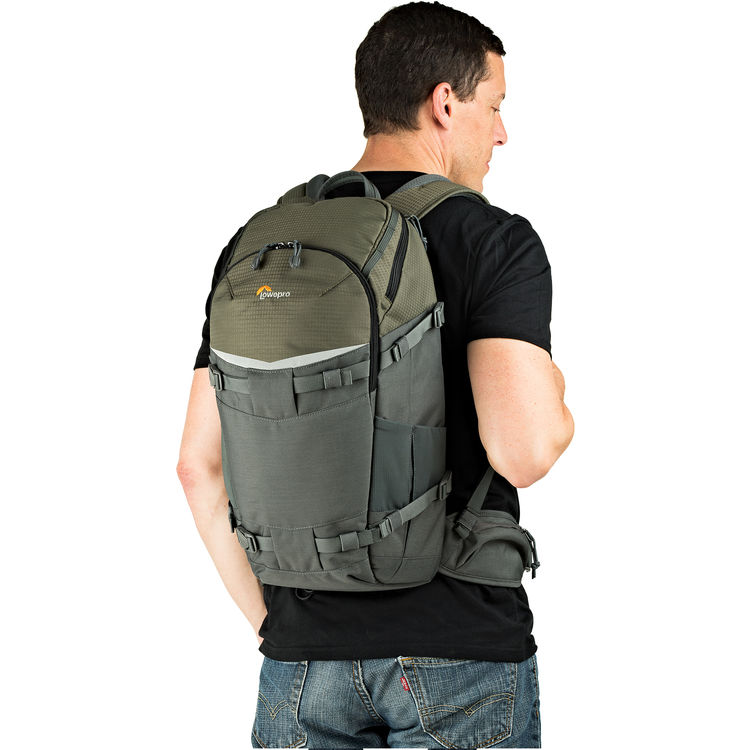
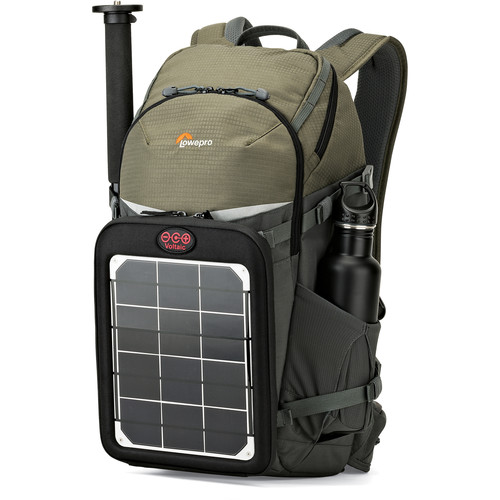
As with all the Lowepro AW series packs, the Flipside Treks have great suspensions systems with padded, ventilated backs, contoured shoulder straps, sternum straps, mesh elastic side pocket, compression straps, a few lash points and a built-in rain cover.

The smallest of the 3, which is the 250 model has a 1-inch webbing waist strap, while the two larger sizes have very nice, padded waist belts with zipper pockets on the side. I love pockets like this, and I use them for carrying extra batteries and a memory card case. I almost won’t even look at a pack these days if it doesn’t have zipper pockets on the waist belt.


Looking at the new Flipside Trek 450 model, it would easily fit a big lens, like a standard 70-200 or even the Fuji XF100-400 or XF50-140. The two smaller version would definitely hold the Fuji 18-135 lens or the XF90mm. They look like they would fit any mirrorless lens except the two big telephotos I just mentioned.

With the new design and extra compartments, I love what I see in the Flipside Treks. They look really sweet, and they pretty much solved the main problem I had with the older Flipsides. It’s as if they’ve been stalking me for the past few years. Hmmm…

Apparently this series has been out for quite a while, which means I clearly haven’t been paying attention. I used the Photo Sport during my two Scotland bike tours last year, but if I’d known about the Flipside Treks, I might have taken one of those instead. Either way, I think they’re worth looking at and I may consider the 350 model as a good all around fast and light hiking and outdoor pack for myself.

If you’re looking for an awesome, full-featured hiking or biking photography pack, I would highly recommend taking a look at one of the new Flipside Trek AW packs. They’re nice and small, they hold just enough camera gear outdoor gear for small to mid-sized adventures, and, going from my experience of beating up Lowepro packs for many years, I’m sure they’ll withstand a lot of abuse.

[iframe]<iframe width=”120″ scrolling=”no” height=”240″ frameborder=”0″ style=”border:none;” border=”0″ src=”https://mer54715.datafeedfile.com/widget/aff_widget_prdt_generate-2.0.php?aff_num=6746&aff_net=1&widget_num=8093&sid=” marginheight=”0″ marginwidth=”0″></iframe><iframe style=”width:120px;height:240px;” marginwidth=”0″ marginheight=”0″ scrolling=”no” frameborder=”0″ src=”//ws-na.amazon-adsystem.com/widgets/q?ServiceVersion=20070822&OneJS=1&Operation=GetAdHtml&MarketPlace=US&source=ss&ref=as_ss_li_til&ad_type=product_link&tracking_id=danhbaisadvph-20&marketplace=amazon&region=US&placement=B01K1JSUMO&asins=B01K1JSUMO&linkId=5acd96c5920b804f0c99e10382b4616e&show_border=true&link_opens_in_new_window=true”></iframe><iframe style=”width:120px;height:240px;” marginwidth=”0″ marginheight=”0″ scrolling=”no” frameborder=”0″ src=”//ws-na.amazon-adsystem.com/widgets/q?ServiceVersion=20070822&OneJS=1&Operation=GetAdHtml&MarketPlace=US&source=ss&ref=as_ss_li_til&ad_type=product_link&tracking_id=danhbaisadvph-20&marketplace=amazon&region=US&placement=B01K1JT7Z8&asins=B01K1JT7Z8&linkId=f9958782ad82d2b3dfb6662dceb9a552&show_border=true&link_opens_in_new_window=true”></iframe><iframe style=”width:120px;height:240px;” marginwidth=”0″ marginheight=”0″ scrolling=”no” frameborder=”0″ src=”//ws-na.amazon-adsystem.com/widgets/q?ServiceVersion=20070822&OneJS=1&Operation=GetAdHtml&MarketPlace=US&source=ss&ref=as_ss_li_til&ad_type=product_link&tracking_id=danhbaisadvph-20&marketplace=amazon&region=US&placement=B01K1JTD8Y&asins=B01K1JTD8Y&linkId=bfc6e163622f055453ecec82fb083d90&show_border=true&link_opens_in_new_window=true”></iframe>[/iframe]

June 13, 2018
See this post
The Lowepro Flipside Trek AW Adventure Camera Packs

NOTE: This webinar is now over. However, you’ll be able to watch the replay on YouTube. Visit this post to see the video and read about how the event went.

This Wednesday at 11:00AM PST, I’ll be doing a free live webinar with Mercedes Murray from Rocky Nook called 5 Things You Should Know About Your Fujifilm X Series Camera.

I’ll be highlighting some of the information from my new book, FUJIFILM X SERIES UNLIMITED, which is the new paperback version of my bestselling eBook. It teaches you everything you need to know in order to get the most from your Fuji and it’s become the essential go-to guide resource for Fuji users around the world.

I’ll choose a few of the settings in detail and expand on how I personally use them in my own photography. We’ll also be doing a Q&A and Live Chat with participants, so if there’s something specific about the Fuji system, or photography in general you’ve been wanting to ask me, this is a great time to get a personal response!

I’m looking forward to this, and not only because I get to talk about photography and the Fuji cameras, but because I know that I’ll get a chance to field questions from you guys as well! Plus you get to see the face  and hear the voice behind the book. 😀

If you would like to purchase a copy of FUJIFILM X SERIES UNLIMITED, you can get it directly through Rocky Nook and use discount code DANBAILEY25 to save 25% on the book.

June 11, 2018
See this post
Join Me for a Live Webinar This Wednesday at 11AM PST

Yesterday, I did a podcast with Aaron King and Brendan Porter from PhotogAdventures.com. We had a great time talking about photography, Scotland, bike riding, getting off the beaten path, Fuji cameras, aerial photography, and a number of other fun topics we diverted to during our hour-long chat.

Based in Utah, Aaron and Brendan are both avid shooters and are both very much into Milky Way photography. They spend many nights up very late chasing clear skies in the desert lands outside Salt Lake City.

Through their PhotogAdventures site, they do weekly podcasts, and offer a number of tutorials videos on image processing, as well as the options to do 1-ON-1 tutorial Skype calls to answer question about Lightroom, Photoshop, or other apps and photography techniques.

They also do landscape and Milky Way photography workshops to places like Goblin Valley, Escalante, Crater Lake, the Bonnevile Salt Flats and they even have an upcoming workshop in the Faroe Islands for September, 2018.

In addition, Aaron and Brendan offer custom, 2-On-1 private instruction. They’ll pick you up from the airport and take you to some of their favorite locations. If you’re in the Salt Lake area and are looking for a good photo adventure, it might be worth looking into.

I was thrilled to be a guest on their 81st weekly podcast, so I hope you enjoy listening to the replay of our super fun photography hangout.  

June 6, 2018
See this post
Listen to a Podcast with Me on PhotogAdventures.com

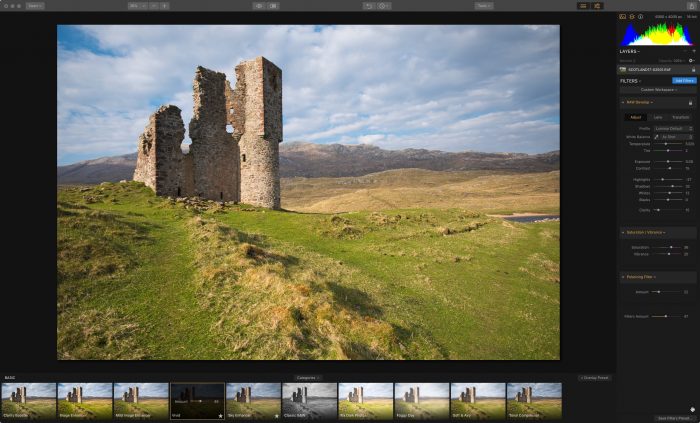
I’ve been using Luminar as my main image processing software for well over a year now. I find it to be a very easy to use program, and with the diverse set of tools and presets it contains, as well as Customizable Workspaces, it’s not only a very powerful editing solution, it offers a fun canvas with which to explore your creativity.

With the most recent update, Luminar was given a number of performance upgrades. RAW engine has been re-engineered, which means it does a remarkably better and faster job demosaicing RAW files, especially those shot with Fujifilm cameras.

This means you’ll get cleaner, smoother RAW files, more accurate colors with fewer artifacts, and automatic corrections for lens distortion, chromatic aberrations and fringing.

In addition, Skylum will be coming out with their promised DAM (Digital Asset Management) feature later this year. This will give Luminar full image catalog capabilities, which will make it an all-in-one image file and editing solution and a viable alternative to Lightroom. (You can read my full review of  the Luminar 2018 improvements here.)

Today, I’d like to offer a short Luminar tutorial and give you some insight on some of my favorite and most used tools when I process my images. Hopefully this will shed some light on what you can do with the program and give you some ideas of your own.

Keep in mind that in addition to doing my RAW conversions in Luminar, I also use the program to tweak select JPEGS in order to give them a little more life.

1. Accent – AI Filter

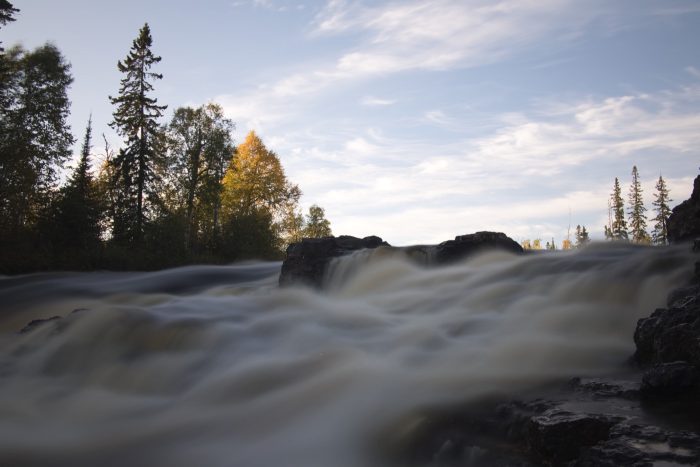
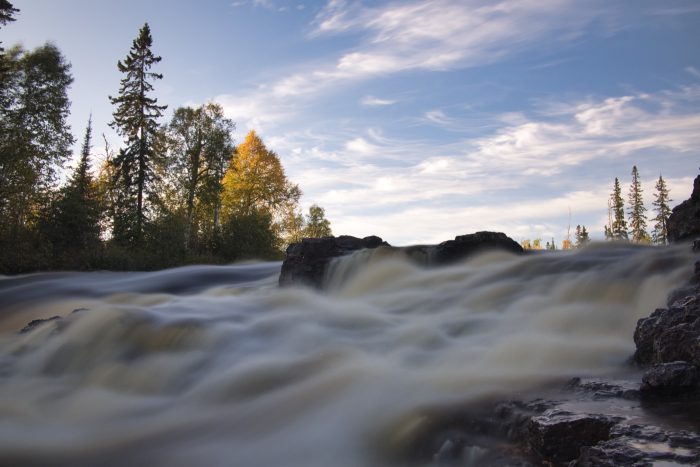
The Accent – AI Filter automatically analyzes your image and uses artificial intelligence and carefully written algorithms that apply “smart enhancements” to improve your photo. If you only have time for a single tool, or if you just want to make a very quick adjustment, this is probably the first tool you should reach for.

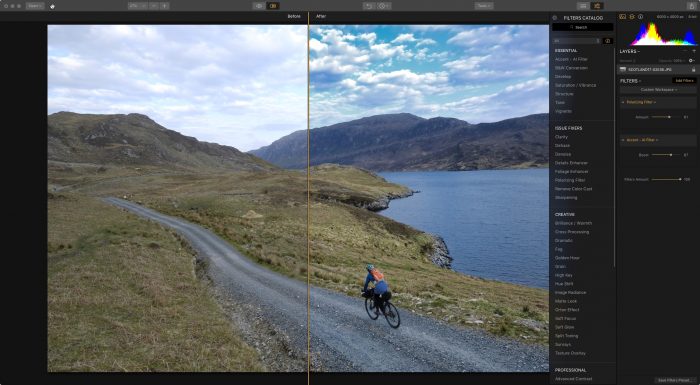
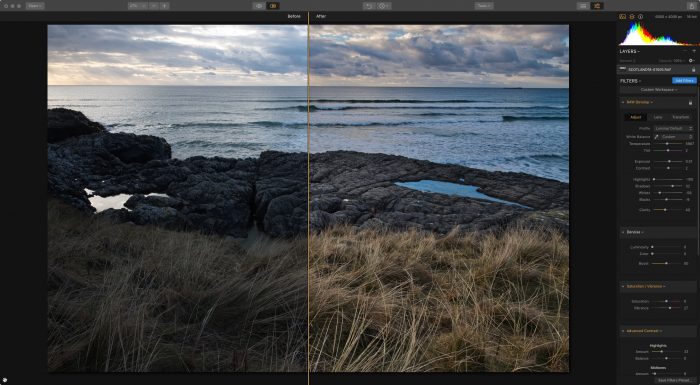
In most cases, the Accent – AI Filter does a great job of controlling your highlights & shadows and adding a little bit of vibrance and clarity to make your image pop. Here’s a before and after example to show you how it works.

For very quick adjustments with added control, choose the Quick & Awesome Workspace, which contains the AI Filter, as well as the Saturation/Vibrancy and Clarity tools.

2. Develop / RAW Develop Tool Panel

The RAW Develop tool panel is your standard, full-service toolkit for adjusting the specific exposure parameters of your RAW files. (If you’re working on a JPEG file, this tool is simply called Develop.)

Similar to what you’ll see in Lightroom, Photoshop and many other image processing programs, this is where you can make adjustments to White Balance, Tint, Exposure, Contrast, Highlights, Shadows, Whites, Blacks and Clarity. 

In addition, you can also apply Lens Corrections and make Transform adjustments. If you’re used to working with this kind of tool and enjoy the process of fine-tuning your exposures, then you’ll probably use this tool quite often.

For even more tonal control, try adding in the Advanced Contrast tool.

3. Structure

Sometimes you feel as if your image would be improved with a little sharpening and definition. This is when you reach for the Structure tool, which increases Clarity and micro-contrast in the areas between the edges in your photo.

In other words, it doesn’t sharpen the edges, it enhance definition in the areas next to your edges. This gives the impression of added sharpness and it increases the overall “crispness” of your photo.

For more control, you can adjust the Softness slider, which controls the overall softness of the textures in your images and adds/decreases the apparent contrast of your darker tones. The Boost slider accentuates and softens the edge detail in your photo, which adjusts the overall clarity of your image.

Be careful, though. A little goes a long way. You can easily overdo your Structure control, and it will be easily apparent if you slide too far.

4. Polarizing Filter

Just like the real thing, the Polarizing Filter in Luminar darkens your blue tones, which increases the richness of your blue skies. It also darkened the less obvious blues inside clouds and on distant mountainsides, which adds contrast and gives the appearance that it’s reducing atmospheric haze.

This is a great tool for just about any landscape photo, especially if if your image contains sky, water or faraway hills.

5. Golden Hour

The Golden Hour filter can be an extremely useful solution for helping add life to dull photos. It adds a degree of warmth that is reminiscent of the kind golden, indirect light you get when the sun is low on the horizon.

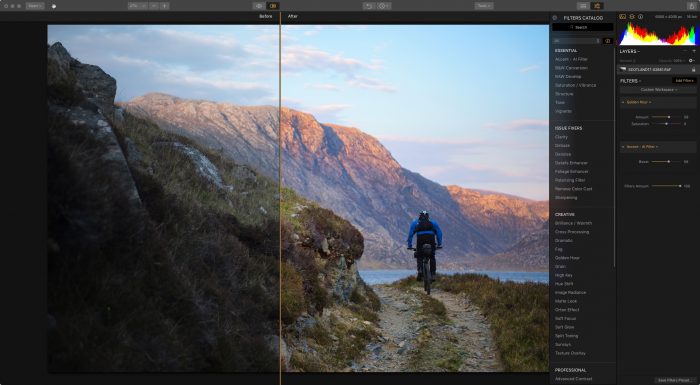
If you have subjects in your photo that area already lit by direct sunlight, this tool will accentuate your sunsets even more, as you can see in this example below. For everything else, you’ll simply raise the color temperature of the image slightly, just enough to give it a more pleasing look.

The reality is that simply warming the color temperature can help many shots look better. Not only does it add a degree vibrance and dimension, it helps commutate the “larger than life” memory of your scene, which I discuss here, in my previous post. 

Can you overdo it with the Golden Hour slider? That’s up to you. Depending on the scene and what kind of look you’re going for, adding a lot of warmth might just be what your shot needs.

You’ll find that it works best with scenes that are already shot at or near the natural “golden hour.” Go too far with photo shot at midday and you’ll just end up making them orange.

This is only a tiny sample of the useful and creative tools and effects you have at your disposal in Luminar. You’ll find that the tools are all very easy to use, and each one has a short description that tells you exactly what it will do, so I encourage you to dig in and play around. Visit this page to see a complete list and description of all the tools contained in Luminar 2018.

If you have’t tried Luminar yet, visit this link to check out the program and download the demo. If you decide to purchase Luminar 2018 or upgrade from a previous version, use coupon code DANBAILEY and you’ll save $10 on your order.

June 4, 2018
See this post
Luminar Tutorial – My 5 Favorite Image Processing Tools

In the beginning, there was only monochrome. All the first photos were shot in black and white, although sometimes it ended up being more brown and cream.

In 1936, Kodak invented the very first color film, which was Kodachrome. This, of course, opened up a whole new way for photographers to express themselves. No longer was photography just about shape, shadow and tone; the dimensions of hue, tint and saturation were added to our collective creative palette, which allowed us to push the boundaries of our vision in any way we chose.

The possibilities were pushed even further with the invention of Adobe Photoshop and the advent of digital imaging. Although few photographers use actual film anymore, our cameras and computers allow us to create any kind of look we want in our imagery.

The options are endless. We can slam the sliders, or use “vivid” camera settings and film simulations to add brilliant, Pantone® exploding levels of saturation in our images. Or we can pull then back and shoot quiet, subdued images that barely have any color at all.

But what’s the “right way?” What’s the perfect amount of color? How much is too much? Is there a guideline or some kind of rulebook that tells us how much color we should use in our photography?

Fortunately, no. There’s no rulebook, although some people actually like rules, because they make things easy. And regardless of how we might judge certain images, this is all just art and there are no “right” or “wrong” answers.

As with any other creative technique in photography, it revolves around the story you’re trying to tell, the specific message or emotion you’re trying to convey, or the visual impact you want to impart on your viewers.

Using Highly Saturated Colors

The general trend in photography, at least on Instagram anyway, seems to be that more saturated is better. You know the look: HDR cotton candy with maple syrup poured all over it. (That’s what my wife calls it.) So vivid that it would make the Wizard of Oz look like black and white.

Technically, there’s nothing wrong with using incredibly vivid color. In fact, rich colors help enhance our photography because it compliments the way our memory actually works.

We tend to store important events and striking scenes in such way that our brain remembers them with heightened, enhanced significance. Much of this revolves around the inherent emotional connection we have with those particular situations.

Think about it. If you were to take a simple snapshot of an exciting scene, using a normal lens and no special creative or visual photographic techniques, chances are good that your picture will look pretty boring.

However, if you use your expensive glass and employ some solid camera and creative techniques, and then apply some selective processing, your picture will look much more exciting. That’s because it more closely matches your own “larger than life” memory of the scene.

Using highly saturated colors in your photo helps create that “larger than life” look in your work.

The colors in our minds are often far more vivid than what “reality”might show, so increased saturation plays to this phenomenon of “memorized color.”

In fact, this psychological concept is what inspired the Fujifilm engineers when they created the original Velvia film. They recognized that photography isn’t necessarily about accurate reproduction, but rather a medium for emotional communication.

Their idea was to produce a film that more closely matched the rich palette of colors we remember. This experiment proved to be a huge success. Velvia went on to become one of the most widely used films for outdoor and travel photographers, and it has been included as one of the film simulations inside the Fujifilm cameras.

Using More Subdued Colors

Of course, slamming the vibrance isn’t the only way to add impact to your photography. Let’s explore what happens when you go in the opposite direction, when, instead of over saturating your colors, you pull them back.

You suddenly tell a very different story with your picture, don’t you?

In a sense, pulling back the saturation and vibrance starts to bring your image towards monochrome territory. This plays into the notion that photography is also the “Art of Omission,” where showing less is actually more.

If you give your viewer too much information by spoon feeding them every possible aspect of your scene, you leave them very little room for their own emotional engagement in the process. There’s nothing left of them to do.

However, if you use the power of abbreviation and only show part of your scene, you force your viewer to activate their own brains and imagine the rest of the scene. You force them to think actively about what lies on the other side of the frame, or imagine what the colors really looked like.

In addition, when you take away the element of color, your viewer can focus on the story and subject of the scene instead of the details. This is why black and white images have so much power; there’s no extraneous information to distract from the specific message or emotion you’re trying to convey.

This is why Kodachrome was the revered choice for photojournalism and National Geographic photographers for so many years, even after Velvia hit the market. It had a very accurate, yet muted color palette that told the story without giving away too much.

This is the approach when you use the more muted X Series film simulations, like ProNeg Std and CLASSIC CHROME, which is actually patterned after Kodachrome. As much as I love using the Velvia film sim in my photography, I also love using these more muted film sims to bring things back and focus on the shapes and story of my scene. Sometimes I’ll even customize the Film Sims on my Fujifilm cameras to add even more creative complexity. 

When processing my photos, these days, I’m just as likely to drag the Saturation/Vibrance sliders to the left as to the right. It all depends on what I’m trying to focus on in my picture. In many cases, it’s simply a matter of getting a creative idea in the moment and running with it.

No matter what system or software you use, or whether you choose your colors in-camera or during the processing stage, I encourage you to experiment with these two approaches and see where your creativity can take you.

May 30, 2018
See this post
Using Bold vs. Subdued Colors in Your Photography

Although Fujifilm has an awesome selection of mid-range and high-end cameras, in my opinion, the “budget end” of the X Series has been somewhat lacking.

They had the X-M1 and the X-A series, which is now up to the X-A5, but none of these models seem to have the same X Series mojo as the X-T2, X-Pro2, X-T20 and X-E3. I’ve always felt they need a budget version of something like the X-T20 to attract more new photographers.

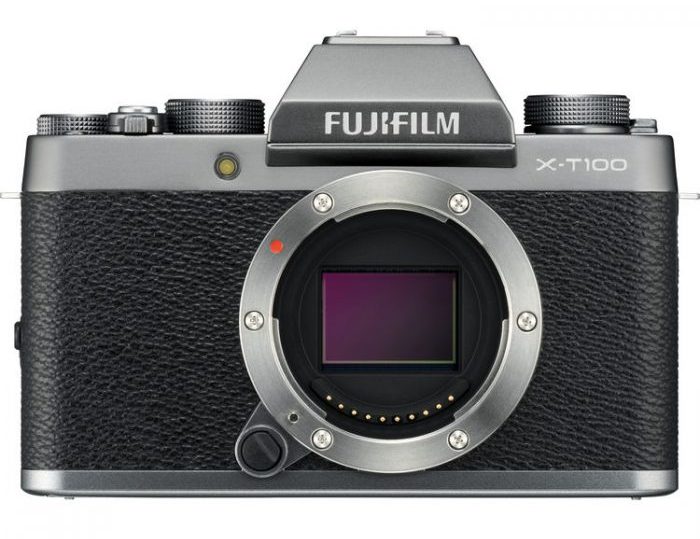
Problem solved. Yesterday, Fujifilm announced the new X-T100, an entry level interchangeable lens camera that offers a very similar look and feel to the X-T20, but with higher performance and more features than the X-A5. Whereas the X-A5 is kind of an abbreviated X Series, the new X-T00 is X Series to the core.

Best of all, it has a consumer level price point- one that can match Nikon and Canon’s budget models. Also, since Mirrorless camera actually offer some huge benefits over traditional DSLRs, in many ways, it’s a more powerful camera than those entry level Rebels and D3400 models.

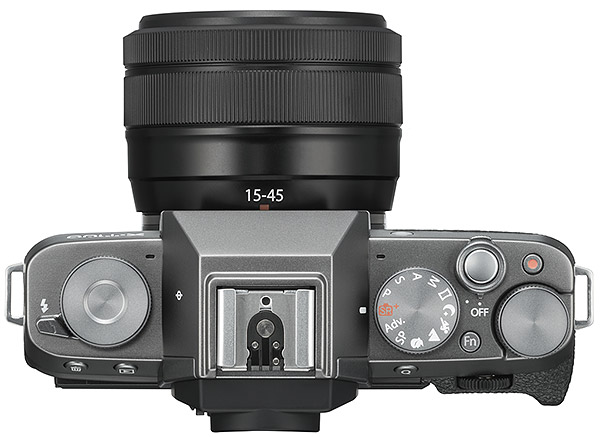
With a stylish, “retro” SLR style design, the X-T100 has a nice compact body with milled metal dials, a 24.2 megapixel sensor, a 3-way tilt LCD screen wth touch capability and Bluetooth connectivity, and EVF (Electronic Viewfinder), which the X-A5 does not have.

Inside, the X-100T you’ll find many of the standard X Series Features:

  • 11 Film Simulations, including Velvia, ASTIA and Monochrome
  • All those fun Adv. Filter Modes, like Toy Camera, Miniature, Dynamic TonePartial Color
  • ISO up to 12800, extendable up to 51,200
  • 6 fps shooting
  • Fn Buttons & Q Menu
  • Video recording
  • 91-point Phase Detect autofocus
  • Decent battery life (Over 400 shots per charge)
  • Built-in flash
  • 14-bit RAW shooting


What’s Missing?

In order to bring the X-T100 in at only $599, they has to make some compromises. The main differences between this model and the higher end X Series cameras is that it has a regular CMOS sensor instead of Fuji’s X-Trans sensor, and it doesn’t have the super fast X Processor Pro chip.

In short, it won’t have the same AF speed and performance as the other models, it doesn’t have the ACROS film sim and it doesn’t have as large a buffer for shooting a lot of continuous frames. Also, it’s not weather sealed, but then again, neither are the X-T20 and X-E3.

And although it does shoot in a variety of video formats, even High Speed HD, it can only capture 4K at 15 fps.

​​​​​​​However, that doesn’t mean that the X-T100 isn’t a great little camera, because it is. You still get excellent image quality with those wonderful Fuji colors and nearly all of the creative capabilities that you’ll find on the other X Series cameras. In fact, many of the settings I cover in X SERIES UNLIMITED are totally relevant to the X-T100, as well.

Also, not everyone is totally in love with the X-Trans sensor.

Some software (cough… Lightroom) hasn’t always done an excellent job demosaicing the X-Trans RAW files, and although most programs have gotten remarkably better, some shooters would rather have a standard CMOS type sensor.

So, there you go.

Who is the X-T100 For?

In my mind, it’s pretty straightforward. The X-T100 is the ideal camera for someone who wants a Fuji, but doesn’t want to spend $900.

Starting at only $599 for the body, or $699 with a lens, the X-T100 is a very attractive choice for someone who might otherwise turn to a beginner DSLR, simply because they’re less expensive. This gets them in the door shooting mirrorless and opens even more people up to the true mojo of the X Series system.

It’s also an excellent backup camera if you’re already shooting one of the higher end models. It’s quite small, so it’s a great travel camera.

And, of course, it’s compatible with ANY and ALL of the X Series lenses, so it could function nicely as a second camera, or as your main Fuji, if you’d rather spend your money on glass than a more expensive body.

In the end, the X-T100 is just an awesome, inexpensive, yet powerful, classic little camera for general photography, especially if you’re not a heavy action shooter or someone who abuses your cameras.

Oh, and it comes in 3 colors: Black, dark silver and champagne gold. Just like an iPhone, only it’s way cooler and much more fun.

You can read about the X-T100 at the Fujifilm website, and you can preorder it here. It’s slated to hit stores on June 18.

[iframe]<iframe width=”468″ scrolling=”no” height=”60″ frameborder=”0″ style=”border:none;” border=”0″ src=”https://mer54715.datafeedfile.com/widget/aff_widget_prdt_generate-2.0.php?aff_num=6746&aff_net=1&widget_num=8085&sid=” marginheight=”0″ marginwidth=”0″></iframe>[/iframe]
May 25, 2018
See this post
Fujifilm Announces the Stylish New X-T100

I just read an insightful blog post by California photographer Richard Wong, called Why Do You Share Your Photos? It’s a very concise piece, but for how short the article is, Richard asks an enormous question.

People have always shared their photographs, but with the immediacy of digital technology and the life-dominating, all-consuming propagation of social media, the notion of “sharing” has taking on a while new life.

Now we can shoot and share within minutes, or even seconds of taking a photo, and we can even schedule are sharing to optimize the number of views that each image earns. And of course, if we don’t get enough likes, we can always buy more.

But what’s exactly is the point of all this sharing? What are we trying to achieve, and is it working for us? Is it making us better photographers? Is it making us better people? Is it making us more money? Is it enriching the lives of our viewers in some way or helping us communicate a particular message?

Granted, although I just painted the notion of modern sharing in a rather negative light, it’s not that cut and dried. Depending on who you are and where you’re sharing your work, the answer to one or more of those questions might be yes.

As you can read in his post, Richard’s take is that a large percentage of sharing isn’t really about “sharing,” it’s about “marketing. From what he sees, it’s less about personal expression than trying to promote workshops, tours, ebooks, prints, websites, subscriber lists, or simply stoking egos and getting more likes. Who doesn’t want more likes?

As a pro photographer, this made me stop and think, because a significant portion of images I share on forums and social media are indeed used to promote my workshops, ebooks, books and blog posts. The reality is that the more people read my blog, the more likely I am sell more ebooks and get people to sign up for my workshops or my newsletter.

However, I also love to share for the sake of sharing and storytelling. As someone who has always been fond of travel writing and photography, I love crafting narratives to accompany my images and take the reader even deeper into whatever adventure I’ve describing.

Sometimes I simply like sharing a cool new image that I’m genuinely excited about, for any number of reasons. Since I’m a human man, I occasionally like to show off my skills and stoke my own ego.

It’s often about sharing my views and experiences that surround the truly magnificent subject matter I often find myself in, whether I’m hiking on glaciers, flying over incredible mountain scenery at sunset or pedaling my bike through beautiful lands. Those are the stories that tell the narrative of my life, and it’s fun to share them with the world.

I also genuinely like inspiring other photographers, because I genuinely feel that the more confident we all are with our own creativity, the world will be a better place.

If one of my photos can help inspire someone to be a better, more proficient and confident visual artist, or if it opens their eyes to a new skill or creative approach, then I feel I’m doing my part.

There’s also the aspect of sharing photos of our natural world to promote message of conservation and exploration.

If my work can inspire someone else to travel or awe them into appreciating the beauty of our world a little bit more, it might spark an idea that has the potential to change the world.

As an influential photographer in todays’ world, I feel I have a responsibility on some level to use my images for good, and I take this task very seriously. However, please don’t equate that to mean that I’m one of those “serious” photographers…

As much as social media has become the massive marketing vehicle in today’s world, I still hold strongly onto the “social” aspect of social media. Sharing my work and corresponding with other photographers, fellow Fuji shooters, travelers and cyclists on places like Twitter and Instagram has allowed me to meet and make friends with a number of awesome people around the world.

In fact, a number of very meaningful friendships were initiated on social media before finally meeting in person during some bike trip or during one of my presentations. Even for people who haven’t yet met, I love the interaction I have with some of my regulars friends on these platforms. And I actual prefer to use social media messaging and @’s to keep in communication with my fiends online, since my email inbox is always so damn full.

So yes, I occasional use my photos, as Richard so eloquently stated in his article, to “sell, sell, sell,” but ultimately, that’s not what drives me to post my work online. It’s to share my own personal artistic and creative take on the world. If, in the process, I end up inspiring someone to have more fun with their own creativity, then all the better.

So tell me – Why do you share your photos?

May 23, 2018
See this post
Why Do You Share Your Photos Online?

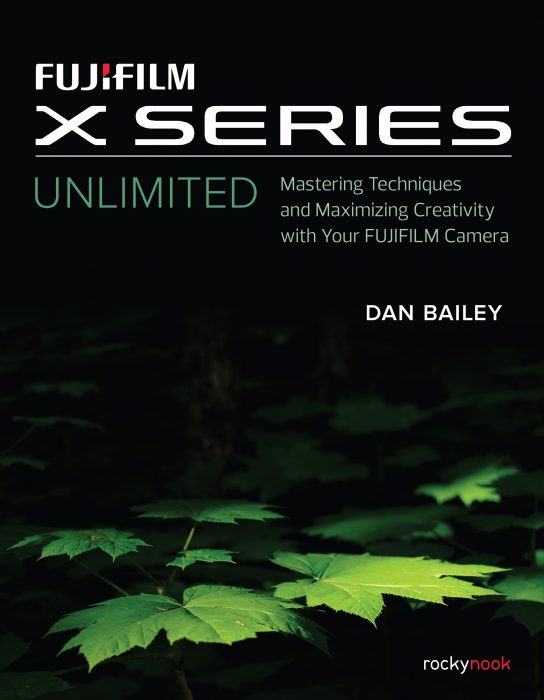
I’m so proud to announce that my bestselling FUJIFILM eBook, X SERIES UNLIMITED, is now available as a print book from Rocky Nook.

FUJIFILM X Series Unlimited: Mastering Techniques and Maximizing Creativity with Your FUJIFILM Camera has just been published as a 256-page paperback, and it contains all the info and content found in my extensive eBook guide.

In addition, it even has a #1 New Release banner on Amazon!

If you order directly from Rocky Nook and use discount code DANBAILEY25, you’ll get the book for 25% off.

With 8 Chapters that are packed full of tips and practical insight, this book will teach you everything you need to know in order to achieve technical mastery and creative liberation with your X Series camera.

THE Comprehensive Guide for the X Series. 

Just as with my eBook, this is the best and most complete guide available for the X Series cameras. Rather than focusing on just one model, my book covers every single X Series camera, even the older models like the X-T1, X-T10 and X-Pro1. And of course, it covers all the latest models, including X-T2, X-Pro2, X100F and the brand new X-H1.

No matter which model you have, FUJIFILM X SERIES UNLIMITED will teach you what every button, setting, function and menu item does on your camera, and it will show you in practical, real-world terms, exactly how you can apply each one to your own photography to get the best performance and maximum creativity.

When I first published X SERIES UNLIMITED last summer and released it as a 50,000-word PDF eBook here on my blog, I had no idea just how much impact it would have with my fellow Fuji users.

In just a few short weeks, it became my bestselling eBook. Since then, I’ve received hundreds of personal messages from readers who told me how much it helped them better understand their cameras and enhance their skills and creative passions for photography.

Last fall, Rocky Nook approached me about doing a print version of the book. Being a small independent publisher dedicated to publishing high quality photography titles, (most of seven-person staff are photography enthusiasts), they seemed like an awesome partner. I hit it off with them right away and within a week, we had everything formalized and ready to go.

Since the book was already written, it didn’t take long to revise the manuscript and adapt it for publication as a paperback. I singed off with my final approval right before my February Scotland trip and I received my review copy in mid March.

I was blown away when I saw the print book for the first time. The Rocky Nook team did an amazing job with the formatting and I LOVE the cover we chose. It’s different from the ebook, but I think it works really well and is very eye catching.

It even ties in with the Black X Series color scheme and that classic “Fuji Green” from the film days.

The size and feel of the book is incredible. (It’s about the same dimensions as an iPad Pro). And although the layout inside is slightly different, as I mentioned above, it’s the same book, just in print form for people who prefer the format of a real book.

Although I may be a little biased, I can attest, it’s a real joy to flip through the pages of the new Rocky Nook version.

If you already have the eBook version of X SERIES UNLIMITED, then this book is technically duplicate content. However, a number of readers have said that even though they already have my eBook on their computers and mobile devices, they love being able to have the print book as a tangible reference. Either way, it’s a great companion to the eBook.

I’m thrilled and honored to have my ideas published in this format, but I’m even more excited that I’ve been able to teach and share my insight with so many of you fellow Fuji users out there. You are the ones who really made this happen. You are the ones who bought my eBook, and stuck with me as I fixed the typos and released updates, and then gave me feedback.

Without you, this wouldn’t have happened. So thank you.

Remember, if you order directly from Rocky Nook (either print or ePub), use discount code DANBAILEY25 for a 25% savings. You can also get the book from Amazon (either paperback or Kindle) and other book retailers.


May 7, 2018
See this post
FUJIFILM X SERIES UNLIMITED, Now Available in Paperback from Rocky Nook