Free eBook from Craft and Vision
11 Ways to Improve Your Photography: Free eBook from Craft and Vision

Do you like learning about photography? Of course, you do. That’s why you braved the wilds of the internets and trudged your way through the wireless network past all the Groupon ads just to get here.

Do you like free? Of course you do. Who doesn’t?

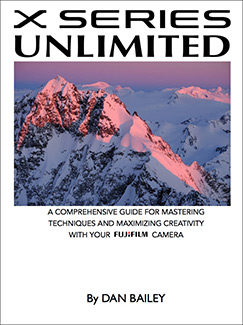
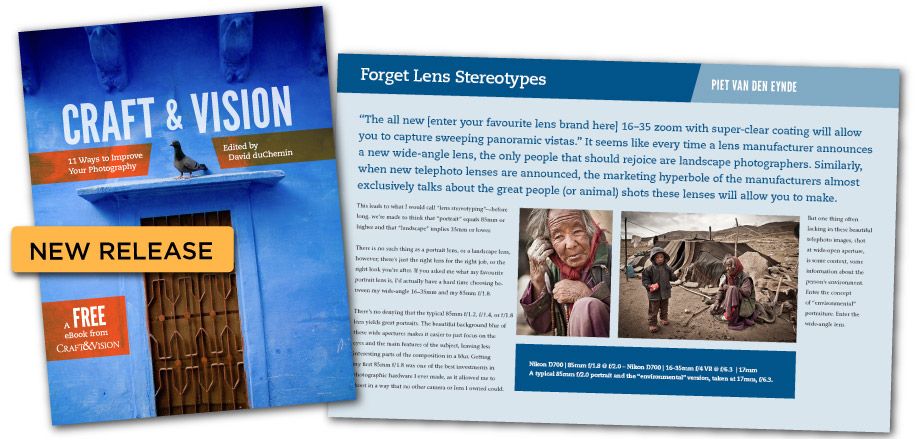
Good, because today, they’re one and the same. The wonderfully creative folks over at Craft and Vision just released a brand new eBook today called 11 Ways to Improve Your Photography. And it won’t cost you cent. Not now, not ever.

A compilation of articles by a number of their top authors, 11 Ways to Improve Your Photography features eleven great chapters, each of which explores a different method for exploring and improving your photography.

With chapters such as Make Your Images More Dynamic, The Power of the Moment, Slow Down and Learn to See, and Make Stronger Portraits, this book is filled with rock solid tips, approaches and exercises that is sure to inspire you and open your creative flood gates.

I could go on, but there’s really no need to. Like I said, the 11 Ways to Improve Your Photography is free. Whether you download it today or get distracted by Twitter, fall behind with your work, forget about it and then suddenly remember while you’re lying in bed six months from now, it will be free then too.

Check it out for yourself. I’m pretty sure you’ll like it, and even if you don’t, you’ll still get your money’s worth. And even if you’ve already read a number of their other books, don’t worry, there’s no recycled content here or excerpts from other books. It’s all brand new stuff, ready to be pored over, digested and tried out next time you pick up your camera. Or tossed into the trash with all of your reject images from yesterday’s photo shoot.

As an eBook author myself, I’ve long admired the titles that Craft and Vision puts out. I’ve read and reviewed quite a few of their books here and I don’t think that there’s a single title that isn’t worth the measly five bucks that the rest of them cost.

Between the brilliant focused vision of David du Chemin, the technical off-camera lighting know-how of Piet Van Den Eynde, the landscape mastery of Michael Frye, the mountain adventure imagery of Alexandre Buisse and all the other great, creative photographers who write for them, like Andrew Gibson, Nicole S. Young, and Stuart Sipahigil, these guys not only know their stuff, the throw it out there with authoritative expertise and inspiration. And they do it with great looking and engaging layouts that really draw you in.

So download 11 Ways to Improve Your Photography. Read all 69 pages now, or stick it on your desktop or your iPad and save it for a rainy day. It’s a great book, and for free, you really can’t miss.

December 1, 2011
See this post
Download a Free eBook from Craft and Vision

Although I do own and have owned a number of zoom lenses, I generally shoot with fixed lenses or primes in my photography. Why? Because they’re lighter and more compact than most zooms, and they’re sharp. Really sharp. A lens with elements that don’t move inside the lens barrel is optimized for one angle of view, and so it does one thing extremely well.

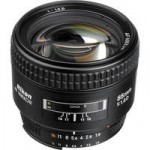
One of my favorite lenses is my Nikon 85mm f/1.8D short telephoto lens. I use it all the time; I rarely leave the house without it. It’s actually lens that I slapped on when I bought my very first digital body. I take it backpacking, hiking, biking, traveling and skiing, and it goes with me on every single assignment.

In fact, if you comb through the metadata in my Lightroom catalog, you’ll see that it’s my second most used lens. Over the years, many of my favorite images were made with that lens. Although I’ve mentioned it here on the blog, (See What Can You Do With a Short Telephoto Lens and 4 More Reasons Why I Love my 85mm f/1.8 lens.) but this is the first time I’ve done a formal review of the 85mm f/1.8.

Rather than include images in the post, I’ve created a gallery of photos at the end to illustrate all the ways that I use this lens.

Lens Speed

First of all, this lens is fast. With a f/1.8 maximum aperture, it’s fast enough to use inside and for many photography applications where you’re dealing with reduced ambient light. I’ve used it in my house, inside the garage, inside buildings, dark monasteries, flamenco bars, deep canyons and dimly lit forests, under overhanging boulders, under ominous overcast skies and just about everywhere else where the light sucks.

In all of those places, it performs extremely well. f/1.8 is fast and that kind of speed lets me use shutter speeds that would be impossible to get with something like an f/4 lens. This means getting the shot, whether you’re shooting a subject that’s moving or just standing there looking at the camera.

Even though modern DSLR cameras have high ISO capabilities, speed still matters, which is why I always advocate getting the fastest lens that you can reasonably afford. The Nikon 85mm f/1.8 definitely falls under the category of “fast.” In that regard,  it’s a lens that won’t let you down.

Depth of Field

The 85mm f/1.8 has an extremely shallow depth of field, which makes it an excellent choice for photographing portraits. Short telephoto lenses are generally ideal for portrait use because of the appealing way that they compress the features of the face. If you really look at a person’s features, you’ll see that our ears are too far back on our head to look all that good. A short telephoto flattens our features just enough to bring those forward a little bit and make us look that much better.

Although the 105mm is often considered the ideal portrait lens, the 85mm f/1.8 does the job really nicely, and it’s m go to lens for portraiture. Even on a crop sensor DX body, the 85mm effectively becomes a 130mm lens, which is still a great length for this kind of photography.

That shallow depth of field is also great for nature and landscape work, as well as any time you want to isolate your subject matter from the background. The 85mm f/1.8 really pulls your subject matter forward and makes it pop in the frame against a really soft backdrop. This makes for extremely nice bokeh qualities.

I take advantage of this aspect of the lens and apply it with nearly every style of subject matter that I shoot, whether I’m photographing people, landscapes, closeups, travel subjects, still lifes. In that way, the 85 1.8 is really a great all around lens. It will do just about anything, except of course, wide angle. However, you can still get in pretty close and just show part of the subject and include some out of focus elements to give your scene a sense of place.

Construction, Size and Specs

The Nikon 85mm f/1.8D is a durable, well built lens. Trust me. I’ve banged it around enough to have damaged the thing if it was a cheap piece of junk. It’s not, it’s built to withstand a reasonable amount of abuse and still perform flawlessly.

The lens weighs 13.4 ounces, and without the lens hood, it’s 2.3 inches long and 2.8 inches wide. However, I always use the HN-23 lens hood, it reduces flare and protects the front of the lens from my occasional recklessness in the outdoors. Overall, it’s compact enough to fit on the camera in just about any type of camera bag, even with the lens hood.

As I said, I rarely leave the house without my 85mm lens, and over the years, I’ve found it to be an extremely valuable and creative tool in my outdoor, adventure, location and travel photography. I highly recommend this lens to any photographer as an essential piece of solid glass that will get the job done in a variety of photography applications and produce professional quality work and exceptionally sharp imagery.

Support this site: By visiting and purchasing gear through these links, you help cover the costs, effort and time that it takes to run this site and produce the articles and reviews that you find here. As always, thanks for reading!

[iframe]<iframe width="120" scrolling="no" height="240" frameborder="0" style="border:none;" border="0" src="https://mer54715.datafeedfile.com/widget/aff_widget_prdt_generate-2.0.php?aff_num=6746&aff_net=1&size=120x240&mode=s&bucket_num=831&link_target=y" marginheight="0" marginwidth="0"></iframe><iframe src="https:///e/cm?lt1=_blank&bc1=000000&IS2=1&bg1=FFFFFF&fc1=000000&lc1=0000FF&t=danhbaisadvph-20&o=1&p=8&l=as4&m=amazon&f=ifr&ref=ss_til&asins=B00005LE75" style="width:120px;height:240px;" scrolling="no" marginwidth="0" marginheight="0" frameborder="0"></iframe>[/iframe]
November 30, 2011
See this post
Lens Review: Nikon 85mm f/1.8D Short Telephoto

I was at the bookstore the other night, mostly getting some early holiday shopping done. Of course, I managed to find myself in the photography section, and as I was staring at the shelves, this book jumped right out at me:

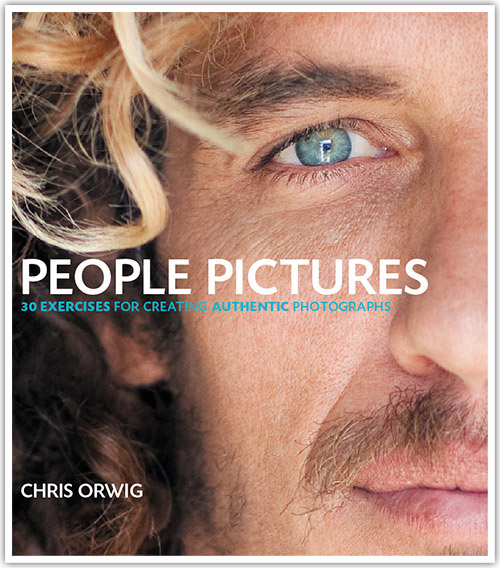
People Pictures: 30 Exercises for Creating Authentic Photographs by Chris Orwig is a really compelling book, not only because it has a great cover, (look at the catchlight in his eyes!) but because it speaks to an aspect of photography that almost every one of us holds very close.

No matter what we like to photograph, landscapes, nature, travel, sports, it’s the people pictures that often hold the most impact. They’re the ones that are usually the hardest to shoot well, and long after the fact, they’re often the ones that mean the most to us.

Why? Because there is nothing so compelling as capturing expression and personality, and if we do it well, we can create magnificently strong images that communicate depth, style and emotion. However, shooting people can often be very challenging and it’s an area of photography where we all strive to improve.

People Pictures: 30 Exercises for Creating Authentic Photographs does an amazing job of guiding you through the process of experimentation and creativity with different techniques towards shooting portraits and photos of people. The author, Chris Orwig, who teaches at Brooks Institute of Photography, offers 30 unique exercises that are designed get you thinking and trying new approaches, in a wide variety of styles.

Done in a very fun way, they push you to come up with new ideas of your own, based on the concepts and examples that Chris illustrates and outlines in each chapter. With headings such as Endurance, Forging Relationships, Turn Your Camera Around, Be Quiet, Point of View, Upbeat and Alive, there are plenty of opportunities to get you thinking outside of your standard box of portrait techniques.

After flipping through this book, I felt compelled to buy it. It’s simple to read, it’s filled with lots of great and very diverse examples, and again, it fosters experimentation, which is the key to all creativity and great artistry. There’s even a Kindle version, which looks awesome on the iPad and even the iPhone. This gives you a really great mobile reference manual that you can take on location for new ideas.

I like People Pictures: 30 Exercises for Creating Authentic Photographs, and I chose to write this review because it offers a fresh and unique perspective on a very timeless aspect of photography that we can all identify with. There’s less text that you’d generally find in most photography books, but in that way, it’s more of a course than just a book.

It will absolutely help you create stronger, more compelling portraits and images of people, but as with any course or lesson, you have make the effort yourself. If you’re willing to step out there and actually work through each exercise and self assignment, then this book will definitely motivate you to branch out with your skills and become a better people photographer.

Chris is also the author of Visual Poetry: A Creative Guide for Making Engaging Digital Photographs. I haven’t checked out this title yet, but from reviews I’ve read, it’s as good, if not better than his People Pictures book.

People Pictures: 30 Exercises for Creating Authentic Photographs.”

November 29, 2011
See this post
People Pictures: 30 Exercises for Creating Authentic Photographs

Canon has four Speedlites in their current lineup, the 580EX II, the 430EX II, the 320EX and the 270EX II, each of which varies in features, power and relative price. By comparing each model, you can determine which one is right for you and your photography needs.

Canon 580EX II
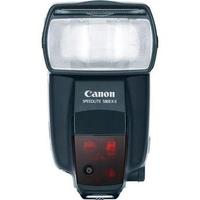
The 580EX II is Canon’s top of the line Speedlite and it’s a workhorse flash. In size, weight, price and functionality, it’s comparable to the Nikon SB-900, which means that it’s not cheap, exceedingly light, or compact. However, it’s a professional unit that will get the job done.

Sporting a new metal hot shoe foot and a weather resistant housing, it features a zoom range of 24-105mm, and a head that rotates in nearly every direction. It has a very fast recycle time and will sync at 1/250 for high speed shutter operation.

The 580EX II is Canon’s only flash that will function as a Master flash controller, and it can control up to three groups of remote flashes, plus itself, if you wish to include it’s own light into the mix. As long as you have line of sight visibility between the Master and all of the wireless remotes, you have virtually unlimited creative options for using multiple flashes to light your scene.

It can also be used as a wireless slave which is controlled by another 580EX II or the Canon ST-E2 Wireless Transmitter.

Overall, the 580EX II is a powerful and versatile flash that packs a lot of power and features, as well as a host of custom functions. Basically, if you want the most control and creativity from your Canon Speedlite system, or if you’re looking for a Master flash, then the 580EX II is the unit you’ll want.

Online price: Around $470 for a new 580EX II

Canon 430EX II 
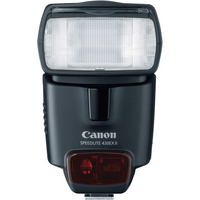
A versatile flash that’s smaller, lighter and less expensive than the 580 EX II, the 430EX II is a great option if you’re looking for a single mid-range flash or an additional light to be used as a remote unit.

It’s also a good choice if you want to save on weight. Compared to the 580EX II, which weighs 405g, the 430EX II comes in at 320g. Not a huge difference, but it’s size difference means that it’s easier to pack in your camera bag.

Like the 580EX II, it has a zoom range from 24-105mm, and the flash head will tilt up, left and right. It won’t go all the way around on both sides, but that’s usually not an issue.

A big difference between the two units is that the 430EX II cannot function as a Master flash, but it will operate as a wireless remote. This alone could be the difference in why you’d choose the 580EX II over the 430EX II.

That said, with the size and weight of the 580EX II, maybe the better route to go is to get a ST-E2 Wireless Transmitter and one or two 430s if you’re goal is to go light and fast. After all, they’re smaller and lighter than the 580s and they’re certainly less expensive. Expect to pay around $300 for a new 430EX II online.

Remember, you can also control the flash from on-camera if you have a compatible DSLR with a pop-up flash, like the EOS 40D, 50D and 7D. Or you can use a sync cord. Battery life is a little better on these models as well; it will fire up to twice the number of flashes as the 580 on a full charge.

Overall, the Canon 430EX II is a versatile and economical Speedlite that will give you a lot of creative options in your strobist photography.

Canon 320EX

Newest in the lineup is the Canon 320EX. It’s is a versatile little flash has a guide number of 78.7’/24m @100 ISO (24mm), full E-TTL, wireless capabilities and an LED modeling light on the front of the unit. It has two zoom settings, 24mm and 50mm.

It’s also designed for Live View and video shooting, and it will illuminate nearby subjects in low light for up to 4 hours of continuous lighting with fully-charged AA batteries.

I don’t see that as being a very big selling point for outdoor photographers, however, it’s wireless functions do it an attractive unit. The 320EX will not function as a master, but if you have a compatible Canon body that will operate as a commander, you can use this flash as one of your wireless slaves.

Price is certainly attractive, they’re only about $239.00 new. For it’s price and size, (smaller than the 430EX II) this might be a really desirable option, especially if you’re picking up a second or third Speedlite.

Canon 270EX II
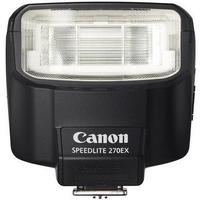
If you’re on a budget or if you need to go extra light on gear, the 270EX II might be the best Speedlite option for you.

Keep in mind, though, the 270EX lacks many of the controls, custom functions as the other two Canon Speedlites, and it has no wireless capabilities. It cannot be used as either a Master or a wireless remote.

It’s a light. No more, no less. Actually, it’s actually less, since it only weighs 145g and costs less than that in dollars.

That said, you can still get some great off-camera and strobist-style lighting with the 270EX. Stick it on the end of a sync cord and you’ve got an off camera flash. Throw on a small softbox like the Lumiuqest Softbox III, or place it behind a large diffusion panel and you can throw some really nice light.

——

Check out Syl Arena’s great book on Canon flashes, Speedliter’s Handbook: Learning How to Craft Light With Canon Speedlites.

This very comprehensive book will teach you everything you need to know in order to learn about Canon flash systems and expand your creativity and lighting techniques.

Current Rebates on Canon Flashes at B&H Photo: Right now, save up to $50 instantly on Canon flashes. Visit the links below to take advantage of this great deal!

[iframe]<iframe width=”300″ scrolling=”no” height=”250″ frameborder=”0″ style=”border:none;” border=”0″ src=”http://mer54715.datafeedfile.com/widget/aff_widget_prdt_generate-2.0.php?aff_num=6746&aff_net=1&widget_num=425″ marginheight=”0″ marginwidth=”0″><p>Your browser does not support iFrame.</p></iframe>[/iframe]

[iframe]<iframe src=”http:///e/cm?lt1=_blank&bc1=000000&IS2=1&bg1=FFFFFF&fc1=000000&lc1=0000FF&t=danhbaisadvph-20&o=1&p=8&l=as4&m=amazon&f=ifr&ref=ss_til&asins=B000NP3DJW” style=”width:120px;height:240px;” scrolling=”no” marginwidth=”0″ marginheight=”0″ frameborder=”0″></iframe><iframe src=”http:///e/cm?lt1=_blank&bc1=000000&IS2=1&bg1=FFFFFF&fc1=000000&lc1=0000FF&t=danhbaisadvph-20&o=1&p=8&l=as4&m=amazon&f=ifr&ref=ss_til&asins=B001CCAISE” style=”width:120px;height:240px;” scrolling=”no” marginwidth=”0″ marginheight=”0″ frameborder=”0″></iframe><iframe src=”http:///e/cm?lt1=_blank&bc1=000000&IS2=1&bg1=FFFFFF&fc1=000000&lc1=0000FF&t=danhbaisadvph-20&o=1&p=8&l=as4&m=amazon&f=ifr&ref=ss_til&asins=B004M8SWBU” style=”width:120px;height:240px;” scrolling=”no” marginwidth=”0″ marginheight=”0″ frameborder=”0″></iframe><iframe src=”http:///e/cm?lt1=_blank&bc1=000000&IS2=1&bg1=FFFFFF&fc1=000000&lc1=0000FF&t=danhbaisadvph-20&o=1&p=8&l=as4&m=amazon&f=ifr&ref=ss_til&asins=B004M8SWBK” style=”width:120px;height:240px;” scrolling=”no” marginwidth=”0″ marginheight=”0″ frameborder=”0″></iframe>[/iframe]
[wpc_table id=2]
November 28, 2011
See this post
Which Canon Speedlite Should You Get? 580EX II vs. 430EX II vs. 320EX vs. 270EX II

Digital Imaging Tips by Dan Moughamian
Introduction

Topaz Labs recently announced Topaz Adjust 5 plug-in for Photoshop, so I thought it would be useful to follow up on the prior Adjust 4 tutorial to show another example of how it can help improve our digital workflows. Aside from some performance tweaks, and the updated user interface, there are also new filters and controls for creating precise results.

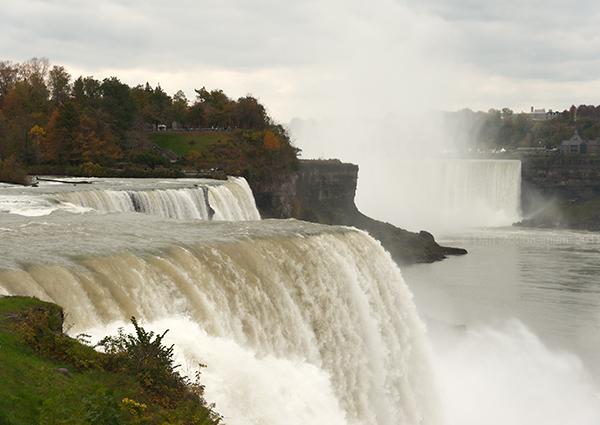
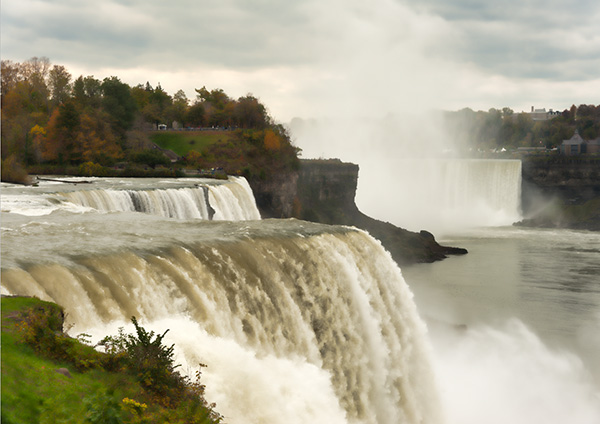
For this tip we’ll take a look at working around a common problem: taking an image that was shot under overcast or partially overcast light (because there was no other alternative), and using what the scene gives us to enhance or re-create the emotion of the place. Sometimes just photographing an interesting place isn’t quite enough to convey the meaning of the place. Seen below, the original shot was taken this fall at Niagara Falls under less than ideal lighting conditions.

The original photograph: not bad but the power of the place gets “lost in translation”.

There are things that I like about this shot, even though it’s been taken a million times before. Sometimes we take pictures not to floor people with something brand new but to remember the unique places that we pass through during this short life. Maybe the shot is for others, maybe it’s just for the photographer; the “who” is not really important. What is important is that we can use selective techniques with apps like Topaz Adjust to add some emotional impact back into the shot.

The Goal

To me, this moment was about the blustery weather, being surrounded by water in many forms (and famous Buffalo Wings and Duff’s!). Summer was gone and there was a sort of surreal moment, trying to understand “big nature” in the context of a mob of people and a row of cheesy looking hotels and casinos on the Canadian side of the falls. I chose only to capture a bit of the man-made here, just to give a hint that it is there. So, how could I help the photo “define” some of the thoughts that I experienced at the time? For one thing I think this is a perfect example of a shot where the small details don’t matter. By that I mean how sharp the trees in the distance are, how sharp the eddies are, etc. We have a tendency to always sharpen, even when it doesn’t suit the scene. For another thing, there was more color here visible to my eye than the camera captured. We can get some of that back in spots.

The Workflow

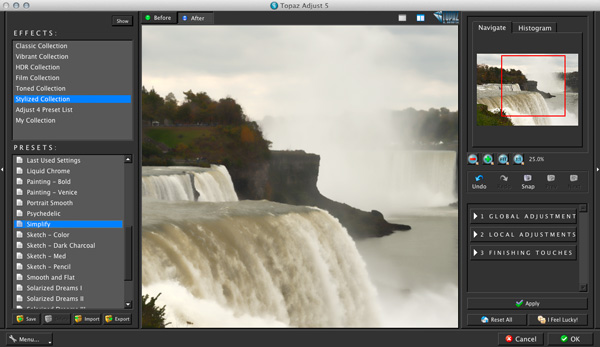
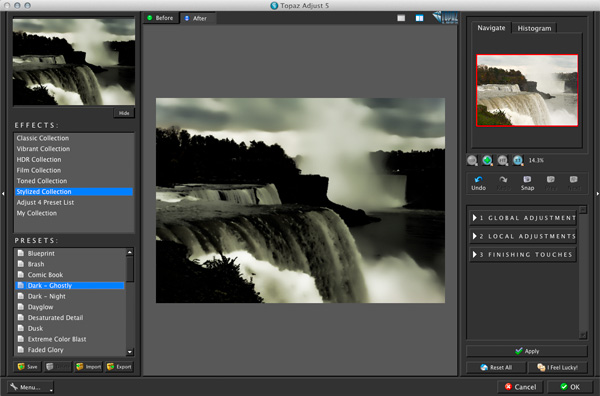
First, in Photoshop choose Filter > Topaz Labs > Topaz Adjust 5. The user interface is similar to the one I described in the earlier Adjust 4 tutorial; the main difference is that the presets are now broken into categories, making it easier to find the type of preset you need. Use the Effects category list to choose the type of workflow you want. As you mouse over each preset, the preview at top left will give you an accurate idea of how your image will look with the preset applied. Down the right side there are three primary groupings of controls; we’ll focus on the Global Adjustments.

The Stylized preset category offer mostly heavily illustrative looks, but there are a few that can also be useful in photographic workflows.

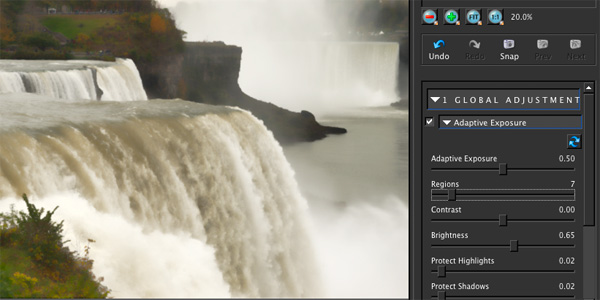
To follow along for this tutorial, you can scroll down the list of Stylized presets and click the “Simplify” option for your photo. Note: to speed up performance, turn off the Enable Auto Update feature in Preferences (accessible via menu at bottom left). This will ensure that the main preview area is not constantly updated (which takes a second or two each time), as you mouse over different effects. Once this preset is applied you can see right away what its purpose is: all of the image details get heavily smoothed over. This is a good starting point to make a few simple corrections and achieve the objective of accenting the water details as well as the contrast.

The default Simplify effect creates a very soft focus or smooth look.

Next, open the Global Adjustments, then open the “Adaptive Exposure” subgroup. What I needed to do first was make the entire image slightly brighter and then make the darker areas on and below the falls contrast with the surrounding areas more, because the water tones were not so uniform as they are here. To make a uniform change in brightness, increase the Brightness slider by a modest amount. Next I increased both the Adaptive Exposure and Regions settings slightly to create localized pockets of contrast (they work in tandem). Note that some experimentation is needed because their effect is not perfectly linear; the bright and dark spots can fluctuate a bit depending on the photo. Specifically these two sliders helped bring back some of the darker streaks in the falling water and on the river.

Adaptive Exposure and Regions work together to create local areas of contrast.

The final step was to reintroduce some detail on the water’s surface to ensure it still looked like a photograph and not a painting or illustration. To do that you can zoom in a bit and then open the Details subgroup. For this shot there was only one control I needed to tweak: the Detail Boost slider can turn an image from pure glass into the grungiest looking shot you’ve ever seen and vice-versa. You don’t need to move it very far; a little nudge goes a long way. Here I bumped up the value until I could see the turbulent details on the water (just above the falls) and then decreased it again until those eddies became small white streaks – rather than having them disappear which is basically what happens with the default setting. The shot below shows the final filter settings applied.

The final look of the filter, after modifications were made.

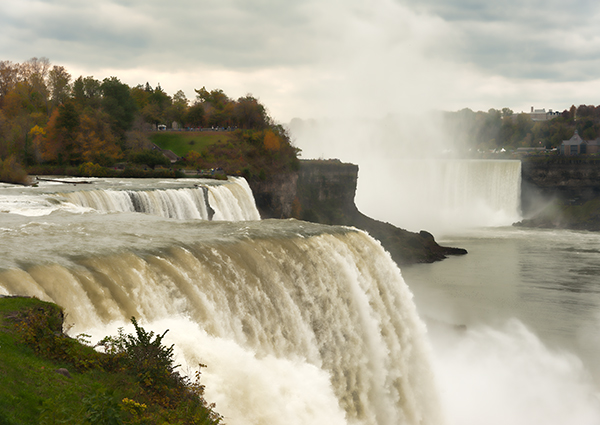
The filter having been applied, the obvious issue was that certain parts of the waterfall and the foreground (i.e. the grass in the corner) didn’t fit with the rest of the shot. They were too saturated for one thing. If you’ve already applied the filter and find “trouble spots”, you can easily handle this by using the History Brush to “paint back” some or all of the original tone, color or texture in specific spots. This technique will be covered along with another “texture recovery tips” in a future tutorial. The final shot is shown below.

The final styled shot. Compare to the original; note the differences in the sky, and the falls, mist and river.

Hopefully you can see from just a few settings how powerful this plugin can be; I encourage you to download the Topaz Adjust 5 Demo if you haven’t already. If you’d like to discuss this other Photoshop techniques, I hope you’ll join me over on Google +. -Dan

————–

Dan Moughamian is an experienced photographer and educator, and has worked
with Adobe Photoshop since the early 1990s. He also has extensive
experience with Photoshop Lightroom, Photoshop Elements, plugins from Nik
software, and many other digital imaging products. As a long-time member
of their testing programs, Dan has collaborated with Adobe Systems to help
enhance many of the core functions in Photoshop, Lightroom, and Elements.

He is the Author of Adobe Digital Imaging HOW-TOs- 100 Essential Techniques for Photoshop CS5, Lightroom 3 and Camera RAW 6, and his work has been also been published in Photoshop User Magazine and Photo Techniques Magazine.

As an educator, Dan’s focus is to help photographers at all levels get the
most from their digital workflows. Tips on raw editing, layer masking,
alpha channels, image adjustments, HDR photography, focus and lighting
effects, and perspective correction, are just a few examples of the topics
he covers. To learn more, you can visit Colortrails.com, and follow Dan on Twitter, and on Google Plus.

November 23, 2011
See this post
Tutorial: Interpreting The Moment With Topaz Adjust 5

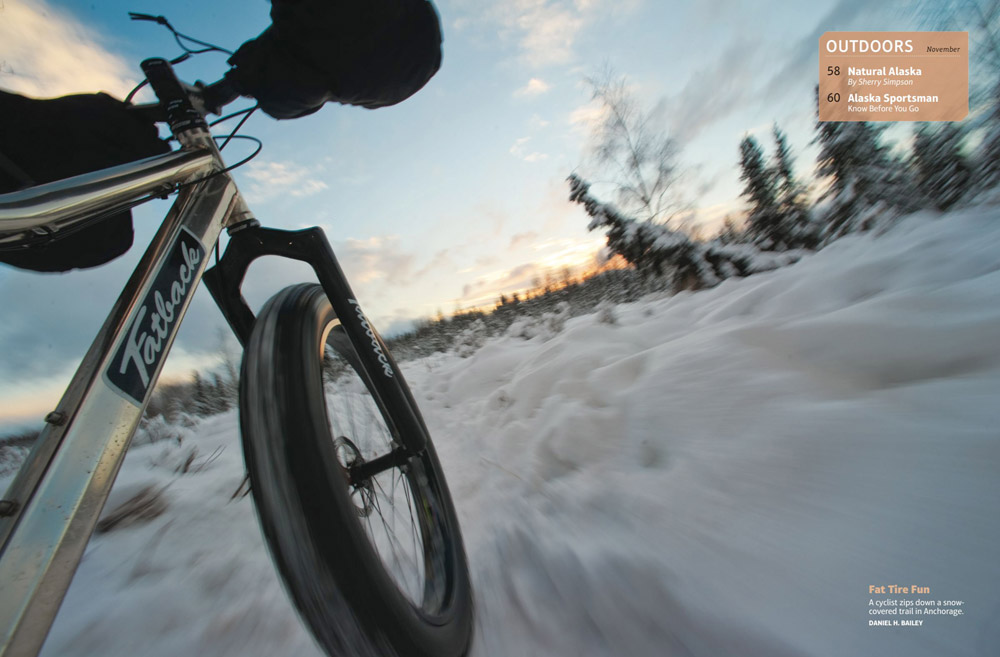
Another recent publication: This photo of my Fatback snow bike cruising through the powdery Anchorage wilderness appeared as a two-page section opener in the October 2011 issue of Alaska Magazine.

I shot this with the Nikon D700 and a 14mm f/2.8D lens on a cold January day. Watch this short video lesson from the field that shows how I created this image.

November 22, 2011
See this post
Recent Publication: Alaska Magazine, October 2011

It’s always great to challenge yourself and push your own creative boundaries. Sometimes you do this with different techniques, sometimes you do by photographing new subject matter, and sometimes you do it by using different gear.

I recently got my hands on a Lensbaby Composer Pro with the Sweet 35 optic and have been trying it out with mixed results. That’s not a comment on the lens, it’s a comment on my own style.

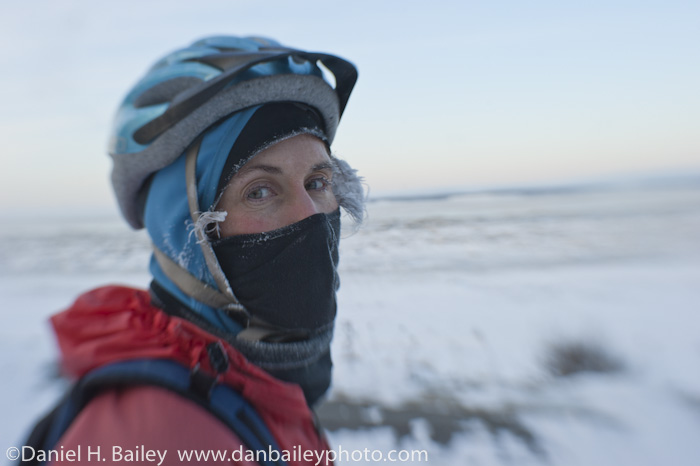
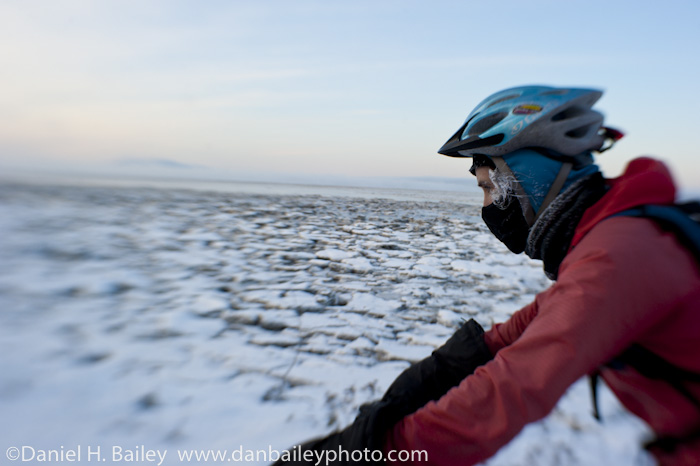
As you probably know by now, I rarely make things easy for myself, and so instead of giving it a nice gentle test drive on some easy to photography subjects, I jumped right in and took it for the first time in sub-zero degree weather on the snow bike in the dimming, late afternoon Anchorage, Alaska light.

Keep in mind, I’m using to using auto exposure and autofocus. By the nature of their design, Lensbabies offer neither. That means shooting any kind of action, motion or quick portraits required me to approach my photography a little differently.

Add to that the fact that I’m all bundled up with an insulated facemask, glasses that keep fogging up and gloves that make it hard to manipulate the camera controls, especially when I’m trying to shoot one handed while riding the snow bike. Plus there’s the whole issue of keeping the camera batteries warm and people that just don’t want to stand around playing ‘model’ in the cold.

Nonetheless, I welcomed the challenge and tried my best to create some compelling shots in very difficult conditions. Gear, technique and weather aside, I think I managed to eek out a couple of cool frames on our short ride, what do you think?

As far as the Lensbaby goes, it seems like a pretty cool tool so far. I’m excited to try it out even more and see what I come up with in my own particular style of outdoor and adventure photography. And wait until I throw some Speedlights into the mix!

November 21, 2011
See this post
Trying Out the Lensbaby in Alaska Conditions

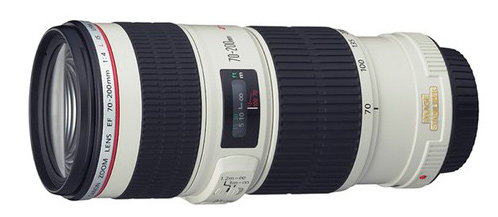
Today we’ve got a guest gear review by British Columbia photographer, Michael Russell. Michael specializes in shooting landscape and nature and he shares his personal experience with the Canon EF 700-200mm f/4L IS USM lens and how it performs for outdoor photography.

———-

Last year I finally decided that I had outgrown my 100mm macro lens as my longest telephoto lens. I wanted a lens that would help me photograph some of the wildlife that I occasionally see, and to help me photograph subjects I wasn’t able to get closer to on foot. I had read some great reviews of the Canon 70-200mm lenses so this seemed like a great place to start my research.

Canon offers 4 versions of its EF 70-200mm lenses. The EF 70-200mm f/2.8L USM, the EF 70-200mm f/2.8L IS II USM (IS stands for Image Stabilization) and the EF 70-200mm f/4L IS USM, which also comes in a non-IS version. At the time of my decision, the 70-200mm f/2.8L IS II USM was not yet available, and the Mark I version of this lens reportedly had an IS system that was less effective than that of the f/4 version. Canon has since updated this lens to the Mark II and both lenses now have the same high quality image stabilization.

Ultimately my choice between these lenses came down to price, weight, and the type of photographs I usually shoot. The EF 70-200mm f/2.8L IS USM has a relatively high price tag ($2,299) so it was well out of my budget. I had considered the non IS version of the f/2.8 lens but this version is almost double the weight of either f/4 versions. I was reasonably certain that I did not require an f/2.8 and that the f/4 would be fast enough – especially considering the landscapes that I often photograph. I had decided that I wanted the IS feature so it really came down to the EF 70-200mm f/4L IS USM. I should point out that I did not consider lenses from manufacturers other than Canon.

The stabilization system in the EF 70-200mm f/4L IS is a “4 stop” IS. IS systems like this one steady the lens when your hands move the camera – they do not have any effect on a moving subject. Essentially you can use a slower shutter speed hand held with the IS system turned on than you otherwise would be able to. The EF 70-200mm f/4 L IS also focuses internally, so the lens does not extend its length as you zoom.

How I use the EF 70-200mm f/4 L IS Lens

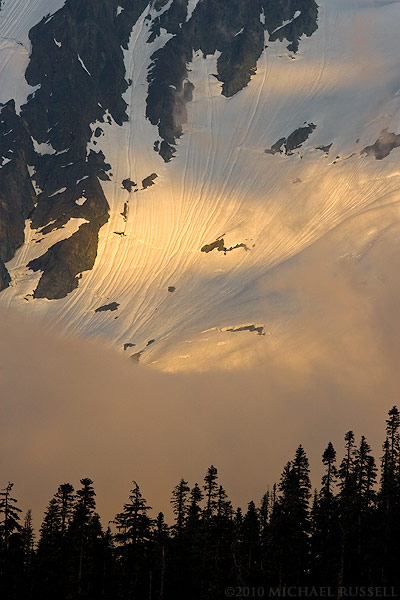
While I purchased this lens mostly for wildlife and the occasional landscape, I was initially surprised how often I have used it for landscapes. There can be many distracting elements in a landscape scene and shooting at a wide angle might make it difficult to minimize these with composition alone. With the EF 70-200mm f/4L IS USM, I am often able to concentrate only on the most important part of that sort of scene.  In the first example below I focused on the patterns in the White Salmon Glacier on Mount Shuksan in Washington State. This was the most interesting part of the photo to me, and the effect would have been greatly diminished with a wider angle lens such as my Canon EF-S 17-55mm f/2.8 IS.

The White Salmon Glacier on Mount Shuksan in North Cascades National Park. ©Michael Russell


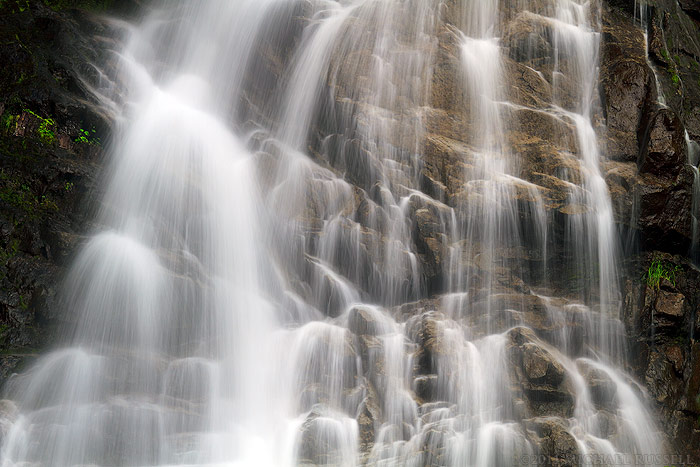
Another example is this image of Eureka Falls – made possible due to the focal length available in the EF 70-200mm f/4 L IS USM. The waterfall is 82 feet (25 meters) from where I was standing, but between my feet and the falls lies the swiftly flowing waters Silverhope Creek. This was not a case of being able to “zoom with my feet” and walk closer to the subject. I already had some nice wide angle images of these falls from another trip and with this lens I was able to show some of the details in the water and the surrounding rocks.

Eureka Falls flowing into Silverhope Creek near Hope, British Columbia. ©Michael Russell


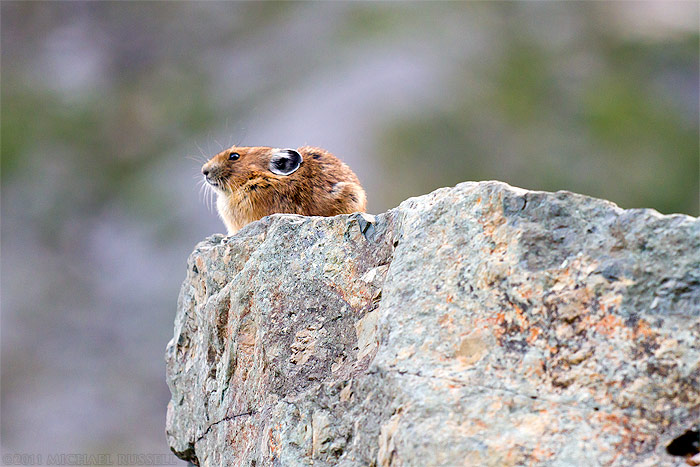
Naturally I also use this lens for photographing wildlife. At a focal length of 200mm you have to be reasonably close to your subject – even more so on a full frame camera. While I almost always shoot landscapes from a tripod if possible, sometimes my wildlife shots are hand held depending on the circumstances. This is when the IS system comes in handy.  This American Pika (Ochotona princeps taylori) was not moving but not easy to get near either. I needed to approach the Pika over various rocks and boulders on a slope so using a tripod was not going to be possible. I turned on the IS system and shot this hand held with good results.

An American Pika in the Mount Baker Wilderness. ©Michael Russell


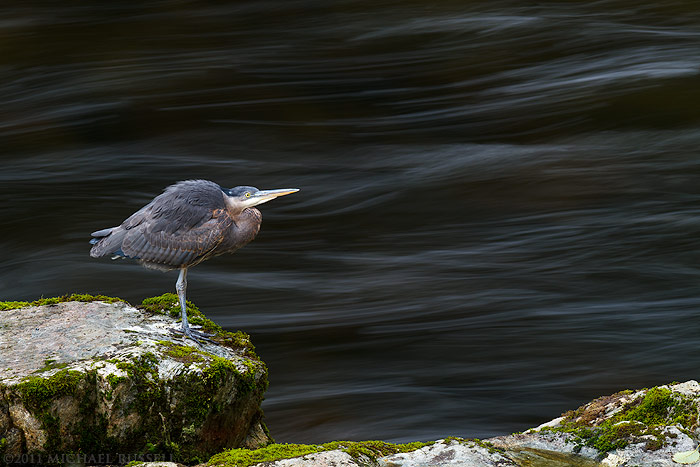
Sometimes the subject is posing nicely like this Great Blue Heron (Ardea herodias) below. In a circumstance like this I always turn off the IS and shoot with my tripod.  While a wide angle photograph might have looked good, being able to isolate the Heron on the rocks and the river flowing behind gave this image something special. This would not have been possible for me without the EF 70-200mm f/4L IS USM.

A Great Blue Heron on the shore of the Capilano River in North Vancouver, BC. ©Michael Russell


Conclusions

When you purchase this lens you receive a lens bag and the ET-74 lens hood included.  The only complaint I really have about purchasing the EF 70-200mm f/4 L IS USM is that Canon did not include the Mount Ring A-2 tripod collar. Canon charges a lot for the tripod collar by itself, ($139) and it just seems that this lens is expensive enough to have included it.

Overall I have been very happy with the performance of this lens. I cannot think of an instance where it has let me down. I have found the images I have made to be very sharp regardless of focal length or aperture. The auto focus system is quite fast and accurate as well.

I have found the photographs made with this lens to have slightly more vibrant colors than with some of my other lenses. Less time spent editing colors later is always a good thing. This was my first L lens from Canon and it is definitely a step above my other zoom lenses in terms of image quality and construction. If you are considering a telephoto zoom lens I believe the EF 70-200mm f/4L IS USM would be a great choice.

Get the $100 Instant rebate on this lens at B&H Photo.

———–

Visit Michael Russel’s website at www.mrussellphotography.com and follow him on Twitter @mrussellphoto.

November 18, 2011
See this post
Lens Review: Canon EF 70-200mm f/4L IS USM
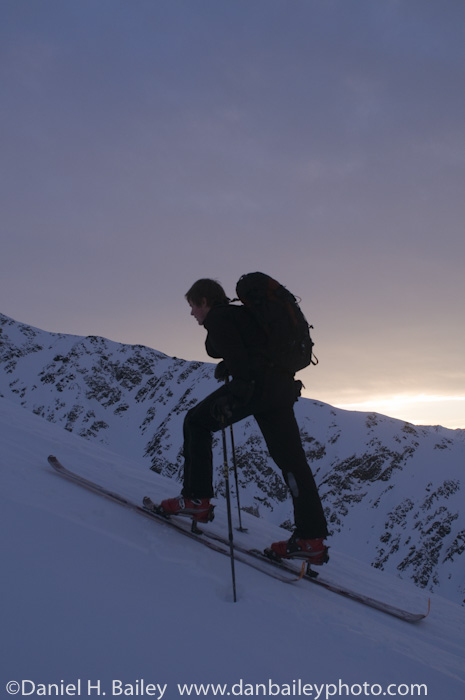
Telemark skiing, Turnagain Pass, Alaska

Blogs are a great way to bring extra traffic to your website, and they’re an awesome way to feature your newest imagery. They can also be a great outlet for photographers who enjoy writing. In fact, some photographers, *ahem* create blogs that are, in effect, online magazines.

And regardless of what you hear, blogs still have relevance, even this ultra modern era of Google+, because they allow for unique branding and a personality, both of which help attract and retain a following.

How can you make sure that people are actually reading your blog? How can you draw strong and consistent traffic that helps increase your overall online visibility, credibility, and in some cases, your income?

Here are 10 sure fire ways that you can get people excited about your blog so that they not only read it, they bookmark it, share it, stumble it and tweet it to the masses. Of course, this is in addition to all the important SEO stuff that you’ll also have to do. We’ll address that in a future post.

1. Post awesome content: Content is king. Period. Post something cool or and it will get seen.

2. Post useful content: Give your readers something that helps them. If there is a problem or issue that you have resolved in your photography, whether it’s technical, artistic, industry or gear related, then you’re in a position to help others, because I guarantee, you’re not the only one who had questions about that particular issue. This is the number one way your posts will be found and shared. If you just post images, then also consider posting the “how to info” for your shots.

3. Write with personality: Don’t be vanilla. Don’t be what you or others think you need to be. Be yourself. Bring forth the real you into your posts, because ultimately, what people like and trust is not perfect, it’s genuine.

4. Post regularly: The more often you post, and the more content that you place into the interwebs, the more likely you are to be found, seen and remembered. Would you subscribe to a magazine that only came out once or twice a year?

5. Be an expert: Surely there’s something that you’re really good at. Working your expertise about a particular subject into your blog posts will increase your credibility and your readership. This goes hand in hand with #2.

6. Be focused: David Hobby’s Strobist blog gets 3 million visitors a month. Why? Because it’s a focused site about one thing- off camera flash. Again, this goes with #2 and #5.

7. Be Diverse: Would you read a magazine that always ran the same type of article? Mix it up. Give your readers variety.

8. Be Concise: Don’t ramble on and make your readers wade through lots of irrelevant content. They’re busy. They don’t have time to waste. Edit ruthlessly. This doesn’t mean that you can’t occasionally write longer, more introspective or detailed posts, just don’t do it every day.

9. Engage your audience: Google+ is so popular because it lends itself well to easy interaction. Blogs take a little more effort to achieve this, but in the end, if your blog is going to succeed, it’s vital that you forge a strong and lasting relationship with your readers.

10. Make it easy to read: Format your posts so that they’re clearly written and easy to navigate. Break text into short paragraphs that tie into the main point, which you need to deliver early in the text.

Of course, this is by no means an exhaustive list on how to write a great blog, but hopefully it will give you some direction. Here’s some more great advice about blogging from Chris Brogan. If you’re really interested in creating a powerful blog that draws strong traffic, then you should definitely check out the best blogging resource ever, Darren Rowse’s 31 Days to Build a Better Blog eBook, which has just been updated with brand new content for 2012.

Oh, and don’t forget to retweet or stumble this post if you found it useful.

Thanks!

November 17, 2011
See this post
10 Ways to Get Your Blog Read

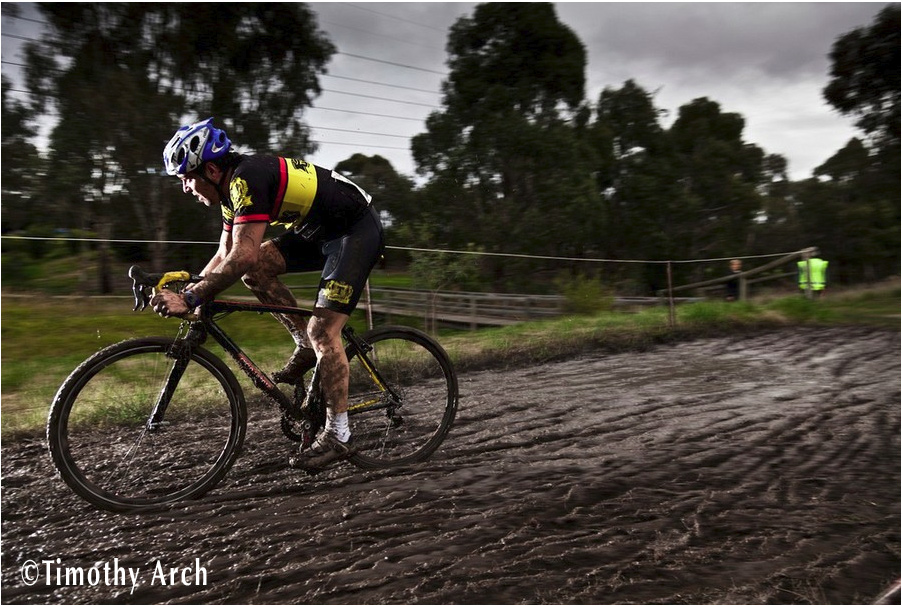
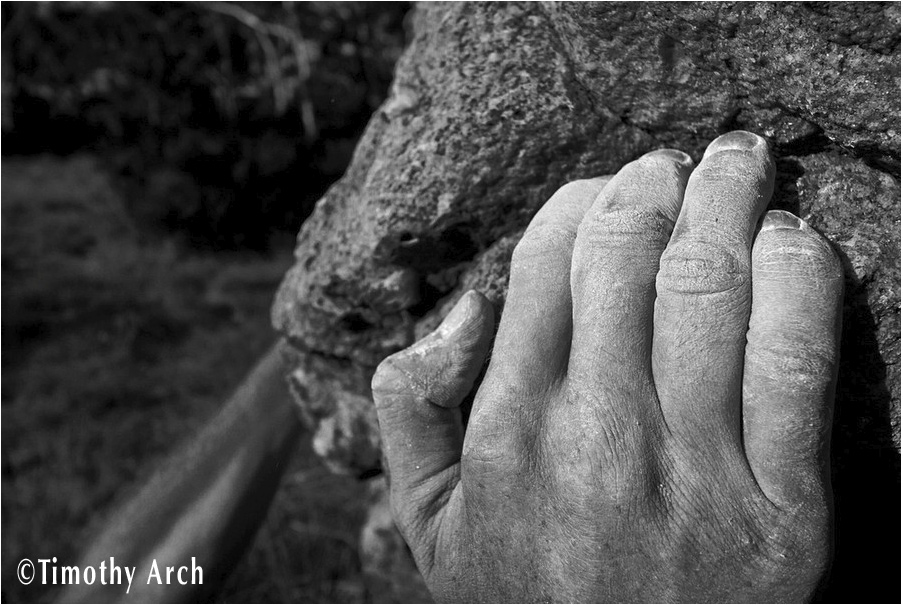
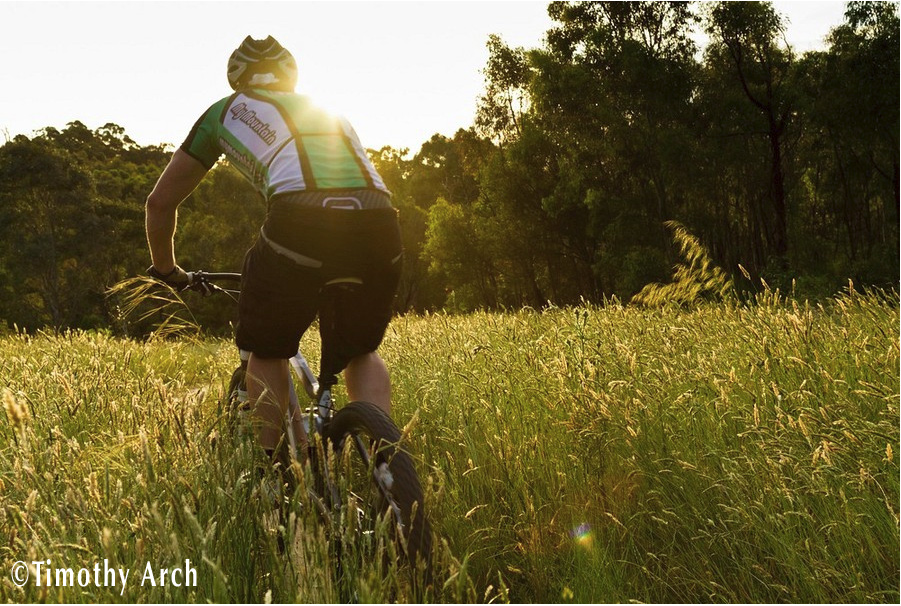
I like to keep tabs on the younger photographers out there who are working hard, producing great work and pushing their creative boundaries.  After all, the young, energetic shooters are the future of our industry; I know, I used to be one of them! (Now I’m just slightly older and energetic.) Their work inspires me, and it drives me to keep being better. I like that.

Timothy Arch is an Australian adventure and outdoor photographers whose work I really like. He’s got a great eye, solid technical skills, he’s proficient with both natural light and off-camera flash, and from what I’ve seen, his imagery is only improving.

I was excited the first time I saw Tim’s work, and so today I’d just like to share some of it with you. Enjoy, and visit his website at www.timothyarch.com


November 16, 2011
See this post
Adventure and Outdoor Photography by Timothy Arch