Truly great outdoor and landscape photographs take our breaths away. As human beings, they fill us with passion, excitement and serenity about the natural world, and they reinforce the love and wonder that we have for our planet. They remind us why we should not abuse it and they give us a perspective that no written word ever could.

As photographers, these images fill us with inspiration and hint at what’s possible when we put a camera into our own hands and head out into the wilderness. After all, the people who make these amazing and beautiful photos are only human just like we are, even though sometimes we hold them as giants.

And most importantly, they remind us that we should all get away from our computers and spend more time outside taking pictures.

It’s often enjoyable to read what photographers write about their own imagery and their creative process. We can learn a great deal from them and be motivated, or at least be highly entertained by the stories that accompany their imagery.

I’ve chosen just a small handful of shooters who create beautiful landscapes and who blog about their work. With so many great photographers out there, this list is by no means complete, it only represents the first few names that came to mind as I was cruising around Twitter this morning.

So, take a few minutes to take in the imagery and words by these wonderfully talented and creative people, and please feel free to add other blogs and links to photographers that you like in the comment section as well.

Finally, to the shooters on this list, thanks for the motivation.

Patrick J. Endres, Alaska

©Patrick J. Endres

Guy Tal, Utah

©Guy Tal

John Cornforth, Washington

©Jon Cornforth

Ian Plant, Virginia

@Ian Plant

Bret Edge, Utah

©Bret Edge
November 4, 2010
See this post
5 Great Outdoor and Landscape Photographer Blogs

Nikon D300s Nikon D7000

With the Nikon D7000 DSLR now on the market, I’ve seen quite a number of photographers around the web who can’t decide which camera to buy, the D7000, or the D300s. They’re both great cameras, but as with anything, there are specific reasons why you might want to choose one body over the other.

I own a D300 (non “s” version), I’ve had it for three and a half years, and until a few months ago, it was my main camera body. I’ve used it to shoot everything, adventure sports, landscapes, travel, people, portraits, events, and it has performed incredibly throughout it’s life. I even dropped it once. Over the years, I’ve recommended it to a number of photographers.

The only reason it’s not my main body is that I now have the D700. (I love my wide angle lenses!) I still use it as a second body and occasionally when I want to extend the length of my telephotos. Since it has the Nikon DX sensor, my 200mm lens effectively acts as a 300mm.

I have not gotten my hands on the D7000 yet, but from everything I’ve seen and read, it looks like an awesome camera body. It has a 16.2 MP DX sensor, 1024 HD video capture, high ISO capabilities and durable magnesium alloy construction. It comes in at just over 1lb. 8 oz, as opposed to the D300s, which weighs 1lb. 14 oz. Chase Jarvis posted a great D7000 road test review on his blog.

So, which one should you buy?

My answer is simple. If you’re a pro or action shooter who needs 7 fps (8 fps with MB-D10 grip), an autofocus system that’s slightly better for sports, (it has 51 AF points and 15 cross type sensors) and a few other pro features, like the 10-pin connector, then get the D300s.

Otherwise, then you should seriously consider getting the D7000.

Aside from being lighter, it has a number of brand new technologies built in, which include a higher megapixel sensor, better low light shooting capabilities, higher resolution video and 14-bit RAW capture at 6 fps. (The D300s will only shoot 14-bit RAW at 2.5 fps.)

And, it the D7000 costs about $300 less than the D300s.

The Nikon D7000 is an incredible camera that represents the latest digital imaging and ergonomic technology from Nikon. For most shooters, it will perform exceptionally well and offer everything you need to produce great photographs.

If you’re concerned with the difference in autofocus systems, consider this. Photographers shot stunning action and sports imagery with the F4, F5, F100 and D90s, and every one of those cameras had more primitive autofocus systems than the Multi-CAM 4800DX autofocus sensor, which is what Nikon built into the D7000.

November 3, 2010
See this post
Comparing Nikon DSLRs: The Nikon D300s vs. the Nikon D7000
Shooting for Fatback Snow Bikes, Anchorage, Alaska

Last week, I had an assignment shooting photos of the new Fatback bikes for one of my favorite local clients, Speedway Cycles here in Anchorage.

Speedway designs and builds the Fatback line right here in Alaska, and they’ve done an incredible job coming up with frame geometry and builds that offer both light weight and increased structural integrity on on the frame and wheels. They’re gorgeous, well crafted bikes that are awesome for snow biking, as well as for beach and sand riding, you know, for those other times of the year when it’s not winter.

I always enjoy working with smaller companies, especially those that are local clients, and as far as photo assignments go, this one was about as good as it gets. We took a few bikes up to the Chugach Mountains on Friday afternoon, spent a couple hours getting some photos of the new frames, and then went back to the shop for pizza and beer.

Check out Fatback’s line of fat tire bikes Bikes at www.fatbackbikes.com

November 1, 2010
See this post
Photo Assignment Shooting for Fatback Snow Bikes, Anchorage, Alaska

After listening to the needs and requests of thousands of photographers, Adobe packed tons of new features and performance enhancements into Lightroom 3. They’re all designed to help you improve the speed, efficiency and elegance of your workflow, and in the hands of a competent user, Lightroom is truly an amazing piece of software and an indispensable tool for digital photographers.

That said, if you’re a new user, or even if you’re upgrading from Lightroom 2, you may find the sheer complexity and layout of the new version rather daunting. The Adobe help files do a pretty good job of answering most questions, and if you’re at all computer savvy, you can find what you need by just spending some time navigating the various menus.

However, that goes against the concept of speed and efficiency. If you’re using Lightroom, then you’re a busy working photographer, or a part time shooter who probably has a lot of other things on your plate as well. In either case, you don’t have time to waste. You want to get yourself up to speed as quickly as possible and learn how to use all the great new features so that you can incorporate Lightroom into your workflow with the kind of efficiency that you demand.

It really does help to have a book to reference, and here the three best titles that can really help you get a handle on how to best use the program. They’re all great books and the money spent on either will easily be earned back in a few hours with the time you save by not fiddling around.

The Adobe Photoshop Lightroom 3 Book for Digital Photographers by Scott Kelby

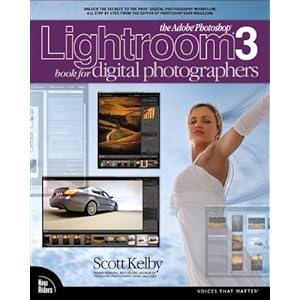
Much like his other book, The Adobe Photoshop CS5 Book for Digital Photographers, this one is a must have update to his previous title, which has been the #1 bestselling Lightroom book in the world. Put simply, Scott Kelby is considered the foremost digital imaging guru and he probably writes the best books on both Photoshop and Lightroom.

Scott relays usable and practical information in an easy to read, down to earth style and shows you how to get the most out of this latest version of Lightroom. He walks through a complete workflow, from setup, through the shoot, (even if you’re shooting tethered) and all the way through to archive and output. He not only shows you, he explains the exact methods and techniques that the pros use to edit and organize their images and he even tells you how and when Photoshop fits into a good workflow.

As with his other books, it’s filled with his patented “Killer Lightroom Tips” that will definitely save you time. In addition, Scott lays out his famous “7-Point System for Lightroom,” which will teach you how master the most important and often used editing techniques.

It’s also illustrated with page after page of gossy, full color screenshots that visually outline each step and make it easy to follow along.

If you’re coming from Lightroom 2, there will probably be some overlap and repetition of techniques that haven’t changed since Lightroom 2, but there is still lots of new and worthwhile material here. If you’re new to Lightroom, then this book is ideal for teaching you the ins and outs of the program and getting you up to speed.

Note:Scotty Kelby’s Lightroom 4 book is now available.

Lightroom 3: Streaming Your Digital Photography Proces by Nat Coalson

This one is another very good title that also greats great reviews. I’ve looked through it and would say that it’s definitely on par with the Kelby book in terms of it’s usefulness and good layout.

Nat is an excellent teacher and explains everything in very clear, professional terms. His goal with this book is to teach you how to use Lightroom as quickly and easily as possible. He approaches the content as if he’s teaching you one-on-one, and he shows you how use the essential features in the program and incorporate them into an efficient workflow.

Like the title says, this book is all about streamlining your digital imaging workflow and through a concise arrangement of step-by-step tutorials, Nat shows you how to save time by using shortcuts and presets, how to make your images look their very best and how to share your photography in the best and most practical way, depending on your needs.

Nat’s writing style is well organized, logical and intelligent. He doesn’t try to be funny, which is one reason why some readers might find prefer this one over the Kelby book. Some people have commented that the screenshots are a bit small in this one. They’re certainly smaller than the pictures in Scott Kebly’s book, but I find them to be adequate.

Overall, this is an excellent book and that I would also highly recommend to any new Lightroom user. Again, there may be some redundant material here to veteran users, but this book can still help you get your workflow under control. After all, we get busier, our time becomes increasingly more valuable.

Note: Nat Coalson’s Lightroom 4 book is now available.

The Adobe Photoshop Lightroom 3 Book: The Complete Guide for Photographers by Martin Evening

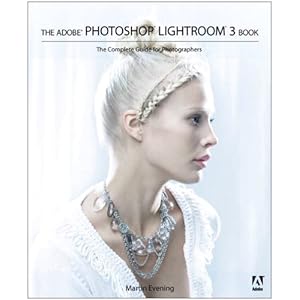
Martin Evening has been working on Lightroom with the design team at Adobe since the beginning. A recognized digital imaging and Photoshop expert and a professional commercial photographer, Martin has been providing valuable feedback to Adobe, which has continued to help them refine and improve the product.

He knows the software inside and out, and in this book, he describes all the new features in Lightroom 3 in detail from a photographer’s perspective. He explains all the steps involved in image management, editing and organization and shows you the tools and how to use them.

Martin is very good at teaching you how to make critical adjustments to your images, whether they involve tonal and tonal correction, sharpening, lens correction, noise reduction and more. He outlines each of these methods in step-by-step tutorials, many of which you can follow along by viewing the image and using the video lessons that are contained on the companion website.

He also shows you how to create an efficient workflow that lets you focus your concentration on actually making photographs, which is what you want to be doing in the first place, right?

Published by Adobe Press, this gorgeous 650-page book is the complete and comprehensive guide to Lightroom 3. It’s wonderfully laid out and printed on top quality paper. Consider by many to be the Lightroom 3 Bible, it’s truly an awesome resource that’s filled with tricks, tips, methods and all the hows and whys of the software and it’s probably the best all-around book on Lightroom. It’s not a simple how-to book by any means, though, and you’re looking for the “show me which slider to move” guide book, then this one is probably not for you.

However, if you want a complete, in-depth reference that will teach you everything you would want to know about Lightroom 3 and show you how to unlock the true power of the program, then is the definitely the book you want.

Note: Martin Evening’s Lightroom 4 book is now available.

Edit- November 23: I recently reviewed another great Lightroom book that is geared more towards beginning and intermediate users and photographers who want a more concise manual to get them started. If you’re an emerging Adobe user, check out what I say about Adobe Digital Imaging HOW-TOs: 100 Essential Techniques for Photoshop CS5, Lightroom 3 and Camera RAW 6.

[iframe]<iframe src="https:///e/cm?lt1=_blank&bc1=FFFFFF&IS2=1&bg1=FFFFFF&fc1=000000&lc1=0000FF&t=danhbaisadvph-20&o=1&p=8&l=as1&m=amazon&f=ifr&ref=qf_sp_asin_til&asins=0321700910" style="width:120px;height:240px;" scrolling="no" marginwidth="0" marginheight="0" frameborder="0"></iframe><iframe src="https:///e/cm?t=danhbaisadvph-20&o=1&p=8&l=as1&asins=047060705X&ref=qf_sp_asin_til&fc1=000000&IS2=1&lt1=_blank&m=amazon&lc1=0000FF&bc1=FFFFFF&bg1=FFFFFF&f=ifr" style="width:120px;height:240px;" scrolling="no" marginwidth="0" marginheight="0" frameborder="0"></iframe><iframe src="https:///e/cm?t=danhbaisadvph-20&o=1&p=8&l=as1&asins=0321680707&ref=qf_sp_asin_til&fc1=000000&IS2=1&lt1=_blank&m=amazon&lc1=0000FF&bc1=FFFFFF&bg1=FFFFFF&f=ifr" style="width:120px;height:240px;" scrolling="no" marginwidth="0" marginheight="0" frameborder="0"></iframe><iframe src="https:///e/cm?t=danhbaisadvph-20&o=1&p=8&l=as1&asins=0321719875&ref=qf_sp_asin_til&fc1=000000&IS2=1&lt1=_blank&m=amazon&lc1=0000FF&bc1=FFFFFF&bg1=FFFFFF&f=ifr" style="width:120px;height:240px;" scrolling="no" marginwidth="0" marginheight="0" frameborder="0"></iframe>[/iframe]

Like what you see here? Get my newsletter and have exclusive outdoor photo tips, reviews and pro insight delivered right to your inbox.

Subscriber Counter


October 27, 2010
See this post
The 3 Best Books for Learning Adobe Lightroom 3

Although my business revolves primarily around commercial, editorial and stock photography, I also shoot portraits for both consumer and commercial customers. It’s not a service that I advertise, aside from a “portraits gallery” on my website, and most of my portrait jobs come from word of mouth and existing clients. That works fine for me right now, because I don’t really want to shoot portraits full time.

That being said, I actually love photographing people. In fact, some of my all time favorite images are portraits that I’ve shot while traveling, like the “woman in red” and the “laughing lama” which are the second to last images in the bottom and second to bottom row in my travel gallery.

Just as I’m driven by the challenge of creating dynamic landscapes and photos that communicate the spirit of adventure, I’m also driven by the challenge of making compelling and iconic images of people that stand on their own as strong photographs and not just as snapshots.

It’s not always an easy task, and as any portrait photographer will attest, it requires every bit of creativity and technique that you can possibly dig out of your bag of tricks. Often times, it even requires additional studio lighting equipment in order to make the shot work.

I’ve got a pair of Nikon SB800 Speedlights, (the SB900 is the current model) which I often place on light stands with umbrellas or the RPS 4030 Studio SoftBox that I just picked up at the local camera store. I’ll either control the SB800’s wirelessly with the D700’s Commander Mode, or I’ll use Pocket Wizards to trigger them if they’re too far away to be picked up by the camera’s infared signal.

I also have a Calumet Travelite 750 that I sometimes use as my main light if I’m shooting inside. Since the Travelite has a photocell eye, I can trigger it with the light from the flashes and have a powerful three-light setup.

Most of the time, though, I like to go light and fast with just the two speedlights. Anyone who’s seen Joe McNally’s work knows that you can do an awful lot with just a simple pair of off-camera flashes. In fact, a couple of speedlights, umbrellas and light stands make for versatile, lightweight location lighting kit.

However, as much as I like to experiment with artificial lighting, my true love lies with shooting in natural outdoor light. It’s so much simpler, way more dynamic, and between the time of day, time of year and the weather, you can get such a wide variety of light falling on your subjects.

I shot the above portrait under natural light. The low sun was coming in from behind and being filtered just enough by the leaves so that it brightened up the foliage and lit up the background nicely. Overhead, the sky was covered with a light blanket of clouds, which made it so that there were almost no shadows.

I was intrigued by the intensity of the girl’s expression and her eyes (she’s an exchange student from southern India), and since yellow and purple are complimentary colors on the colorwheel, they always look great together. By placing her close to the right edge of the frame, I was able to create a dynamic balance to the image and create a nice contrast between the patch of yellow leaves behind her and the color of her shirt.

Having been very excited about my results from this shoot, I’m especially motivated to do more portraits this fall and winter. Maybe I should start advertising.

October 26, 2010
See this post
Creating Dynamic Images of People
Holland America Line's Mariner Magazine, Fall 2010 issue. Cover and inside photos by Dan Bailey

This past summer, I shot an assignment in Denali National Park for Holland America Line’s award winning Mariner Magazine, which had me photographing aerials of Denali from the back seat of a Cessna 206, and also tromping through the tundra for a few days with my camera in order to get landscape and animal photos.

The assignment landed me the cover and two inside spreads to illustrate a feature article by Michael Shaprio. I’m really proud of the photos that I got during the shoot, and I’m equally excited to have the opportunity to contribute to such a high quality publication.

This year, Mariner Magazine won the 2010 Grand Magnum Opus Award, which recognizes the best in custom publications, as well as the Apex’s 2010 Award for Publication Excellence, which recognizes the best in graphic design and editorial content.

Read more about my adventures shooting this assignment here.

October 25, 2010
See this post
Recent Publication: Holland America’s Mariner Magazine, Fall 2010 Issue
Trail running, Powerline Pass, Chugach Mountains, near Anchorage, Alaska

Last week I wrote about my ongoing quest to find the best camera bag for my style of outdoor and adventure photography. After checking out a number of bags, I decided to give the LowePro Inverse 100 AW a try. I picked one up over the weekend and took it out on a half day mountain run with my uber-running wife yesterday. Here’s my field tested review.

What attracted me to this bag is that it’s small and simple. Many of the adventure style camera bags out there are simply too big for what I need. I’m either running or cycling with it, or wearing it with a backpack when I ski and hike, so I want something small that won’t take up too much room on my front, especially when I’m wearing it with a pack and being very active.

For me, the most important aspect of a bag is being able to keep my camera right there within easy reach whenever I need it. Since my shooting style often revolves around fast breaking situations and moving quickly, I’d rather have a small bag that fits a single body and one or two lenses and keeps them handy than one that carries more gear, but requires me to stop, get inside my backpack and reach for it. I’d miss too many shots that way.

If I need that extra big lens or flash, I can always stuff it into a lens case and either wear it on the belt or cram in in the pack, but when I’m on the move, I like to keep at least two lenses at my fingertips.

Essentially a rectangular belt pack that’s designed to be worn either on the front or the back, the Inverse 100 AW has a mesh padded belt and a single compression strap on each side. It has a single top access compartment and two dividers that holds a single pro size DSLR and a secondary lens or flash and a pair of velcro memory card slots right inside the lid

On the front of the bag it has a small zipper compartment where you could easily put a couple of filters, spare battery or memory card case. That pouch also doubles as a small shove-it pocket where you could stash a jacket or hat. There’s a mesh pocket on each side of the bag, one of which is big enough to hold a water bottle. Finally, it has two a pair of straps on the bottom where you could strap on a small tripod.

Finally, like all the LowePro AW bags, it has a waterproof cover that tucks away when it’s not needed. I see this getting used alot, since I frequently get stormed on.

So, yesterday morning, I dropped in my Nikon D700, 24mm lens, 85mm lens, and two spare cards. With keys and a Clif bar stuffed into one of the outer side pockets and a water bottle in the other, we hit the trailhead and took off for a few hours.

The bag sat well on my hips with very little bounce; the two compression straps really help snug the thing into your body. By the end of the day, my hips were a tiny bit sore, but that would happen with just about any pack when you’re running with that kind of weight.

When I needed access to my camera, I simply loosened the belt and swing the bag around front. I really like the sideways dual-zipper lid, it opens quite easily with a quick pull and when open, it’s completely out of the way. I could even run with the bag out front for short stretches if I needed to have fast access for shooting.

Overall, I’m very happy with the LowePro Inverse 100 AW. It worked really well for me yesterday, I see it being a very handy bag for many types of mountain excursions. In fact, I’m sure that I’ll get a ton of use out of it over the next few years, since LowePro bags wear well and last. I’m especially curious to see how well it does while skiing. It’s actually not that much bigger than my old Photoflex bag, so I don’t see it getting in the way when I’m making turns.

If you’re looking for a compact, versatile, weatherproof and durable way that keeps your camera gear accessible during your outdoor adventures, definitely give this bag a look. And here’s a Lowepro coupon, just for being a reader of my blog. Clicking through the banner below and using the discount code LP20 in your shopping cart will get you 20% off your order when you buy directly at Lowepro.

Please note, the 20% discount code is good on any product purchased directly from the Lowepro site. Click the banner below to go to the Lowepro store.


October 19, 2010
See this post
Field Test Review of the LowePro Inverse 100 AW Camera Bag


The other day I received an email from a reader, we’ll call him “Larry,” who had a question about Nikon lenses. Larry is currently in the market for a telephoto lens, and, being a smart shopper, he did some research and somehow ended up landing on my blog.

He’s read that I use a Nikon AF 80-200mm f2.8D ED lens for my work. Seeing some of the imagery that I’ve captured with that particular lens, he figured that it might be a good choice for him as well.

However, he’s also read that the Nikon AF-S 70-200mm f2.8G ED VRII is also a great lens, and since it’s a more up to date model with Vibration Reduction technology, he’s having trouble making up his mind. Normally, a decision like that would be a no brainer- you get the newer model, the 70-200mm.

In this case, though, the 70-200mm costs twice as much as the 80-200mm. Current street price is $2169.00, whereas the 80-200mm doesn’t even break the thousand dollar mark. Current street price on that lens is $999.00.

Larry wanted to know why I use the 80-200mm and not the 70-200mm, and if I had to shop for a new telephoto today if I’d make the same choice. I told him my answer, but then it occurred to me that Larry is probably not the only photographer out there trying to decide between the two models, so I’ll tell you exactly what I told him.

Nikon AF Zoom-Nikkor 80-200mm f2.8D ED Telephoto Lens

Nikon 80-200 f/2.8 D ED Lens

The Nikon AF Zoom-Nikkor 80-200mm f2.8D ED is an outstanding lens. I bought mine fourteen years ago. Back then, that lens didn’t even come with a tripod collar. I have the one with the single push-pull zoom that controls both focal length and manual focus. See a photo of that model here.

Nikon upgraded that lens in 1997. The gave it dual rotating zoom rings, one for focal length and one for focus, and they stuck on a tripod collar. That version has been out ever since then, and as I said, it’s an outstanding lens that produces excellent, professional quality results and tack sharp imagery.

Someday maybe I’ll get around to trading mine in for one of those models. I’d probably make good use of the tripod collar, although for the type of work I do, I mostly shoot hand held with that lens and get great results.

Nikon AF-S Zoom-Nikkor 70-200mm f2.8G ED VRII Telephoto Lens

Nikon AF-S Zoom 70-200 f/2.8 G ED VRII

The Nikon AF-S Zoom-Nikkor 70-200mm f2.8G ED VRII is also an outstanding lens that produces excellent quality imagery. It has the faster, AF-S autofocus system, which is great for quick action and sports, and it has Vibration Reduction, which is a feature that obviously attracts many potential buyers. A photographer could not do any wrong buying that lens. However, as I said, it costs over twice as much.

So, which one should you buy?

Unless you absolutely need the AF-S for very fast sports and money is no option, then I’d recommend the 80-200mm f2.8, especially if you have one of the high ISO capable bodies like the Nikon D3x or the Nikon D700. It’s a great all around zoom telephoto for a variety of outdoor photography, sports, landscapes and portraits. If I had to choose on today, I’d go that route and here’s why.

As I said, I often hand hold my 80-200mm, and with the high ISO performance of the newer Nikon DSLR bodies, I just don’t see that I’d use the VR often enough to justify the cost. Chances are, most of the time you’d need the VR, your subject is moving anyway, so it wouldn’t really make a difference. If your subject is not moving, then make use of that tripod collar and screw it on to a set of legs. You’ll probably get better results anyway.

Also, the 80-200 lens has a much lower profile tripod collar than the 70-200. You can take off the foot on the 70-200, but the rest of the collar still sticks out pretty far below the lens. That makes the 80-200 that much more compact if you’re packing it in somewhere. Overall, it’s a smaller, lighter lens anyway. And it has an aperture ring, so you can use it on an older SLR body if you’ve got one lying around. You can’t use the G-series Nikon lenses with a manual film body like the FM-2

Finally, there’s the AF-S factor. Sure, I’d love to have AF-S  for some of the subjects that I shoot. However, in real life applications, the Nikon 80-200mm AF focuses about 80% as fast as the AF-S on the 70-200mm. It’s no slouch. I do just fine without AF-S on my newer Nikon bodies, even when shooting things like skiing and kayaking.

So, my real world advice on this matter stands. Buy the 80-200mm f2.8D ED, and use the extra thousand bucks to buy something else, like another lens. Or two more lenses. Or put it towards a second body or a new computer. The 80-200mm is an awesome lens and so is $1,000 cash. I guarantee, you won’t be disappointed with either.

EDIT March 2013: As technology and products evolve, I have a new recommendation. I suggest that you take a serious look at the new Nikon AF-S 70-200mm f/4G ED VR Telephoto Zoom Lens. It’s considerably lighter and less expensive than the AF-S Zoom-Nikkor 70-200mm f2.8G ED VRI, ($1,399) and it has Nikon’s 3rd Generation VR system.

Since I bought this lens last month, it has become my go-to adventure and outdoor telephoto zoom. It’s got full pro specs, with Nano Crystal Coat, ED glass and an AF-S motor, and the image quality is excellent. Your only tradeoff is that you lose a single stop. It’s f/4, but while that would have made a big difference with film, with today’s digital cameras, it’s really not much of a factor.

Read my full review of the new Nikon AF-S 70-200mm f/4G ED VR lens here.

Finally, if your lens buying stars align properly and your credit card cooperates, you can show your appreciation for this review by ordering it here at B&H Photo. Doing so will throw a tiny bit of cash my way and it won’t add any additional cost to your order. It can be your way of saying, “Hey Dan, you rock!”

October 15, 2010
See this post
Comparing Nikon Zoom Lenses: 80-200mm f2.8D vs. 70-200mm f2.8 G VRII
Trail runner shot from up in a tree, Campbell Trails, Anchorage, Alaska

I love recording the way that humans travel through the landscape under their own power. I would even go so far as to attribute that as one of the main cornerstones of my personal vision with photography.

Capturing the perfect combination of person and environment fills me with satisfaction, probably because it requires the right convergence between a number of elements. The landscape obviously has to be visually interesting, enough so to stand on its own. The human has to be in right place in the frame, to give it a balanced feel, and they have to be at the height of their stride, stroke, turn or body position so that the shot has the optimum sense of dynamic action.

And, of course, you have to seek out the best vantage point in order to place your subjects where you want them in the frame and give the shot an interesting angle of view. Sometimes that takes a considerable amount of pre visualization, and often in my case, physical exertion as well.

When it all comes together, though, and you get “the shot,” you get excited because you know that your creative, physical and technical efforts have paid off. For the action and sports photographer, capturing that pinnacle of motion in a beautiful setting is what it’s all about.

In order to find the right vantage point for this shot, which I made with my Nikon D700 and 14mm f2.8 lens on the Campbell trails in Anchorage, I climbed about eight feet up into one of those little tiny aspen trees at the edge of the path. Let’s just say that holding yourself steady in an eight-inch diameter tree while you shoot a trail runner for fifteen minutes does require a certain amount of physical exertion.

Noone said that outdoor photography had to be easy, right?

October 13, 2010
See this post
Featured Image: Trail Running in the Fall, Anchorage, Alaska

Adobe Camera RAW for Digital Photographers Only, by Rob Sheppard

Frequent readers know that I often tote the benefits of shooting RAW. In fact, I usually sum it up with a simple sentence like this:

“If you’re serious about your digital photography, you should be shooting in RAW.”

Here’s an example that I often use to illustrate that statement.

Your digital camera sensor is capable of capturing an incredibly wide range of tone and color detail. By shooting in RAW and processing your captures in your digital imaging software, you’re able to preserve the maximum amount of tonal detail and produce images that have the highest possible quality.

Don’t you want that from your imagery? Don’t you want your landscapes to jump off of the paper with wonderfully dynamic tones? Don’t you want your portraits to carry stunning impact with rich color detail?

Of course, you do, which is why it’s worth spending some time learning the ins and outs of how to shoot and process RAW.

Enter Adobe Camera RAW for Digital Photographers Only, by Rob Sheppard. This book is great introduction to the world of RAW digital photography and Adobe Camera RAW, which is the RAW converter program found in Adobe Photoshop and Lightroom.

Rob is the former editor of Outdoor Photographer magazine and he does a great job explaining RAW is and how to use both your camera and ACR to bring your RAW captures to life in a way that matches your own personal and creative vision. He teaches you how to manage white balance, how to understand histograms and use them to ensure proper exposure, how to reduce noise and how to make the most of the powerful tools that you have on your camera as well as in ACR.

He also explains the steps towards creating an efficient workflow for your digital photography so that you don’t have to spend hours in front of your computer processing images. After all, you’d rather be out shooting and making more images, right?

Rob’s main goal with Adobe Camera RAW for Digital Photographers Only is not just to shower you with technical jargon so that you can be an software and digital imaging expert, instead, he keeps the focus on the imagery. As he explains how to use each tool, slider and method, he always keeps the artistic aspect of photography in the forefront so that you can produce beautiful photographs. The technology only serves that end, and he’ll be the first to admit that fact.

Whether you use a DSLR or one of the higher end point and shoots like the Nikon Coolpix P7000, if you’re new to digital photography, or if you’re new to shooting RAW, I’d definitely recommend this book. It’s filled with great information, useful tips and, of course, great images to help illustrate each concept, and it will help you get up to speed with both the technology and the terminology.

October 12, 2010
See this post
Adobe Camera Raw for Digital Photographers Only by Rob Sheppard