I often get questions from readers and workshop students about how I exposure for my scenes.
Which exposure mode do I use, how often do I bracket, and in what increments? Which metering pattern do I prefer, center weighted, spot or multi segment? How do I handle challenging light? What should the histogram look like? Do I exposure for the right or the left?
Since proper exposure is such a vital part of photography, I thought I’d give you a quick primer on the exact exposure methods I use with my Fujifilm mirrorless cameras. Note, these techniques work with pretty much any kind of mirrorless camera.
I’ll start by saying that my technique looks a lot different than it used to, simply because mirrorless camera technology makes exposure a whole lot easier.

Compared to digital, color slide film had very narrow latitude, only about five stops, so you either nailed it, or else you threw the picture away. Anyone could get it right in easy light, but when the light got really tricky…
…Let’s just say that this is what separated the men from the boys. Your exposure chops were the most important skills you had as a photographer and serious shooters were forever chasing the dragon of being able to perfectly expose for every type of scene, no matter how challenging the light.
Oh, and I say “men” & “boys” because it’s us male people who tend to obsess about the technical aspects of photography, like how big our lenses are and how good we are at exposure. Women are perfectly capable of making a perfect exposure in tricky light, they usually don’t flap their wings so much when they nail it.
With DSLRs, things are kind of the same. Even though modern sensors have a much wider latitude than film, unless you shoot in Live View Mode, you still have no idea what the picture will look like until you actually shoot it and press the playback button. However Live View on most DSLRs doesn’t give full functionality and performance, especially with regards to autofocus.
Also, if you’re shooting fast breaking scenes, waiting to see if you nailed it might mean the difference between nailing the scene or missing it.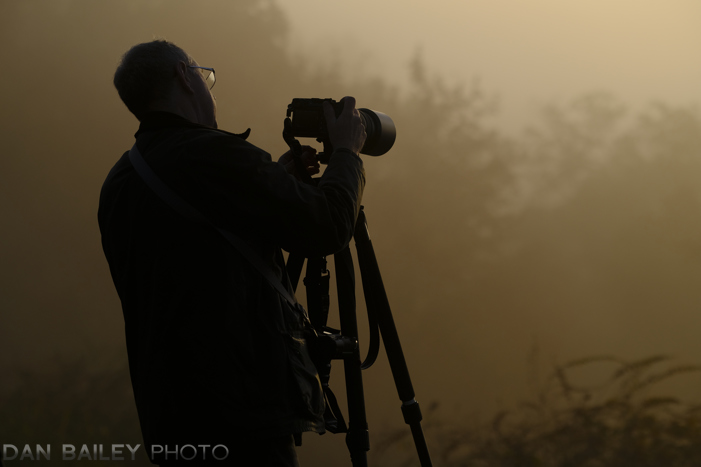
The Magic of Mirrorless
It’s a whole different world with mirrorless cameras. Real-time Live View with full performance and WYSIWYG viewfinders shows you what the picture will look like before you take it, simply because what you’re looking at on the screen is an exact view that’s being fed directly from the sensor.
It’s like magic. There is no surprise. No more “oops.” No more blowing the shot because you underexposed when you should have overexposed, or because you used the wrong type of meter.
Even in the most challenging lighting situations imaginable, you can still see EXACTLY what your final image will look like. And that changes everything.
With this in mind, here’s my basic exposure workflow:
-
Turn on camera and set to Aperture Priority Mode.
-
Point it at the scene.
-
Look at the LCD or peer through the EVF.
-
If I like what I see, I press the shutter button.
-
If it looks too dark, I turn the EV+/- Dial a few click up until I like what I see. Then I press the button.
-
If it looks to bright, I turn the EV+/- Dial a few click the other way, until I like what I see. Then I press the button.
I’ll say it again: IF I LIKE WHAT I SEE, I PRESS THE BUTTON.
It’s as simple as that. Most of the time, the camera gets it right, but if I want something different than what the camera is showing me, I simply turn the EV Dial until l get the look I want. Even if I’m using a different exposure mode, like Shutter Priority or Program.
In other words: The EV+/- Dial is your friend.
Here’s an example:

The other day, I was riding in an airplane. I looked out the window and saw beautiful sunset light hitting the “winglet.” I grabbed my camera and pointed it out the window.
Hmmm… what should I do to ensure “proper exposure?” Set a spot meter and point it at the winglet? Or maybe at the brightest part of the sky. (That’s what we used to do.) Nah, that’s too much work.
I simply looked at the screen and decided that the current exposure at 0EV was a little to bright. The color on the winglet was a little bit washed out, so I turned the EV+/- Dial to -3 and pressed the button.
That’s all. I turned the EV dial until I liked what I saw. Then I pressed the button and immediately Tweeted it to Alaska Airlines as soon as we landed.
Here’s another example.
In the scene below, the camera told me that “The right exposure” was one thing, but I wanted a slightly darker background and more contrast, so I turned the EV+/- Dial to -7 and took the second photo.


What About Shutter Speed and Aperture?
Ok, now we’re getting a little more complicated. But not really.
For some picture situations, you’ll want a high or low shutter speed in order to freeze or blur the motion. Other times, you might want a wide or narrow aperture in order to get a shallow or wide depth of field.
In Aperture Priority mode, you can control both of those parameters by simply turning the Aperture control until you see either the shutter speed you want or the f/stop you want. The camera will compensate by changing the shutter speed, which you can see right in the display.
So, for most scenes, I simply point the camera and think about how I want my scene to look. Sharp? Blurry? Lots of stuff in focus? Only one thing in focus? Once I figure that out, I turn the Aperture ring until I see either the shutter speed or f/stop that will create that effect.
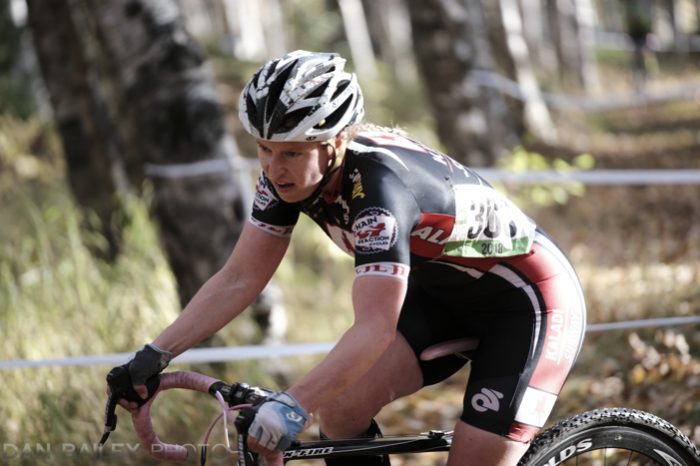
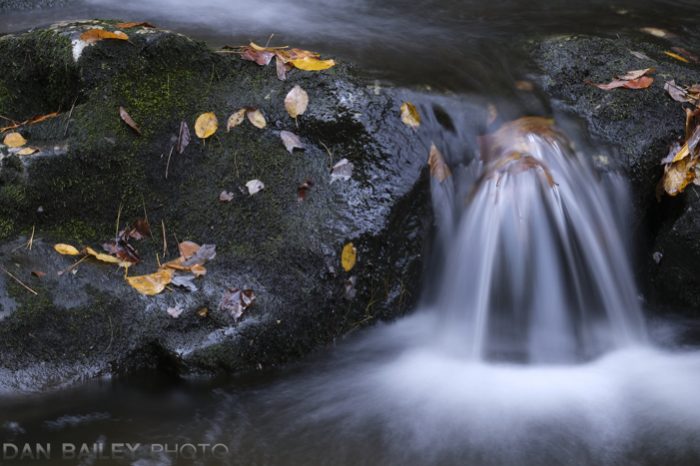
For the first picture below, I wanted a fast shutter speed. I set my aperture to f/2.8, which got me a speed of 1/640 sec. For the second picture, I wanted blurry water, so I set my aperture to f/16, which gave me a shutter speed of 3 seconds.
What about ISO?
If my current ISO setting won’t give me either the f/stop or shutter speed I want, I simply adjust the ISO. (You could use Auto ISO, but I prefer to change it manually.)
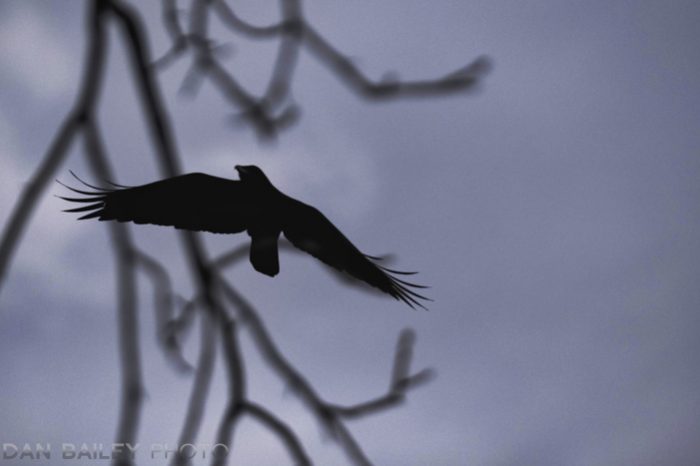
Here I was photographing crows early in the morning when the light was dim. I was using the new Fuji XF200mm f/2, which meant I needed a high shutter speed in order to get a sharp photo of a flying bird. I cranked the ISO up to 1600, which gave me a high enough shutter speed.
It’s a simple as that. Need the speed? Crank up the ISO dial.
What about Manual Exposure Mode?
Manual exposure mode works pretty much the same way, only you have to control everything. You adjust the shutter speed, aperture control and ISO, and watch what happens in the viewfinder. As you adjust those controls, you’ll be able to see the picture get brighter or darker.
When you get your desired shutter speed or f/stop, and you like what you see on the screen, press the button.
Simple as that.
If your picture is too light or dark, adjust SS, f/ or ISO until you get the look you want. Then press the button.
What about The Histogram?

The Histogram is a graph of all the tones in your image. Without going into too much detail, (you can read a great post on histograms here), the basic rule is that you don’t want to have a giant spike on either side, because that means that either your highlights or your shadows will be “blown-out.”
Sometimes it’s ok to blow out your shadows, because shadows are your best friend in photography. Blown highlights don’t usually look as good in photos.
You also don’t want to have a huge gap on the right side of the histogram. Due to the way that digital sensors capture light, there’s more tonal information in the brightest tones than in the darker tones. This means you have more latitude for processing your photos if they’re generally brighter than if they’re darker.
If you try to brighten the really dark tones in your photo processing software, you’ll end up with more noise than if you adjust the brighter tones.

You can display a histogram right in your LCD/EVF. (Depending on the model, you can show a simple histogram or a 3-color RBG histogram. Either is fine.) This can help you with your exposures. Why?
Because you can’t always trust your LCD. Sometimes it can can fool you. Not all cameras have the same quality viewfinder, and not all screens are calibrated the same with 100% accuracy. Also, the LCD can look different in excessively bright or dark light.
I usually trust the LCD on my Fujis, but I’ve seen some cameras where the LCD is not very accurate. You’ll generally find this to be true with cheaper cameras.
It’s very simple to incorporate this tool into your shooting method. When you’re doing the “Exposure Workflow” I outlined above, just keep an eye on your histogram and make sure there aren’t any huge spikes or gaps at either end. If there are, simply adjust the EV+/- Dial or our camera controls until it looks ok.
Ideally, you want a nice, even bell curve that extends all the way across, but doesn’t jump over either side. When in doubt, you should aim for a brighter image than a darker image. However the exact shape will very depending on what you’re shooting.
If you’re photographing predominantly light or dark subject matter, or subject with very high or very low levels of contrast, your histogram won’t look like a nice bell and it may even have some gaps the edges. You may even have some spikes.
Sometimes spikes and gaps are unavoidable, especially if you’re shooting high contrast subjects. Again, you just don’t want too much stuff blowing over the edges.
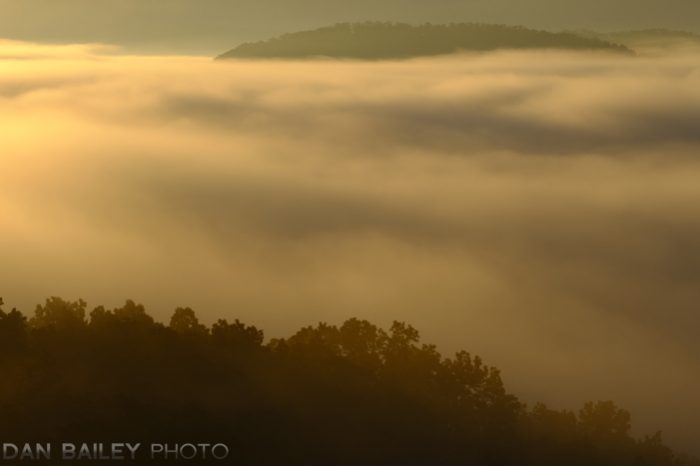
Imagine how different the histograms would look like for these three photos below.

 Being a great photographer still requires a high level of proficiency and experience with your camera. It takes knowing which settings to change, being able to adjust them quickly in real-time, anticipating your scenes and knowing how to translate your creative vision into a final photograph.
Years of practice.
However, the basics of getting a good exposure are relatively simple when using mirrorless cameras. Don’t make it harder than it needs to be. Look at the screen/viewfinder and if it doesn’t look right, make an EV adjustments as needed. When you like what you see on the screen, press the button. It’s that easy.
[…] I often get questions from readers and workshop students about how I exposure for my scenes. Which exposure mode do I use, how often do I bracket, and in what increments? Which metering pattern do I prefer, center weighted, spot or multi segment? … Continue reading → […]
Thank you for that info.
I have the xt2and really like it, I over think it at times. Will practice your advice. Thanks
Hi John – It’s easy to overthink, especially with such incredible technology. We sometimes feel that it should be harder than it actually needs to be. I hope this approach helps simplify things for you and gives you more confidence with your X-T2.
[…] varying my looks with the different film simulations, often shooting bursts in Continuous High and quickly adjusting exposure via the EV+/- dial. In situations with tricky light, I usually shot in RAW+JPEG and used Luminar to process images that […]
I find that while I do not believe I expose too far to the right based on the histogram on the LCD, when I view the actual image on the LCD I usually find a the highlights over exposed and clipped more than I would have expected based on the histogram.
Please advise / explain /
Steve, my guess is that you have the setting NATURAL LIVE VIEW setting on. This means you’re not seeing the effects of your chosen film simulation, which does affect the exposure. In order for this WISYWIG exposure method to work on the Fuji cameras, you’ll need to turn this setting off inside the SCREEN SETTINGS Menu.