Lowepro Flipside Sport AW Adventure Camera Pack


Adventure and outdoor photographers take note, there’s a new pack on the block: the Lowepro Flipside Sport AW. Built especially for highly active shooters, this streamlined and technical daypack lets you hit the trail running with your gear. Literally.

Designed with a breathable, fully adjustable suspension system and front panel flap access, the Flipside Sport AW holds your gear securely on your back while you’re on the go, and gives you quick access when you’re ready to shoot. To get your camera, you simply undo your shoulders straps, swing the pack around to the front and unzip the panel. There’s your gear. All of it. Right there, easy to see, just like the view in that picture above. No taking the pack off, no digging around. Fast and simple.

Done shooting? Ready to go? Zip it closed, swing it back around and stick your arms through the shoulder straps again. A few seconds later, you’re off and running.

It’s obvious that Lowepro is really taking note of the thing that we adventure and mountain photographers want most in a pack, which is quick access and the ability to move quickly through varying terrain without the thing bouncing all around on our backs. If you’ve ever run with your camera gear, then you know exactly what I’m talking about. Whether you’re photographing sports like running, skiing or mountain biking, chasing kayakers down the river or simply hurrying up the trail to catch last light, you want a pack that will hold your gear securely and that lets you get in and out with little hassle.

The Flipside Sport AW is designed to do both, and although I haven’t gotten my hands on this pack yet, from what I’ve seen, it appears to do both really well. when I do, I’ll of course, write up a full review. Edit, June 11: My full review of the Flipside Sport AW is now up- Read it here.

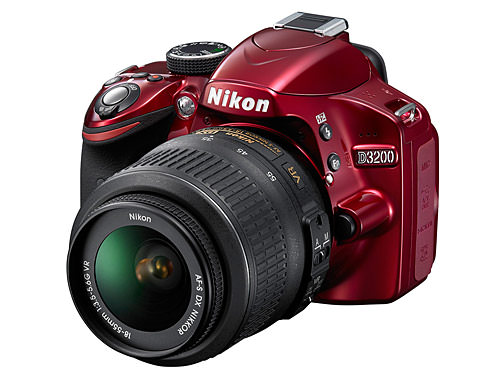
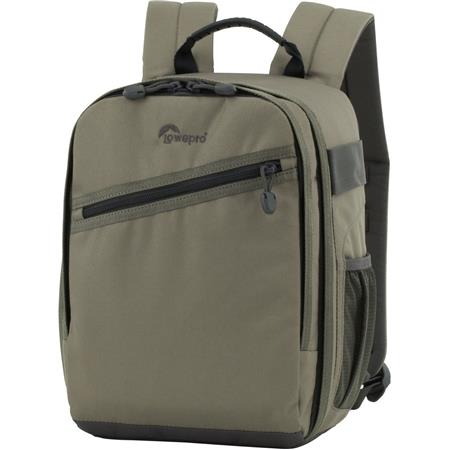
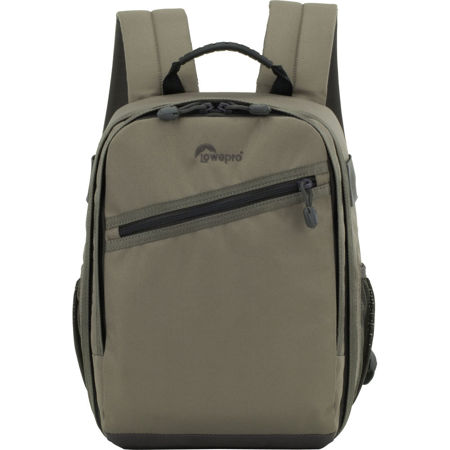
The pack comes in two sizes, the Flipside Sport 15L and the Flipside Sport 10L. The pack shown above is the 15L model and you can see how much gear it holds. That’s in addition to the hydration ready pocket and whatever other small amount of clothing and personal gear that stash in there. The advantage of the 15L size is that it will hold a pro sized DSLR with attached battery grip, which is something that the Photo Sport 200 won’t do.


Lowepro Flipside Sport 10L AW

The Flipside Sport 10L version is a little smaller, although it will still fit a DSLR body with attached lens (up to 70-200mm f/2.8), a couple of extra lenses or flashes, personal gear and hydration bladder.

Both versions also have a unique tripod stash pocket on the side of the pack and a removable camera compartment, which allows you to use the Flipside Sport AW as a regular daypack when you’re done shooting.

Check out the video below of the Flipside Sport AW in action with pro photographer Trevor Clark. Pretty much tells the whole story.


[iframe]<iframe src=”http:///e/cm?lt1=_blank&bc1=000000&IS2=1&bg1=FFFFFF&fc1=000000&lc1=0000FF&t=danhbaisadvph-20&o=1&p=8&l=as4&m=amazon&f=ifr&ref=ss_til&asins=B00809MO9S” style=”width:120px;height:240px;” scrolling=”no” marginwidth=”0″ marginheight=”0″ frameborder=”0″></iframe><iframe src=”http:///e/cm?lt1=_blank&bc1=000000&IS2=1&bg1=FFFFFF&fc1=000000&lc1=0000FF&t=danhbaisadvph-20&o=1&p=8&l=as4&m=amazon&f=ifr&ref=ss_til&asins=B00809MMWW” style=”width:120px;height:240px;” scrolling=”no” marginwidth=”0″ marginheight=”0″ frameborder=”0″></iframe><iframe src=”http:///e/cm?lt1=_blank&bc1=000000&IS2=1&bg1=FFFFFF&fc1=000000&lc1=0000FF&t=danhbaisadvph-20&o=1&p=8&l=as4&m=amazon&f=ifr&ref=ss_til&asins=B00809MOWA” style=”width:120px;height:240px;” scrolling=”no” marginwidth=”0″ marginheight=”0″ frameborder=”0″></iframe><iframe src=”http:///e/cm?lt1=_blank&bc1=000000&IS2=1&bg1=FFFFFF&fc1=000000&lc1=0000FF&t=danhbaisadvph-20&o=1&p=8&l=as4&m=amazon&f=ifr&ref=ss_til&asins=B00809MNEY” style=”width:120px;height:240px;” scrolling=”no” marginwidth=”0″ marginheight=”0″ frameborder=”0″></iframe>[/iframe]

April 27, 2012
See this post
The Lowepro Flipside Sport AW Adventure Camera Pack

Digital Photography School has just released a brand new eBook called Natural Light: Mastering a Photographer’s most powerful tool, by pro travel photographer Mitchell Kanashkevich.

This one looks promising for a couple of reasons. First of all, Mitchell is a top notch photographer. (He’s the author of the Rabari eBook that I reviewed here a few months ago), and I think that he shoots very compelling work.

More importantly, we often hear that photography is all about the light, but we don’t always learn how to effectively use it in our photography.

In this 96-page eBook, Mitchell details not just how to use magic hour light- (that’s the easy one), he explains how to understand and use all different types of light in order to communicate and evoke the mood and emotion that you’re trying to bring forth in your imagery.

Photographers often get told to put their cameras away at midday, but the truth is that if you’re only shooting pictures at sunrise and sunset, you’re missing an entire day’s worth of great photo opportunities. Some subject matter can actually benefit from different types of light, whether it’s harsh, cool, soft, diffused or foggy. Understanding and gaining mastery of how to use these different types of light will indeed make you a better photographer.

In Natural Light, Mitchell covers the role and power of light in photography, how to deal with the technical aspects of shooting in different types of light, how to use quality, direction, diffusion, and reflection to your advantage when composing subject matter and how to control the light without having to resort to using lots gear.

That’s the kicker. Without extra gear. The light is already there, and it doesn’t necessarily take lots of flashes and modifiers to create compelling imagery if you know what you’re doing, it just takes understanding and practice. Natural light is simple. It’s unencumbering. It’s free. It’s real. Natural light is how we cut our teeth as photographers and it’s what we always come back to when we want to slip through the world with only our cameras, our eyes and our minds.

Equipment is cool, but being a master of light is even cooler.

Check out Mitchell’s book, Natural Light: Mastering a Photographer’s most powerful tool.

April 26, 2012
See this post
New eBook: “Natural Light,” by Mitchell Kanashkevich

Get All 40 Craft and Vision eBooks for 40% Off.

I’m a huge fan of the Craft and Vision eBooks. David duChemin and his crew have done an amazing job putting together a library of informative and inspiring titles that provide a world of technical instruction and creative insight.

Written by a collection of leading pros, each title covers a specific area of photography, such as unlocking and expanding creativity, technical lighting, understanding light, discovering and fine tuning your personal vision, processing & printing fine art and more.

Each title is filled with years of experience, stunning imagery and thorough writing that describes, educations, inspires in such as way that after reading one, you can’t wait to pick up your camera again and rush outside.

About half the books are written by modern visionary genius David duChemin. If you aren’t familiar with his work or his writing style, I put him in the same category of imagery and photographic mentorship as the late Galen Rowell. David is an incredibly talented and hard working humanitarian and travel photographer who writes with such passion for the creative craft of imagining, seeking out and producing compelling photographs that match your own excitement about the subject.

I’ve read almost all of the C&V titles and have reviewed a number of them here on my blog, and I think that every single one of them is well worth reading. For the awesome content and colossal amount of inspiration that each one contains, I honestly think that they’re worth more than only five bucks, but that’s not my call.

At that price, you simply can’t go wrong, except that this week only, you can get the entire Craft and Vision photography eBook collection for 40% off.

If you’re new to the C&V books, then this is a great introduction. I promise, you won’t be disappointed. And even if you’ve already picked up a few C&V titles, this limited time deal allows you pick up the rest of the collection and you’ll still save money.

This is a limited time deal, and it expires at the end of this week. You can check out all of the titles here.

April 25, 2012
See this post
All 40 Craft And Vision Photography eBooks for 40% Off
Kayaking Tunnel Falls, Gore Canyon, Colorado River

You show up at the river in your twenty year old (Choose one: Toyota or Subaru) with a pack full of camera gear, a case of blank memory cards and enough energy and excitement to power a small city. Your adrenaline rises as you scramble down the rocky trail in your Tevas with the faded nylon straps, grasping at small bushes and branches as if they might help steady your footing as you skid over loose dirt and pebbles on your way down to the bank.

The roar of the class V rapid grows in your ears and blocks out nearly every other sound as you get closer. You can almost smell the frothy mountain water, the same water that you were skiing on sixty miles up canyon just a few weeks ago. Every couple of minutes, a few stray drops cut loose from the river and land on your bare arms that are ripped from carrying heavy camera gear and adventuring in the outdoors.

A hundred yards upstream, a group of kayakers are just putting in to run the rapid. You quickly drop your pack and pull out your camera, slap on your big lens and make a few test shots until you’re confident about your exposure, making sure that you’re shutter speed is high enough to freeze the action.

So how do you ensure that you get the shot? Better hurry with your analysis of the scene because here they come!! Don’t worry, I’ve done this before- I’ll give you some quick pointers. Here are three simple tips for photographing action. Yes, you can apply these techniques to other sports besides kayaking. Now good luck and have fun!

1. Get Closer

Don’t be afraid to zoom that big lens all the way in, that’s what they’re made for! Use it like you mean it. Bring that action right up close!! Let your viewers feel like they can almost smell and drink that water! Get them right into the middle of the whole mess and show them the tight details. Let them think that they’re about to trip over your subject! I guarantee, it will take their breath away.

Kayaking Upper Narrows, Cache la Poudre River, Colorado

2. Zoom Out

Ok, enough of the close stuff, now zoom out and give us the whole scene. Let us see your subject in context of their entire environment. Adventure sports are as much, if not more, about the adventure, than the sport itself, so let us get a feel for the dramatic expanse of the natural world where these people are enjoying their time in the outdoors. After all, you love it here just as much; show us what’s so great about this place or this activity.

Whitewater kayaking, Cache La Poudre River, near Fort Collins, Colorado


3. Keep Shooting

Feeling good? Think you’ve got some awesome shots so far? You’re doing great, but don’t stop yet, keep that motor drive working. Keep burning frames until either your subject is gone or the light is gone, or both. Chances are good that as good as the stuff you’ve already shot might be, there’s a totally killer image just waiting for you to grab, only you won’t know when it’s going to appear until it jumps right in front of your eyes.

It will probably take you buy surprise, so you’ll have to keep your eye trained on the subject and your finger at the ready, because it will only happen once. You won’t actually know when (or if) it will even happen until it’s staring you right in the face for a mere spit second. It’s that moment that separates the big boy and big girl photographers from the amateurs. You either get he shot or you don’t

Dave Zinn kayaking Poudre Falls, Cache la Poudre River, Colorado


Did you get it? Awesome!! Great job! Feels good doesn’t it? Now pack up, head on down the canyon and meet me at the (insert favorite watering hole.) The first pitcher is on me!

April 24, 2012
See this post
3 Simple Tips for Photographing Action

After your camera, there no single piece of hardware that sees more use then your monitor. It’s what you use to preview, edit, correct and proof ALL of your imagery, and as we all know, there’s nothing quite like viewing your photos on a large, high quality screen. That’s why, whenever you visit The Apple Store, the first thing you do is pull up your website on the big 27″ iMac. Yea, I do it to.

However, if you don’t have an iMac, or if you’re not a big fan of the glossy and highly reflective screens on the Apple Cinema Displays, what are your choices for an affordable, high performance monitor for photo editing?

After years of sporting a pair of 17″ screens, I recently upgraded to the 24″ Dell U2410 UltraSharp Monitor. It’s an excellent quality flat panel LCD display at a very reasonable price that has me wondering why I didn’t do this years before.

With a 16:10 widescreen 1,920 x 1,200 resolution, factory calibration, industry standard IPS (In-Plane Switching) technology, 12-bit internal processing and compatibility with both Adobe RGB (96% coverage) and sRGB (100% coverage) color spaces, the Dell U2410 delivers vibrant, consistent and accurate colors that make it suitable for the demands of professional quality photo editing, graphic design and video work.

It has HDMI, DVI and VGA connectors, 4 USB ports (two on side, two on back) ports and an SD meda card reader built into the side of the display. Setup is about as easy as you can imagine- Plug it in and you’re up and running. And as I said above, compared to the Apple monitors, there is no glare. I can’t see my own reflection staring back at me. No windows, no lights, just the stuff on the screen. To me, that’s key.

Viewing and editing photos on this display is a joy. In Library, or Filmstrip mode, I can view about twice the number of photos that I used to see on my 1,280 width monitor, and when zooming into full screen for previewing, comparing, or correcting, I’m presented with gorgeous, high resolution reproductions that fill the screen. When using Photoshop, I’ve still got enough room for a decent sized 100% image and the tool palettes

If I’m doing other tasks, I’ve got plenty of room to run multiple windows on the 24″. I’m still using one of my old 17″ screens for the email window and Photoshop tool palettes, but even if this was my only display, it’s big enough to not feel too crowded. I may hook up the my second 17″ monitor for a triple screen setup, but unfortunately, the way the Mac Pros are configured, you need two of the $99 Apple MiniDisplay Port to Dual-Link DVI Adaptors if you want to run three displays off of the video card.

Why Didn’t I Get The Dell 27″ or 30″?

Believe me, I thought about going big. I really did. Why didn’t I? Part of it was price. When I bought mine, they were around $500. Prices have dropped, though. The Dell U2410 24″ is now only $265, while the Dell 2711 27″ Monitor is hovering close to $700. The Dell U3011 30″ Monitor is around $1,099. Add shipping to Alaska on a monitor that big, and I’d be spending a whole lot more, if I could even find a seller that would ship up here; some won’t.

While these are great monitors, and bigger is always better, However, I will probably pick up a second 24″ U2410 in the near future and the simple fact is that two 27″ or 30″ screens won’t fit on my desk. Two 24s will, and aside from that, the price of two 24s is considerably less what it costs for two 27s or two 30s.

I find the Dell U2410 24″ Monitor to be an excellent quality display, probably the best one in its class, and for the price, you really can’t beat it. Some users have reported color tints when they get them out of the box, but I saw no such thing. I do calibrate my monitors, which you should always do,  (I use the DataColor SypderPro system), and have experienced nothing but consistent color, sharp text and crisp graphics.

Dell monitors have been used by professional photographers and stock agencies for years with great reviews. If you’re looking to upgrade, this is a display that I’d highly recommend.

Support This Site: If you do decide to buy a new screen, please consider clicking through these links. It doesn’t cost you anything extra and it helps compensate me for the time and effort that it takes to run this site. Thanks! -Dan

[iframe]<iframe width=”120″ scrolling=”no” height=”240″ frameborder=”0″ style=”border:none;” border=”0″ src=”http://mer54715.datafeedfile.com/widget/aff_widget_prdt_generate-2.0.php?aff_num=6746&aff_net=1&widget_num=1011″ marginheight=”0″ marginwidth=”0″></iframe><iframe src=”http:///e/cm?lt1=_blank&bc1=000000&IS2=1&bg1=FFFFFF&fc1=000000&lc1=0000FF&t=danhbaisadvph-20&o=1&p=8&l=as4&m=amazon&f=ifr&ref=ss_til&asins=B00302DNZ4″ style=”width:120px;height:240px;” scrolling=”no” marginwidth=”0″ marginheight=”0″ frameborder=”0″></iframe><iframe src=”http:///e/cm?lt1=_blank&bc1=000000&IS2=1&bg1=FFFFFF&fc1=000000&lc1=0000FF&t=danhbaisadvph-20&o=1&p=8&l=as4&m=amazon&f=ifr&ref=ss_til&asins=B006TF37H8″ style=”width:120px;height:240px;” scrolling=”no” marginwidth=”0″ marginheight=”0″ frameborder=”0″></iframe>[/iframe]

April 23, 2012
See this post
Photographer Review: Dell UltraSharp U2410 24″ Monitor

One of my favorite things about entering a new season here in Alaska is watching the ptarmigans change color. We spotted quite a few of these funny little snow chickens during last evening’s spring ski outing in the Chugach Mountains near Anchorage. Although they’re still predominantly white, like the snow covered tundra, their naturally camouflaged plumage is starting to turn.

The ptarmigan, a rock and tundra bird, is a member of the grouse family that lives exclusively in northern latitudes. Since they have very few natural predators, they’re surprisingly approachable. They’ll typically let you get within about twenty feet or so before they waddle off or take to the air and flutter about fifty feet away to safer ground.

In perfect sync with their habitat, small patches of brown are beginning to appear on their plumage. A careful eye is required in order to pick them out from the landscape. (Can you spot all three ptarmigan hens in the photo above?) It’s amazing to see how well they blend in with the terrain. Depending on where they stand, even a slightly brown neck will do an excellent job of hiding them against a patch of melted out grass.

I always love watching ptarmigans and hearing their funny, quiet croaking coos, and I’ll stop to stare with whimsical fancy nearly every time I’ll see them in the mountains. Eventually, Mr. Ptarmigan showed up, no doubt to shoot his harem away from the guy with the big long sticks on his feet.

Since we were just out for a fun tour, I went ultralight and took my Fujifilm X10. As you know, my excitement for the X10 keeps growing, and I found it to be a perfectly adequate camera to capture the evening’s adventures. I didn’t feel limited at all, with it, and even though it might have been nice to have a 200mm to zoom in and isolate the birds, that would have required almost ten times the weight of the X10 in gear. Sometimes it’s nice to go light.

The X10’s meter handled the snow perfectly, and putting it on 6 fps burst mode allowed me to grab multiple shots of the ptarmigans in flight. For most of the evening, I just left the camera on program and let it do it’s thing while I did my thing, which had us back at the car for a 9:30 sunset and home by 10 for a frozen pizza and glasses of Yellow Tail cab.

Ah, springtime in Alaska.

April 20, 2012
See this post
Spring Ptarmigans, Chugach Mountains, Alaska

Yesterday, Nikon announced the brand new D3200 DLSR Camera, the replacement for the entry level D3100. With a 24MP DX format CMOS sensor, Full 1,920 x 1,080 HD video and excellent high ISO, low light performance, the D3200 could be called the baby brother of the D4 and D800.

It also has the same Expeed 3 image processing engine as the flagship Nikon D4, which means that for a camera that’s aimed at beginning photographers, the D3200 will create high quality image files of impressive clarity and resolution.

While the D3200 is a great first camera choice for new photographers, it obviously lacks many of the main features that would make desirable as the main camera of most serious outdoor photographers. It’s only got an 11-point AF system, no full frame sensor, it only works with AF-S lenses, it won’t control other flashes and it’s certainly not as rugged as the higher end models.

That said, there are a few reasons why you might want to consider buying a D3200.

1. A Second or Backup High Quality HD-DSLR Body

With Full HD 1,920 x 1,080/30p video, the D3200 could be used as a second on-loction video body that your assistant/art director/friend could use to document your photo shoot. Behind the scenes videos are becoming more popular by many photographers and if you’re already shooting stills with your main DLSR body, you need a second or backup body running if you want to capture some video of your assignment. The D3200, which comes with an 18-55mm lens, is a relatively inexpensive option for this kind of task. Plus, it allows you to use your higher end Nikon glass if you choose to do so.

It’s also an inexpensive backup camera body option for your main DSLR. Nikons rarely let you down, and if a camera is going to spend much of it’s life relegated to a backup, why not make it something small, light and affordable? (See #2 below.)

2. It’s Small And Lightweight

The D3200 is even smaller and lighter than the D7000, not to mention that it has even more megapixels. It’s as light a DSLR as Nikon has ever made. There are situations when you don’t actually need the superior features of a high end DSLR, and having a really light body might come in handy sometimes. With a 24.2 MP sensor and Expeed 3 image processing, the D3200 will produce extremely high quality images, and it won’t weigh you down.

3. WiFi Upload with the WU-1 Wireless Mobile Adapter

For $59 the new Nikon WU-1 Wireless Mobile Adapter allows you to shoot and instantly send photos wirelessly to your smartphone or tablet. Think social media. Think on- location documentation of your photo shoots and adventures that you can upload and share on the spot.

The WU-1 also allows you to take control of the D3200, remotely activate Live View Mode and trigger the shutter right from your smartphone or tablet.

Oh, and reason #4- it comes in Red.

Check out the complete specs at the Nikon Website. Right now, the D3200 is available for pre-order at B&H Photo. Price: $699 with lens.

April 19, 2012
See this post
3 Reasons Why You Might Want The Nikon D3200

Photoflex Galen Rowell Chestpouch and lens caseWhen does style become an obsession?

A year and a half ago, I wrote a post called Trying to Find The Right Camera Bag, in which I begged and pleaded with everyone online to help me find another Photoflex Galen Rowell Chest Pouch and lens case. You see, this little pouch, which was designed by the father of modern day adventure photography, and manufactured for a short time by Photoflex, had become my favorite bag. It had been my companion on many an adventure, and offered me such simple quick access to my camera that it had helped define my fast and light style of photography to the point where I couldn’t even imagine NOT having one.

Problem, though is that they’ve been discontinued for years. I’ve gone through two of them since 1996, and my second one is falling apart, despite numerous battles with dental floss and the bar tack machine at my friend Eric’s sewing shop. At some point, the thing just needs a complete overhaul.

During the past few years, I’ve searched eBay, Craigslist and the world wide web, desperately trying to find one. A couple months ago, the trail grew hot as I called a photographer in Montana, but alas, he’d already sold the bag and couldn’t be talked into parting with his second one. Can’t say that I blame him. I even went directly to the source, pleading with my contacts at Photoflex to search the far dark corners of the warehouse in the hopes that there might be one hiding on some long forgotten shelf. They came up empty.

However, thanks to my friend Steve Zimic, my cries for help have been answered. I met Steve while on a 1993 trip to the Mustang district in Nepal as part of a Wilderness Travel/Mountain Light Galen Rowell photo workshop trek. We’ve kept in touch over the years. (He shot this photo of me and Galen during our trip.)

A couple weeks ago on Easter morning, Steve sent me an email alerting me to a GRCP II that had just popped up on eBay. Truth is that Steve wouldn’t have minded having a backup for his own GRCP, but he knew of my desperation and passed first dibs to me. I placed a bid, raised my own limit, crossed my fingers and nervously waited for ten days until it was confirmed that I had been not only the winning, but the only bidder.

The bag arrived in the mail on Monday, brand new, looking like it had just been brought back from 1996 in a time machine. I like to think that it’s just been secretly hiding somewhere in the world, waiting and trying to get back to me, kind of like the ring of power, eventually finding its way to that nice gentleman in Oregon who saw it at a local  thrift store, bought and put it up for auction on eBay, knowing that I’d be the one to bid on it.

It was fate. Like a dream come true. Like an Easter miracle. Like meeting the brother of the long lost friend that I used to know. Ok, getting a little sappy, I’ll just stop right there.

So, thank you Steve, thank you Ray from Oregon, and hello new camera bag. Oh, imagine the fun that you and I are going to have together. I’m suddenly feeling very nostalgic. Maybe I need to go read my copy of Mountain Light again.

April 18, 2012
See this post
Yay!! Replacement Photoflex Galen Rowell Chest Pouch

And the winners are

Before I announce the winners of my Spring Photography Giveaway, I’d like to thank everyone who entered and say that this was a really awesome promotion.

Not only did I connect with a large number of new followers who also have a distinct passion for exploring life with a camera, I really enjoyed reading all the entry forms and seeing what YOU love to photograph.

Plus, I have the distinct pleasure of giving away some really cool gear to a few select photographers. Hopefully you guys enjoy your prizes!

For those of you who are also interested in reading some or all of the entry forms, check out this list of The Coolest thing that everyone has photographed.

Now, without further delay, here are the randomly selected winners and their entries:

1. Grand Prize: A Lowepro Photo Sport 200 Photo Backpack

William Sinkins: “Riding on a train in Bulgaria that was simular to the orient express and snaping pictures and videos going through the mountains…”

2. Lumiquest Softbox III & Ultra Strap

Tina Lagrotteria: “A live Frog under a large tree at nighttime. WOW!”

3. Manfrotto Pocket Series DSLR Tripod

Matt Fulkes: “Castles,cathedrals and ruins in the United Kingdom.”

4. Landscape Photography: The Four Seasons, by Chris Gatcum

James Ritchie: “My daughter or The Colosseum in Rome.”

5. A copy of my eBook, “Going Fast With Light”

Connie Johnson: “Without a doubt, my grandchildren.”

If you didn’t win, fear not, this isn’t the last time I’ll be giving away stuff… Stick around to be notified the next time I get a pile of gear to raffle off.

Also, let’s all take a minute to say THANK YOU!! to my wonderful sponsors who all donated the items for this promotion. PLEASE visit their websites, they all make excellent gear that I personally use and highly recommend. Seriously, you couldn’t go wrong owning any of this stuff.

•• Lowepro gear has long been standard equipment for adventure and outdoor photographers worldwide. They make a wide selection of durable camera bags, packs, pouches, lens, media and computer cases.

As one of my readers, you get a special deal on Lowepro gear: Click this link and enter code LP20 in your shopping cart to save 20% when you purchase anything on the Lowepro website. Follow Lowepro on Facebook for special webinars, specials and Free Bag Friday.

•• Lumiquest makes ultra lightweight flash gear and light modifiers. They’re used by the best shooters around, guys like David Hobby, Joe McNally and Dave Black, to name a few. When it comes to going fast with light, you really can’t get any lighter. If you’re going to own one Lumiquest item, it should be the Softbox III.

Shop the Lumiquest Store and enter discount code SOCIAL MEDIA in your cart to save an addition $5 off of their already $10 off April special. Plus get free shipping on select orders. Follow Lumiquest on Facebook for special deals.

•• Manfrotto makes awesome tripods and other camera support systems. I’ve been using their tripods and light stands for years; they do the job and hold up to rigorous outdoor conditions. Ask any pro and there’s a very good chance they’ve got some Manfrotto gear.

•• Focal Press publishes a wide selection of media technology books, ebooks, videos and tutorials. They have a full selection of excellent photography books by authors such as Martin Evening and Michael Freeman, as well as large catalog of film & video, audio, broadcast and web titles as well. Follow Focal Press on Facebook to see the latest releases.

•• Dan Bailey Photo. That’s me. I take pictures and write article and ebooks. You’re already here, so you probably know that stuff.. Have a look around and check out some of my archived posts, sign up for my newsletter and follow me on Facebook.

Thanks again for your support and excitement. Have a GREAT SPRING!!

April 17, 2012
See this post
Spring Photography Giveaway Winners Announced!

We outdoor photographers dig technical photo backpacks that allow us to carry our camera gear into the backcountry. But what about the times when you’re traveling in urban environments? And as with most regular camera bags, where the heck are you supposed to put your iPad?

Lowepro has just come out with their Tablet + Camera series that are designed for the photographer/blogger/traveler on the go. They’re relatively small, inconspicuous bags and backpacks that fit a modest selection of camera gear, as well as a an iPad or other similarly sized Android tablet computer.

Event Messenger 150

Lowepro Event Messenger series camera + tablet bag

The Event Messenger 150 is a shoulder bag that holds a DSLR/lens combo, 2-3 extra lenses or flash, depending on size. It’s also got a couple of added compartments sized to fit an iPad/tablet and a few accessories, like your iPhone, memory cards and Moleskine notebook.

It’s designed as an around town courier style bag that allows top flap access to your gear without screaming “I’m carrying camera gear!!” Its secure lid closes via fastex buckle also has dual flap velcro that you can switch to quite mode so that it doesn’t make that loud RIP every time you open the bag. Nice. For people who need to carry more gear, there’s also the Event Messenger 250, which is the biggest camera shoulder bag in the line.

Photo Traveler 150

The Photo Traveler 150 offers a similar camera gear and iPad carrying capacity for those photographers who prefer a small backpack over a messenger bag. Camera, couple lenses, flash, iPad, charger and a couple other essentials. It may be a little tight for a pro DSLR, but it’s sized perfectly for a compact camera system or the smaller DSLRs. Would be great for something a Fuji X-Pro 1 or Sony Nex kit, or even a single compact camera and all your daily items.

I see these discreet looking, yet stylish little bag as a perfect companion for day trips, or for those times when you’re running errands, visiting clients or friends, strolling the Santa Monica Pier, pedaling around town, escaping to the coffee shop or as a carry on camera bag for airplane travel.

Carry. Shoot. Write. Blog. Share. All from one little bag. Nicely done, Lowepro. Could have used one of these yesterday.

Discount for my readers: Check out the Tablet + Camera bag series here and use discount code LP20 in your shopping cart to save 20% on your gear when you buy direct from Lowepro.

Please note, the 20% discount code is good on any product purchased directly from the Lowepro site. Click the banner below to go to the Lowepro store.

April 12, 2012
See this post
New Tablet + Camera Bags from Lowepro