I peeked at my WordPress stats the other day and realized that I had just passed three million page views on my blog.

According to Google Analytics, which I didn’t install into 2011, or three years in, I have hit three and a half million page views, with a million and a half unique visitors. 

I’m totally blown away by those numbers. After all, I’m just one guy banging away on my keyboard a few times each week. I sit here writing about photography and exploring the ideas about creativity and picture taking that fascinate me, and yet, I’ve managed to attract a few visitors.

I started this blog in March of 2007, and in my first few posts, I featured some few recent skiing photos, liked to a feature article about me that had just been published in Outdoor Photographer Magazine, and wrote a retrospective on my experience being a professional photographer for ten years.

Over the next couple years, I continued to post new images, promote published work and updates to my website, share the occasional tip and write short “news” type articles announcing things like new products, notable events and interesting photography apps.

Occasionally, I would write longer articles about topics that drew my interest, like my personal goodbye to Kodachrome, or do fun pieces, like my 5 Worst Injuries as a Pro Photographer.

Holland America Line’s Mariner Magazine, Fall 2010 issue. Cover and inside photos by Dan Bailey


By 2010, I had started to do more “tips and insight” posts, drawing from nearly fifteen years of experience as a pro shooter. During that time, I also started a freelance position as Senior Contributor to a new photography blog called The Photoletariat, where I wrote the same kind of content, but to a larger audience.

My readership started to grow quite a bit during my two years writing for The Photoletariat and when the site eventually shut down after a two year run, I continued in full force with my own blog, bringing many of those readers with me.

By then, I had started to gain quite a bit of traction with my blog, and as my readership grew, I expanded on my overall approach and the types of content I offered. I wrote my first eBook in the fall of 2010, and by the next year, I had three eBooks under my belt and was contributing articles for a number of other sites as well.

I also discovered that my blog had become a powerful marketing arm for my business and my writing. In many ways, the blog has become the central hub for my business and everything I do as a professional photographer.

My blogging is what led the publisher for Focal Press to reach out and express interest in doing a book with me. It took a couple years to get things rolling, but in the winter of 2015, my first print book hit the stands.

Through the years, I’ve continued to refine both my writing and teaching style, I’ve published more eBooks and print books and have even been recognized as a top photography blogger in the industry. And, I’ve found that my blog has allowed me to connect with a huge number of other photographers around the world, some of who have ended up becoming close friends.

In addition, this outlet has allowed me to explore aspects of writing in a very personal and fulfilling way. For example, many of my blog posts are nothing more than thinly disguised journaling and travel writing pieces. I’ve always been fascinated by the craft of writing, and it looks like I accidentally became someone who now does it for a living. Who would have thought?

When I sit back and look at where this has come since March of 2007, I’m totally blown away. I know I’ve put in countless hours of hard work, writing, tweaking pages, researching plugins and continually refining things, but the reality is that you guys are the cog that has made this all happen.

Whether you’re a regular visitor, or if you’ve only stopped by once during a Google search, your readership is what has made me a successful blogger, and in many ways, a successful photographer.

I am so grateful for your support, especially those of you who have stuck with me since The Photoletariat and the early days of my blog. In fact, if you’re a longtime reader, I would love to hear how many years you’ve been following me, or if you even remember The Photoletariat!

With that in mind, to everyone who has ever read or shared my posts, I just want to extend my very sincere thanks to you guys for visiting my blog over three million times. I know that some blogs get a few million hits every single month, but again, I’m just one guy and the fact that I’ve attracted numbers like that simply blows my mind.

Anyway, I hope that you continue to stick with me. I’ve still got a lot of ideas that I want to write about… they never seem to stop coming, so if you’ll keep reading, I’ll keep pounding out more blog posts.

Take care and have a great weekend.

-Dan

June 21, 2019
See this post
Three Million Page Views!

Now that June is finally here, we can pretty much count summer as being officially underway. For us Northern Hemisphere photographers, summer means bountiful landscape photography sessions and long days exploring outdoors with our cameras.

For you Southern Hemisphere people, you’re certainly not left out of the fun, it’s just that your days are much shorter and cooler right now. However, that’s hardly an excuse to shy away from landscape photography, there are endless opportunities for photographic creativity no matter where you live.

To celebrate the arrival of June and inspire you to get out and shoot your best work, I’m running a month-long special on my BEHIND THE LANDSCAPE eBook.

When you purchase the book, simply use discount code BTLJUNE in your shopping cart and you’ll get this comprehensive how-to guide at a special price.

In BEHIND THE LANDSCAPEI take you behind-the-scenes during the creation of sixteen of my favorite landscape images I’ve made in the past five years. For each example, I walk you through the entire process. I let you look over my shoulder as I outline the exact gear I had with me, the specific concept I had in mind, my creative approach, potential problems I faced, and how I solved them.

I describe my compositional techniques, my lens choice, how I used the light, specific exposure information and any other details that went into the process of bringing the image to life. I also highlight the types of challenges that you might face when shooting a similar style of imagery, and I show you how to overcome them so that you can walk away with a great photograph.

For every single image, I walk you through my own creative and technical process as I work through each of these steps. I evaluate each scene, describe the camera gear I had with me, analyze the color, quality and direction of the light, and tell you my specific approach for how I plan to capture each scene. Then I describe in detail my exact method of execution for turning my creative ideas into a successful image.

At the end of each example, I give you my final analysis for the image and describe the specific elements that I feel give the shot exceptional visual power. In addition, I share my final thoughts, reflecting on the personal, creative or introspective journey that led to the image.

Finally, I leave you with three takeaways. These are specific tips, techniques, compositional methods and ideas that directly contributed to the success of the image. The idea is that you can identify the methods that worked worked, so that you can apply to your own photography.

Years of Professional Insight at Your Disposal

Not only does BEHIND THE LANDSCAPE teach you the essential steps towards creating stronger images, it provides real-world inspiration that will motivate you to get out and try these techniques on your own.

Most of the photos in the book were shot in locations that are accessible to anyone with a basic level of fitness, and none of them required any special camera gear aside from what would be considered a normal outdoor photography kit. This means you can use these tips with your own subjects.

I’m confident that you’ll get a lot out of BEHIND THE LANDSCAPE. It’s packed full full of useful information and and inspiration and written so that you can start applying these techniques right away in your own photography.

You can download the eBook here, and remember to use discount code BTLJUNE to get your special 20% discount. 


Terry Bourk

I have read you new book “Behind the Landscape.” I could not “put it down” meaning that I kept at it because each photo you presented/analyzed was interesting and informative. I am trying to develop an eye for composition (both the scene and the light).

Thank you! The examples you present and the suggestions are very helpful. Purple Mountains, McKinley River and Wonder Lake are fascinating.

I loved Behind the Landscape!


Callum Rankine

Much like Dan’s images, this book can be enjoyed on a variety of levels. Dan shows a series of landscapes and takes us behind the scenes to see how he created them.

Now you could just simply follow suite and create similar images - but where would be the fun in that? Instead I saw the book more as a jumping off point for further exploration in landscape photography. This is a book that will make you *think* about your photography and that is never a bad thing. One to read, think about, and read again. Highly recommended!

June 3, 2019
See this post
June Special – Save 20% On My BEHIND THE LANDSCAPE eBook

My first lens was a manual focus 50mm f/1.4, and from day one, it was true love. It went everywhere with me, attached to my shiny, chrome body Nikon FM2. We shot everything together, mostly because that was the only lens I had.

Then I bought a 28mm wide angle, and shortly after, a 70-210mm. I was drawn to those lenses because they showed the world in very different ways than my eye saw it. As my style developed with action and adventure photography, this “normal lens” view fell out of favor and my poor 50mm got shoved into my camera bag where it sat, neglected and rarely used for a long time.

However, as the years have passed and my style continues to evolve, my excitement for the “normal lens” has been rekindled, and I’ve come to see just what a versatile tool the regular old normal lens is. Today, my normal lens of choice is the little tiny Fujifilm XF35mm f/2. If you look inside my camera bag, you’ll see that my 35 f/2 is fixed to my main X Series camera body much of the time.

I’m just wild about the form factor of this sexy little lens, and I’ve fallen in love with that “normal view” once again. Over time, I’ve learned how to use it to its full potential.

Normal lenses are called normal because they see he world in a similar perspective and angle of view as the human eye. The beauty of this kind of lens is that if you get in close, it will blur the background and make your subjects stand out beautifully against a soft wash of color. This makes it an amazing choice for shooting portraits or details out in the world.

Move in even closer and your depth of field becomes extremely shallow. This gives you an ideal effect for closeup photography and shooting still life subjects. It won’t get you as close a macro lens, just close enough to isolate your subject matter against a very soft background.

Back up a little bit and you’ll show more of the environment. Not too much, just enough to help flesh out the story of your subject. I love shooting landscapes with my little 35 lens, because it allows me to narrow down the world and create a nice, concise and focused scene.

Normal lenses do have one big limitation, they’re not always the best choice at medium and longer distances. They simply can’t bring distant subject in very close. Also, since depth of field begins to widen out, you end up with what I call the classic “postcard look,” where the subject matter is all presented in the same, flat perspective.

For this reason, when shooting subjects that are far away, normal lenses tend to produce rather amateur looking imagery. This makes them tricky to use for shooting adventure, sports and events, because further than about 20-30 feet, you can’t isolate your subjects from the background anymore. Everything ends up being in focus.

However, if you’re able to move in relatively close, you start to get those shallow depth of field benefits back. And you can always shot how they relate inside the bigger world. This is how I use them for landscapes and adventure; as I said, I try to create a nice focused scene that tells an abbreviated story of the greater environment.

The ease of shooting with a lens like this is that it shows the world in a very familiar view. It sees the scene as your own eyes see it, without distracting you with all that stuff in the peripheral areas of your vision. Your approach with normal lenses is pretty much “look, see and shoot.”

In today’s photography world, fixed lenses are often cast aside in favor of zoom lenses, which obviously allow you to change your focal length and adjust your framing without moving your feet.

However, I like moving my feet. I also love the simplicity of having one look with prime lenses like the Fujifilm XF35mm f/2, and I believe that it forces you to work your creative muscles a bit more. By removing any possibilities for changing focal length, your compositional and framing skills get a better workout, and you limit the number of choices you have to make when you’re shooting. 

In addition, I feel that if you use a fixed lens on a regular basis, you’ll really get to know how it sees the world. This can dramatically increase your confidence and efficiency with composition. In the end, there’s something really cool about having a tried and true piece of photography gear that you know so well.

The Fuji system in general perfectly matches my fundamental “fast and light” approach to photography, and the little 35 f/2 fits right into the kit. For a guy who often depends so much on wide angles and zooms, I’m sometimes a little surprised at how much I love this little normal prime, but I guess that’s how love works.

Even if you don’t shoot Fuji, I encourage you to embrace the challenge of using normal lenses and explore the creative benefits they can offer you.

[iframe]<iframe width=”120″ scrolling=”no” height=”240″ frameborder=”0″ style=”border:none;” border=”0″ src=”https://mer54715.datafeedfile.com/widget/aff_widget_prdt_generate-2.0.php?aff_num=6746&aff_net=1&widget_num=8359&sid=” marginheight=”0″ marginwidth=”0″></iframe><iframe style=”width:120px;height:240px;” marginwidth=”0″ marginheight=”0″ scrolling=”no” frameborder=”0″ src=”//ws-na.amazon-adsystem.com/widgets/q?ServiceVersion=20070822&OneJS=1&Operation=GetAdHtml&MarketPlace=US&source=ss&ref=as_ss_li_til&ad_type=product_link&tracking_id=danhbaisadvph-20&language=en_US&marketplace=amazon&region=US&placement=B016S28I4S&asins=B016S28I4S&linkId=c4ccce249862b88ae49f5c77e8486036&show_border=true&link_opens_in_new_window=true”></iframe>[/iframe]

May 28, 2019
See this post
Why I Love Shooting with the Fujifilm XF35mm f/2 Lens

We all know that photography is all about the moment. That one brief, yet perfect instant, or as we so fondly know it as, that decisive moment, when the the elements of our composition come together in an exciting and unique way.

It’s the peak of the action, the perfect expression, the split second when all other concerns in the world drop away from our consciousness because, well frankly, there is nothing else at at time that deserves our attention than The Moment.

Unless we’re talking about the light. You know, that rich, warm light that only happens at certain times of day, or when there’s a fire or volcano nearby, that bathes the world so vividly and imparts such a special character to our scenes.

We live for that light. We seek it out. We pull ourselves out of bed and out of the tent at ungodly hours while the rest of the people in our time zone still slumber in dreamland for that light.

We stay outside until dark and trade a reasonable dinner time for the potential of wonderful visual experience. We chase it in order to preserve and capture it as it falls on the shapes, landscapes and people in the world that draw us in.

Absolutely. Photography is all about the light.

Unless it’s about the artistry. Anyone can snap a photo with their camera, but it takes someone with skill and vision to take that jumble of stuff in front of our cameras and arrange it into a simple and appealing composition.

Think about all the creative elements that are required to make a great shot. You need to consider the framing, the position of the subject, the inclusion or exclusion of certain elements in the scene, the color, the shapes, the dynamic qualities of the scene, and of course, you need to consider which lens to use. 

Definitely. I’d say that photography is all about the artistic vision. 

Unless it’s about the equipment. After all, you need good gear to make the best photographs. We’re talking high quality glass, lots of megapixels, high ISO capabilities, low noise. You don’t get that with a cheap camera, it takes…

Money.

Photography is all about the money.

Forget what I said about that other stuff, I was way off base there. If you want to take great photographs, you’ve got to spend lots of money. Like I said, you’ll need a pro camera body, expensive fast lenses that don’t distort, and that let you shoot fast in low light, and probably a couple or a few flashes, wireless triggers, diffusers and other light shaping tools if you’re into that artificial lighting stuff.

Oh, but wait. We’ve all seen people out there with really fancy gear and the kinds of big lenses that most of us will never be able to afford. And you know what? Some of them can’t a picture to save their life. They try to force it. You can’t do that. Sure, you can zoom in on a far away subject, but just snapping a photo at the wrong time is only going to get you so far. 

It takes patience. You’ve got to wait for just the right…

Moment.

See, I was right. Photography is all about the moment. 

Or is it…?

May 20, 2019
See this post
Photography is All About The Moment… Or is it?

I’m excited to unveil my brand new video tutorial mentorship series, Photography On The Brain.

In this ongoing series of focused video lessons, I’m going to explore photography with a wide range of topics that challenge you to think about photography in a whole new way.

When you sign up for the series, I’ll send you a new tutorial video each month. In each lesson, we’ll explore a different aspect of photography and expand on topics like creativity, approach, method, technique, composition and how to develop your own personal vision in a way that goes deeper than regular “tips based” instruction.

These short, concise videos are designed to inspire, get you thinking more deeply about photography and motivate you to try and apply these concepts to your own image making.

You’ll also have the opportunity to join my private Photography On The Brain Flickr Group, where you can continue the conversation with me, ask questions, share your own insight and even post your own images for comment and critique.

The Video Companion to My Blog

Many of these concepts will be similar to what I feature here on my blog, but I’ll expand on them in first person with my own voice. I’ll be talking to you directly and showing you image examples to illustrate each topic.

This will allow a unique learning experience for you, because you’ll get much more personal and in-depth style of instruction, and you’ll get to see the excitement and passion I have for these topics. In this way, I consider Photography On The Brain to be the video companion to my blog, which has developed into a very influential and widely read photography resource for people around the world.

Develop Your Own Photography Brain

I call this series Photography On The Brain, because photography is indeed a very brain influenced activity. Starting with the decisions you make to actually create your photo, to the ways that human beings respond to imagery, I feel that great imagery starts and ends in the brain.

In addition, the technical and creative craft of photography makes use of both left and right brain components, which is one of the main reasons that photography is such a challenging and rewarding activity.

The more mental brain power, i.e., “active thought process” you put into your photography, the more confident you’ll be with your problem solving skills and your own creativity. You’ll be better able to capture compelling, powerful images and develop a style that continues to evolve year after year.

In these lessons, I’ll be sharing with you the very ideas that continue to drive my own fascination and enthusiasm for photography, and help you expand your own level of creativity, confidence, efficiency and personal approach to the image making process.

Here’s What You’ll Get

Each month, you’ll receive a concise video lesson, around ten minutes in length, in which I will explore a specific aspect about photography in an intelligent, thought-provoking way. 

You can either watch the lesson right in your browser on any device, or download the lesson to watch later. You’ll have unlimited access to watch all current and previous lessons, so you can always go back and revisit certain topics if you wish.

At the end of each lesson, I’ll leave you with a specific challenge that will encourage you to try and apply these ideas in your own photography going forward. You may find that the approach is not always obvious, and that’s the point, since my goal is to get you thinking more deeply about the process of photography and creativity.

Continue the Conversation in our Private Flick Group

If you sign up for the “WORKSHOP LEVEL” Tier of this mentorship, you’ll receive an invitation to our private Photography On The Brain FLICKR Group. Here, you’ll be able to participate in the conversation as we explore the lesson topics even further.

You can ask questions, share you own ideas and insight and interact with me, as well as fellow members, and you can even share your own photos and see the techniques that other photographers are using to capture their shots.

In this way, you’ll be able to benefit from the shared learning that a community like this offers, and maximize your potential for growth as a photographer.

You’ll also be able to help influence the direction of this mentorship, as the questions you ask will help spark ideas that I’ll cover in future lessons.

A Unique and Exclusive Instruction Style

I can guarantee for certain that you won’t get this stuff anywhere else. How do I know this? Simple. Because it will me talking to you, not anyone else, and I’ll be sharing personal ideas and insight about photography that come straight from my own brain.

These are the concepts that fascinate and intrigue me on a very personal level, and that have continue to excite and drive my own photography year after year. Even though I’ve been shooting photos for nearly three decades, my own passion and skill with photography keeps improving, and I continue to shoot photos that I’m absolutely in love with just about every single month.

This is the kind of excitement I want to share with you. I want you to have the same passion and confidence with your photography as I do, because I know just how awesome it feels to capture an amazing image with your camera. I want you to have that kind of success on a regular basis.

Any Camera and Subjects Welcome

This mentorship series is not designed around any specific camera system or any specific style of photography, it’s for all outdoor photographers, regardless of brand or style. No matter if you shoot landscapes, travel, sports, action, adventure, lifestyle or outdoor portraits, the concepts and process for capturing a powerful apply equally to all genres.

Although I use Fujifilm X Series cameras and lenses, and may occasionally demonstrate certain techniques in my lessons with my Fuji, the ideas and methods I talk about are universal and apply to all camera systems.

In the end, photography is not about the gear anyway, it’s about the big lump of gray matter behind that camera. That’s what determines how you pictures will look and how good you are at capturing photos that excite you and your viewers.

Take Advantage of My Expertise & Experience

As an accomplished pro photographer, workshop leader, author and a Top 100 photography blogger, I have inspired thousands of people with my expert knowledge, my honest, down-to-earth and highly inspirational approach, and my infectious, energetic attitude towards life and photography.

My ideas are based on giving students a mix of mentally engaging ideas that help expand creativity, and real-world methods that allow them to maximize their skills and confidence, while liberating them from the bounds of what they often think they’re “supposed to do” in order to be good photographers.

I’m really excited about this new series, so if you’re hungry for new ideas and open to a fresh, motivational approach to learning in a fun, thought-proking way, then give me a chance. Take advantage of my extensive knowledge and experience. I’m certain that I can make a difference in your photography. And if you find that this mentorship is not right for you, you can cancel at any time.

You’ll get a huge amount of insight and inspiration for the price of two cups of coffee each month, or in the case of the WORKSHOP tier, the cost of a single sandwich. Isn’t your photography and creativity worth that?

See this page for more info about my Photograph On The Brain Video Mentorship Series, or sign up below and get your first lesson right away. 

Three Options – Basic, Workshop & Full Year

BASIC LEVEL – $9.95/mo

  • The exclusive video lesson, delivered each month.
  • Lifetime access to all previous lessons with on-demand downloads.
  • Billed Monthly.


WORKSHOP LEVEL – $14.95/mo


  • The exclusive video lesson, delivered each month.
  • Invitation to join the private Photography on the Brain Flickr group.
  • Lifetime access to all previous lessons with on-demand downloads.
  • Billed Monthly.


FULL YEAR WORKSHOP LEVEL – $179/yr

  • The exclusive video lesson, delivered each month.
  • Invitation to join the private Photography on the Brain Flickr group.
  • Lifetime access to all previous lessons with on-demand downloads.
  • Billed Yearly.


May 8, 2019
See this post
Introducing My New Photography On The Brain Video Lesson Series

This past Saturday was a total bluebird day. We’re talking sunup to sundown, with not a single cloud in the sky. No haze, no moisture, none of those thin, whispy feathers that sometimes creep into the atmosphere  during the afternoon. Nope. Nothing but solid blue across the entire expanse above.

After soaking up a few hours of sunshine on my bike, I came home, grabbed my flying stuff and went up to shoot some evening aerials. With the almost certain promise of incredible light on the mountains, I was quite optimistic that I was going to get at least a few worthy shots.

As it turned out, Saturday night ended up being one of the most magical evenings for aerial photography I’ve had in months.

I went wheels-up at around 8:45 pm and climbed straight east towards the Chugach Mountains, specifically to the area around Whiteout Glacier. I knew that some friends of mine were skiing the Eklutna Traverse, which crosses this area, so I figured I’d go see if I could find them.

After photographing a few of the taller peaks at the end of Eagle River Valley for about fifteen minutes, turned east and reached the confluence of Eagle and Whiteout Glaciers. It was right around this point when the light started getting really good, splashing bold pink light on the peaks and west facing snow fields.

I spotted ski tracks pretty quickly, and eventually saw a tent that was set up in one of the high bowls. I circled around the area for a good half hour, snapping about a hundred frames before the sun finally dropped below the horizon and the pink light faded.

Between the gorgeous contrast of pink against shadowed blue, the pillowy, snow-covered mountain faces and the massive cracks and crevasse fields, I had plenty of compositional options to work with. I shot with my XF50mm f/2 lens on my X-T3 the entire time, cranking out frame after frame of saturated, Veliva goodness, all the while, being amazed by the quality of the light.

The only thing I wished I had was warmer gloves. Although it had been 50 degrees in town, up here at 8,000 feet, the outside air temperature was only 10 degrees F, which seeped pretty quickly into my lightweight, Pearl Izumi cycling gloves, which are my favorite cool weather glove.

They’re awesome for 35-45 degrees in the wind. Not so much at 10 degrees. By the end of the evening, my right had was pretty cold and it took awhile for the screaming barfies to finally go away. Oh well. Live and learn. At least I got some pretty pictures.

I hope you had a great weekend as well. What did you shoot?


April 29, 2019
See this post
A Magical Photography Evening with Incredible Light

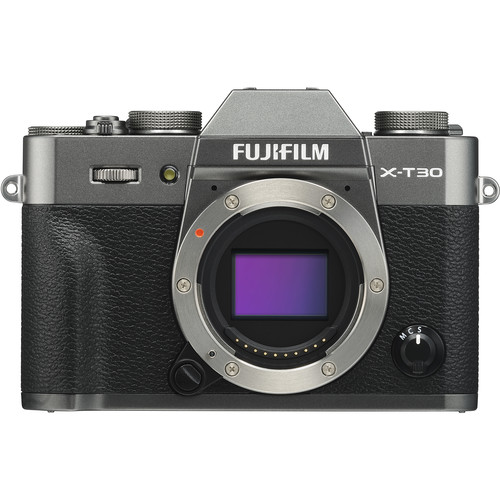
Every time Fujifilm releases one of their “X-T” flagship cameras, they follow closely behind with the little brother/sister version. This time, the supremely powerful X-T3 has been followed with the X-T30, which by all means is an amazing little camera.

These stepped-down versions have always been great models, because fundamentally, they’re the same camera, just not quite as rugged and not weather sealed. Although a few features are different, they offer the same image quality as the higher end models, at a greatly reduced price.

In this case, Fuji’s new X-T30 costs $600 less than the top shelf X-T3. At $899, the X-T30 represents an amazing value, and quite possibly the best value for the incredible performance it offers.

In this post, I’ll quickly run down what the main differences are between the X-T3 and the X-T30 and what you save (or get) with that extra six hundred dollars.

Body Design, Weather Sealing and Durability

The main difference between the X-T3 and the X-T30 lies in the basic design. Where the X-T3 has an all-metal magnesium-alloy body, the X-T30 is built with a magnesium-alloy top and a mix of metal and plastic in the rest of the body. Also, the X-T3 is weather sealed, where the X-T30 is not.

This makes the X-T3 an overall tougher camera, and it will handle more abuse. However, don’t discount the toughness of the X-T30. It’s still built to withstand a regular life of knocks.

Back when I used  the X-T10, I gave it a considerable amount of abuse in the outdoors; I even subjected it to heavy rain a few times, and it survived just about everything I threw at it. I expect the X-T30 to offer the same level of durability. For most users, it will be fine. However, if you regularly beat the crap out of your camera, than it may not.

Size and Weight

X-T3 Dimensions: 5.2 inches wide, 3.7 inches tall and 2.3 inches at its widest. (132.5 x 92.8 x 58.8 mm) and weighs 1.19 lb (539 g) with the battery.

X-T30 Dimensions: 4.7 inches wide, 3.3 inches tall and 1.8 inches at its widest. (118.4 x 82.8 x 46.8 mm) and weighs 13.5 oz (383 g) with the battery.

The X-T30 definitely feels smaller, and it has a slightly less pronounced grip than the X-T3. However, it does have a nice, streamlined feel and a more compact size if you like to go fast and light. Pop one of the small primes on the X-T30 and you have tiny little powerhouse that will probably fit in your coat pocket.

Electronic Viewfinder

This is one of the biggest differences. The X-T3 has a much larger, higher resolution and higher magnification EVF than the X-T30. (3.69 vs 2.36 million dots, .75x vs.62x mag. and .5 inch vs .39 inch panel size.)

Keep in mind, though, both viewfinders offer 100% coverage and even the X-T30 viewfinder still offers a larger, wider view than what you’ll get on most similarly priced DSLRs.

Button/Dial Layout

This is where the two cameras differ the most. Where both cameras have a “3-dial” top deck, the controls are slightly different.

The X-T3 has ISO, Shutter Speed and EV+/- controls across the top. Where the X-T30 has a similar layout on the right side, instead of a dedicated ISO dial, it has a dedicated Drive Dial. This allows extremely fast “on-the-fly” selection of all your shooting modes. This means moving ISO control to one of the Fn buttons.

The X-T30 also has the Full Auto Switch, which puts the camera into Advanced Scene Recognition Mode. This mode offers worry-free shooting in any situation, under any type of lighting condition.

Also, following with the design style of the X-E3, the X-T30 has a slightly different button layout and it does not have the four button D-Pad on the back of the camera. Focus selection is achieved using the AF/Selector Joystick and the four Fn controls from the D-Pad are now accessed with touch screen “swipes.”

Sensor and Image Quality

Here’s where it gets good. Both the X-T3 and X-T30 use the exact same 26.1 MP APS-C Back Side Illuminated X-Trans 4 Sensor. They also use the same Quad Core X-Processor 4 computer chip, which means that both cameras shoot the exact same image quality and have excellent high ISO performance.

Side-by-side, there is no difference – They both shoot 14-bit RAW files and gorgeous looking JPEGs with those legendary Fuji colors, and that’s what makes the X-T30 such an amazing value.

Autofocus Performance

As with image quality, the X-T3 and X-T30 are identical with regards to autofocus. Both cameras are built with 2.16 million pixel, 425-AF point phase detect AF system that covers the entire frame and increased sensitivity down to -3EV. Essentially, this means you’re able to achieve workable AF performance under very dim conditions like candlelight.

Also, with the increased performance of the X Processor 4 chip, both the X-T30 and X-T3 are able to track moving subject with a very high degree of speed and accuracy, even at ultra high frame rates.

Continuous Shooting and Buffer Capacity

MECHANICAL SHUTTER: Using the mechanical shutter, the X-T3 can fire at 11 fps, even without the grip. The X-T30 is limited to 8 fps, which is still very fast; certainly fast enough for most sports and action scenes. In many cases, if you can’t nail it in 8 fps, you won’t be able to nail it in 11.

In many fast breaking situations, technique and timing is more important than an additional 3 fps. That said, if you know what you’re doing, those extra 3 frames per second might make a slight difference between a great shot and an exceptional shot with slightly better framing.

ELECTRONIC SHUTTER: Both the X-T3 and X-T30 feature incredible fast electronic shutters that allow for blackout-free shooting speeds of up to 20 fps and full resolution and 30 fps using the new 1.25X “Sports Finder” crop mode.

As of right now, these are some of the fastest blackout-free frame rates in the entire industry, and they offer incredible creative option when shooting very fast moving subject matter.

BUFFER: Buffer capacity is one of the main areas where the X-T3 has the advantage. It’s always been this way, even with the original X-T1 and X-T10. The higher end models have more internal memory which allows for a much larger buffer.

Shooting at 8 fps, the X-T3 can nature almost 50 RAW frames and 200 JPEGs without stopping, where as the X-T30 will start to stutter after only 18 RAW frames and about 90 JPEGs. This will probably not be a factor for most shooters. Again, if you need more than 90 frames to nail your scene, maybe there’s another approach you can take.

Nearly Identical Camera/ShootingSettings

Since they have the same sensor and processor, both the X-T3 and X-T30 feature nearly all of the same shooting and camera settings. In fact, most of the menus are identical on both cameras, with means that they both share the exact same creative controls, focus options and camera customization.

It also means that my X-SERIES UNLIMITED eBook covers every single feature found on the X-T30.

When the X-T3 was introduced, it has some really cool creative features that are now included in the X-T3, including B&W ADJ (WARM/COOL), COLOR CHROME EFFECT, PRE-SHOT ES, SPORTS FINDER MODE and ETERNA film sim.

I’ve written about the new B&W ADJ feature, which I LOVE using, and I’ve also written about the amazing PRE-SHOT ES feature, which is a special boon to sports, action and wildlife shooters.

Movie & Video Capabilities

Both the X-T3 and X-T30 offers amazing 4K capable movie capabilities and greatly expanded, dedicated movie settings menus. There are a few main differences, though.

The X-T3 is able to shoot 4K at higher frame rates (60p vs 30p) higher bit rates, (400Mb/s vs. 200Mb/s), for longer durations (30 min vs. 10 min) and with the option of using a more advanced video compression codec.

However, this will not be an issue with 99.999% of video shooters. For most projects, the X-T30 will shoot gorgeous looking video that’s fine for most types of projects. If need those higher specs, you’ll definitely want the X-T3.

Final Thoughts

As with the X-T10 and X-T20 the new Fujifilm X-T30 offers incredible performance at an exceptional value. You get identical or nearly identical performance of the X-T3 with regards to image quality, AF speed/tracking and electronic shutter frame rates, you get all of the same Fuji film simulations and the same color reproduction, all of the same creative, shooting and camera settings, and high quality video.

In my mind, aside from the slight design differences, when I think in practical, real-world terms for people shooting in most conditions, the only differences between the X-T3 and X-T30 are toughness and weather sealing, buffer rate when shooting a high number of frames in CH Mode, and a more substantial grip and a slightly bigger electronic viewfinder.

For all that it has, the X-T30 is an amazing little camera with a nice little compact body and a price tag that’s $600 lower than the X-T3. It offers everything you need to make awesome pictures, no matter what you shoot, and I can attest, it will withstand a reasonable amount of abuse. Just don’t smash it too hard or drop it in the water.

The X-T20 was one of the top selling mirrorless cameras, and the X-T30 is sure to follow in that trend. Small enough for travel, unobtrusive street photography, hiking and backpacking, bikepacking and cycle touring, affordable enough for amateur photographers or as a second body for pro shooters, and fun enough for everyone, what’s not to love?

Of course if you want top of the line and need the most rugged, weather sealed body, the fastest buffer for capturing action subjects and wildlife and the highest video specs, then the X-T3 is clearly the camera for you.

You can order the X-T30 here, and it comes in three colors: black, silver and charcoal silver. The X-T3 comes in silver and black. 
April 24, 2019
See this post
Comparing the Fujifilm X-T3 and X-T30 – What’s Different?

When I look through the camera and arrange my subject matter in the viewfinder, I usually try to keep things away from the edges. In fact, one of the most ingrained compositional guidelines I live by in my photography is to keep the edges sacred.

I just think it gives the photo a cleaner, less cluttered look. It also reflects the notion that you, as a photographer, are making deliberate decisions about the arrangement of subject matter in your frame.

Look at the photo above. See that partial flower along the left side of the top edge? Looks a little sloppy, doesn’t it? It’s almost like I didn’t notice it was there there until later. That’s exactly what I’m talking about. I should have noticed. It’s good photography technique to notice stuff like that.

Here’s another version. See the difference?

Of course, this second shot has a different issue. See those flowers near the top right corner? They’re also sitting right at the edge. Are they any less offensive than in the first example?

I think they work, and here’s the difference. We can consider them disappearing subject matter. They’re part of a repeating pattern of orange flowers that draw the eye in and out of the frame. They’re similar enough that we recognize them for what they are, instead of being a unique subject element that’s chopped off.

Also, since they’re so out of focus, they just fade nicely into the background. They add a bit of additional flavor before subtly leading our eye out of the frame.

However, I realize that to some viewers, even this example is visually bothersome. If this were your photo, you might have a strong compassion to remove them entirely from the frame. And that would be ok, because it’s your photo.

Let’s look at at another example.

This one is a little more obvious. In the first example, that frosted twig is sitting a little too close to the top of the frame. Pretty easy to spot right? It feels a bit crowded up there, and there’s no room for the subject to breathe.

That’s a prominent description I like to use when talking about this technique. You want your subject elements to have enough breathing room so that they don’t feel cramped at the edges.

Of course, if you’re dealing with a repeating pattern or if you’re focusing on the details of a scene, you can totally get away with busy edges, as long as you’re being deliberate about your composition, and as long as you’re not cutting anything unique or important off right at the edge.

In this case, it’s all considered environment. Nothing is being cut off, it just ends, or rather it just travels out of the frame in a natural way.

When we create our compositions, we strive to include a little bit of tension and visual discomfort in our frame, but there’s a difference between offering slight discomfort and making it so your views are bothered.

In the last example, I’ll give you three versions, only this time, I want you to tell me which one works best and which one doesn’t. Take a look and let me know which of these three scenes appeals to you the most, and which one bothers you the most.

As you’re playing around with the camera, and looking at subject matter, think about this guideline and see if it helps create more effective compositions. Be deliberate with your framing and remember to pay attention to every single element in your frame. Nothing should get by you.

If it does…and it occasionally will, it just means you need more practice seeing. We all do.

April 23, 2019
See this post
Photography Composition Tip – Keep the Edges Sacred

I’m excited to let you know that I’m the guest on this week’s FUJILOVE Podcast!

During this episode, I talk with Zürich based street and documentary photographer Jens Krauer about, cameras, creativity, passion, the power of still imagery, Fujifilm, shooting aerials from the open window of my 1947 bush plane, my own journey with photography, my passion for teaching fellow Fuji users and what it takes to be a pro photographer and successful blogger in today’s world.

I also discuss my forays into shooting video, which is a very new thing for me. Having just shot my first professional video project using the X-T3, I share my thoughts about shooting video vs stills and where I see myself going with this now that I’ve peeked into Pandora’s Box.

I really enjoyed my extended conversation with Jens, we dove into a wide variety of topics. In fact, after we finished recording the episode last month, we continued our discussion for another 45 minutes.

FUJILOVE is without a doubt one of the best online resources for Fuji shooters and so I’m psyched that they were finally able to fit me in on the podcast.

Listen to the interview here, then spend some time cruising through the archives and consider subscribing to the monthly FUJILOVE Magazine.

If you’d like to listen to other podcast interviews with me, you can visit the archive page here.

April 17, 2019
See this post
Listen to Me on the Latest FUJILOVE Podcast

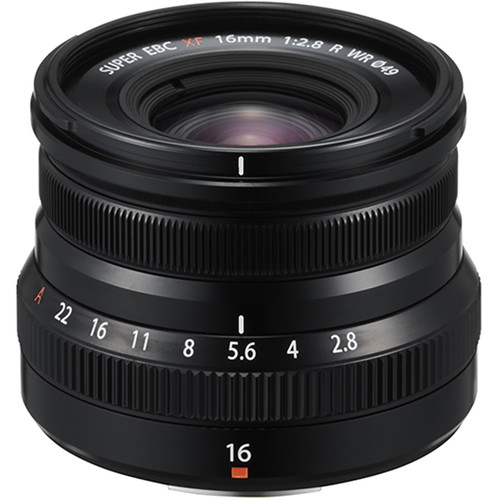
I’m a huge fan of Fujifilm’s awesome f/2 WR prime lens series. The XF35mm f/2, XF50mm f/2 and the incredible XF90mm f/2 are among my favorite and most used lenses, so I was very excited to hear last year that the next lens in the series would be the XF16mm f/2.8.

Now that it’s been released, I’ve been able to shoot a few photos with it, and I can say, this was indeed the lens I was waiting for.

Back in the day, when I was a budding adventure and outdoor photographer, my favorite wide angle lens was the venerable Nikon 24mm f/2.8. This piece of glass saw more action in my early shooting days than any other. To me, it had the perfect meld of size, weight and view angle, and Fuji’s new 16 2.8 brings that classic combination to the X Series.

Even though the other lenses in the series are f/2, Fujifilm opted to shave size and weight and make this one an f/2.8. That’s plenty fast for most wide angle uses, and besides, if you really need a super fast wide, you can always spring for the XF16mm f/1.4.

However, that 16 1.4 is quite a bit bigger, heavier and much more expensive. Whereas the 1.4 version comes in at 13 ounces, which is just three ounces shy of a full pound, the new 16mm f/2.8 comes in at just 5 ounces. In addition, it costs under half as much: only $399, vs $999 for the 1.4.

Yes, speed is nice, but as I said, 2.8 is plenty fast for most wide angle photography, and for the size and weight difference, the new XF16mm f/2.8 is a fantastic little lens.

I just think that wide angle lenses are so versatile in the world of outdoor photography. They’re indispensable for shooting landscapes, action/adventure scenes and astrophotography, but also great for environmental portraiture, because you can get close enough to feature the subject and still show enough of the background to tell the story.

Having used a variety of wide lenses over the years, I’ve always found this focal length to hit a real sweet spot. If a lens gets too wide, you can start to get distortion at the edges, and by the nature of the design, ultra wide glass is usually bigger, as well.

Fuji has the tiny XF23mm f/2 lens, but that classic 35mm “photojournalist” focal length has never really been my cup of tea for regular use. It’s just not wide enough. The 16mm with it’s 24mm view angle yields an excellent combination of wide, small and relatively fast, which in my book, hits the target for everything I want.

Just like the other lenses in Fujifilm’s compact WR series, the new XF16mm f/2.8 follows the same classic “Fuji-cron” design, with a lightweight, compact build, a numbered aperture ring and a slightly tapered front. It comes with a small, very unobtrusive hood. The kind you have no problem leaving on all the time.

Lens quality is amazing, with gorgeous color reproduction, no visible distortion or softness at the edges, and very quick and responsive autofocus. It allows you to get quite close, with a minimum focusing distance of 6.6 inches.

(The photos of the poppies above was shot at the closest possible distance.) Compare that to Fuji’s 16mm f/1.4, which has a minimum focusing distance of 5.9 inches.

Compared to my other favorite wide angle, Fuji’s XF14mm f/2.8, the new 16 f/2.8 has a slight edge in size, minimum focusing distance, and again, it costs less than half as much. And it’s weather sealed, which the 14 is not.

I don’t have a single bad thing to say about the 14mm f/2.8, it’s been a mainstay in my bag since my first days shooting with the X Series, but I have to say, the smaller build of the new 16 is pretty nice. It makes it that much more appealing for use on an ultralight weight bike trip or hiking trip in the backcountry, especially if you anticipate bad weather.

And what about the original 18mm f/2? That’s a fun little lens, but this new 16 is just way better on every level.

I love these little Fuji primes, and if you look in my bag on any given day, you’ll find at least two or three of them in there, the 35, 50 and often the 90. Add in the 16, and I’ve got an ultra compact, ultra lightweight kit that covers an extremely workable range.

Traditionally, photography has been a rather expensive activity. However, since the introduction of the X Series, Fujifilm has done an incredible job giving us a number of very high quality lens choices at reasonable prices, which allows a greater number of people to enjoy great photography.

The new XF16mm f/2.8 fits perfectly into the line and offers Fuji shooters an exceptional and very affordable wide angle lens. Given its size, weight, speed, sweet view angle and the fact that nothing else even comes close in this price range, this is surely one of those no-brainer lenses for just about every X Series photographer.

April 15, 2019
See this post
First Look at Fujifilm’s New XF16mm f/2.8 WR Lens