According to Feedspot’s website, these rankings are compiled based on a combination of factors, including Google reputation, social media influence, post quality and consistency and by expert review by their editorial team.
As with my previous ranking, I’m honored to have made this list and have my blog stand alongside such inspirational and educational websites, especially since I don’t have near the traffic as some of the sites on this list.
This tells me that my site was chosen and ranked on content more than numbers. This makes me feel awesome, as I work very hard to provide my readers with a mix of photography tips, gear reviews, photo essays and insight about creativity and photography method.
Through the past 10 years of writing this blog, I have developed a true love for sharing my own passion, experience and knowledge of photography with other shooters.
Each time I sit down and write another post, my hope is that the imagery and articles I share help teach and inspire people to get out there and explore the world with their cameras. Having received two of these Top 100 rankings, it seems as if my message is resonating with you guys!
Of course, there would be no Top 100 rankings without you, so I’d like to express my sincere gratitude to everyone who has ever spent time here on my blog. Thanks so much for your support!
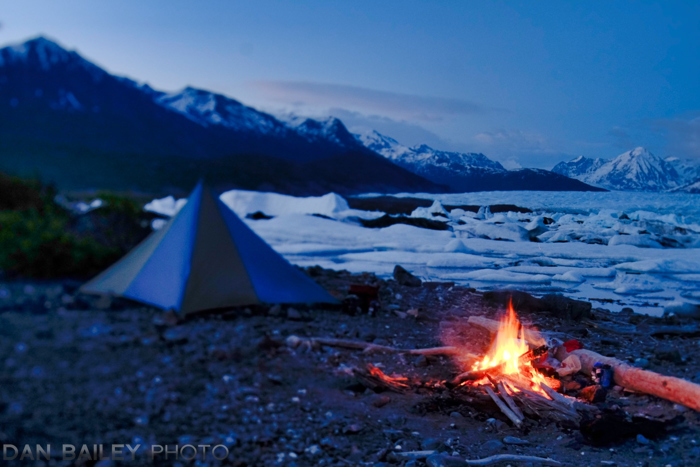
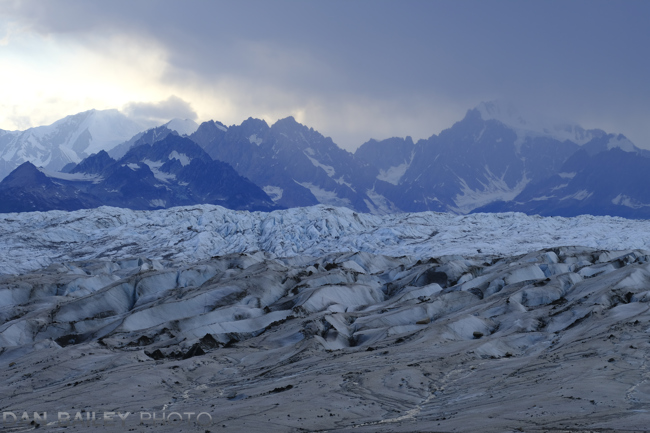
I love “flying to hike” with my little Cessna bush plane, and one of my favorite types adventure is when I land near a glacier and actually hike up on to the ice. I’ve done this on the Knik Glacier and the Lake George Glacier, and a couple weeks ago, I hiked all the way up onto the Triumvirate Glacier, which lies along the eastern edge of the Tordrillo Mountains, about 60 miles west of Anchorage.
The trick is to find a gravel bar that’s relatively close to the glacier, and that’s smooth enough to land on. However, even if you nail that part, it’s never a given that you’ll actually be able to get onto the ice.
Even if you’re able to land close enough for day-hiking striking distance, you can easily be shut down by a wide and swiftly running braided river or glacial lake. Or any number of other impassible features in the accompanying landscape.
I’d been eyeing the Triumvirate Glacier for a few years as a potential day hike. Up until recently, I could never find a suitable landing spot that was close enough and that gave me potential hiking access without being cut off by water. Until last week.
Flying out there on an exploratory mission one evening, I spotted a sandbar that was long enough for the Cessna, (I need about 350-feet to land and about 600-feet to take off). It was also way closer than the sandy strip located about two miles west and on the other side of the river.
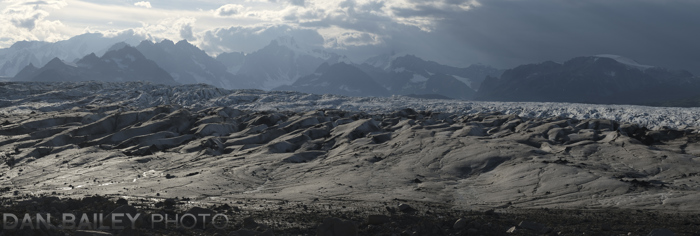
[caption id=”attachment_20175″ align=”alignnone” width=”650″] I landed on that white alluvial fan near the bottom right, and hiked around the left side of the glacier lake to access the moraine. From there, it was a long, dirty, muddy slog to reach the ice.[/caption]
My landing went quite well, I had a brisk, 10kt headwind that aided me with a nice, slow approach. After making two test passes, I skimmed in right over the water and set the plane down on the relatively soft sand.
Once I shut her down, I got out and paced out the landing area so I could get an accurate measurement of how much room I’d have during takeoff. From water to the place where it starts getting bumpy, I walked out about 900 feet. That’s plenty of room, even with a softer surface. Even without a headwind, I should have no problem.
Returning to the plane, I grabbed my pack, noted the time and set off on my hike, having no real idea how far I’d make it or if would even be possible to get up onto the ice.
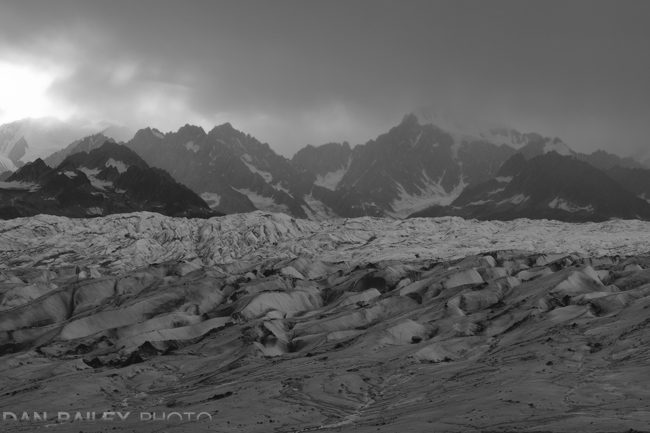
[caption id=”attachment_20173″ align=”alignnone” width=”650″] Looking toward the moraine. It looks a lot different and much further away from ground level![/caption]
The first of the hike was flat, but it went from sand to talus pretty quickly. I had to navigate a couple of small water crossings, but they weren’t bad at all; I didn’t even get my feet wet. The ground got a little muddy as I reached the other side of the lake and made my way to the base of the moraine, but I was able to hop from rock to rock to keep my feet dry.
Then the slog began.
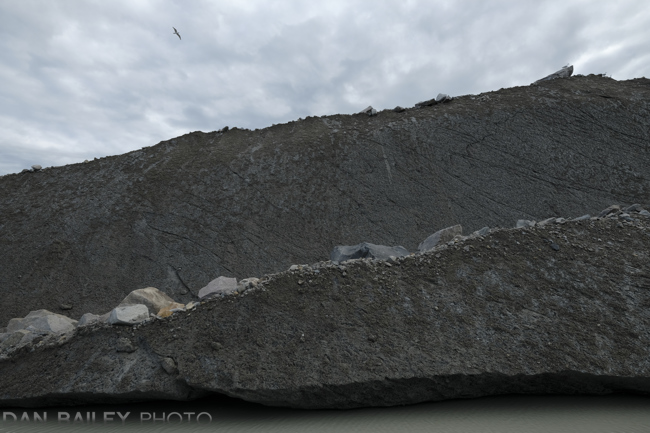
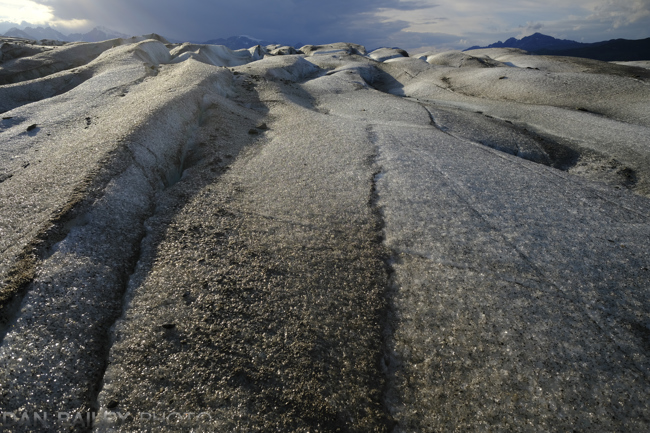
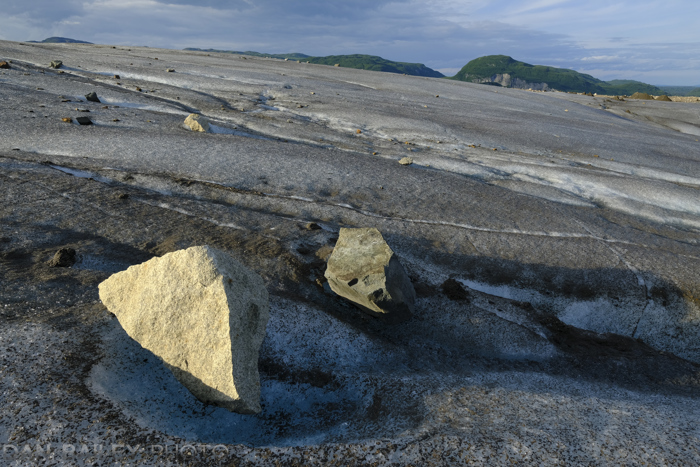
A glacial moraine is essentially an enormous, messy debris pile. As the glacier moves down the mountain, it pushes an immeasurable amount of rock and dirt in front of it as it grinds down the landscape. The result is a huge conglomeration of rock, mud, sand, and even huge chucks of ice. We’re talking ice blocks that can be as large as a cruise ship, or at least the size of a Beverly Hills mansion.
Walking on a moraine is an activity not for the faint-footed. The terrain moves with nearly every single step, so you have to move constantly, at least through certain sections until you find a small patch of stable ground. The really tricky parts are the slopes that are really just chucks of black ice covered in sand. Trying to walk up is impossible in regular shoes, so you often find yourself constantly weaving and re-navigating.
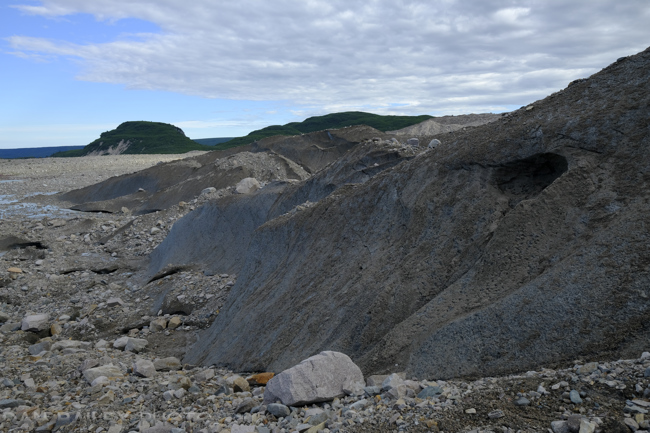
It’s non-stop up and down, weaving through small troughs, over scree hills and talus slopes and following sandy ridges as you try to make your way to a specific point you might have spotted below. Then when you get there, you make another spot and continue on. Hiking chaos that goes on and on.
Moving quickly, I pushed on, with my trusty Fuji X-T2 slung around my shoulder. The higher I got, the more expansive the moraine seemed to be as it revealed more of its massive self to me. Eventually, got my first glimpse of the ice, but it still seemed so far away. I began to doubt whether I’d be able to reach the ice, but I keep pushing those seeds out of my mind and set my sights on the next hill.
Although routefinding was a challenge, what concerned me more was finding my way back, especially since there is no trail of any kind on this huge disaster pile. Fortunately, as you can see in the picture above, there were definitely some identifiable and rather unforgettable landmarks. Lower down, I even built two cairns that would hopefully keep me on track.
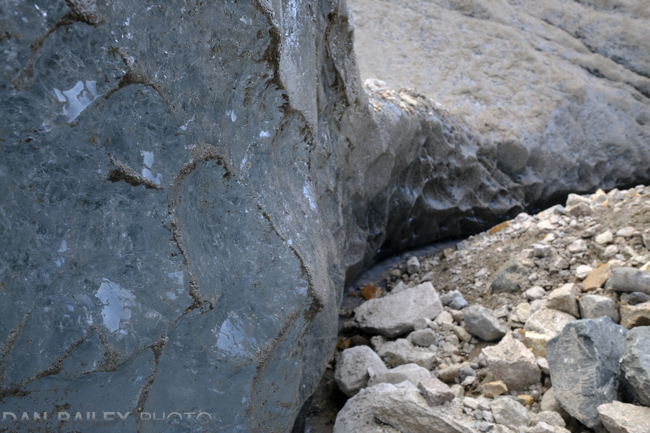
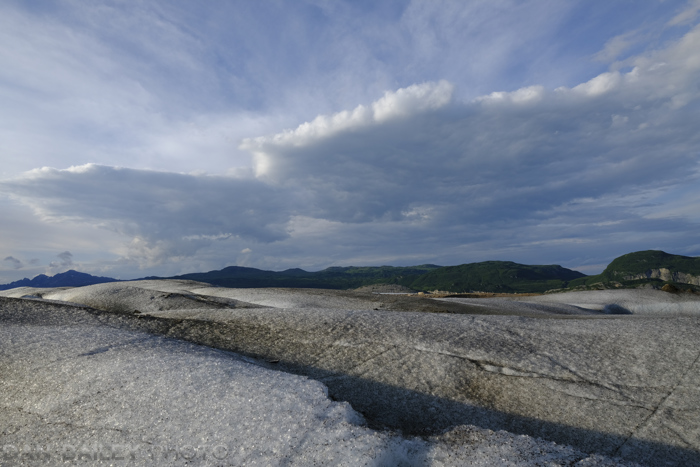
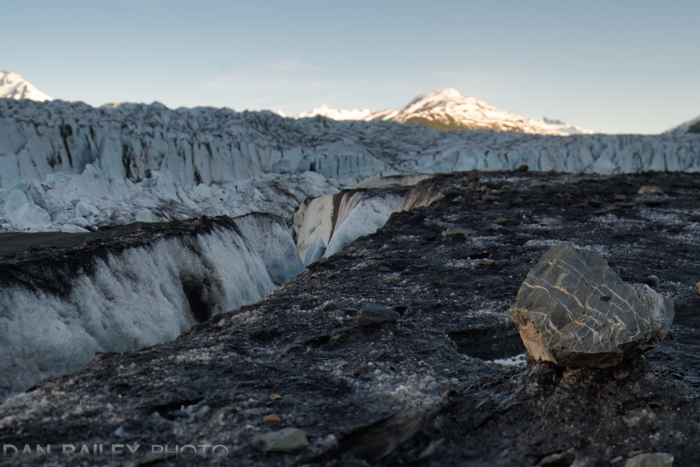
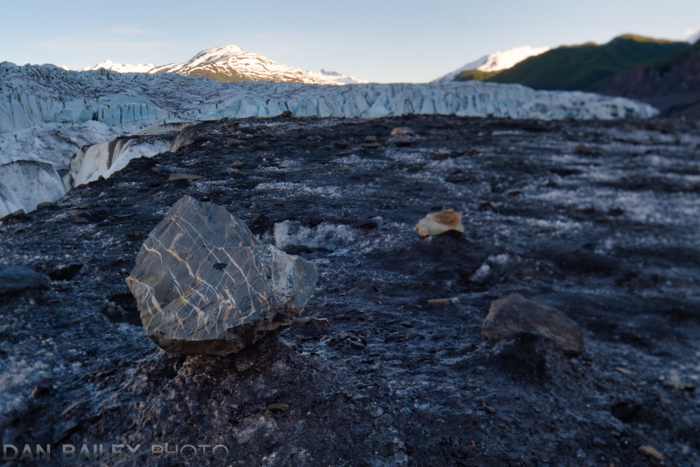
Finally, after a long, two-hour slog I got within striking distance to the actual glacier. From there, it was only a short stretch, although the final bit in front of the ice was about 50-yards of mucky, ankle-deep mud that resembled quicksand. It took careful and rather adept rock-hopping to clear this final barrier, and eventually, I stepped foot onto the Triumvirate Glacier.
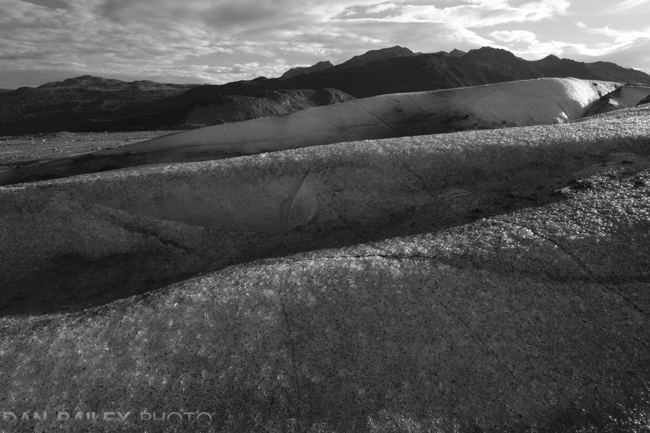
Fortunately, the lower section of the glacier was relatively flat featureless ice that gradually sloped up towards the first folds and jumbles. I was able to walk a few hundred feet before it got too steep.
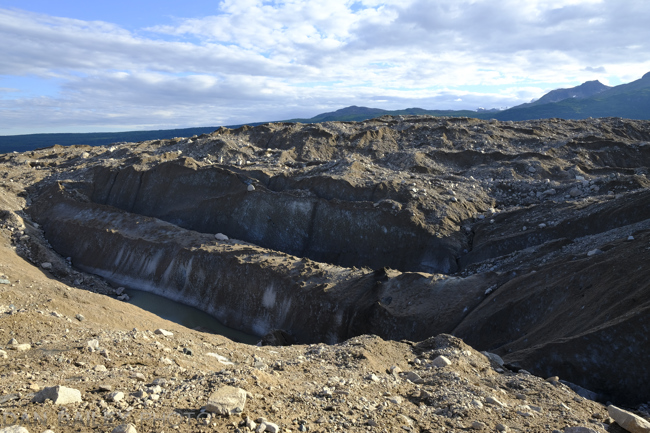
By now, it was 9:00PM, so I didn’t have long before I had to turn around. Unslinging my X-T2, I shot a series of photos, alternating between color and black and white. I mostly shot with the XF14mm f/2.8 wide angle lens. As I started my hike back, I turned around and captured some compressed telephoto shots with the XF90mm f/2 lens, even shooting a couple of in-camera panoramas.
The hike back went smoothly, or so to speak. Tromping, running, sliding, skidding, hopping, and mashing your way down a glacial moraine is hardly a smooth process. However, I successfully retraced my path and even passed by my two cairns again before defending the final hill down to the base and beginning the mostly flat walk back to the plane.
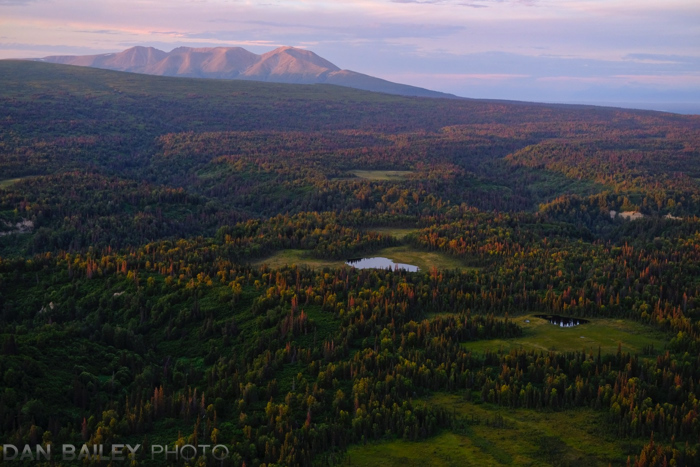
Arriving at my little yellow Cessna just over an hour after I left the ice, I started her up, taxied back across the sandbar, waited for the dust from my prop wash to settle, then took off with room to spare. After making a quick circle over the toe of the glacier, to mentally retrace my steps, I turned and began my 40 minute flight back to Anchorage under the color of the setting sun.
I’ve been back from Scotland for over two months now, and I realized that I’ve only share shared a few images from that trip here on the blog. That’s patly due to the fact that my posting frequency dropped quite a bit in June and July for obvious reasons, and also because most of my writing time this summer was spent working on my new comprehensive Fujifilm guide, X SERIES UNLIMITED.
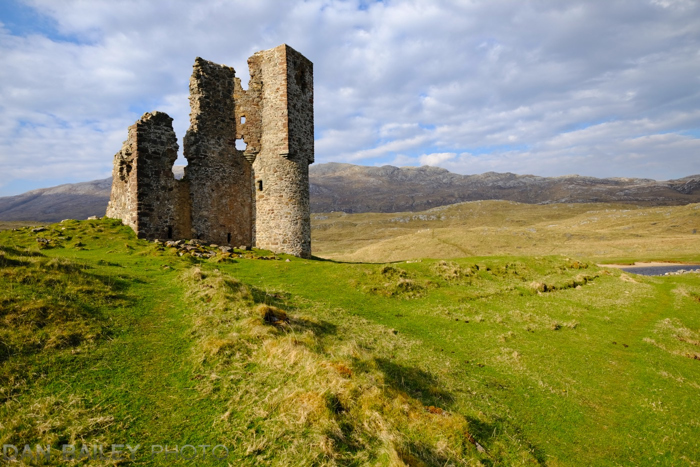
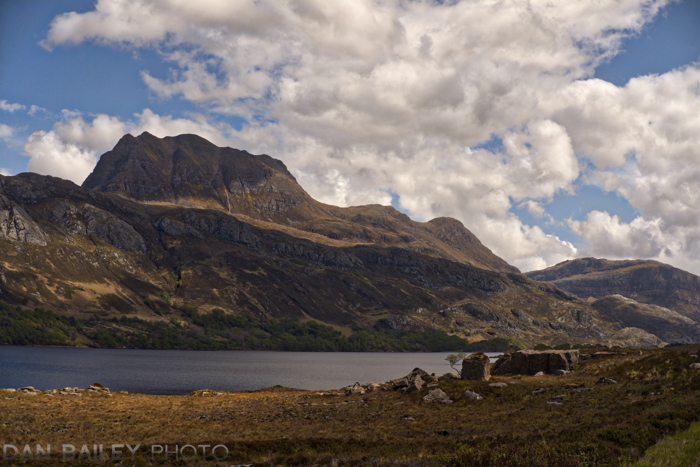
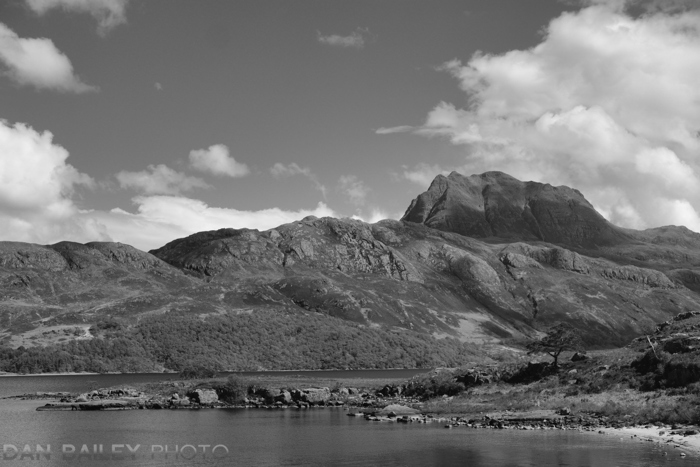
So, today I’d like to share one of my favorite landscape images from my 3-week bikepacking adventure, a view of Slioch towering over Loch Maree in the Scottish Highlands.
At 981 meters (3,218 feet), Slioch is one of the most impressive mountains in the North West Highlands. Located near the village of Kinloweche in the region known as Wester Ross, Slioch stands alone, isolated from other similarly sized peaks, which gives it special prominence.
It’s name derives from the Gaelic word, Sleaghach, which means “spear,” and when viewed from the west, the top of Slioch definitely as a dramatic, slender point.
We had a nice, long view of Slioch while pedaling along the 12-km long Loch Maree. We had left the small town of Gairloch that morning, under clearing skies after a solid night of rain. After climbing southeast away from the coast, we crested a long hill right by Loch Bad an Sgalaig, and began a long and relatively straight pedal alongside Loch Maree.
[caption id=”attachment_20146″ align=”alignnone” width=”700″] Our view from the town of Gairloch the previous evening.[/caption]
[caption id=”attachment_20147″ align=”alignnone” width=”700″] A view of the Scottish Highlands alongside Loch Maree.[/caption]
The scenery changed dramatically as we rode towards the loch and very quickly, Slioc came into view. Sitting at the southern end of Loch Maree, we drank in its impressive form for well over a half-hour.
When you’re on the move, even on a bicycle, the scenery can sometimes change pretty quickly. With their wide open views and majestic vistas, features in the Highlands tend to hold your attention for much longer period of time.
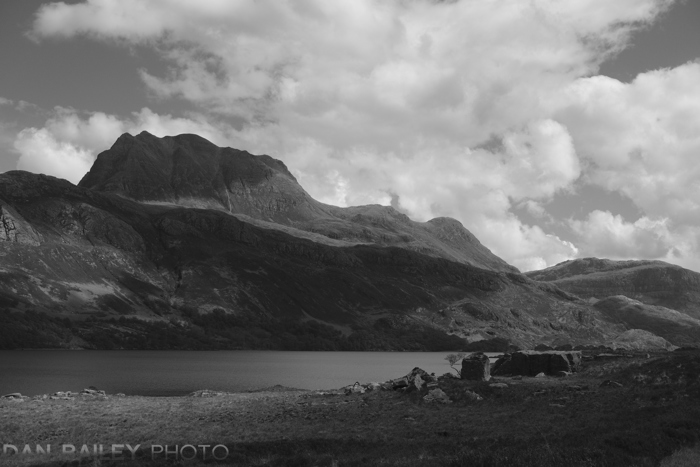
I had no idea what this beautiful mountain was called, but fortunately, the little cafe/gas station in the village of Kinloweche had a map on the wall, so I was able to learn the name, which was quite easy to commit to memory.My Slioch photo actually started as a black and white. Being mid day, the light wasn’t particularly impressive, so I set my Fuji X-T2 to the ACROS film simulation, using the RED FILTER setting to add more drama to the skies. I felt that a monochrome image might help capture the peak with a timeless, yet captivating simplicity.
I had stopped a few times to shoot the mountain as I rode alongside the loch. Eventually, as we got closer, I found a very pleasing vantage point that let me balance the prominence of the peak with the small jumble of boulders in the lower right foreground.
In addition, the light hit in such a way to light up the foreground on the lower left side of the frame, and at the same time, shrouded part of the mountain in shadow. I felt this added much greater depth to the scene, instead of just having everything being lit by the same level of sunlight.
Even though I liked the initial black and white look, I set the Fuji to shoot RAW+JPEG. I wanted to give myself options for processing the photo later, in case I came up with what I felt might be a more compelling idea. I don’t always like to defer my creative ideas until later, but sometimes even I break my own rules, especially if I’m moving quickly through a scene.
This this. As soon as we rounded the southern end of Loch Maree and dropped into the forest before Kinloweche, Slioch disappeared from our sight, and I haven’t seen it since.
The Slioch frame became embedded on my memory card with a few thousand other shots until I downloaded the card few weeks later when I was back in Anchorage.
[caption id=”attachment_20150″ align=”alignnone” width=”1400″] The unedited Slioch photo from the RAW file.[/caption]
Here’s what the unedited RAW version looked like before I did anything. As you can see, it’s pretty dull. I still liked the black and white ACROS version, but I really wanted to see if I could make this image something special.
Opening the image in Luminar, which is my image editing program of choice these days, I started previewing some of the presets to see if anything popped out. I demoed a few different ones, like Image Enhancer, Vivid, Sharp and Crisp and even one called Artistic Copper Strong.
There was something about the Artistic Copper preset that drew me in. It contains some interesting tools, including a Split Color Warmth effect, which selectively enhances warm and cool colors, almost as if you were adding a very subtle split toning look.
I liked how it warmed up the landscape a little bit without comprising the daylight blue of the sky. Further enhancing this effect, I slid the Color Temperature slider up towards the yellow spectrum, and then added some Clarity, Saturation and Structure, as well as a twinge of Grain and finished if off with a touch of magic using the Luminar’s Golden Hour Filter.
So, although I didn’t end up using the Artistic Copper preset, it helped spark some creative ideas and put me on the path towards my final image.
I really like the end result. It’s got some much needed life and extra detail, but it’s not over done. The colors are rich, without being too saturated, and at the same time the overall color palette is relatively subtle compared to what it might have looked like if I used the Velvia film simulation.
I’ll confess, I don’t often spend much time processing my images. That’s one of the things I love so much about Luminar, if you want to work quickly, you can achieve good results with minimal time. Although it may sound like I made a lot of adjustments on this image, it really didn’t take much time to go from a flat RAW file to a finished image that I love.
If you’ve read my blog or eBooks, you know that I usually shoot my Fuji as if I were shooting film. I like to gauge my scene, pick a look or film simulation that matches my creative vision at the time and walk away with the shot I want, as opposed to shooting everything in RAW and processing later.
Well sometimes, even I like to shake it up. That’s the beauty of digital photography, you can approach it however you want. There will be situations where a particular scene inspires you to process and try create a special, representational photograph, while other times, you just want shoot and go, and let the camera do your processing.
Neither way is better. It’s all about how YOU want to spend your time and exercise your creativity. If you’re interested in checking out Luminar, you can download the demo here. If you like what you see, you can use discount code DANBAILEY to save $10 on the program.
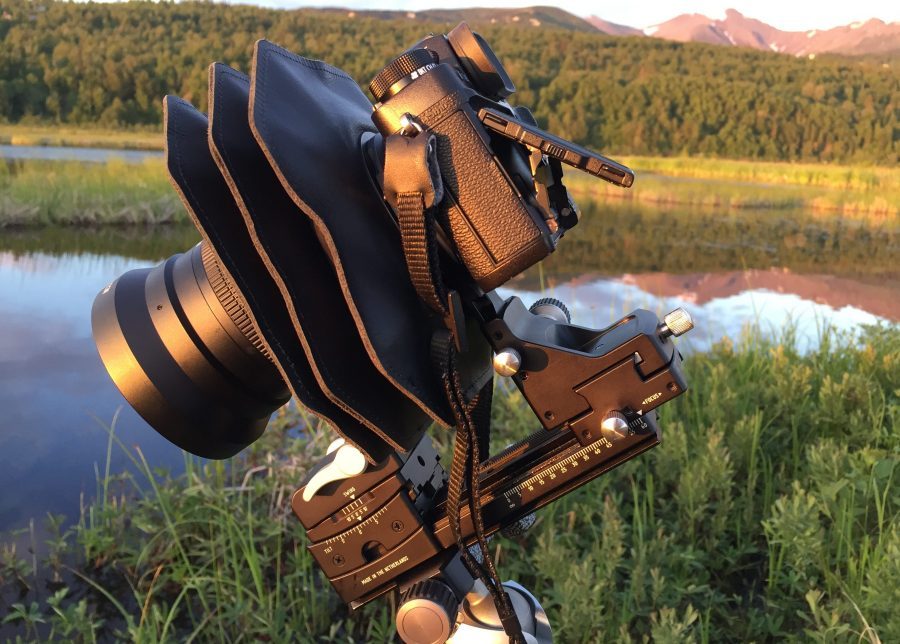
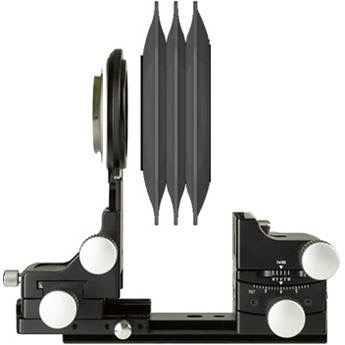
Earlier this summer, I had the chance to try out the Actus Mini View Camera For Fujfilm X Series, manufactured by Cambo Photo. This innovative and well-crafted device turns your mirrorless Fuji into a high quality, and highly portable view camera, and allows you to shoot highly stylized photos that would otherwise be impossible to capture.
Consisting of a monorail base, a camera mount plate and a flexible bellow, and an add-on lens mount and lens, the Actus Mini allows you attach any X Series camera as a digital back. This lets you perform traditional tilt, shift and swing motions and add an enormous amount of creative and professional quality options to your photography.
Exact configurations vary depending on which lens you use. At this point, you cannot use your own Fuji lenses with the Actus, however you can order optional lens plates which allow you to use the Actus with Hassleblad, Mamiya, Pentax 645, Leica R, Nikon-F and Canon-EOS lenses. So, for example you could use your X-T2 or X-E1 on the Actus with a Hassleblad or Nikon lens if you so choose.
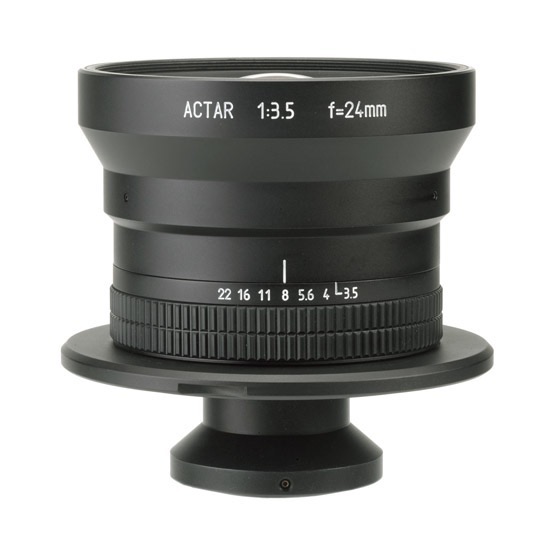
Currently, Cambo has three of their own lenses designed for their Actus mirrorless camera system, a 24mm, a 60mm lens and an 80mm. The unit I used shipped with the German made ACTAR 24mm f/3.5 lens. It’s bigger than any Fujinon lens, but it’s an incredible piece of glass.
Constructed with 6 multi-coated elements in 11 groups, the ACTUS 24mm is an exceptional architecture and landscape lens that produces almost no distortion. I was extremely pleased with how it performed when shooting a wide variety of landscapes, nature and even a few people photos.
Before we get into all that, though I need to tell you how it works.
Setup and Operation
The Actus rig came packed into small Pelican Case as three pieces: the monorail, the lens and the bellows. Don’t tell the Cambo guys this, but I didn’t use the Peli case all week, I just stuffed the gear into one of my LowePro packs. It actually fit perfectly, which illustrates just how portable is rig really is.
Once on location, it’s extremely easy to assemble. You place the monorail onto your tripod, remove rear lens cap and slide the lens onto the lens mounting plate, attach your camera to the rear camera mounting plate and slip the bellows in between. The bellows have magnetic plates on both sides, so they simply snap right to both sides and create your light seal.
From start to finish, we’re talking less than five minutes. Probably three if you’re methodical and careful. Once its all put together, the fun begins.
The all-metal monorail is extremely well crafted with a high level of precision engineering. It feels very substantial, like you’re using a truly professional piece of equipment. The four large knobs control your tilt, shift, swing and focus controls. There’s also a small knob that locks your focus so it doesn’t accidentally drift or get bumped.
It’s also highly modular. You can order different lens plates, different lenses and a variety of bayonet plates for using the Actus Mini with other camera brands as well, including Nikon, Canon, Sony, Olympus, Pentax.
Tilt, Shift and Swing
If you’ve never used a real view camera before, (I hadn’t) it can be a little intimidating at first. However, it’s a simple matter of trial and error to figure out how it all works.
Basically, with a view camera you can tilt the lens up and down, swing it from side to side, and shift the body up and down behind the lens, or side to side. This allows you to get those special “tilt shift” effects, where your plane of sharp focus can vary from very wide through entire picture, to narrow slices of focus that run up and down, across, or even diagonally through your frame.
If you’re familiar with the ADV Miniature Mode on the Fuji cameras, it’s like that, only with way more control. Depending on your lens aperture, camera orientation and how you control the knobs you can create a wide or very narrow focus slice anywhere in the frame. You can make it run vertically or horizontally across the frame, and you can fine tune exactly where your point of sharp focus will be.
Focus control is accomplished by turning the focus dial on the back of the ACTUS. As with a traditional view camera, you gauge your focus by looking at the camera’s LCD screen, or through the viewfinder. Only you don’t need a big piece of cloth over your head to gauge your precision, you have a much more powerful tool.
Setting your X Series camera’s Manual Focus Assist setting to Focus Peaking (I use red peaking) allows you to easily see exactly what’s in focus. This is perhaps the most beneficial aspect of having a mirrorless view camera. You can turn the focus knob and watch the field of red highlights move back and forth or side to side across your frame, which allows exceptionally quick fine tuning of your focus.
Tilting the lens up and down creates differences in focus from top to bottom in your frame. This allows you to create those miniature effects, and the amount of blur is controlled by how much you tilt he lens and by your aperture setting.
Swinging the lens side by side give you the same kind of effect, but on the vertical axis. So instead of having top and bottom blur, you can have strips of blur on either side of the frame, or vary focus left and right across the frame.
Shifting the camera up and down keeps vertical lines parallel to your film (sensor) plane and controls parallax error when shooting architecture. It also helps you control and fine tune your framing since tilting the lens up and down can affect what is shown in your viewfinder.
Shifting the camera back and forth does the same thing as shifting up and down, but on the vertical axis. It also helps when shooting shoot images you plan to stitch together as panoramas. Shifting the camera on a tripod like this instead of moving the whole camera, like most people do, allows you to dramatically reduce distortion effects when shooting multiple frames across you field of view.
Selective Focus Fun!!
The creative options with a view camera are huge and so the ACTUS greatly expands the photographic possibilities you can achieve with your Fuji. Since they all have the same mount, the Actus Mini will work with any APS-C sensor X Series camera, and will open up your creative boundaries in ways you never would have imagined.
I had a blast shooting with the ACTUS Mini for Fuji and after I got the hang of how the focus and all the knobs work, I felt pretty adept at getting the effects I wanted. The focus peaking setting on the Fuji REALLY helped and made an enormous difference in my experience with the ACTUS Mini.
The best part about the Actus Mini is that it perfectly compliments the compact, lightweight nature of the Fuji cameras. Although the Actus rig itself isn’t exceptionally small, it’s certainly compact and light enough to carry easily into the backcountry. During my week with the Actus, I did a couple of 3-4 hour hikes with it and felt no noticeable burden and even carried it up onto a glacier.
The Actus Mini isn’t cheap by any means. After you buy the camera, whichever lens you choose and the corresponding lens mount, you’ve spent more than what any X Series camera body or lens costs. However, not as much as some of the big DSLR glass that many photographers buy without thinking.
However, if you’re really interested in using a view camera and opening up your photography options, and you have the budget, the Actus Mini is one cool piece of gear. Consider it an investment in your creativity. It’s something that would easily last a lifetime, especially since you can order different body mounts for use with other camera systems.
Cambo also has the ACTUS-GFX, which offers the same design for GFX users. Given the ultra high resolution and clarity of the medium format GFX camera, this seems like an incredible combination. It’s probably the best modern view camera you could own right now. Definitely a must have for the most serious of landscape and architecture photographers.
This past Saturday, I spent a really fun day teaching classes at Glazer’s Camera in Seattle. I did a two-hour “Getting to know your Fuji camera” class, which was followed by a three-hour “Advanced X Series” class, where I covered in detail a few of the topics in my new X SERIES UNLIMITED eBook.
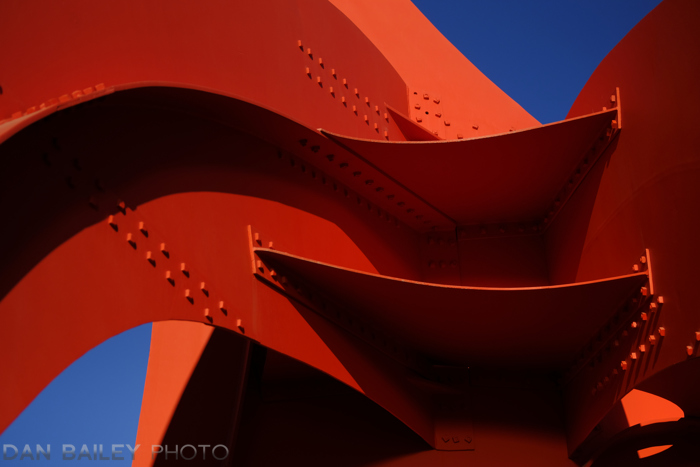
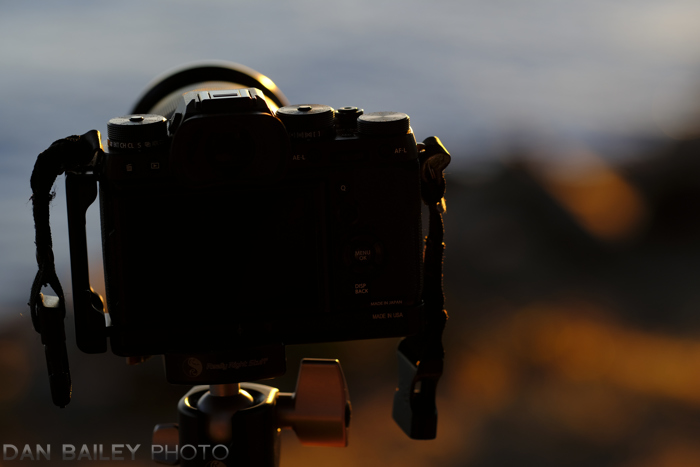
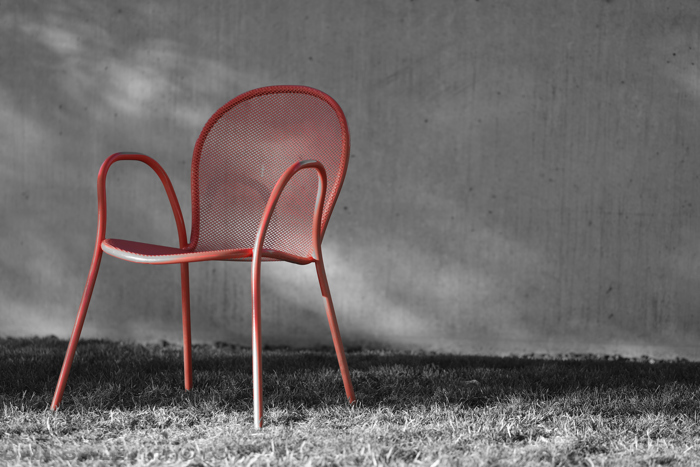
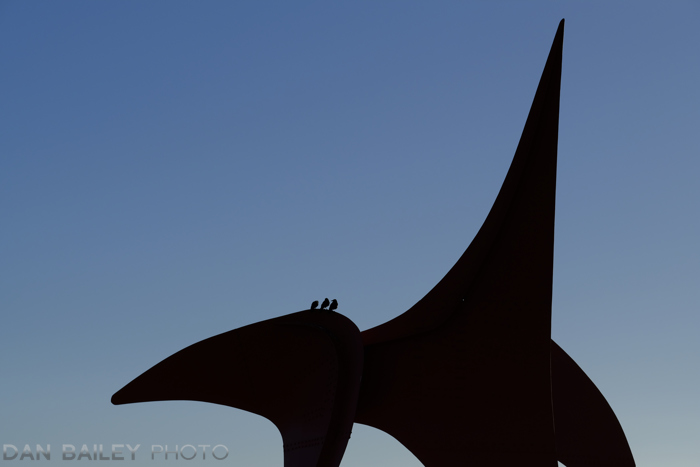
We ended the day with a Photo Walk through Olympic Sculpture Park and ended right down on the waterfront where we were treated to a beautiful, summer sunset. (That lead-in photo from yesterday’s post was also from the photo walk.)
We couldn’t have asked for a better evening and I couldn’t have asked for a better group of photographers to join me that day. Both classes were full, and some of the participants spent the entire day with me, attending both classes as well as the photo walk. A few people were just there for the walk.
We had a wonderful group of enthusiastic photographers of all ages, and it was fun meeting new people and even seeing some familiar faces. I always enjoy hanging out with other photographers and teaching people how to get the most performance and the most fun from their cameras, even if they’re not using Fujis. In the end, it’s really not about the camera, right?
Superb sunny weather, great light and lots of enthusiastic shooters, I don’t see how it could have gone any better. It ended up being wonderfully rewarding day for me, and it inspires me to do more photo walks in the future. (Back in May, I led a photo walk in Edinburgh, Scotland.)
HUGE thanks to Glazer’s Camera, and a big virtual hug to Kate, who organized the event helped me out all day. Also, big thanks to Fujifilm for sponsoring the event.
Here are a few of my favorite photos from the walk. If you were one of the participants, I’d like to thank you for joining us, and encourage you to post a link to your photos here in the comment section, or tag me and @glazerscamera on social media.
After GoDaddy crashed my entire site for nine days, I’m finally back up and running with a brand new web hosting company and faster, more secure servers.
During what was supposed to be a routine migration to a new server, they broke my databases, then overwrote the good backup versions with the new corrupted versions, which rendered my site totally inoperable. With each passing day, hours on the phone with the GoDaddy techs and still no resolution, I was getting concerned that all of my content (890 post and 60 pages) and over 10 years of work would be gone and that I’d have to rebuild my entire site from scratch.
And even though I have cached copies of many of my previous posts, I would still have to manually repost them, which would take more time than I currently have allotted for non-bike riding time.
Fortunately, they were able to locate and recover “good” backup versions of my databases. All of my content was saved, except for the last month, which was only four blog posts. However, the databases were still damaged, and even though GoDaddy closed the ticket called it good, I still couldn’t get into my WordPress dashboard and do anything.
By this time, through a recommendation I received from another photographer friend, I’d already found an awesome new web host called Host Duplex, and we started migrating everything over yesterday morning. As of this writing, my main website, blog and email are fully running from the new host and I am both relieved and incredibly grateful for the “above and beyond” assistance that Host Duplex has given me.
Unlike many large hosting providers that offer cheap prices and low priority call centers, Host Duplex is a small Los Angeles based company who is focused on providing “perpetually excellent customer service.” they also offer high performance systems, a strong backup strategy and rock solid security against hackers and malware. And apparently, they like hosting photographer and filmmaker blogs!
After my GoDaddy debacle, where I was dealing with a different tech every single day and getting little to no real help, I had one person I dealt with at Host Duplex. He not only helped me get moved over, he actually did all of the work migrating, updating and optimizing my WordPress installs and even created a brand new user login to replace the missing file that GoDaddy lost.
I cannot even begin to express with words (emojis, maybe) how awesome this was. It got me from standing there with a broken website in my hands to being back in business in just over 24 hours.
These guys cost more than your average web hosting company, but the tradeoff is unbelievable customer service. After my GoDaddy nightmare, being able to deal with a single, dedicated point of contact is worth more than gold.
Since nearly every aspect of my business relies on my website, having it go down, having it being hacked or having to deal with some nameless tech at a call center is simply not an option for me anymore. I’m more than glad to pay for the extra service.
Also, after having my Instagram account hacked and stolen earlier this month, and reading about other people having their WordPress sites hacked, web security has suddenly become a paramount issue for me. This is my life’s work and I can’t afford to have something like this happen to me again.
And, being a small business owner myself, I’m exited to support small company that provides this kind of boutique-level service and support. In addition to the great service I’ve received, I can already notice a dramatic jump in performance and speed on my blog, and as a reader, you will to, especially as we go forward.
If you’re looking for a web hosting solution that offers excellent performance and top level customer service, I can’t say enough good things about Host Duplex.
I’d like to close this post by thanking all of my readers for your support, encouragement, recommendations, advice and technical assistance during the past week and half. I had people recommending various hosting companies, helping me locate caches of my old posts on the web and one reader in Italy even took it upon herself to download and send me my entire website archive.
If there was any doubt before, it is now confirmed: I have the best readers in the world.
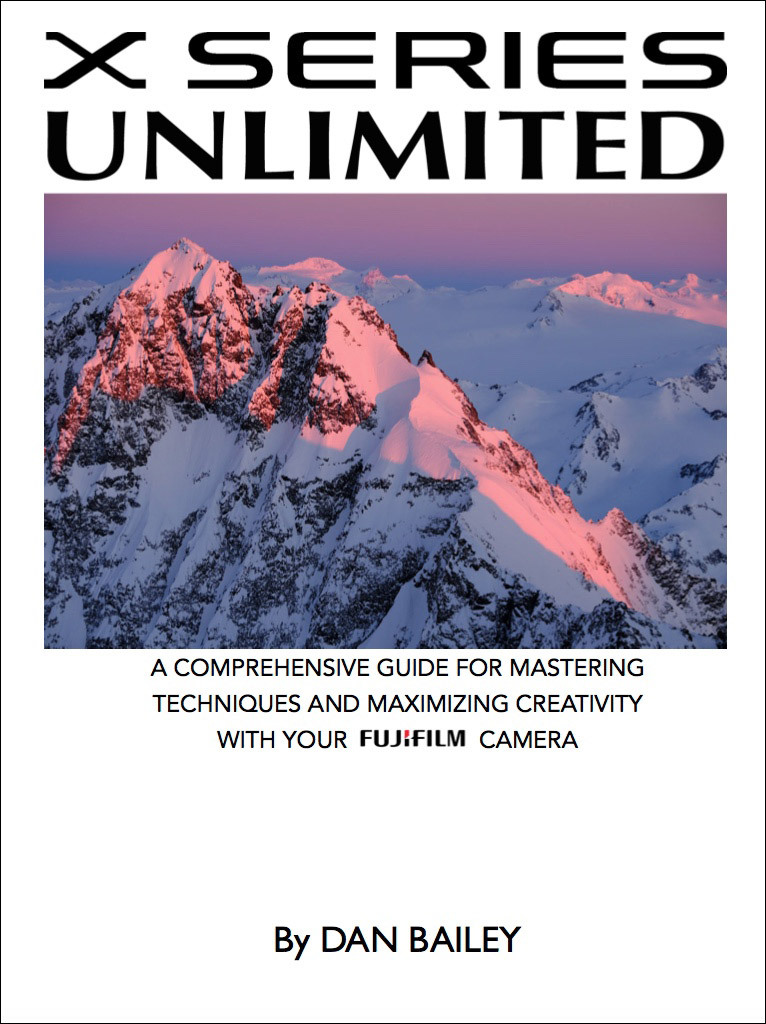
I’m excited to announce the release of my brand new ebook, X SERIES UNLIMITED: A Comprehensive Guide for Mastering Techniques and Maximizing Creativity with your FUJIFILM Camera.
This comprehensive 329-page guide will teach you eventing you need to know in order order to gain mastery with your Fuji and help you achieve maximum performance from your camera and total creative liberation with your photography.
I consider this to be the definitive guide for the X Series.
I meet a lot of Fuji shooters who are super excited about the gear, but who don’t know even a fraction of what their camera can do. This is not surprising, and it’s certainly no comment on them as intelligent or competent shooters.
For as clean and classic as they are on the outside, when you dig deep, you find that there is an astounding set of features tucked away inside all of the X Series models. And while the manual explains every single feature, it doesn’t really tell you how to use these features in real life shooting situation.
That’s where I come in.
Having shot with the X Series cameras for nearly six years and worked closely with the FUJIFILM tech reps and product managers, and having taught numerous Fuji-specific workshops and classes, I know these cameras inside and out.
I know how they function out in the world and I’ve tested them with a wide range of subject matter in extremely challenging conditions, environments and shooting situations. In fact, I shot this photo a few days ago, using a number of the specific techniques I cover in the book.
All the settings. All the Features. Applies to every Model.
Inside the book, I cover every single feature, every single menu item and function and, more importantly, I tell you (and show you with imagery) exactly how you can use these features in real life shooting situations.
It’s not just for the X-T2, it’s for EVERY SINGLE MODEL. Most of the features found on the FUJIFILM camera are common to all the models, even older cameras like the X-E1 and the original X100. You won’t find every feature on those first-generation models, but you’ll find most of them, and certainly enough to help you make great pictures!
I resisted writing a manual like this, but after giving an Advanced X Series class at Glazer’s Camera in Seattle, where the questions never stopped coming from the full classroom of attendees, I decided it was time for me to write a full-length, advanced X Series book and pick up where my original FUJIFILM Tips and Tricks Guide left off.
I’ve helped many photographers get the most from their X Series cameras, both online, and in person at workshops, classes, trade shows and in-store events. (Maybe you’re one of those people!) I’ve explained countless features in great detail, helped people set up and optimize their cameras, solve problems and troubleshoot common, and sometimes, uncommon issues.
Between my X Series knowledge, my experience and my genuine passion for sharing my photography insight with others, I’m confident I can help you get the most from your Fuji camera, no matter what kinds of subjects you like to shoot.
If you take the time and learn to master even a few of these features, you’ll be able to take the technical and creative aspects of your photography to a new level of proficiency.
If you order right now, you can take advantage of the special introductory price. After the intro period is over, the price will go up, so don’t wait. Start learning how to master your X Series camera today!
If you don’t have a PayPal account and would like to pay with a credit card, please use this button below:
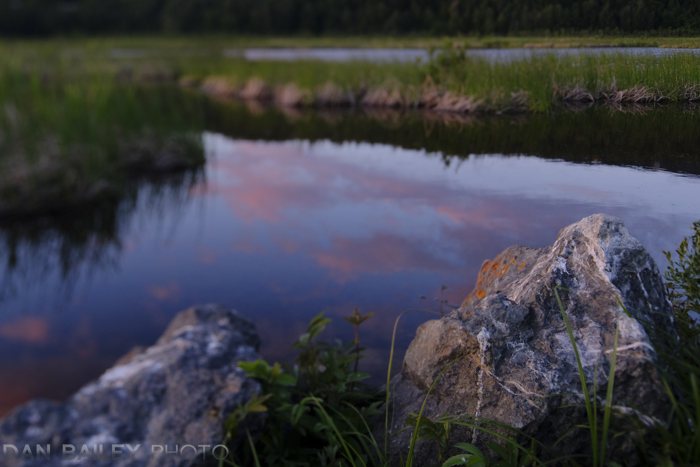
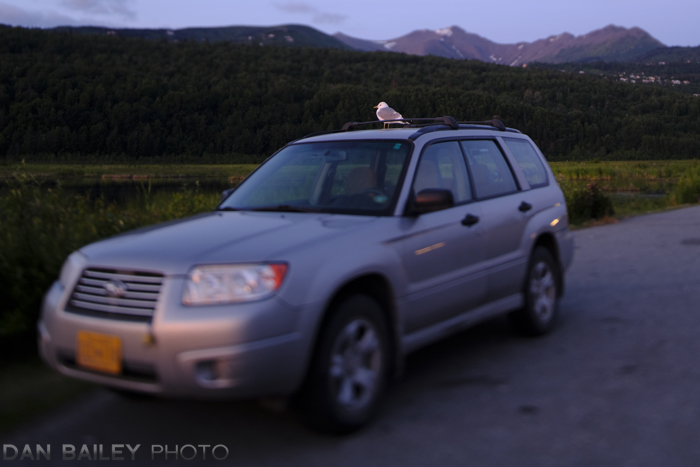
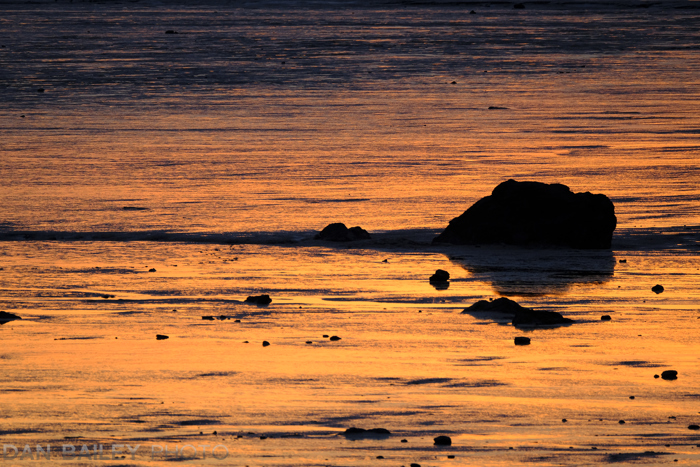
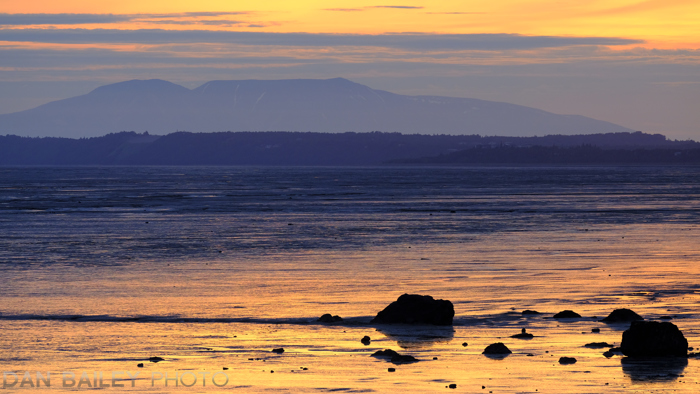
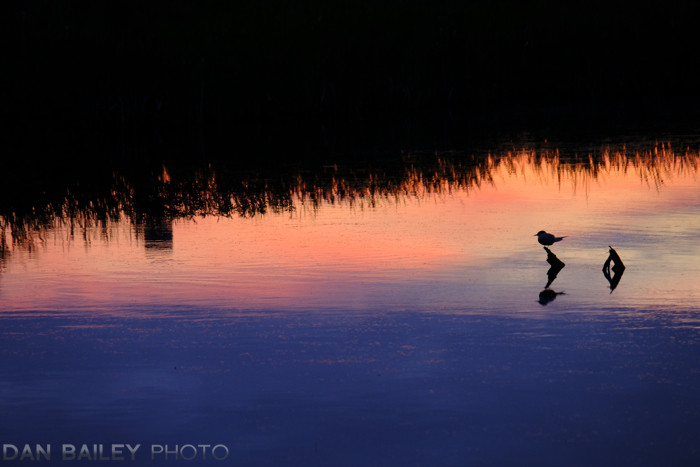
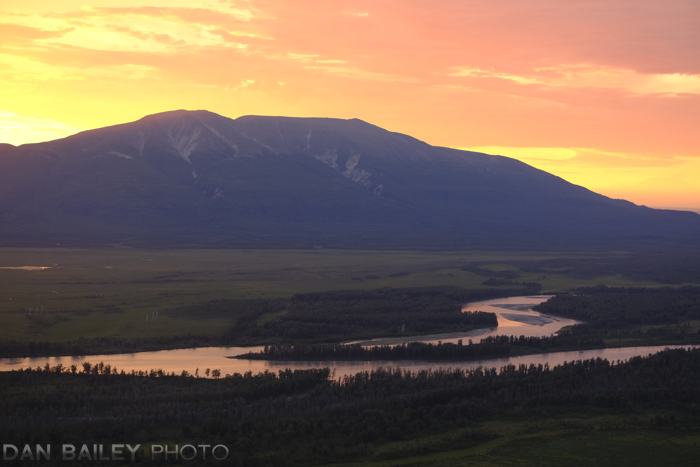
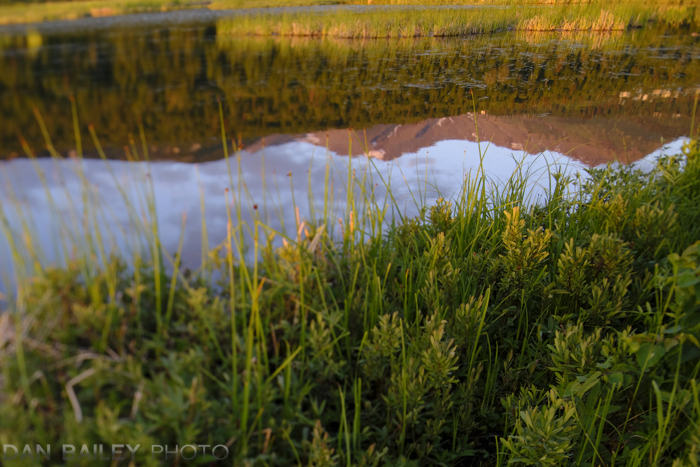
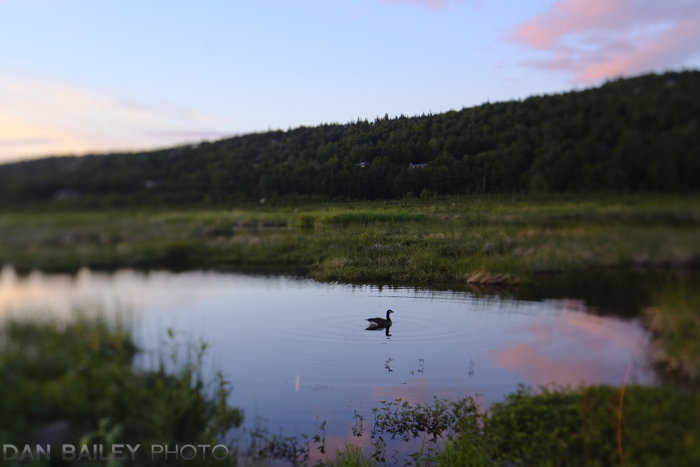
Summer evenings are time for staying up late and watching the sun make a long, lazy trip towards the horizon as it shines through the leftover haze and clearing storm clouds that were kicked up into the atmosphere earlier in the day.
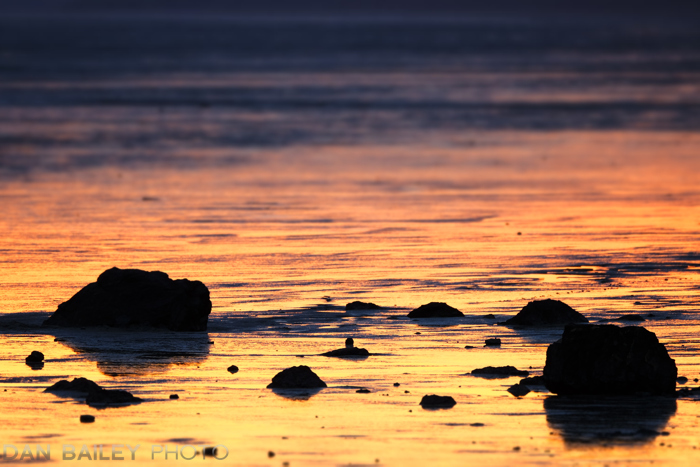
Summer evenings are a time when the sky turns pink and gold, and when the water soaks up those same colors, sometimes with even more brilliance.
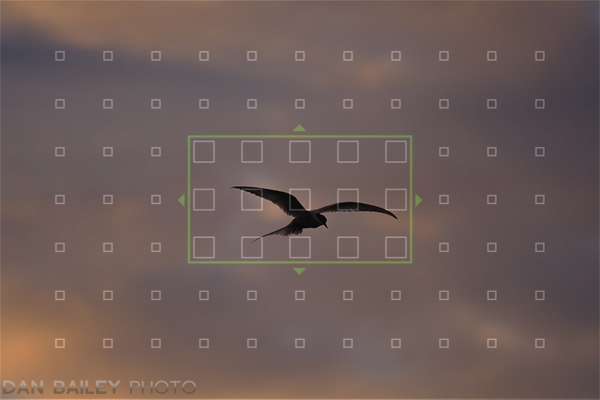
Summer evenings are a time for rich contrast, dark shadows and intense highlights that play off of each other in the landscape.
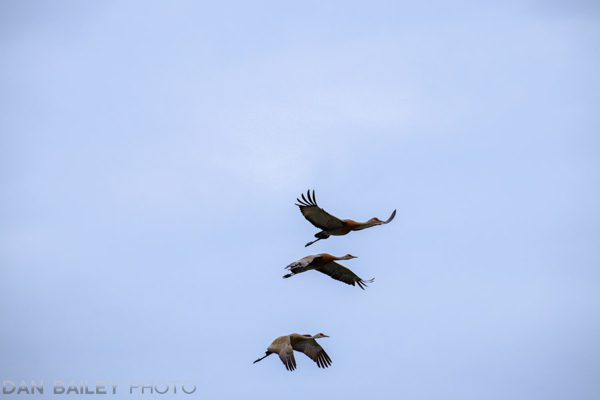
Summer evenings are time when the song of a solitary bird catches your ear as it flies overhead in search of an evening snack, or a great view of the word below.
Summer evenings are time for calm, quiet reflection, both in the landscape and in our own minds after a busy day of excitement, hard work, adventure, chaos and time spent chasing inspiration and creativity.
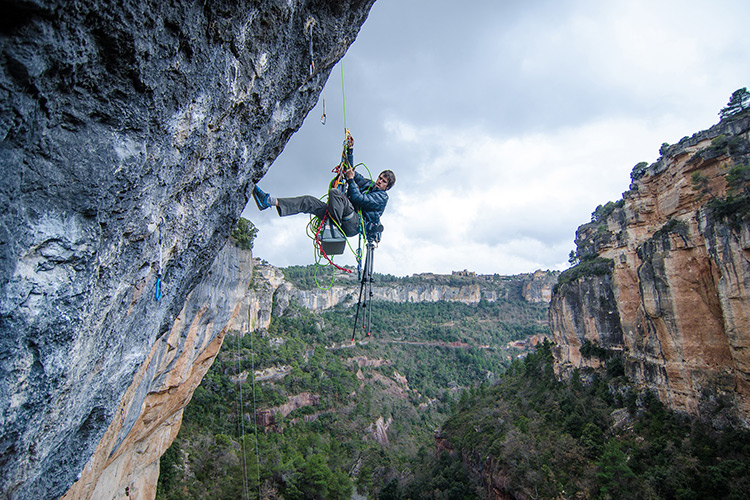
Keith Ladzinski is a world class adventure photographer who shoots for National Geographic, and I taught him everything he knows.
Ok, I’m totally kidding.
However, I did teach Keith some stuff and played a least a small part in success as a pro. I taught a number of photography courses in Fort Collins, Colorado back in the 90s and he was one of my students in a class called How to Sell Your Photos and Break Into Stock Photography.
At the time, Keith was a young, rambunctious 20-year old kid, compared to me, a slightly older 28-year old rambunctious kid, or something like that. However, even then, he showed incredible promise. I still remember the first time I viewed his work during our class critique; he had these gorgeous images with strong visual elements and very striking light.
During the class, I gave Keith some advice as to where he should try to market some of his images, and it ended up paying off. He sold a few shots and that was pretty much the start of his career.
It’s a long, 2-hour podcast, and it’s an insightful look at Keith’s journey to being a pro photographer. However, if you don’t have time to listen to the whole thing, you can fast forward to around the 42:00 minute mark, which is shortly before he starts talking about me and the class.
I’ve only run into Keith once since that class, in Indian Creek Canyon, Utah, about 15 years ago.
I’m super psyched for him, he’s not only an awesome photographer, he’s a super nice guy who’s worked extremely hard and he deserves every bit of success that’s come to him.
I don’t consider myself a video guy. Partly because I’m so enamored with the concept and power of still photography, and partly because I’m scared to open up the Pandora’s Box of massive video files, faster computers, more hard drives and an immeasurable time suck with editing, rendering and organization.
That said, I do enjoy creating short video clips, and so recently, I’ve started to experiment with shooting video on the Fujifilm X-T2, which does 4K and has some nice video features built right into the camera.
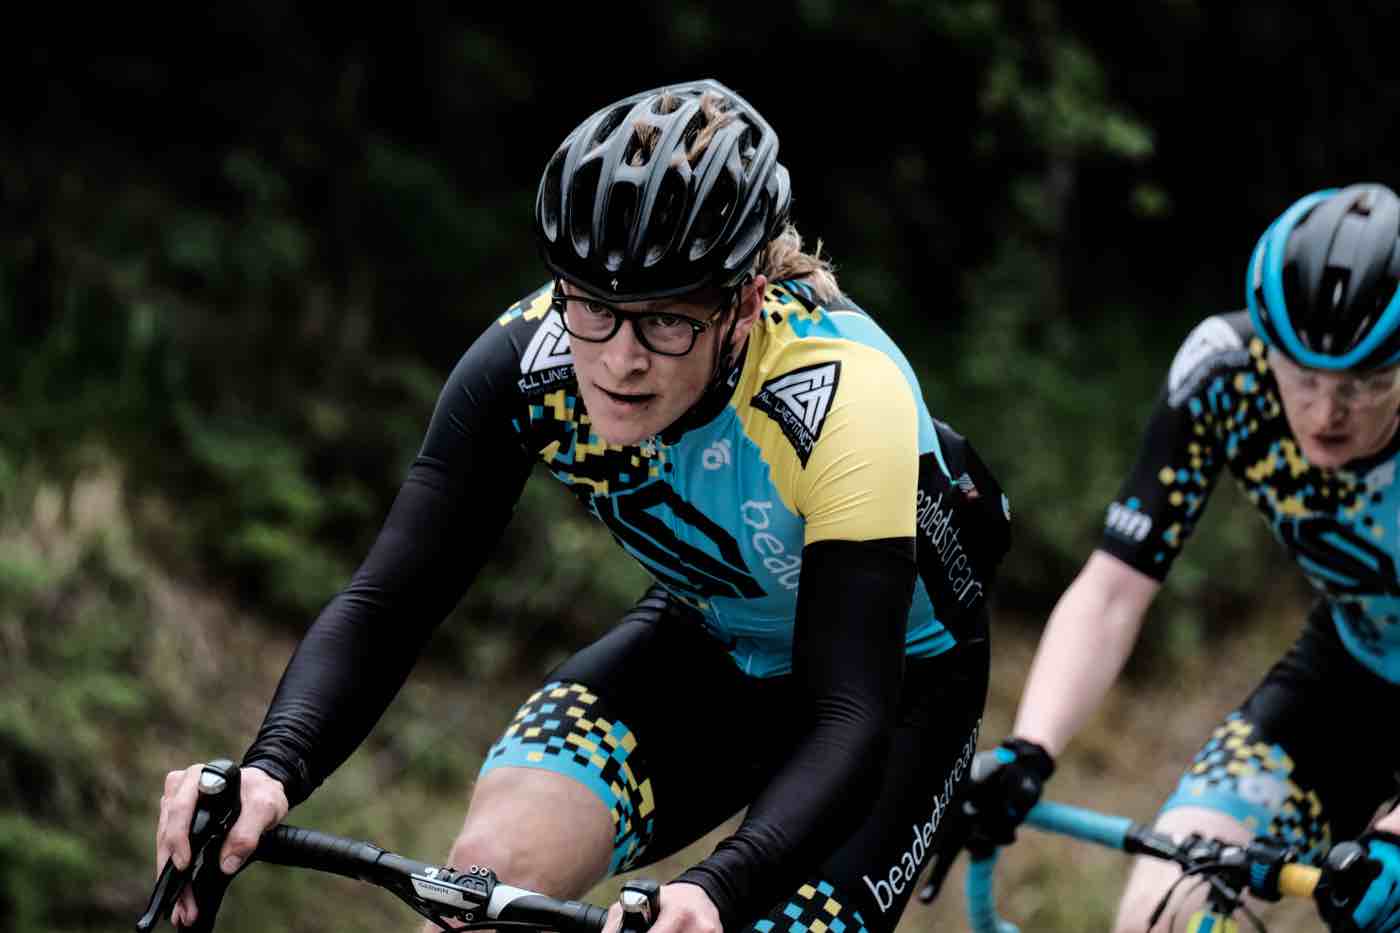
Last week I decided to try shooting some motion at a road bike crit race here in Anchorage. I’ve shot (and raced with) these guys numerous times, so it was fun to try something new and test out the X-T2’s video capabilities.
I was especially intrigued at how well it would handle autofocus on such quickly moving subjects, especially using the XF100-400mm lens. Also, since the X-T2 allows you to shoot video with the film simulations, I thought it would be fun to play around with that as well.
For this race, I shot mostly with the 100-400 lens, and also with the 35mm f/2 and 50mm f/2. I used ISO 3200 with the Classic Chrome film simulation, but tweaked it with increased Shadow Tone in order to give it a more gritty look. I also used the Vertical Power Booster Grip for the X-T2. (It’s on sale for $100 off right now.)
Overall, I was pretty impressed with how well it did, even with cyclists who were racing by me at near mach speed. At last it seems that way when you’re standing right there in the middle of the action. I only almost got run over once.
After the clips were pieced together, I edited one of my original songs called Sawblade, which is a Jeff Beck style guitar piece I wrote and recorded a number of years ago.
I really enjoy scoring video with my own music, (I did the Actus Mini View Camera preview video last week), so expect to see more of these in the future.
Until then, enjoy the video clip and hear the full song below. Let me know what you think!
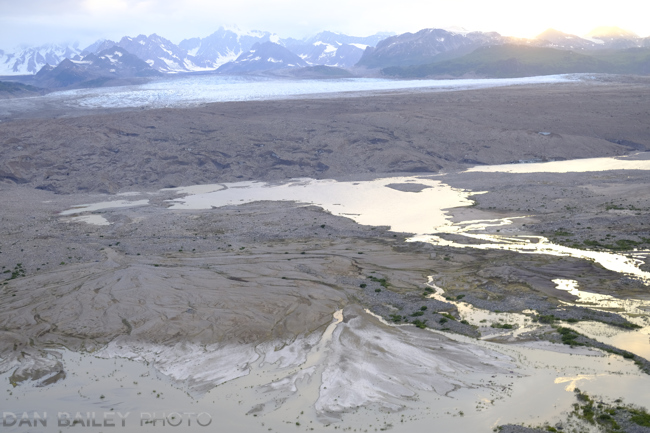 I landed on that white alluvial fan near the bottom right, and hiked around the left side of the glacier lake to access the moraine. From there, it was a long, dirty, muddy slog to reach the ice.[/caption]
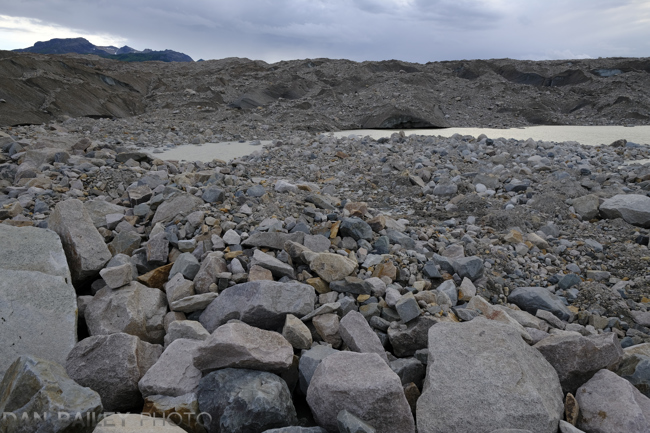 Looking toward the moraine. It looks a lot different and much further away from ground level![/caption]
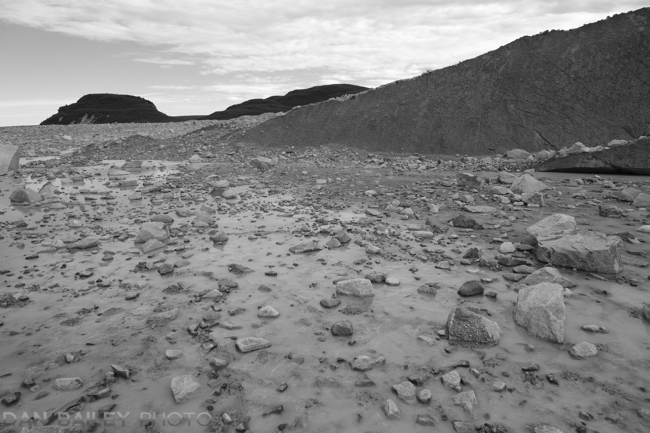

 The hike back went smoothly, or so to speak. Tromping, running, sliding, skidding, hopping, and mashing your way down a glacial moraine is hardly a smooth process. However, I successfully retraced my path and even passed by my two cairns again before defending the final hill down to the base and beginning the mostly flat walk back to the plane.
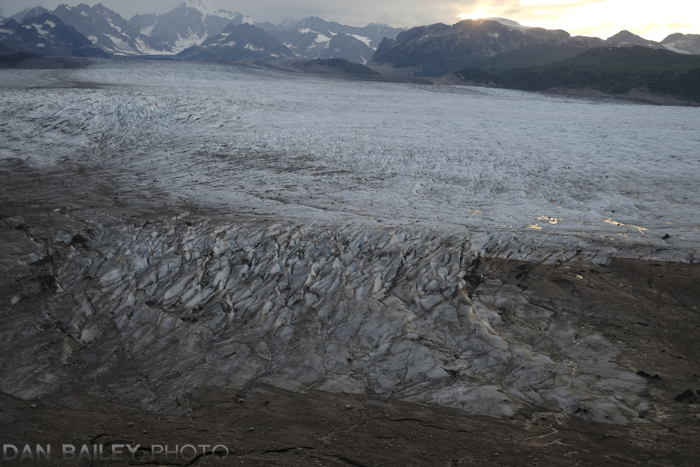
 I’ve been back from Scotland for over two months now, and I realized that
 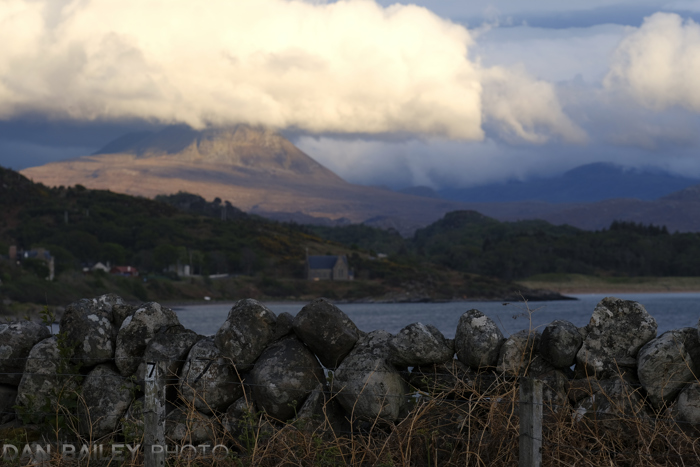 Our view from the town of Gairloch the previous evening.[/caption]
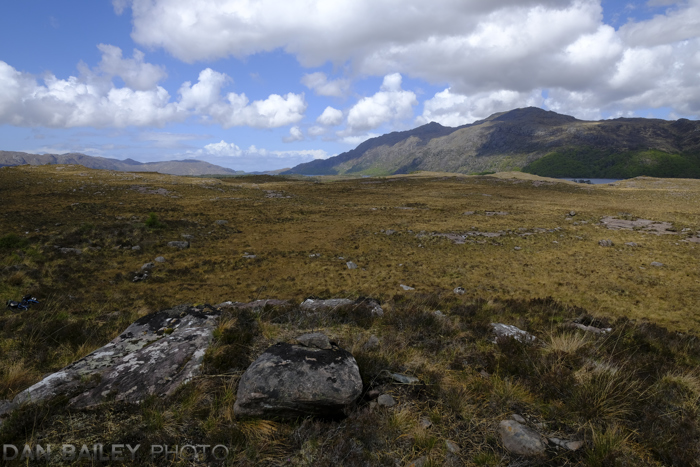 A view of the Scottish Highlands alongside Loch Maree.[/caption]
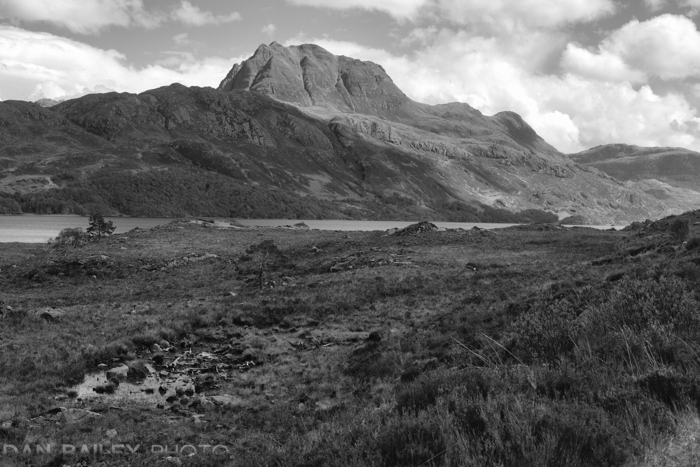
 My Slioch photo actually started as a black and white. Being mid day, the light wasn’t particularly impressive, so I set my Fuji X-T2 to the ACROS film simulation, using the RED FILTER setting to add more drama to the skies. I felt that a monochrome image might help capture the peak with a timeless, yet captivating simplicity.
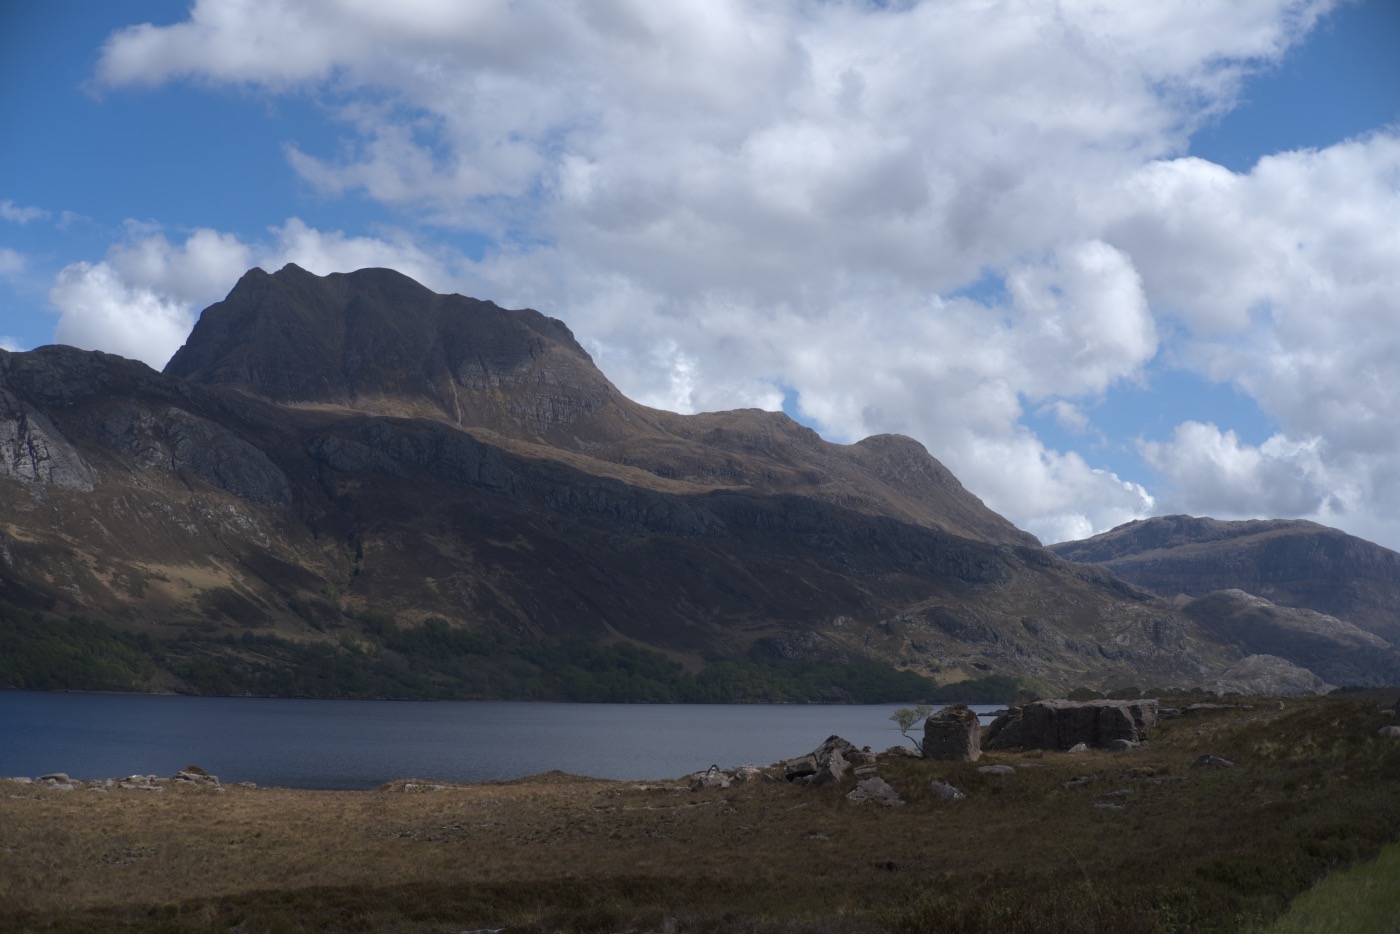 The unedited Slioch photo from the RAW file.[/caption]
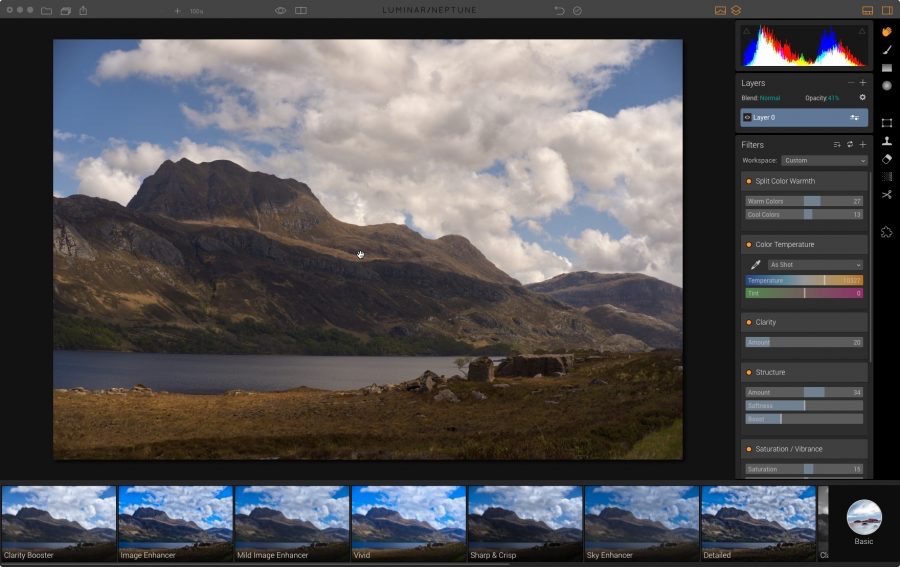
 Tilt, Shift and Swing