I don’t consider myself an event photographer per se, but occasionally immersing myself into a recurring series like year’s Arctic Cross cyclocross races provides me with unique challenges to push my creativity and practice my technique. After all, there’s nothing that works your technical proficiency like trying to shoot subjects that speed by in less time than it takes to say, “Hey, wait a second!”
I’ve been enjoying shooting the Arctic Cross races this month for a few different reasons. First of all, it’s great to see friends and meet new people in the local Anchorage biking community. Also, it gets me outside with my camera, and as I told one person last week who asked me why I’m doing this, “It’s fun and it makes me better.”
In order to NOT shoot the same pictures week after week, I’m trying to come at each race with a slightly different approach. Whereas the previous two weeks, I shot with my Photoflex TritonFlash battery powered strobe, this time I just brought a couple of Nikon Speedlights, one fixed to a Gorillapod, the other to a Justin clamp. This allowed me to go even faster with my light. That’s right, just like the title of my off camera flash eBook says.
The Flash
Here are a couple of shots that I made with one SB-910 flash set on the ground at 90 degrees to the riders as they they sped through the mud puddle. Shooting with my telephoto, Manual exposure 1/250 @ f/4.5, and TTL flash, (triggered with the D700’s pop-up flash), I prefocused right on the middle of the puddle so that I wouldn’t have to worry about any focus tracking burps in the split second that it take for this scene to open and close.
Remember how I said that shooting like this works your technique? When you’re in the moment shooting action sports with flash, anything can and will go wrong: Flash set to the wrong channel, second flash batteries dying, remote flash not seeing the trigger flash, TTL flash not working at all until I realized that it was still set to SU-4 optical slave mode… Yea, all that happened during a one hour race. Find it fast, fix it, and still grab the shot.
The Angles
Another approach I went with this time was to look for more diverse angles and vantage points from which to shoot. Photographing at any vantage point other than at eye level is always going to make your images look more interesting, so I looked for things to stand on and places where I could crouch down and catch riders from behind as they moved away from me.
The Grit
With all the mud, dirt, sweat and lung busting exertion inherent to cyclocross racing, I continued to look for ways to accentuate the pure grit and intensity of the sport. Shooting directly towards the sun with a wide angle lens and shooting in the dark forest with no flash gave me a different look than I had been getting with some of my other setups.
Finally, the excitement of shooting during the past few weeks has inspired me to jump in and start racing myself. As a usual cross country mountain bike rider whose bike racing experience consists of some junior high BMX track races, a couple of 100 mile winter snow bike races, a recent 24-hour summer race, and a few trail half marathons, I’ve done very few “short” events like this.
Although I’ve got decent lungs, plenty of fast twitch muscles and lots of energy, it had been awhile since I did any sprinting like that. However, 49 and a half minutes of going total balls through forest, singletrack and mud had me hooked. What’s not to love? I can’t wait for next week!
You buy a camera. A real one. How cool is that? You play around with it for awhile and figure a few things out, and in short time, you find yourself starting to grab some good shots. You get pretty excited about that, which is understandable, because, after all, it’s awesome to watch your own skills improve.
Eventually, you think that you’re good enough to start some money with your photography, so you make some business cards and start looking for work. Awesome! There is room for everyone in this business and just because you’re somewhat of a beginner, nothing says you can’t start small and work your way up the ladder. Gotta jump in sometime, right? Might as well make it now.
Maybe you start by shooting at races and events, capturing your own adventures, or photographing family portraits and budding models. In time, you start to make some sales and bring in a few checks, which you use to upgrade your equipment. By now, you’re starting to do some regular photo shoots, some paid, and some for trade so that you can keep improving your skills. Things seem to be going well. Your confidence is up, people like your work and you seem to be getting a pretty good following of local clients…
STOP!!!!
Before you go any further, you need to stop and seriously evaluate your work. Before you drop some serious cash on new gear or quit your day job, you need to take some time and consider how good your imagery really is. And I don’t just mean going by what your close people say, because your Facebook friends, your coworkers and even your best paying customers don’t come at this with a trained eye. If you have trouble with this process, then find someone outside your circle who you trust to critique your work.
You need to take a look at your imagery and judge it based on what you see in the professional world. Check out the best of the best and see how your own work stands up. To be fair, I’m not saying that it needs to be at that mark right not. In fact, don’t worry if it’s not even close. You’re not looking to compare, you’re looking to see the bench mark. You want to get there eventually, and by studying the best photography out there in your own genre, you can see the areas where you need to improve if you have any desire to reach that mark.
What happens if you don’t do this?
The cardinal mistake that some aspiring pros make is not doing what I just mentioned. Once they experience some success, some photographers insulate themselves from this crucial step and fail to chart their own path for improvement. To put it bluntly, think that they’re better than they really are, and consequently, they don’t get much better. They peak, or else plateau for a long time.
Like I said, there’s nothing wrong with being as good as you are at any given point in your career, but if you don’t seriously analyze your skills and your photography, you won’t see the areas where you need to improve. You won’t seek out the resources and training that will help you get better. You won’t recognize the areas where you work falls short of where it could be. If you have trouble with this process, then find someone who you trust to critique your work. And as you progress as a working photographer, you’ll want to keep doing this throughout your career.
Never stop learning.
I say this over and over. Doesn’t matter how good you are, or how good you think you are, you should never stop learning and driving yourself to become a better, more technical, more creative, more proficient photographer. Believe me, no matter who you are, there’s room for improvement. You think that it’s exciting to watch yourself get better when you first start out? Try it when you’ve been shooting for 20 years. Now THAT’S gratifying!
Want more tips on become a pro? Check out my How to Become a Pro Photographer eBook, or subscribe to my newsletter for regular tips, exclusive content and pro insight.
Back in the days of film, the task of monitor calibration wasn’t even a concern for most photographers. You simply sent your slides or negs off to the client and let them deal with color accuracy. If it didn’t look right, it wasn’t your fault.
These days, with digital photography, color accuracy begins with you, and the best way to ensure that you get consistent results across all of your devices is to calibrate on a regular basis.
Note that I didn’t say “monitors,” I said “devices.” That’s because with the advent of mobile technology and programs like Photosmith, Adobe Photoshop Touch, numerous portfolio apps and Dropbox, photographers aren’t just using office computers and laptops to process their photos, they’re using iPads to edit, present and deliver images to clients. This makes it even more critical to have consistency between all of these different screens.
The Datacolor Sypder4Pro offers display and color calibration solutions for photographers and other creative professionals across all devices, desktop monitors, laptops, iPads and even iPhones. I’ve been using the SypderPro calibration systems for a few years now, currently on my 24″ Dell UltraSharp U2410 display, and as a working pro who has images published in a variety of outlets, I can attest that it’s an affordable solution that’s easy to use and that gives you consistent results month in and month out.
With a single full-spectrum sensor tool, quick start guide and a simple step-by-step wizard, the Spyder4Pro works with both Mac and Windows, and lets you calibrate multiple displays, even those connected to the same computer. You can adjust white points, gamma, brightness and even adjust for the ambient lighting level of your office, studio or other working environments. This allows you to calibrate on location if you’re tethering or previewing while shooting assignments away from home.
And since the Spyder4Pro has support for iPads and iPhone displays, you can ensure that you’re getting accurate color in your mobile workflow, or when using those devices to present images to clients and customers. As good as the iPad screen is, it’s not the same screen as the one on your camera, your desktop computer or your laptop. Colors can and will vary across all screens. Even two devices of the same type can have different color casts. Next time you’re on an airplane look forward at all the built in TV screens and see how different they look. Your expensive computer equipment probably won’t be that much off, but it will vary over time.
Whether you’re printing your family photos or shooting for professional publications, at only $169, consider the Spyder4Pro a inexpensive color insurance. There are a number of calibrations systems out there, but this one gives you the most bang for your buck. It’s also a big time saver. If you’ve ever had trouble getting your prints to look just right, then you know just how many hours you can throw away in a year trying to get them to match your display. Imagine what you could do with all those wasted hours? Calibrate on a regular basis and you won’t lose them in the first place.
Very special thanks to California photographer Robin Black, who wrote this guest post.
The Muir Project Interview, by Robin Black
“Wander a whole summer if you can. Thousands of God’s blessings will search you and soak you as if you were a sponge, and the big days will go by uncounted. If you are business-tangled and so burdened by duty that only weeks can be got out of the heavy laden year, give a month at least. The time will not be taken from the sum of life. Instead of shortening, it will indefinitely lengthen it and make you truly immortal.” –John Muir
Last summer, a group of friends set out to thru-hike the John Muir Trail—but these are no ordinary hikers. They call themselves The Muir Project, and they’re an assortment of photographers, musicians and other artists who wanted to document their journey. The footage they returned home with has become a work in progress called “Mile, Mile and a Half,” and judging by the preliminary trailers they’ve shared, it’s going to be a beautiful and inspiring documentary.
There were varying degrees of backcountry experience among the group, but after the idea had percolated for years, they were committed to their journey. Some people plan this particular hike for years, or even decades—and fewer still are able to actually carry out the dream of a JMT thru-hike. Their documentary may just inspire you to make your own thru-hike.
As their project gets closer to completion, they’ve lauched a Kickstarter fundraiser for the additional funds needed to make this a truly professional project. They still have a few weeks go go on the fundraiser, and if you’d like to help them finish their project, you can find the details here.
I sat down—virtually—with the members of the Muir Project recently to find out how they planned for and carried out their adventure. They are:
Jen Serena, Still Photographer
Ric Serena, Co-Director/Cinematographer
Jason Fitzpatrick, Co-Director/Cinematographer
Durand Trench, Location Sound Mixer
Zee Hatley, Additional Camera
1. How did the project get started? Whose idea was it?
RIC: Jason was definitely the initial catalyst for the project. He’s a native Californian and I think it’s always been on his list of things to do before he dies. I’m ashamed to say this, but I’d never heard of John Muir before meeting Jason. He’s not a figure we grew learning about in the southeastern US, but after moving to Los Angeles and befriending Jason, I came to learn about John Muir and the trail named in his honor.
As the years passed, we continued talking about hiking the trail in its entirety and bringing our cameras along. Jobs, children & prior commitments in one form or another forced us to put if off year after year, but we finally made the commitment to do it. Ultimately, I think I was always missing that extra “something” that intrigued me about documenting our journey. But as others became attached to the project, the artistry angle seemed to fall in place.
2. Why the idea to include all the various artists and creative types?
JEN: Part of it was just a natural gathering of friends, but as each new member was added, with their particular strengths in various forms of artistry, we knew we would have a truly compelling story. Each viewer can latch on to just the sound, the music, the stills or video, but then it all blends to become a beautiful tapestry of storytelling. And the painters were just an extremely remarkable string of luck – as we met them along the trail.
3. How do you all know each other? Did you all know each other before starting the trip?
JASON: Ric and I worked together at CBS, and somehow we found out that we each loved backpacking. He and Jen joined me on a really difficult, but amazing winter trip to the Ostrander Ski hut in Yosemite. After that we helped each other out on a few film projects, and became good friends.
RIC: Durand and I met a few years back through a mutual friend. I knew he enjoyed the outdoors, but for as much as we discussed our shared interest in backpacking, we never hiked together. Our friendship really formed on set (he’s been a location sound recordist for nearly all my directing projects) and in bars (need I say more?)
JEN: Then PB & Bernie were good friends of Durand’s, and the others we met along the trail as happy accidents.
DURAND: What can I say?! I like backpacking and good conversation with friends over drinks. That usually brings a pretty eclectic and amazing group of folks together on the trail. No matter what happens out there, we’re always having a good time.
ZEE: I knew Ric and Jen through a mutual friend for the better part of a decade, the others I met during prep. Jason and I got to spend a few weekends doing food drops, which means ROADTRIP! The next best way to get to know someone is by hiking with them.
4. How did the concept for the project progress–has this documentary always been the goal?
RIC: We’re all storytellers that went out for a long hike. I think we hoped we’d have a film in one form or another, but I don’ think any of us truly knew what we were going to walk away with. Honestly, we would’ve been happy with a 10 minute short film, but it turned out we had enough material for a feature documentary.
JASON: I think the film we have is different from what we thought it would be when we set out. I also think its much better. We never realized that it would be so much about us and our experiences on the trail, but I think that the personal elements to the film make it much more entertaining. I think that not only seeing the beauty of the trail but seeing how it effects each of us makes the film more accessible, and compelling than it would have been if it was focused simply on the history and geography of the trail.
5. How long did you plan the trip before you took that first step on the trail? What kinds of barriers/problems did you face in this phase?
JEN: We couldn’t get a permit out of Happy Isles – the normal starting point for the trail – even applying 6 months in advance. And when we arrived a few days early to attempt the lottery, we found that there was a max of 4 permits per group, so we were out of luck there too. I guess the only other problem was Durand getting altitude sickness on the food drop, but I should let him tell that story.
DURAND: If you’ve never attempted a month long thru hike like the JMT, not a single member of our group had done so before, the logistics that go into a successful trip are DAUNTING. Between permits, food drops, transportation to and from the end points, and then simply planning how many miles you’ll do each day the planning is crucial and can be overwhelming. As Jen noted, I suffered from altitude sickness, as well as a brutal case of food poisoning, less than a week before hitting the trail which was a humbling reminder that it is impossible to foresee and plan for every problem you might face. The best advice I could give, would be to treat the entire trip, planning included, as an adventure. If you can’t laugh and shrug off some of the inevitable and unforeseeable issues you’ll face, it will ruin your trip.
ZEE: Honestly, prep went pretty easy for me, being that Jen and Ric were so good at the planning. Particularly the meal prep. We got to spend a good day, as a group, divvying up the ingredients into meals according to recipes Jen had found. Then the food drops, which were easy enough, until Durand decided to get sick on us within sight of the pass we had to get over for the drop. That was scarier than he’s letting on. He did not look well, and we had to book it back down the mountain at dusk. I was so worried for him, and so glad that it wasn’t me (as I am clearly the weakest hiker in the bunch.) But altitude sickness can hit anyone at any time. Even with no prior episodes. If there’s one thing I would change, I would have turned around as soon as he started looking green in the gills, and not let him push on. It made it that much worse, and there’s always the donkey drop.
6. Did you all have prior experience hiking the backcountry?
JEN: For Ric & I, our longest trip was 4 nights. So this was a big deal. But once there, we found out that it actually wasn’t. After 3-4 days, there’s a natural rhythm that you work into.
DURAND: I’ve been camping and backpacking as far back as I can remember. The majority of family vacations in the Trench household involved getting in the car and heading to the backcountry. While I can soundly say that I did not always appreciate the experience at the time, hiking in solid rain around Mount St. Helens and waking up to a sibling banging pots together at 3am to scare off wolves surrounding our camp comes to mind, I look back at all the experiences as invaluable life experience that allows you to put everyday situations into perspective. Prior to the JMT my longest backpacking trip was 2 weeks. Each trip into the backcountry is an all too brief experience and I am already planning a longer outing.
ZEE: I’d done some destination trips in Sequoia/Kings Canyon as a kid, but that was along the lines of: hike in for a day, stay a week, hike back out. Through hiking is a different story, a very different story. You see so much more, yet get to know it so much less intimately.
7. Were there any close calls regarding life and limb (or cameras) while you were on the journey?
JASON: We were pretty good about protecting our gear. We knew going in that we’d be dealing with some more extreme elements than a JMT hiker would on a normal snow year, do we had several layers of water protection for the crossings and rainy days.
As for limbs, other than a few cranky ankles, some pretty horrific blisters and a cut or two we were pretty lucky. Nobody was seriously hurt.
8. If you had it all to do over again, would you?
JASON: HELLS YEAH!!!!
RIC: Absolutely, but I want to bring my sketch pad next time around.
DURAND: Wait, what?! When? I’m in.
JEN: Well, somebody has to feed these guys.
ZEE: I still need to work on my harmonica playing…
9. How did you plan for carrying all the photography (painting, music) gear into the backcountry?
RIC: We had a test hike about a month before in the Ojai valley. It provided us the opportunity not only to hike with others we hadn’t been in the wilderness with before, but also to see what gear we needed and didn’t need. For example, I was dead set on bringing a 200mm lens with me, but quickly realized on that test trip, that it would be such a rare occasion that I could effectively use that lens (many times, I had to steal shots as we’re hiking along) that it wasn’t worth the weight. From there, we all just distributed gear based on weight and who would use what equipment the most. In terms of music, PB always brings his Uke and Bernie was trying something new with the glockenspiel.
RIC: The painters? We hadn’t planned on meeting them…it was completely fortuitous. Once we saw how dedicated they were to THEIR medium, I know I felt my creative commitment paled in comparison.
10. Because of all that extra gear, did you have to plan more resupply drops than a “normal” JMT hike?
JASON: We didn’t do more drops than most, we just had heavier packs.
ZEE: Well, we didn’t do more drops than most people going our pace… but I don’t know that people doing 9 day JMT trips were doing four drops. I also have no idea how they get to see anything at that pace, we certainly wouldn’t have been able to shoot anything.
11. What was your biggest surprise on the trip? What did you learn or experience that took you by surprise?
JEN: I can honestly say I was pleasantly surprised by being able to “hang” with the guys. I’ve held my own on trips before, but that was only a few days. This was a month, and after seeing so many hikers dropping of the trail that year, I had my doubts early on. But in the end, working as a team, I was able to do it. And there’s no greater feeling.
DURAND: I was surprised that the days weren’t as grueling as I had imagined. Don’t get me wrong, we had some really, really hard days, but when you are in good company and can laugh at the trials and tribulations you face each day, it is made quite a bit easier. I also learned that there is never enough time. There will always be spots that you pass along the trail where you wish you could spend at least a few hours if not an additional day.
RIC: My biggest surprise was that Durand is funny.
12. What was your greatest lesson on the trip, personal or otherwise?
JASON: How amazing and worthwhile it is to take the time to immerse yourself into something exciting and positive. It may be a lot of work, and it’s not easy to disappear for a month, but so many wonderful things have come as a result of it.
DURAND: Opportunities like this don’t come along very often and you really have to take advantage of them. Taking a month off does not come easily, but I will never look back on this trip with regret.
RIC: Prior to the trip, I had guilt about being away from our daughter for 30 days. I knew she’d have an amazing time with her Grandparents, but I still questioned the decision. Having finished the trip and returned to my regular life, I no longer have those feelings. I want her to know her parents followed their dreams, and I’m proud we can set that example.
ZEE: I learned that I had completely let myself go. It was bad enough on the trail with my wobbly legs under that heavy pack, and the heavy breathing that makes me sound like a 30 year smoker. Then watching the movie, and seeing that I’ll be immortalized with that flabby gut… literally in the worst shape of my life. I’ve since started running and being more active in general, and if we ever get a similar opportunity again, I’m planning on sporting a six pack. I really want people to meet me after seeing the movie, and have them not quite recognize me.
13. Do you have a tentative release date for the documentary?
RIC: We’re aiming for the middle of October for a completion date, but we’re hoping to spend a few months in film festivals before releasing the film to the general public. The Kickstarter Campaign will be instrumental in helping us to achieve both goals.
Robin Black is an award winning Los Angeles based photographer who spends most of her time photographing the Sierra Nevada, California coast and desert Southwest areas. Her work has been featured in galleries around the U.S., including the museum gallery in Yosemite National Park. Check out Robin’s work at www.robinblackphotography.com and see update and new imagery at her Facebook Page.
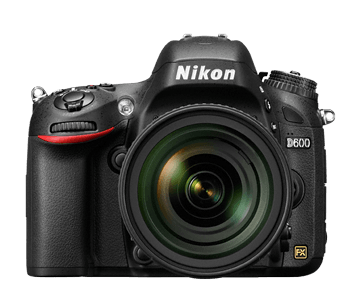
The brand new Nikon D600 hits the stores today. In fact, B&H Photo is offering free shipping on D600 bodies to US customers who don’t happen to live in the remote, cold frontier town known as Alaska, or the faraway tropical paradise of Hawaii. If you’ve been dreaming and waiting with baited breath for this camera, order today and you might even have it by the weekend.
There’s no question that the D600 is an awesome camera. With a 24MP full frame sensor and Nikon’s EXPEED 3 Image Processor, which is the same found on both the D4 and D800, the new D600 will produce fantastic image files that have excellent quality and rich tonal depth.
However, for the price of a D600, you could buy a pair of D7000 bodies ($996 right now), and still have change left over for an extra battery and memory card, or the Nikon 35mm f/1.8G DX. (Effectively a nifty fifty on the DX bodies.)
Or, you could buy just one D7000 and have enough money left over for, oh, I don’t know… how about a thousand dollar lens? “I’ll take the 105 f/2.8G ED-IF VR for $900, Alex.” Or a round trip plane ticket to Alaska? Mmmmm…. glaciers and bush planes…!” How about a huge stack of promo cards that you can send out to prospective clients. “Sure, we’ll hire you, Mr. Bailey, we LOVE your work!!”
So, getting down to the meat of the issue, you want to know if the D600 is worth the big jump in price and if you should upgrade. Should you buy the shiny new D600 or stick with the less expensive, but older D7000. Let’s review features and compare both cameras.
Full frame vs. DX?
This largely boils down to the issue of whether you want a full frame FX sensor or a DX sensor. What’s the difference? Generally, FX sensors are much more expensive to produce, but they give you higher quality images than DX sensors. Much of this has to do with pixel size. FX sensors are bigger, and in order to spread the same number of pixels across a larger surface area, pixel size is increased.
Larger pixels have better light gathering ability, and thus have much more sensitivity in lower light conditions. This means that FX sensors can produce higher dynamic range imagery that has lower noise at higher ISO settings. Result: FX gives you much better high ISO performance.
However, you have to use good lenses with FX sensors or you’ll see a noticeable drop in sharpness and possible vignetting at the edges. DX cameras let you get away with less expensive budget lenses, but FX cameras let you use your older Nikon lenses with no change in the angle of view.
Image Quality
Along with the differences in sensor and pixel size, the D600 (24.3MP) uses Nikon’s newest EXPEED 3 Image Processor. The D7000 (16.2MP) uses the older EXPEED 2 processor (same on the D700), and although it produces excellent quality images that have wide tonal range and depth, the D600 is simply better.
Is it night and day? Yes. The D600 has been scored WAY higher than the D7000 in DxO image evaluation tests. Will it make all the difference in your photography? No, probably not, unless you like to shoot in low light. There’s no question that the D7000 shoots great looking photos, but if you want the maximum quality from your imagery, you’ll get better performance with the D600 than you will with the D7000.
Lenses
This will be biggest concern for many photographers. If you’re going from DX to FX, you may need to upgrade your lenses. DX lenses simply won’t give you the quality that you need to take advantage of an FX sensor, and if you get a full frame body, you’ll want full frame lenses. Besides, you should never skimp on lenses anyway. No matter what camera you use, good lenses on a cheap body will ALWAYS give you better images than a cheap lens on a good body. Remember that mantra. Forever.
If you’re coming from film and still have some older Nikon glass, rest assured, you can use them all on the D600, especially those wide angles! In fact, the “D” series lenses work great on full frame sensor cameras.
Flash
Niether the D600 nor the D7000 have a PC socket for flash sync cords. (You can use the $20 Nikon AS-15 adaptor, which turns your hot shoe into a PC socket.) They both have pop-up flashes that can act as commanders and control up to two groups of Speedlights, but whereas the D600 only syncs to 1/200 sec, the D7000 syncs to 1/250. No one is sure why Nikon didn’t do this on the D600, but in comparison, the just announced Canon 6D only syncs to 1/180 sec.
If you shoot sports or outside in bright sun a lot with flash, the D7000 will perform just a little better in this department, but keep in mind that with its vastly improved dynamic range and larger sensor, much of this can be compensated for in post production, so in my mind, it’s a moot point.
Autofocus
Both cameras use a 39-point AF system that has 9 cross type sensors. The difference is, however, that since the D600 has a larger sensor, the AF sensors are more densely packed into the center of the frame. They’re more widely spread out on the D7000.
That said, Nikon made some internal improvements to sensitivity of the module in varying light. If you shoot people, landscapes and things that don’t move very much, you’ll probably find that the D600 will perform just fine. Most people tend to focus on subjects that are near the center anyway, so this will probably be a non-issue.
If you shoot sports and erratically moving subjects that go all over the frame, the D7000 might have a slight edge here, simply because it has a wider effective profile. That said, I’ve tried the D600 autofocus, and I can report that it’s very fast and highly accurate.
Video
D800-style cinema qualty video, larger FX sensor, uncompressed HDMI output, headphone jack- The D600 wins out big time here.
Bottom Line
Like I said, if you’re serious about photography and want the maximum quality from your imagery, especially if you shoot in varying and low light conditions, or if you shoot video, then the D600 is a very worth upgrade, or purchase, if you’re coming from an even older body like the D90 or D60. It’s a whole lot of camera for the price. Sure, it’s expensive, but two grand is not out of the question for an entry level pro quality body, which the D600 is in many respects, minus a couple of features that most users won’t miss anyway, and which keep it a thousand dollars less than the D800.
That said, the D7000 is still also a whole lot of camera for the price, and if you’re on a budget, if you and your clients are happy with your imagery, or if you already have a slew of DX lenses, then maybe you’re not ready to upgrade yet. I’d start saving money, though, because you’ll probably want to go full frame sooner or later.
Support this site: Give your virtual thumbs up for the time, energy and research that it takes me to bring you reviews like this one by purchasing gear through these links. Thanks! -Dan
Cyclocross season continues here in Anchorage, and so last Saturday, I headed out to the course with gear and excitement. Riding high on the success of the previous week’s photos, I was hoping to come back with some shots that would knock my socks off even more.
After a great photo shoot, you look back on what you did and analyze why it worked so well. You identify specific techniques and approaches and add them to your proverbial bag of tricks for next time. However, that’s where the trouble starts.
The natural tendency is to repeat what works, but do the same thing too many times and your style will get old. Your work will begin to look the same. With this in mind, I went with a different approach for this second race.
Instead of parking myself at one spot and working that particular scene like I did last time, I decided to shake things up. I don’t really like to stand in once place anyway, I like to move around and experience the world from different places, so I moved. Of course, when I say “moved,” I really mean “ran.”
Before the race, I scoped out a couple possible locations where I could at least start. When the action got underway, I shot small groups of racers in one spot and then sprinted to the next, blazing through small sections of forest with my light stand and Photoflex TritonFlash intime to set up and capture another cluster of racers. I don’t call it Fast with Light for nothing!
And yea, the light stand met the dirt more than a couple times. Let’s just say that setting up a battery powered strobe on a hill presents inherent challenges. Tucking it behind willow branches helps keep it upright. So does just lying it down on a steep incline.
Sometimes I’d leave the light and run off to another area of the course to shoot without it, only to come back and drag it up the hill to grab a new vantage point. Although it probably didn’t look as much, I began to develop a method as I followed the racers around the course and experimenting with different compositional techniques and lenses.
Things worked. Things didn’t. That’s all part of shooting action sports and pushing your creativity. If everything always came out great, it means you’re not trying hard enough.
Mostly I shot with my Nikon 24mm f/2.8D lens, and my 80-200 f/2.8D on the D700. My Photoflex TritonFlash gave me rock solid performance throwing dynamic light where needed. Even after this race, the battery is still about 70% full- I didn’t even bother to charge if after all those frames I shot last week. I could probably shoot the entire series on a single charge.
As I’ve pointed out before, though, for shooting as close as I was with the flash, any speedlight and softbox combo would do fine. Even a Nikon SB-700 or Canon 430EX II with something like a Lumiquest Softbox III would get the job done. Heck you don’t even need a light stand, just clamp the thing to a tree.
In situations like this, it’s more about timing than anything else. Position the light, wait for the rider to come by, hit the shutter. What a battery strobe like the TritonFlash gives you is faster recycle times and more shots per charge.
So how are these shots compared to last week’s collection? I’ll let you decide. You can view a larger collection of photos from this week’s race on my Facebook page. Then leave a comment and let me know how I did.
One really cool thing about this series is that I’ve been making new friends out at the races and getting to know more people in the Anchorage cycling community. (Hint: more potential models!) The next event is this weekend, and in the spirit of coming at it with a different approach, I’ve decided to actually race this time instead of just take pictures.
There, I said it, guess I’m committed, although I might be a little out of shape. I haven’t raced since the Kincaid race this summer, and that was 24 hours of endurance, not 40 minutes of heart pounding, hill climbing, barrier jumping adrenaline madness. I can’t wait!!
If you’ve been waiting to upgrade your Nikon DSLR, at long last, the waiting game is over. Now it’s time to choose. D800 bodies are finally showing up in regular stock at many camera stores, and the D600, which is already on shelves.
So, which camera should you get- the D600 or the D800? Let’s review the main features and see how the two cameras compare. Hopefully this will help you decide which body is right for you.
Image Quality
The biggest difference in this department is the number of pixels involved. Both cameras use the same size 24mm x 35.9mm FX-format full frame CMOS sensor and shoot 14-bit RAW, but whereas the D600 has 24.3 million pixels on its sensor, the D800 has a groundbreaking 36.3 million pixels packed onto the same area.
Essentially, this gives the D800 a big edge on resolution, simply because the pixels are packed more densely on the sensor. However, resolution alone is not the only factor that’s involved when were dealing with image quality.
That said, the sensor on the D600 has been given the second highest DxOMark score in overall image evaluation tests for available full-frame cameras. Also, software and image processing plays a huge part in how good your images look and how well the camera is able to reproduce tones across the entire spectrum of light and dark. Both the D800 and the D600 (as well as the D4) use Nikon’s new EXPEED 3 image processing brain, so even though the D800 will shoot higher resolution images, the D600 will produce comparable quality images, even in low light conditions.
When it comes to metering, the D800 has a brand new 91,000 pixel RGB sensor matrix meter, while the D600 uses the older 2,016 pixel matrix meter that’s found on the D7000. While this will not make or break your exposures, the D800 obviously has an edge when it comes to metering in tricky lighting situations and scene analysis.
Frames Per Second
This is where the D600 edges out the D800. CMOS sensors are able to process images at remarkable speed, but since the D600 has fewer pixels to crunch during each exposure, it’s able to fire at a faster rate. Whereas the D800‘s top speed is only 4 frames per second at full resolution, the D600 can fire at 5.5 fps.
However the D800 can fire faster when it’s not shooting full res files. If you’re shooting a scene and absolutely need that extra speed, you can always switch to DX mode or 1:2 aspect ratio mode and shoot at 5 fps, or slap on the battery grip and shoot DX mode at 6 fps.
Autofocus
The D800 uses the new Multi-CAM 3500FX autofocus system, which is the same one that’s found on the top of the line D4. It has 51-point detection with 15 cross-type sensors and 3D tracking. Cross type sensors are autofocus points that are oriented in both the vertical and horizontal axis. They’re more sensitive to variations in light across multiple planes and thus offer improved accuracy when detecting and locking on certain subjects.
The D600 uses the new Multi-CAM 4800DX autofocus system, which is similar to the one found on the D7000. It only has 39-point detection with 9 cross type sensors. In effect, when compared to the speed and accuracy of the D800, the D600 has a slightly stepped down system. That said, I’ve tried the D600 and can report that it indeed has a very fast, accurate autofocus system, especially when used with AF-S lenses.
Also, since it’s been adapted from the D7000, which is a DX body, the AF matrix is more densely packed into the center of the frame. Some photographers who frequently position moving subjects closer to the edges of the frame might find this arrangement somewhat limiting.
Flash Capabilities
Both the D600 and the D800 have pop-up flashes can function as wireless commanders, and can control up to two groups of remote Speedlights. For most off camera flash work, both cameras will offer just about the same level of creativity.
I say “just about,” because there are differences. While the D800 flash sync speed is 1/250 sec. the D600 only syncs at 1/200. Strobist David Hobby has said that this is a major limiting factor. However, while I can understand his math and methods, and while I wish the D600 synced at 1/250, I just don’t think the difference between 1/250 and 1/200 will be the end of the world for many photographers. In fact, Canon’s new 5D MK III also syncs at 1/200.
The D600 also lacks a sync cord port, which is usually used to trigger flashes and strobes inside the studio. If you shoot mainly outside, no sync port is really not an issue. If you do need one, though, you can always buy the $20 Nikon AS-15, which slides right onto your hot shot and turns it into a PC sync port.
Body Construction
Whereas the D800 is built with a full magnesium alloy chassis, the D600 has some composite materials incorporated into its design in order to save weight. It still has magnesium alloy on the top and sides, and it has the same weather sealing as the D800, so unless you’re really beating it up, the D600 should weather the elements outside just fine.
The D600 is also slightly smaller and lighter than the D800, in fact the D600 is the smallest, lightest and least expensive full frame camera to date; it’s great for going fast and light!!
Video
Although the D800 will obviously shoot quality video since it has more pixels on the sensor, both cameras will shoot Full HD and are very comparable in this area. The main limitation on the D600, though, is that you can’t adjust your aperture while you’re recording.
Storage Media and Batteries
Both cameras have a dual-memory card slot. The D800 takes one CF and one SD card, while the D600 takes two SD cards, just like the D7000. All three cameras use the same EN-EL15 battery, so if you’re upgrading from a D7000, you can swap batteries between any of the three bodies.
Other Features
The D600 has a couple of features that the D800 does not have. One is the new WU-1b Wireless Adaptor which plugs into the USB 2.0 port on the D600 and allows you to send photos directly to your smartphone or tablet. At this point, there is no wireless adaptor for the D800.
Another think the D600 has several built in “Scene Modes, as well as U1 and U2 user banks that are found on the exposure mode dial. This allows you to program specific and often used camera settings for instant recall. You might have one setting for manual flash use and one for action sports shootings, etc…
Both cameras have the same size and resolution LCD monitor, compatibility with just about all Nikon lenses, new or old, similar battery life and very similar control layout.
Price
This is the big one:
D600 = $2,099
D800 = $2,999
Final Anaysis
So, which camera should you buy? As with any camera, it comes down to how you’ll use it and what you demand from a camera. For enthusiasts, photographers who are moving up from a D7000, or one of Nikon’s other DX bodies, and even many professional users, the D600 is an excellent quality camera that will deliver excellent image quality and offer a wide selection of usable features that will allow you to fully explore your creativity and push your technical abilities.
As far as quality goes, 24.3 megapixels is more than enough resolution for most people, after all, we’re still talking still talking over 6,000 pixels on the long end, vs. 7,300+ pixels on the D800. That’s not very much, especially when you compare to what we had just a few years ago.
Unless you absolutely need (want) the largest file sizes and the highest dynamic range, the D600 will likely give you everything you need in a photographic quality. You’ll save on price as well as on storage space. D800 RAW files are considerably bigger than RAW files made on the D600.
And as I said above, the flash sync speed is definitely an issue, but I don’t see it being a huge issue for many photographers, especially for outdoor, action, and travel shooters, and photographers who like to fast with light. Sure, you may lose a tiny bit of power on your Speedlights when trying to overpower the sun, but for regular flash use, you may never run into any problems. Remember those Cyclorcoss images I shot last week with my strobe? Many of them were shot at 1/100, 1/160 and /1200 sec.
In my mind, the bigger matter to consider is the autofocus system. If you’re a demanding pro user who shoots erratically moving sports and likes to frame subjects outside the center, or shoot sports and moving subjects in lower light, you may find the AF system on the D600 somewhat limiting. The D800 has the same high end AF system as the D4, and if you’re a heavy pro user, then you can probably afford to the higher jump to the D800 anyway.
$3K is certainly a lot of money to drop on a camera unless you can justify the price, though. If you’re coming from a DX body and going full frame for the first time, the D600 is an outstanding camera. It’s simply a better camera than you’ve probably every used before and you’ll likely find it to be an excellent and usable tool. For most outdoor photographers, it’s a no brainer. Want a new camera? Get the D600.
If you’re one of those disappointed D700 users who feels somehow lost and left out of this round of the Nikon upgrade game, you have three choices:
1: Get the D600, sacrifice a tiny bit on AF and flash sync speed and still get image quality that’s better than you’ve every shot before. However, despite the two things that I would have liked to see on it, the D600 is really a fantastic, and high performing camera. Nikon did well with this one and the majority of photographers will find it that it fits their needs perfectly.
2: Go D800 and sacrifice a little bit on frames per second, concentrate on timing instead of just slamming your finger down on the shutter and wildly spraying frames, and still get a camera that’s superior in every other way. (Or go full mac daddy and get the D4)
3: Keep shooting with your D700 because it’s still an excellent and relevant camera that will still deliver great results for you and your clients, and wait to see what Nikon comes out with in six months or so. However, if you’re like most D700 users, chances are you’ll be disappointed in that too.
I know, it seems like there will never be another D700, but who knows. There’s still a thousand dollar jump between the D600 and the D800, which means that there’s certainly room for something in the middle. Question is, will Nikon fill that price point with a D4 mini, which is what we all want anyway? We can only watch the Nikon Rumors site and keep our fingers crossed.
Or, like I said, you can buy one of these two awesome and capable cameras and go make some killer photographs with all that juicy new DSLR technology.
D600, D800. Red pill, blue pill. The choice is yours.
Support this site: Give your virtual thumbs up for the time, energy and research that it takes me to bring you reviews like this one by purchasing gear through these links. Thanks! -Dan
[iframe]<iframe width=”468″ scrolling=”no” height=”60″ frameborder=”0″ style=”border:none;” border=”0″ src=”http://mer54715.datafeedfile.com/widget/aff_widget_prdt_generate-2.0.php?aff_num=6746&aff_net=1&widget_num=1597″ marginheight=”0″ marginwidth=”0″><p>Your browser does not support iFrame.</p></iframe><iframe src=”http:///e/cm?lt1=_blank&bc1=000000&IS2=1&bg1=FFFFFF&fc1=000000&lc1=0000FF&t=danhbaisadvph-20&o=1&p=8&l=as4&m=amazon&f=ifr&ref=ss_til&asins=B0099XGZXA” style=”width:120px;height:240px;” scrolling=”no” marginwidth=”0″ marginheight=”0″ frameborder=”0″></iframe><iframe src=”http:///e/cm?lt1=_blank&bc1=000000&IS2=1&bg1=FFFFFF&fc1=000000&lc1=0000FF&t=danhbaisadvph-20&o=1&p=8&l=as4&m=amazon&f=ifr&ref=ss_til&asins=B0076AYNXM” style=”width:120px;height:240px;” scrolling=”no” marginwidth=”0″ marginheight=”0″ frameborder=”0″></iframe>
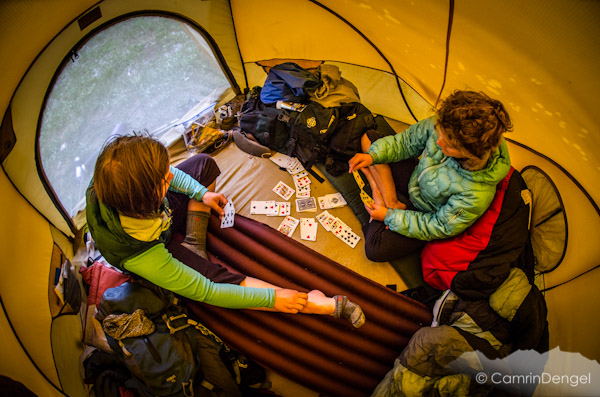
Today I welcome guest writer and emerging photographer Camrin Dengel. I’ve been watching Camrin’s work for almost a year and I really like her style. She’s already had a number of images published and is a frequent contributor to Women’s Adventure Magazine.
Becoming An Adventure Photographer, by Camrin Dengel
I used to think that EVERYONE wanted to be an outdoor adventure photographer. That they were just too realistic to actually chase after that dream. I mean, make a living traveling, exploring, playing outside, you know … actually living. How crazy of a idea is that? It turns out, not that crazy! It also turns out that not everyone wants to be an outdoor adventure photographer.
While talking to one of my friends about careers I naively asked her why she didn’t want to be an adventure photographer. Her response was that her level of creativity didn’t extend much beyond sewing lumpy bison stuffed animals for friends new babies or environmentally conscious city planning. She explained to me that while running around being my model is a blast, the thought of having to be the one behind the lens sounds stressful and like it would take the fun out the actual adventure. In contrast, for me and possibly for many other photographers being behind the lens is liberating, exciting and a form of expression.
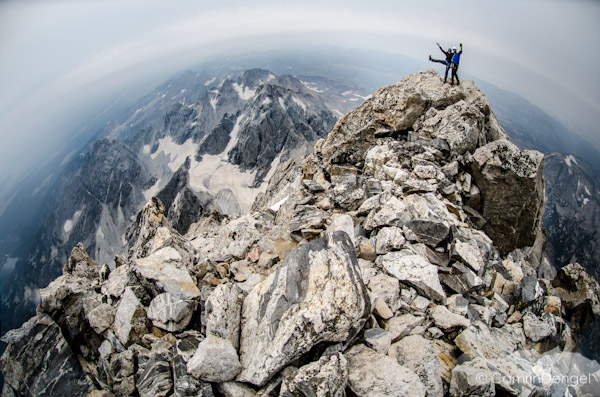
So, here I am, trying to ease my way into this industry. And by ease I mean launch a career. It’s a little harder than I thought it would be. Don’t get me wrong, when I was first introduced to the world of adventure photography I was bombarded with negativity, harsh criticism and blatant honesty about the hardships of I would encounter.
Junior year of college I decided to attend National Geographic’s Workshop at the Summit for Adventure Photography. Aside from my professors lack of encouragement, missing a week and a half of classes during prime exam time, and having just learned to shoot manually with my cheap olympus camera kit a few days before, I went! It was a totally new world full of professional athletes, editors, and world renowned photographers. And they didn’t hold much back. I still remember a photo editor from National Geographic critiquing one of my images displayed on the wall in front of everyone and saying, “This photograph is just not successful in anyway”. Ouch!
I returned to school a little beaten down, exhausted from 4am shoots and totally pumped on photography. It’s been close to two years since I decided I wanted to make a career out of outdoor lifestyle/adventure photography.
The beginning was hard and progress was slow. Like anyone first starting out I took loads of terrible photos. At first I only knew that they were bad, but not exactly WHY they sucked so much or how to fix them. So I kept shooting. I’d come back from trips with hundreds of images and if I found one with no limbs cropped out, open eyes, not too awkward of body position and my models/athletes (or should I say my dirtbag college buddies) were wearing something somewhat exceptable, then I felt like I was moving forward. I was lucky to have friends kind enough to humor my addiction to the camera. For all the terrible pictures I took of them I’m still surprised they let me keep going at it!
Thankfully no one cut me off and I continued to shoot. Eventually I started producing some “decent” work, and feed back from professors or professionals that I reached out was slowly starting to have more of a positive spin. That was all I needed to keep me going.
I’ve graduated school now and am giving photography my full attention. I’m just starting to see bits of my work published and it feels great! But I know I’ve still got a long way to go. It’s a good thing that I really love it, huh? And not just the getting published part, but the getting inspired by other photographers work, brainstorming, actually shooting, … not always the editing part, but the whole journey is what I’m after.
So my advice to anyone getting started? Yeah, you are going to have a lot of work ahead of you and it is going to be hard. You’ll probably get discouraged a time or two, but if you really love it, you’ll keep going and eventually you’ll get there. Photographers are always growing in terms of they’re work and there are always new ideas, new skill sets and new forms of passion that will keep you moving forward. We all have to start somewhere!
————
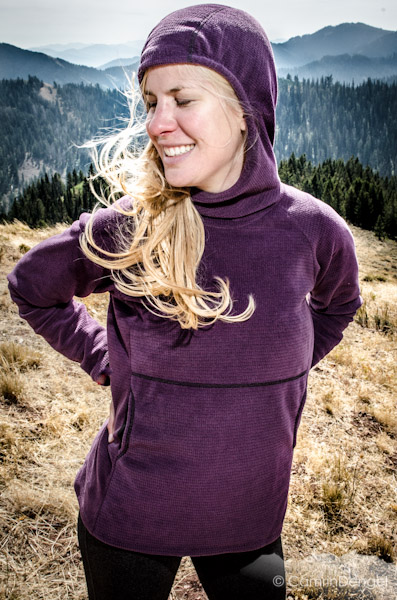
An outdoor lifestyle and adventure photographer, Camrin grew up in Valdez, Alaska where she developed a passion for the outdoors. Whether she is skiing in the mountains, kayaking on the river, or just about anything in between, there isn’t much in the way of adventure that she’ll turn down. Along with her passion for photography and playing outside, Camrin enjoys brewing her own kombucha and window shopping gear stores. For more of her work check out her blog.
It’s here. The rumors were true. Yesterday, to no one’s surprise, Nikon announced the heavily leaked and highly anticipated D600 camera body.
With a 24.3 megapixel CMOS FX format sensor, Full HD 1080p cinema quality video capabilities, 5.5 frames per second shooting at full resolution, 39-point AF system, ISO range of 100-6400 (expandable to 50-25,600), wireless compatability and an incredibly compact body design, the Nikon D600 bridges the gap between pro-level full frame bodies and the more affordable DX sensor bodies in the lineup.
Built as the little brother to the D800, the D600 features the same EXPEED 3 image processor that’s found in both the D4 and the D800, which means that the D600 will be able to capture images with brilliant detail, incredible depth and smooth tonal gradation in a wide variety of lighting conditions.
And, since it produces smaller image files, it actually surpasses the D800 in a critical area: Frame rate. Where the D800 can only shoot 4 fps at full resolution, the D600 fires at 5.5 fps, which makes the D600 a highly versatile camera for sports, action and adventure photographers.
Finally, since it uses the same NE-EL-15 battery as the D7000 and D800, the D600 will slide right into your system. See full specs at the Nikon website.
When the first rumors began circulating last year, it was thought that the D600 would be a consumer-level DSLR that lacked the kinds of pro features that demanding users require. To the contrary, and much to their credit, Nikon has delivered a rugged and highly capable camera that will appeal to a very wide selection of photographers.
Built with magnesium alloy and composite construction, a 100% viewfinder and the same dust and weather sealing found on the D800, the D600 is made to withstand harsh environments. It’s compact body design will certainly appeal to outdoor and nature photographers who want to go light and fast, as well as to people who have smaller hands.
And with an an impressive shooting speed of 5.5 fps, the D600 is faster than both the D700 and the D800. For photographers who were unsure if the D800s slower 4 fps would be fast enough for them, the D600 solves that issue.
In fact, the D600 solves two other issues that has kept many people away from the D800: Price and RAW file size. At $2,099, the D600 is considerably less than the $2,999 price tag of the D800 and much more affordable to many people. Yes, it’s quite a jump higher than he D7000, for the pro features that it does have, it’s a solid, and doable investment if you’re serious about your photography.
Also, the truth is that most shooters simply don’t need 36 megapixel images and enormous 70MB RAW images files. The D600’s 24.3 megapixel RAW photos should be high enough resolution for all but the most demanding of commercial and landscape photographers.
So what’s the catch? The D600 is truly an amazing and innovative camera, but in order to keep the price at a reasonable level, Nikon had to make a couple of small sacrifices. In my mind, the biggest is the 39-point AF system, essentially an upgrade to the D7000 AF system. For comparison, the D4, D800 and D700 all have highest end 51-point systems with 15 cross type sensors.
To be fair, I have never used the D7000, so I don’t know the ins and outs of how well a 39-point autofocus system works when compared to the higher end bodies. Also, to put things in perspective, I shot action for years with the N90, which only had an 11 point system and 1 cross type sensor, and I got some fantastic images. I would imagine that with the upgraded Multi-CAM 4800 technology, even at only 39 points, the D600 will perform very well in that department. D7000 users, I’d be curious to hear your experiences.
Also, the D600 has a slightly smaller buffer capacity than its bigger brothers. (16 images shooting at 14-bit RAW, vs. 17 for the D800 and 20 for the D700.) However, in most shooting conditions, I’m not just pressing the shutter down for 5-6 seconds at a time, I’m capturing small bursts of images during the peak of the action. That said, I like my frame rate to be fast and the 5.5 fps frame rate of the D600 gives this camera a great deal of appeal for people like me who shoot action, sports and fast breaking subjects.
Third is the flash sync speed, which is only 1/200. Most pro cameras sync at 1/250 or higher. Still, the built in flash on the D600 will operate in commander mode and control up to two groups of off camera speedlights like the SB-700 and SB-910.
While I would have liked to see the AF and flash systems built to pro-specs, these things may not necessarily be deal breakers, not when you throw in 5.5 fps, full weather sealing and a $2,099 price tag. Of course, what I really wanted was a 24 megapixel professional grade body in all respects, not just some. You know… (I almost don’t even need to say it) … a true upgrade to the (here it comes…) D700. Unfortunately, this is not it.
That said, Nikon has indeed delivered more than most people had expected with the D600. It’s an outstanding camera that will produce exceptional imagery, and with the features that it does have, I think it will have tremendous appeal across a broad range of photographers.
Best part about the D600 is that it begins shipping next week. No waiting for months, it’s already in production and slated in-store date is September 19. Pre-order a D600 body at B&H Photo , and you’ll have one in your hands by the end of the month.
Now that I’ve said my piece, let me know what you think. Does it meet/exceed/fall short of your own expectations? Will you get one?
Even more than your camera, your lens is the most important piece of gear in the craft of photography. Through the specific angle of view and depth of field characteristics that each type offers, your lens is the device that directly translates your vision of the world into an image. In the end, it’s not the body that determines the quality and look of your photograph, it’s the lens.
Buying a new lens is certainly an exciting event, but with so many choices on the market, it can be a daunting process. There are a number of factors that play into your decision, including budget, size, weight and your own photography style. As you do your own evaluative research and ask yourself which lens you should buy, which lens will be the right one for your own brand of image making, it can sometimes help to see what lenses other photographers find useful.
With that in mind, here’s a current list of the five most popular Nikon lenses and why I think you might consider each one if you’re in the market for some new glass.
1. AF-S 50mm f/1.8G
Every photographer should have a 50mm lens. It’s the lens that most people start out with, at least they used to before kit zoom lenses became standard equipment with new camera bodies.
A 50mm lens is a highly versatile tool that will carry you through your entire photography life, and Nikon’s latest generation of this lens, the AF-S 50mm f/1.8G is a superb choice. It’s light, fast, sharp, has very shallow depth of field up close, and with the Silent Waver Motor, it focuses with incredible speed and accuracy.
Portraits, nature, travel, still life, street photography, the 50mm will do it all. Note, it’s not the best sports lens, unless you’re able to get close enough to the action.
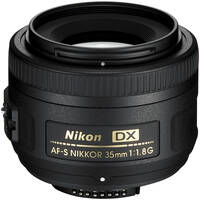
Engineered as a DX lens, the Nikon AF-S 35mm f/1.8G lens functions as a normal, fast 50mm f/1.8 lens on the 1.5x crop sensor DX camera bodies.
Everything I said above about the 50mm lens above applies here if you have a DX camera. It’s fast, sharp and also has the Silent Wave internal focusing motor. If you have a D90, D7000, D5000, D3100, D3200 or one of the other non-full frame Nikon DLSRs, then this is a must have lens.
If you have a full frame sensor and are looking for a 35mm lens, you’ll want the older 35mm f/2D lens, as this DX version will give you light falloff on a non-DX body.
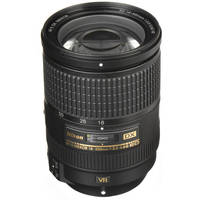
Considered by many users to by a great all-in-one lens for DX sensor Nikon DLSRs, the AF-S 18-300mm f/3.5-5.6G ED VR gives you an affordable and lightweight option for full coverage across the entire spectrum of view. From wide angle the way to high power telephoto, this lens gives you the equivalent of a 450mm lens and lets you bring the subject up close. Very close.
Built with Nikon’s second generation VRII vibration reduction technology, Silent Wave internal autofocusing, extra low dispersion and aspherical glass elements and Nikon’s Super Integrated Coating, this lens gives consistently sharp results for the price. It will even allow close focusing of up to 1.4 feet at the 300mm setting.
Granted, with a maximum aperture of f/5.6 when zoomed all the the way out, it’s not as fast as more expensive f/2.8 lenses. However, it’s certainly smaller and less expensive. And with today’s high ISO capable cameras, lens speed is not as much of an issue than it was back when we were shooting 50 and 100 speed slide film. These days, f/5.6 is not the end of the world. In fact, the featured shot on my Facebook Page was shot with long lens at f/5.6.
Want a convenient compact do-it-all lens that weighs less than 2 lbs? This might be your choice.
The AF-S 24-70mm f/2.8G ED is the workhorse lens of pro photographers like Joe McNally, Lucas Gilman and David Hobby. Optimized for both DX and FX full frame Nikon cameras, this is top quality glass.
It’s not a small, compact or lightweight lens by any means, but it will get the job done. It’s the ultimate lens for photographers who love the look and feel of mid range primes, but want the simplicity and convenience of carrying a single lens instead of three or four.
With a fast f/2.8 aperture all the way through, ED glass, AF-S focusing and Nikon’s Nano Crystal Coat, this lens has fantastic edge to edge sharpness, exceptional contrast and color and it will produce outstanding images. Built to rugged pro-grade standards with dust and moisture resistance, it will perform in all conditions.
Landscapes, travel, professional quality portraits with amazing looking bokeh, events, photojournalism, street photography, the 24-70mm lives up the hype for one reason- it’s an all out five star lens.
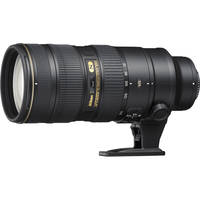
If you shoot sports and action, this is the one. Period. The end. If you can afford it, definitely get this lens, or one like it.
The Nikon AF-S 70-200 f/2.8G ED VR II is the absolute standard telephoto zoom lens for shooting professional quality sports, or any subject that requires distance between the photographer and subject.
Built to pro specs with incredibly fast AF-S internal focusing, superior ED glass and vibration reduction that lets you shoot up to 4 stops faster in lower light conditions, this lens gives brilliantly sharp, high contrast images with reduced ghosting and flare. It works equally well on both DX and FX bodies.
I have a lens in this range and it’s been my own go-to glass throughout my entire photography career. I use it for action, portraits, landscapes, travel, just about everything. For what I do, I simply could not live without this type of lens and this model is the best one that Nikon has ever made. Read the reviews. You’ll see. King of the zooms. No need to say any more.
Edit: Nikon recently came out with the brand new Nikon AF-S 70-200mm f/4G ED VR Telephoto Zoom Lens. It’s a full-on pro quality zoom lens with an even more advanced VR system than the 70-200mm f/2.8 version has. I highly recommend this lens, because it’s got excellent optics and it costs about a thousand dollars less than the f/2.8 version. Read my comparison review between these two lenses and see some example images.
Support this site: If do find yourself in the market for new glass, please consider purchasing gear through these links. It doesn’t cost you anything extra but it helps cover the costs, effort and time that it takes to run this site and produce these articles. As always, thanks for reading!


 Today I welcome guest writer and emerging photographer Camrin Dengel. I’ve been watching Camrin’s work for almost a year and I really like her style. She’s already had a number of images published and is a frequent