lr-mobile_ipad_iphone_sync_1400x80011

Last week Adobe rolled out a big new update to their Creative Cloud service and announced a few new features and improvements for photographers.

The first is the fact that after dangling the carrot in front of us for months, they finally made permanent the CC Photography Plan, which gets you Photoshop CC and Lightroom for $9.99/mo. While this plan still isn’t the perfect solution for some photographers, it appears here to stay, so if you want PS and LR, this is your only option. At least now, you don’t have to rush and make a decision if you’re on the fence.

The second big announcement is that Adobe has now released Lightroom Mobile for the iPhone. It’s identical in functionality to the iPad version, which was introduced back in April, and both apps now include star ratings and custom view and sort options. (If you’ve been using the LR Mobile on the iPad, you’ll want to upgrade to v. 1.1.)

This lets you take your photography workflow just about anywhere, at least anywhere you have a wi-fi connection. I see this as a useful solution, because although we may not carry our iPads everywhere, we almost always have our iPhones with us.

If you’re like me, you’re in a constant state of editing from all the recent shoots that continue to pile up on the desktop. If you can knock out a few folders of images when you’ve got some free time on the go, that’s a good thing. Even just X-ing a few rejects will make a difference when you get back to the regular computer.

With Adobe’s Smart Preview feature that’s built into LR Mobile, RAW files only take up about 1-2MB each, but since they have to be sent up into the cloud from your desktop and then back down to your iPad, that still takes time and bandwidth if you’ve got a huge folder of images. In those cases, it might be a good idea to break them up into smaller collections so that you’re not overloading things.

LR Mobile still doesn’t do keywording, but it seems like Adobe is on the right track and listening to their customers. I’m confident that we’ll see that feature added in a future version of the software. Also, note that LR Mobile only works with iOS 7.

You can read about all the new photography updates to Adobe Creative cloud here, including Photoshop improvements and the new Photoshop Mix iOS app.

However, if you’re not super excited about the Adobe Creative Cloud plan, here are 6 alternative photo editing software choices.

June 24, 2014
See this post
Adobe Lightroom Mobile Now Works With iPhone

_DSF6087If there’s one thing I love about summer, it’s hiking above treeline. Nothing brings me quite the same joy as going on long mountain rambles, piecing together alpine ridge traverses and frolicking in the high  tundra. Give me a light pack, minimal camera gear, a pair of trekking poles and miles of open terrain and I’m a happy guy.

Even better are short multi-day trips that let you sleep up in the high country. This means you’re right there in the middle of the good light when it happens, instead of watching it from below when you’re hiking back to the car or driving home. There’s incredible freedom and serenity from hiking through the late evening and then picking out an ideal camp spot on some ridge that overlooks the valley below, and then waking up to first light with no one else around.

Now that summer is here, I’ve been getting out as much as my schedule allows. Here are a few photos from recent trips during the past couple weeks. All were shot with the Fuji X-T1, which I’m loving as a hiking and backpacking camera. It reminds me of my early days when I’d hike with my all manual Nikon FM2. They’re about the same size and they have a similar feel.

Amy Sebby descending Pepper Peak, Eklutna Lake, Chugach Mountains, Alaska

Lenses: My lightweight hiking setup usually includes a wide angle, a small normal lens and a zoom. My typical Fuji kit would be the XF 14mm, 27mm and 55-200mm. I’ve also been trying the brand new Fuji XF 18-135mm lens, which is what I used to shoot the photo above. It’s offers a pretty usable zoom range in a single lens, and even though it’s not super fast, it offers very good image stabilization.

During times when I take my Nikon gear, I’ll go with the 24mm f/2.8, the 50mm f/1.8 or 85mm f/1.8 and sometimes the AF-S 70-200mm f/4G ED VR lens, which is an awesome lens for the backcountry. Not only is it light, the 5 stops of VR let you shoot pretty slow shutter speed without a tripod.

Either way, this kind of setup gives me a wide range of focal lengths for shooting wide vistas, close action, landscapes and distant details.

Backpacks: For day trips, my default pack is the Lowepro Photo Sport 200 AW. It carries great and holds any of the above camera combinations, as well as extra food, water, clothing, etc… If I’m going super light, I’ll take the Lowepro Flipside Sport 10L AW. This tiny pack has just enough room for a small hydration bladder, a couple of extra layers and snacks, as well as a body and 2-3 lenses.

For overnight trips, that’s when I’ll go for one of my larger Osprey packs like the Talon 33, and either carry the camera around my neck/shoulder by the strap or else use a chest/waist pouch. My longtime favorite is the old Photoflex Galen Rowell Chest Pouch, which is sadly no longer made. ClickElite has a couple of models, as do Lowepro and Tamrac. My first holster bag ever was a Tamrac zoom and it worked pretty well.

I hope you’ve been getting out as much as possible in the outdoors as well this summer!

_DSF5776

_DSF5558_DSF5639 _DSF5652 _DSF5802_DSF5508_DSF5495_DSF6256

June 23, 2014
See this post
My Summer Hiking Photography Gear
Trail to Nowhere.

There were times when I couldn’t see more than 50 feet in front of me. It was like walking a trail to nowhere that kept refreshing itself every few paces. Since I’d never been up this trail before, every step was an adventure that I willingly took on, since I knew I’d be ascending into the clouds at about 2,000 feet.

Pioneer Peak stands like a guardian at the north end of the Chugach Mountains. A blocky pyramid that towers over 6,000 feet above the braided gravel bars of the Knik River, it’s a worthy objective. While not an extremely difficult mountain to climb, it’s a classic Chugach scramble, which means that it’s high, steep, involved and slightly circuitous as you make your way from trailhead to summit.

photo3
The Approach. Also known as “Bear Country.”

On a sunny day, the Pioneer Ridge route offers incredible views of the entire Knik Glacier and Matanuska valley, but with the low clouds that hung over the entire range, more than anything, I was out for exercise, not scenery. I could barely see the trail when I popped out of the forest.

Just about every decent hike in Alaska requires the obligatory steep ascent through thick stands of willows, ferns, cow parsnip and devil’s club. In other words, the place where the bears like to hang out.

With my bear bell clipped to the back of my pack and a can of pepper spray shoved into in the side pouch, jangled my way up the steep muddy trail and climbed right into the clouds, which, when you’re inside them, just look an awful lot like fog.

Fortunately, I didn’t encounter any big furry four-legged creatures on my way up the trail and eventually I hit what I like to call The Payoff. That’s the high alpine tundra where you find what you came for: high rocky peaks, two thousand foot scree and talus slopes and long ridges that connect different sections of the range.

After 3,000 more feet of leaning on my trekking poles and hiking up the well marked trail, I reached the 5,000′ mark at the top of Pioneer Ridge. From there, I had two options: either turn right and climb South Pioneer Peak or turn left and walk the few-mile ridge out towards Yudikench Peak.

However, the fog was so thick that I couldn’t see anything. No peak. No ridge. Not even the hint of a massive peak that stood a half mile away. I could barely pick out a large patch of snow that blended in with the fog at the top of the ridge. Nonetheless, I celebrated my excitement to be up here in this magical place all by myself by sitting down in the tundra and eating my sandwich. Cheddar, gouda and lots of fresh arugula and other greens from my garden.

With little desire to walk a ridge or climb a mountain that I couldn’t see, I packed up and started down, happy that I finally got out and hiked Pioneer Ridge. As much as I wanted to get up the summit, I had no idea what to expect. I knew that there was lots of 3rd and 4th class scrambling on loose rock, but with absolutely no visibility, I figured I’d be better off coming back another day.

That’s when the sky opened up and revealed most of the south ridge.

photo2
Sucker Hole over Pioneer Peak.

Let me revise that last statement. It’s not like the weather actually cleared; it was really just a big sucker hole in the clouds that boosted my sense of motivation. In other words, it was just a brief opening that lured me right in.

When I say “brief,” I mean “brief.” Not 15 minutes after I’d turned around and started up the ridge, the fog blew back in and took away every bit of my view. I kept going, though, figuring that if if things got dicey, I could always turn back. I’m good on that scambling stuff, though, and I was moving quickly, so I was pretty sure I could make it.

The Ridge.

The trail was easy to follow at the base up the ridge, but as I got higher, that’s where it got a little more circuitous. Since I couldn’t see top of the peak, there were times when I could only look at an abbreviation of the upper terrain as it faded into the fog and make an educated guess about where the route went.

For the most part, the route and my alpine navigation skills kept me out of anything too hairy, but I had to backtrack a few short sections and work my way up and around some steep blocks that fell away towards nothingness. Although I’d say that I was slightly concerned at times, for the most part, it was just a matter of motivating my self to keep going up hill. That’s pretty much what climbing is, whether you’re on highly technical terrain or broad, safe ridge: going uphill when you get a little scared or tired.

False summit.

The most frustrating part of the climb was being fooled by all the false summits that looked like the real summit. With visibility so limited in the fog, every big pointy section looked like the top.

Each time, I’d get excited and scramble a little faster until I got what I thought was the top, only to have yet another big pointy half-hidden block reveal itself even higher up.

I’d sigh, resign myself to more climbing and push on, knowing that I’d be probably be fooled again a few hundred feet up.

At one point, another brief hold in the clouds showed me a series of scree slopes and a grassy ridge down below and to the right that I could use for the descent. That would save me time from having to skirt back down the entire 3rd and 4th class ridge.

Finally, after a bit of scrambling up a final chute, I turned a corner and saw that I’d reached the summit. If there was no fog, I could have seen the bigger north summit of Pioneer Peak, which is only about 500 feet away.

The Top!
Ridge to Nowhere.

I didn’t linger. I quickly retraced my steps down to the scree slopes, bombed down the loose rock sections and worked my way right, over rock, moss, snow and tundra, to an easy ridge that took me back to the beginning of the route.

Somehow the lack of rocks and scree did little to alleviate the fact that it was still hiking a few hundred feet uphill, even if it was easy ground. I leaned on my trekking poles a lot during this section.

Finally, I reached the top of Pioneer Ridge, which signified the beginning of a 5,000+ foot descent back to the car.

I shoveled a few cookies in my mouth and ran all the way back down, jangling loudly down the trail over tundra, and finishing the last 2,000 feet in the thick greenery.

Before I hit the trees, I dropped through the bottom of the clouds and finally got a view of the braided Knik river 3,000 feet below me. Total stats for the him: 15.29 miles and 8,535 feet of elevation gain.

Oh, and I shot all these photos with my iPhone.

photo4
The Kink River.


June 16, 2014
See this post
A Foggy Hike up South Pioneer Peak

_DSF4611Last night I kicked off the 2014 summer photo workshop season and led my first Sunset Photo Safari here in Anchorage with Through The Lens Alaska. There were four of us on our evening adventure, my co-instructor Jody Overstreet, and two clients, and we had a great time chasing light while showing them some really fun, out-of-the-way spots where they could practice their camera skills and learn a few things.

The idea behind the Sunset Photo Safari is simple: We take you on a four-hour photography tour and visit a handful of scenic locations around Anchorage that offer great photo opportunities. Our itinerary is completely flexible, and depending on the weather and light, there’s a wide variety of subject matter that we might encounter: landscapes, wildlife, amazing sunsets, closeups, even some action or aviation.

_DSF4599

Both Joe and Brent were in town for a conference, and since they had their last night off before heading home, the SPS was an awesome way for them to get and explore the area in a way that they would never have gotten the chance to do if they just stuck around downtown.

We had some great light last night, and ran through everything from backlit rain sprinkles, a rainbow over the inlet, lenticular clouds, still water scenics, a flowing creek and a magnificent sunset overlooking the entire Anchorage bowl. My favorite was the sunset virga over the Cook Inlet with Mt. Redbout in the background. In fact, I was almost amazed at the variety of images that I shot in just four hours, and I live here!

_DSF4573

Between Jody, Jeff and myself, (we rotate schedules) you’ll be able to get personal instruction from at least one pro photographer. Sometimes, like last night, two of us will go along, so you’ll have double the opportunity to learn some new tips and techniques, and maybe even borrow some gear from one of us. (Last night, I let one Brent use one of my Fuji lenses as well as my tripod.)

In addition, we’ll also give you a free instructional eBook called Take Your Best Shot, and an invitation to join the Anchorage PhotoWalk online community to share your images and get peer and instructor and commentary.

If you find yourself in Anchorage, or if you live here and want to attend of these mini Alaska photo workshops, please contact me visit our Through The Lens Alaska website. The Sunset Photo Safari runs weekday evenings from 8 PM to Midnight throughout the summer.

_DSF4596_DSF4624_DSF4644_DSF4632_DSF4648

June 3, 2014
See this post
My Sunset Photo Safari Workshops

_DSF8518Last week the site MirrorLessons.com ran a feature interview with me called Braving the Elements with the Fuji X-T1, which profiles my experience with the camera in extreme conditions in Alaska and Iceland, and sheds light on my thoughts about mirrorless cameras for the future. I also give some advice on lens choice and a few ideas on what makes for more dynamic adventure images.

As the first photographer in the US to shoot with the X-T1, I’ve now put it through four solid months of heavy use for both pro and personal work. I’ve run thousands of frames through it and have been impressed with its capabilities at every turn. Overall, the image quality, technical function and creativity that it’s inspired have far outweighed the small handful of elements that drew criticism from early reviewers.

In some ways, I’m honestly surprised at how seamlessly I’ve been able to incorporate this camera into my lightweight, fast moving style, since I have such strict criteria about my gear. In my mind, that’s not just a testament to the designers and engineers at Fujifilm. I feel that it signifies the beginning of a whole new era where small and light can also be full-on pro. 

In the past, that wasn’t possible, but with cameras like the Fuij X-T1, the Olympus OMD-E-M1 and the Sony a7, we’re seeing a transformative shift in both the technology and in the overall ideas that people have about photography and cameras.

Read Braving the Elements with the Fuji X-T1 and then check out the MirrorLessons website. Mat and Heather have done a great job putting together a solid resource that reviews mirrorless cameras and accessories and also features professional shooters who use mirrorless gear.


June 2, 2014
See this post
Braving the Elements with the Fuji X-T1. A Feature Interview with Me on MirrorLessons.com

_DSF3427The Fargo

Last Thursday, I went to the bike store and test rode a new Salsa Fargo, bought one, then threw it in my truck and immediately took it on a 235-mile bikepacking tour of the Denali Highway, where I enjoyed three long, blissful days of pedaling gravel through incredible, wide open Alaska vistas.

Ok, to be honest, that wasn’t quite how it played out, but it does make for a good story. Truth is, I’d already tried out the Fargo a few weeks previous, so I already knew what I was getting into. The Fargo is essentially a drop-bar off-road adventure bike with disk brakes and a mountain frame that’s set up for touring. It’s the kind of bike that makes you want to load it up and go places. Fun places. Far away places. Mountain-ey places. What’s not to love?

For a guy who loves bike riding and adventure, the Fargo seemed like a perfect choice. Plus, it’s blue this year, so there’s that. Now, after breaking it in on the Denali Highway, where it rolled over the miles like a true gravel eating machine, I can attest that my other Fargo riding friends were right all along. This bike rocks.

_DSF3389Breaking down the features and ride quality of the Fargo, it’s like….

Oops… This is supposed to be a camera blog, not a bike review blog.

Sorry. I got a little carried away with excitement about my new blue bike. Let’s see… how do I get back to cameras? Oh, right.

The Fuji.

If you’ve been reading my blog for the past few months, you know that the Fuji X-T1 has held the starting position in my camera bag since I first got it in my hands back in early February. I’ve shot with it in a wide variety of conditions and applications, even for pro work, and so far, the thing has not let me down.

In fact, this little Fuji X-T1 has indeed proved itself worthy of adventure, at least the kinds of adventures that I like to have, most of which involve just me, or me and someone else moving light and fast over varied terrain. I love it because it’s highly functional, it produces incredible image quality and above all, it lets me shoot my style without limitation.

_DSF3574

If anything, it actually compliments my style, because it allows me to take it places where my DSLRs just get too heavy. Believe me, I’ve carted that stuff to four continents on my bicycles, including the Himalayas, and every single tour, I wished that I had lighter gear.

Then, a year and a half ago, I did a week-long ride up Highway 1 along the California coast and only took the X20. For the first time ever, I left my DSLR at home. It was limiting, but liberating at the same time. Last year, I rode the Via Claudia Augusta route over the Alps and took along both the X20 and the X-E1. Although the X-E1 was still limiting in some ways for me, I saw the writing on the wall.

Now, with the X-T1, I feel as if I have arrived. I finally have a fully capable camera setup that’s light enough for adventure bike touring, which is something that I’ve always loved and something that I plan to do a lot more of in the coming years.

The Fargo and the Fuji. Oh, what a perfect combination! I can only imagine what kinds of adventures lay in store for the three of us.

The Denali Highway

_DSF3562

Although Alaska is an enormous state, we don’t have very many roads up here. That said, what we lack in numbers, we make up for in sheer grandeur. While we don’t have the extensive network of fire roads and four wheel tracks that many of the states in the Lower 48 have, we have two gravel roads of such lavish and magnificent proportion, that it almost makes up for our relatively small amount of rideable dirt: The Denali National Park road and the Denali Highway.

The 90-mile Denali Park road is without a doubt one of the finest mountain gravel roads in all the world. You can read about our summer solstice, all-night cycling tour here. If you like to ride bikes off of the pavement, you should ride the park road.

Not an hour south, lies the longer, Denali Highway, which runs for 135 miles from Cantwell to Paxson. Over 100 miles of the road is dirt and gravel, and since it’s mostly BLM land, you can ride and camp just about anywhere. There are no park busses, (there are occasional cars and RVs), so in some ways, it feels more wild than the Park Road. It also crosses the 4,000+ foot Maclaren pass summit, which is the second highest pass in Alaska.

_DSF3466_DSF3649_DSF3627For our weekend bikepacking tour, we rode round trip from Cantwell all the way to the end of the gravel on the other side. There and back again. We had originally intended on riding all the way to Paxson, but after realizing that the last 20 miles was paved and that there is NOTHING in Paxson; no food, no water and no lodging, we turned around at the Tangle Lakes Inn.

3 days of dreamy gravel riding in great weather. What could be better? We did encounter some thick haze from the fire that’s burning right now near Delta Junction. Overall, the Fargo did awesome. The Fuji did awesome. Our legs did awesome, although they got a little tired at the end of each 12+ hour day. When the sun sets at 11:00 PM, it’s kind of hard to stop pedaling!

I can’t wait for the next big ride.

_DSF3613_DSF3423_DSF3426_DSF3452_DSF3383_DSF3650_DSF3356

May 28, 2014
See this post
The Fargo and The Fuji. Bikepacking The Denali Highway

How about a May eBook sale?

From now until the end of the month, you can save 20% on select photography eBooks from my catalog.

Titles included in this deal are listed below. Simply use discount code MAY20 in your shopping cart and the savings will automatically be applied to your purchase.

ZEN PHOTOGRAPHER, an 81 page collection of essays, photographs and rock solid tips that are designed to ignite your imagination, inspire your creativity and help you turn your passion into a dedicated focus.

ZEN PHOTOGRAPHER was listed as one of the best books of 2013 by the editors of one of the biggest photography sites around, Photo.net.


Going Fast with Light, an 83 pages manual that will show you how to use off-camera flash techniques and apply speedlight-style lighting techniques in your outdoor photography.

As photographers, we all know that the best light can also be the most challenging light. However, it’s not always practical to carry lots of heavy and bulky lighting equipment into the outdoors. Going Fast with Light shows you specific flash gear and light modifiers that are both affordable and easy to pack, as well as a host of techniques that will help you dramatically improve the quality of your imagery.


Making The Image, is a conceptual guide that shows you how to create stronger photographs. By exploring how the human visual system responds to the world, it breaks down imagery into individual concepts, such as light, color, balance and viewpoint and shows you not only how, but why you should apply those concepts to your own photos in order to make them that much better and more powerful.

This book contains ideas that I’ve been thinking about and utilizing in my imagery for over a decade, and I’m really excited to finally have them all down in one place. I consider it the defining guide on my own style, as it accurately represents how I see and compose my imagery.


How to Become a Pro Photographer

This in-depth eBook is for anyone who is considering a full or part time career in photography. Illustrated with stunning imagery and packed with industry resources, links and valuable information that I’ve gained during my experience working as a full time pro for a decade and a half, it will tell you what you need to know in order to get started making money as a photographer.


You can also grab the Bundle of all four eBooks for just over 30 bucks! Remember, use discount code MAY20 in your shopping cart. This sale runs until midnight Alaska Time on May 31, 2014, so don’t wait!

In addition, I’ve reduced the price of my Kindle ebook, Creative Photography Techniques: 20 Tips for Stronger Images. Right now, it’s only $2.99.

These 20 tips are all short, concise and easy to remember, and they clearly outline necessary elements that are needed to produce a great image. They’re not meant to be hard set rules, they’re meant as ideas to help inspire you to begin experimenting with your own photography.

Each technique is illustrated with three image examples that let you see how it can be applied to a subject. Topics covered include light, color, composition, vantage points, using different lenses and many more.

May 19, 2014
See this post
May Sale – Save 20% on My Photography eBooks

After nearly four months of preorders, back orders, lots of hype, and a slight delay due to a reported light leak in some bodies, the Fuji X-T1 is finally listed as “In Stock” at both B&H Photo and Amazon. I would also guess that many local deals either have them by now or will get shipments soon. B&H is even offering free shipping to the USA.

I’ve been shooting professionally for almost 18 years, and not since I moved from the all manual Nikon FM-2 to the AF N90 body back in 1996 has a single camera made such a big impact on me and my approach to outdoor photography.

After being one of the initial prototype testers for the X-T1, I got mine in early February, the week it was announced. Since that time, it has changed my life. The very next day, I boarded a plane for Iceland and left my DSLR at home. Until that day, I would never have imagined pulling a stunt like that. We’re talking Iceland! The land of Fire and Ice. The place where they film Game of Thrones. Glaciers. Black sand beaches. Volcanos. Waterfalls. The northern lights. If that isn’t “Serious Camera” territory, I don’t know what is.

However, I wanted to travel light. Instead of a heavy camera pack, I took along a small shoulder bag, the Lowepro Nova Sport AW, filled with my Fuij X-T1 body and four lenses: the XF 14mm, the tiny 27mm pancake lens, the very sharp 18-55mm and the long telephoto 55-200mm. A week later, I came back with a few thousand images that I loved and I didn’t regret not taking my “big camera” at all. Recently I added the superb 56mm f/1.2 which is a stunningly sharp and fast portrait-style short telephoto.

I’ve long advocated that you’ll get the best photos if you have your camera with you and if you make it easily accessible during your adventures. For years, I’ve managed to lug my Nikons all over the world while climbing, biking, hiking, skiing and canyoneering, and at the same time, fit them into my lightweight, fast moving style.

However, the X-T1 lets me go even lighter, and at the same time, it gives me pro quality imagery that’s more than suitable for just about any type of professional publication. Even though it has a smaller APS-C sensor, it has a higher resolution and better clarity than my 5 year old D700, which is still my favorite Nikon DSLR body. It shoots twice as many frames per second as the D800 and it weighs a full two pounds less than the D4s.

Don’t get me wrong, I still LOVE my Nikon gear and I still use it for specific applications and some assignment work, but for going fast and light in the outdoors, these days, it’s the X-T1 all the way. It’s lightweight, rugged, fast, precise, it shoots great looking photos and inspires my creativity in fun new ways.

Is it the perfect camera? Hardly. There are certainly a few design quirks and technology issues that will no doubt be improved down the road, but overall, it feels great in my hands and it gets the job done without slowing me down._DSF3206

Even though I’ve been a big fan of modern DSLR ergonomics, the simple, classic design of the X-T1 has proved to be highly functional. From the ISO dial on the left to the +/-EV dial on the right, I can change settings really fast.

Even though still love the intrinsic nature of a prism viewfinder, the EVF on the X-T1 is amazing. Most of the time I don’t even remember that I’m looking at a tiny TV screen.

Even though I never though I’d need a tilt screen LCD, I find myself using it quite often. It comes in quite handy for shooting low and high angle work and during times when having my eye pressed into the camera just isn’t the best idea.

Even though it’s not a Nikon, it still plays nice with my Nikon Speedlights and my Photoflex TritonFlash batter powered strobe. I simply put the flashes in SU-4 optical slave mode or trigger them in Manual mode with a PocketWizard on the X-T1 hot shoe. If I can imagine a lighting setup, I can get it done with this camera.

And even though the AF system is not quite on par with my Nikon AF-S lenses, the X-T1’s predictive 8 fps focus tracking is extremely fast, accurate and completely usable for shooting action and adventure subjects. I’ve used it to photograph mountain biking, snowboarding half pipe dog sled racing and every time, it locked on and gave me sharp results.

_DSF2134

So far, I’ve used the X-T1 for landscapes, portraits, aerials, sports and assignment work. I’ve shot nearly 20,000 frames with it, sometimes in very tough, wet or extremely cold conditions, and every single time, it has delivered to my satisfaction. No, to my joy. To my excitement. To my enthusiasm and to my passion for photography.

Remember, the camera is just a tool, and over time, tools evolve. Years ago, pioneer adventure photographers like Galen Rowell eschewed medium and large format cameras in favor of smaller, lighter SLRs. Even though they didn’t have the same resolution as bigger cameras, they made his style of first person outdoor photography much more possible.

We’re seeing a similar transformation now, and not just with adventure and outdoor people. Portrait shooters are moving to mirrorless cameras in large numbers and for good reason; the combination of image quality vs. weight can’t be beat. Cameras like the Fuji X-T1 and the Olympus OMD series are changing the landscape of photography. They’re rewriting the rules and offering us new options for being even more mobile than ever before with our gear. I’ll be that if Galen were alive today, he’d take a serious look at these new rugged compact interchangeable lens cameras.

Megan Chelf carrying Brody on her shoulders at sunset, Anchorage foothills.Above all, what makes you come back with great photographs is getting yourself to those amazing places in the first place. Burdening yourself with too much gear can limit those possibilities. I consider myself a very nimble photographer. I prefer to travel light through the world. While I can appreciate and respect the production quality that you get when carting a dozen or more Pelican cases everywhere you go, that’s just not me.

Like I said, the Fuji X-T1 has changed my life. I’ve long wanted a lighter weight, weather-sealed setup that’s still capable of shooting pro work and meeting the demands of my style, and that offers excellent quality glass. With the X-T1, I’ve found exactly that. Plus, l like the combination of classic feel and modern features. It’s kind of like recording with my ’59 reissue Strat with Logic Pro on my laptop. Old meets new. The best of both worlds.

During the past four months, there’s been a lot of excitement surrounding the Fuji X-T1. I’ve certainly contributed to some of that, but only because I like to share the gear and methods that work for me.

If you’re an outdoor or travel photographer who is looking to go lighter and take advantage of the technology and quality that these new cameras offer, I can’t recommend the X-T1 enough. If you’re already an Olympus shooter and don’t want to totally redo your lens kit, then you should go for the OMD-E-M1. It’s a very similar camera with many of the same types of features.

If you haven’t ready my full X-T1 review and field test, you can check it out here. And if you decide to order one, or an Olympus, or any camera gear for that matter, clicking through these links helps me out and doens’t cost you a single cent more.

Order the Fujifilm X-T1 for only $1,299 (body only) at B&H PhotoAmazon or Adorama

Order the Fujifilm X-T1 with 18-55mm lens for only $1,699 at B&H PhotoAmazon or Adorama

[iframe]<iframe width=”120″ scrolling=”no” height=”240″ frameborder=”0″ style=”border:none;” border=”0″ src=”http://mer54715.datafeedfile.com/widget/aff_widget_prdt_generate-2.0.php?aff_num=6746&aff_net=1&widget_num=4995&sid=” marginheight=”0″ marginwidth=”0″></iframe><iframe style=”width:120px;height:240px;” marginwidth=”0″ marginheight=”0″ scrolling=”no” frameborder=”0″ src=”http://ws-na.amazon-adsystem.com/widgets/q?ServiceVersion=20070822&Operation=GetAdHtml&ID=OneJS&OneJS=1&source=ss&ref=ss_til&ad_type=product_link&tracking_id=danhbaisadvph-20&marketplace=amazon&region=US&placement=B00HYAL88W&asins=B00HYAL88W&show_border=true&link_opens_in_new_window=true&MarketPlace=US”></iframe>[/iframe]

_DSF3068


May 14, 2014
See this post
The Awesome Fuij X-T1 Camera is Now In Stock

ANM-BEAR-00115With summer hovering just around the corner, my Alaska photo workshops are about to get underway. In addition to my five-day, four-night Mountain Cathedrals workshop, which runs July 9-13, and my Sunset Photo Safaris, which run selected evenings throughout the summer, I’ve just added one-day brown bear viewing photo workshops to the mix.

These exclusive workshops will run a small handful of days from July through September, and they offer you unparalleled opportunity to photograph coastal Alaska brown bears in their natural environment. I’ll be on hand to give you one-on-one instruction and photography/camera advice. Since they’re limited to only four participants, you can count on extremely personal interaction with me and you won’t have to fight with lots of other people to get the best vantage points.

Bear-sidebar-photoThese special photo tours begin with a scenic bush flight that offers amazing views of three active volcanos on the rim of the Cook Inlet, as well as numerous salmon streams, glaciers and other unique Alaska sights. Then we’ll land on a beach in Lake Clark National Park, where we’ll meet up with a local naturalist and bear guide.

After a short briefing and being outfitted with boots, our guide will take us through the park by foot and ATV so that we can photograph these magnificent animals from a very close, but safe distance as they roam the beach, dig for clams and play in the stream. If the salmon happen to be running, there’s a good chance you’ll get to watch them catch fish, which is quite a sight!

Even the views are amazing. On one side you have the volcanic range of the Aleutian Range and on the other, across the inlet, you can see the distant Chugach Mountains. It’s not uncommon to see bald eagles as well. You really can’t have a more picturesque location!BearBanner2I’ve been down to this area, so believe me when I tell you that you will be amazed at how close you get to these bears. There’s no lottery. No huge crowds and no viewing platform, you’re just right down there on the beach with the animals. I’ve had them walk right by me within about 20 or 30 feet, but it’s safe because you’re in a small group, and besides, there’s more than enough for them to do then worry about bothering a bunch of photographers.

All of these images were made with nothing longer than a 70-200mm lens, so it’s not like you need enormous glass to get great photos. Plus, I’ll be right there with you to to answer questions, offer photography advice and help you get the best pictures from this once-in-a-lifetime experience.

Trip cost: $1,185 per person (limit 4 per trip). Includes orientation, photographer and natural guides, round trip bush flight from Anchorage, transportation to and from the air taxi office from downtown, and a hearty lunch in one of the nicest, most remote backcoutnry lodges in Alaska.

Click here to visit Through The Lens Alaska, LLC and reserve your spot on one of my special Alaska Brown Bear Photo Workshops for 2014. (Right now, I have three open spots left for my first trip on July 1, 2014.)

Brown Bear

May 12, 2014
See this post
My One Day Alaska Brown Bear Photo Workshops


LovingLandscapesCover-363x448

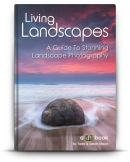
A while back, Digital Photography School released their excellent eBook, Living Landscapes- A Guide to Stunning Landscape Photography, which was written by Todd Sisson. (I follow Todd’s work online and he shoots beautiful imagery!)

This month, dPS just released  companion volume to this book: Loving Landscapes – A guide to Landscape Photography Workflow and Post-Processing, which was written by Todd and his wife Sarah.

With over 200 pages, this book is filled with information on how to transform your RAW files into stunning, finished images.

Inside, you’ll learn how to master Adobe Lightroom and how to use it to the fullest in your landscape post-processing, how to bring Photoshop into the mix, how to set up your computer for maximum performance, how to expose, blend, control noise, apply lens correction, sharpening, filters, layer masks and a host of other techniques. You’ll even get 10 free Lightroom presets.

Overall, this book gives you the tools and methods to get your workflow under control so that you can get the most of your software and your on-location creativity. In a world where shooting the photos is sometimes only half the battle, you need to have good computer skills in order to bring those captures to their full potential. Todd and Sarah do a really great job in helping you understand not only the basic concepts, but they also teach you some advanced skills that will make your photos really shine.

I’ve always liked the Digital Photography School eBooks, I think that Darren Rowse has put together a good team of writers and designers, and each one is packed with clear information richly illustrated pages. These books are especially good for beginning to novice landscape photographers, and you’re sure to learn a number of useful techniques and tips for how to create more stunning work.

He also backs up every single book with a 100% money back guarantee. If after 60 days, you didn’t think the book was very helpful, or it didn’t meet your expectations, he’ll refund your money.

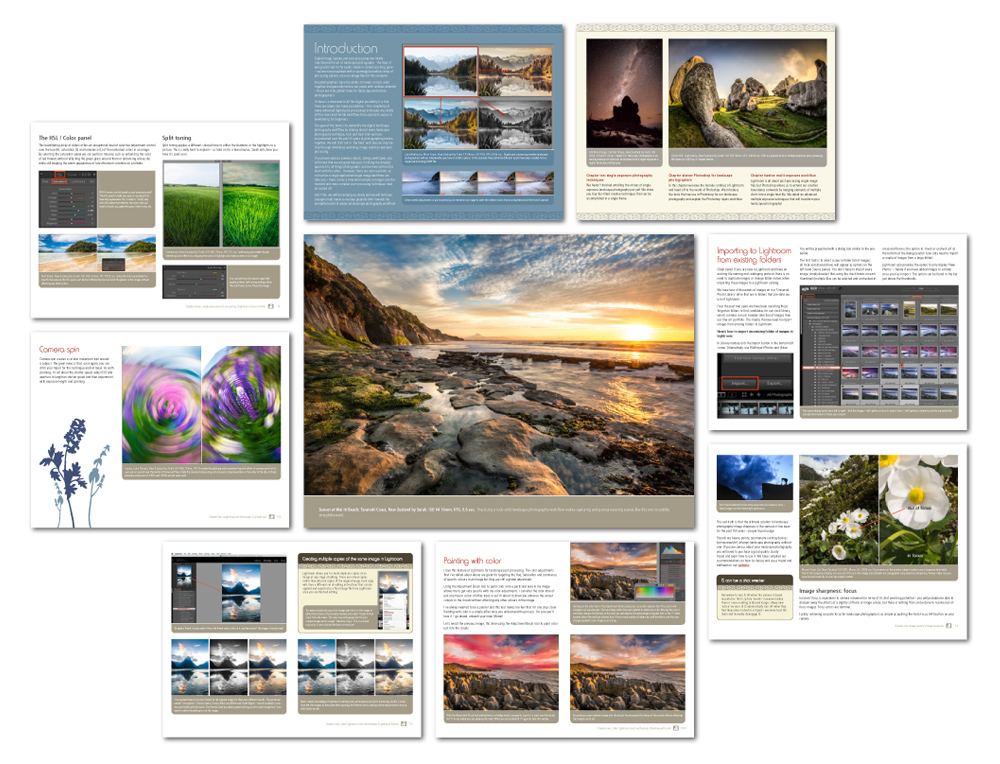
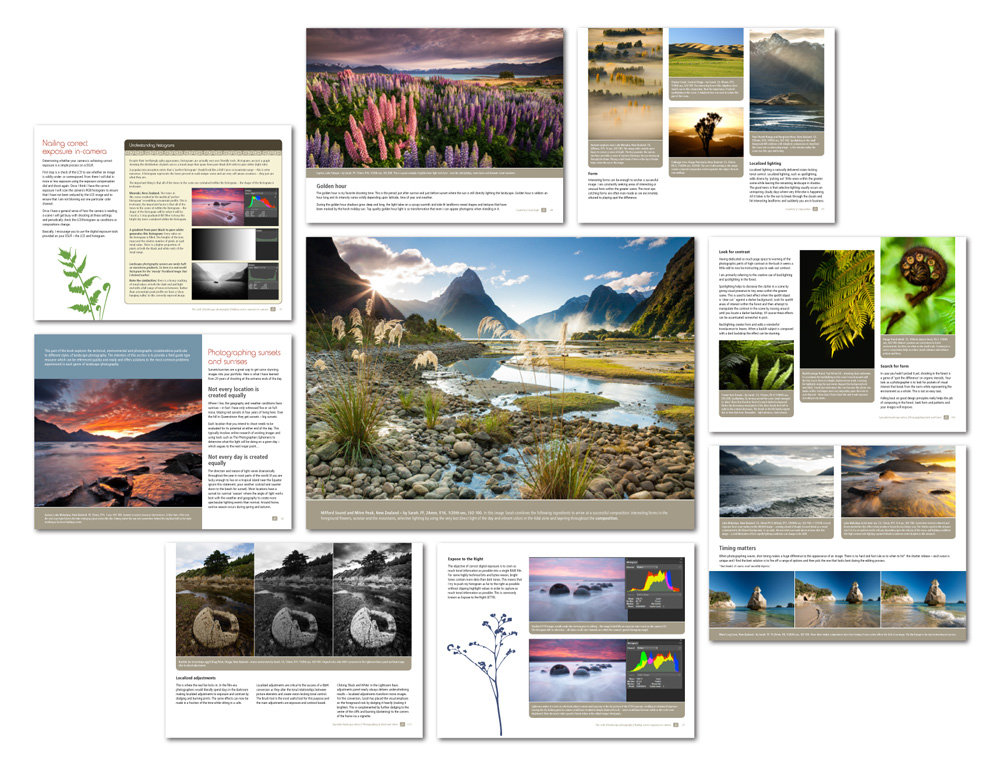
Below are screen samples from the two books, the first one is from Loving Landscapes and it shows you the types of post processing he covers. The page grabs below that are from Living Landscapes. As you can see, both ones present a wide variety of info and subject matter.

Anyway, check them out. With summer approaching, landscape photography season is just getting underway. Wouldn’t it be nice to go into it armed with some new techniques and creative methods to try out? You can read both of these books on any computer or mobile device, including iPads and other tablets.

May 7, 2014
See this post
New Landscapes Workflow and Post Processing eBook