More and more photographers these days are converting to WordPress based websites, and for good reason. They’re relatively easy to build, they’re economical, especially when compared to commissioning a full website from scratch, and they integrate perfectly with blogging and social media.
With an increasing number of great looking photography website templates and useful plugins that are available, it’s easy to create and customize a strong looking website that shows off your work in a effective and individual way.
Here are a few of the top WordPress themes for photographers. If you feel that your website needs an overhaul, this may be a great way to go.
1. Photocrati
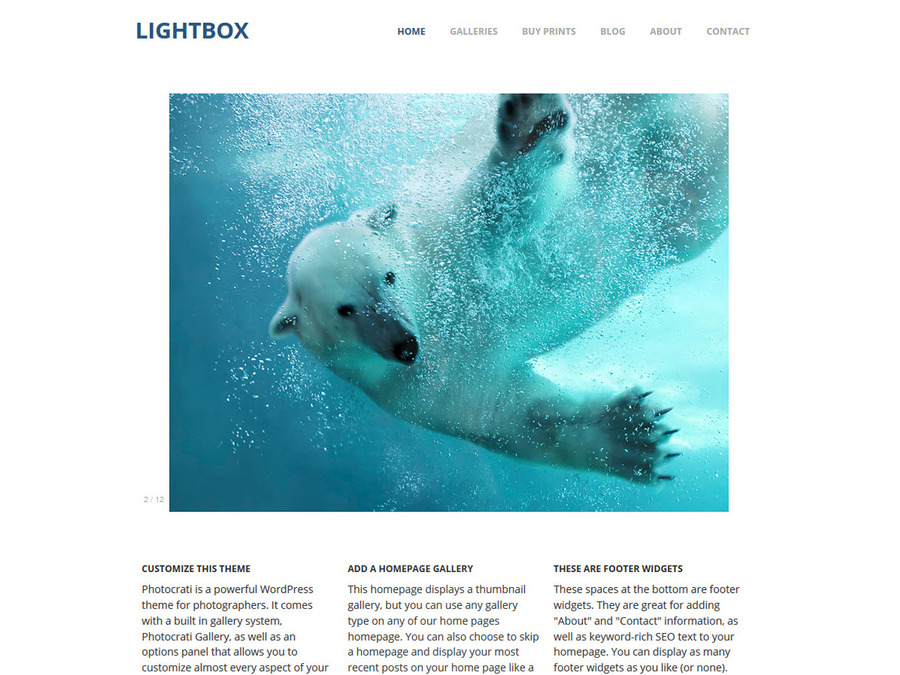
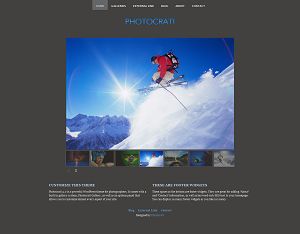
This is what I use on my main website. The Photocrati Theme is actually one “Super Theme” that offers 15 different preset theme styles and four gallery styles. This effectively gives you 60 different possible themes to choose from. In addition, each theme and style is fully customizable, so you can change colors, typefaces, gallery settings, add sidebars, widgets and modify just about every single aspect of the theme.
Photocrati also offers strong full compatibility with iOS devices, strong SEO options and built-in ecommerce options for your galleries so that you can start selling work right from your own site. They also feature extensive online support, which I can attest, is very good.
A socially conscious company that’s dedicated to supporting photographers, Photocrati offers annual grants for humanitarian and environmental photographers who are working on specific projects. Some of the biggest names in the outdoor and nature photography industry work with Photocrati, including Steve McCurry, Art Wolfe and Jim Brandenburg.
2. Graph Paper Press
Graph Paper Press makes themes that are specifically geared toward photographers, artists and other creatives. They offer 33 different themes, all of which are totally customizable, as well as 14 plugins, including a testimonial widget, so that you can make a website that’s both functional and visually appealing. Also, if your WordPress skills are a little rusty, they offer 40 video tutorials that help guide you through the process of building your site.
The Graph Paper Press themes vary widely in look and style, and some of them even integrate with PhotoShelter. Rather than sell single themes, you get a subscription that gives you access to all of the Graph Paper Press themes and full online support. They also offer a limited number of free themes.
3. Elegant Themes
Elegant Themes has a number of bold photography and portfolio themes, including Gleam, ePhoto, Modest, Evolution and Envisioned. It’s also one of the more affordable options; for an all-includive price of $36, you get access to all 77 themes and updates. With options like full screen galleries, custom background images in posts, multiple page templates, and a custom ePanel that integrates with the WordPress Dashboard and allows you to control and customize your theme’s layout, colors and settings, you can create a great looking photography website without spending a lot of money.
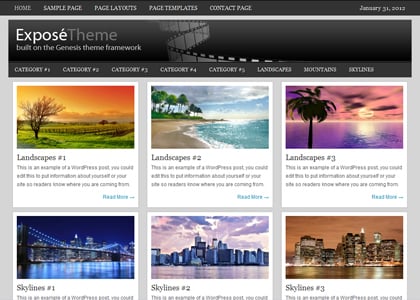
4. Expose Theme by Studio Press
Expose by Studio Press offers a simple way to show off your portfolio and your best images. This theme gives you a custom background and header image options, 6 different layouts, featured images in posts, threaded comments. Studio Press themes are all very clean and well designed and allow for building powerful and effective websites.
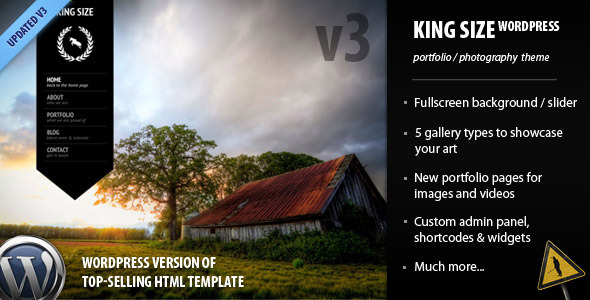
5. King Size by ThemeForest
King Size is one of many photography specific themes by ThemeForest. It offers a dramatic fullscreen background slider image option, five gallery types and a number of portfolio page options, including video support, custom admin panel and right-click disable. As far as themes go, King Size is an impressive and original style theme that dramatically shows off your work. Again, though, it’s only one of many. Also check out Atlas.
Today I review perhaps my all time favorite lens. In fact, if I had to narrow down my camera gear and choose but one single lens to use for the rest of my life, it would be my Nikon AF 24mm f/2.8D. (Canon also has a 24mm f/2.8 lens.)
I’ve had my 24mm for well over fifteen years. It was the first lens that I bought when I lost the day job that sent me on my path as a professional photographer, and I’ve taken it on every single adventure, trip, vacation, expedition, afternoon outing, day trip, assignment and stock shoot since the very first day I’ve owned it.
Size and Weight
The main thing I love about this lens is that it’s small and light. At 9.5 oz and about 2/3 the size of your fist, it fits perfectly in my light and fast style of photography. I generally prefer shooting with prime lenses instead of zoom lenses for this reason, my 80-200mm f/2.8 being the exception. Fixed wide angle lenses are much more compact than wide angle zooms, and they’re sharper and faster.
Size and weight matter when you’re out slaying peaks with friends who hike REALLY fast, when you’re out for an entire day on the bike, or when you’re traveling around Europe or Asia with minimal gear. Sure, the Nikon 24-70mm f/2.8 is a great pro quality lens that offers a wide choice of compositional options, but which lens would you rather run or hike ten miles with?
The Nikon AF 24mm f/2.8D is indeed sharp; sharp enough for any kind of work that you’ll ever do. It creates imagery that is crisp from front to back and edge to edge, unless you’re trying go shallow.
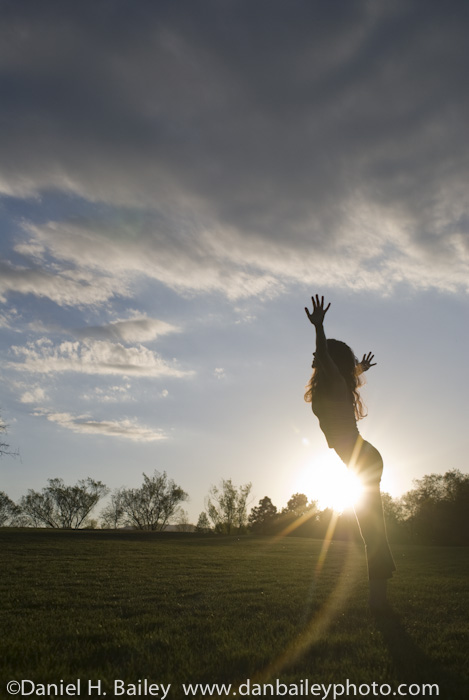
When shooting with limited depth of field, it gives razor sharp subjects that stand boldly in front of dreamy soft backgrounds. It allows you to accentuate your foreground subject matter with prominence create depth that carries the viewer’s eye all the way through your frame and then back again.
Usability
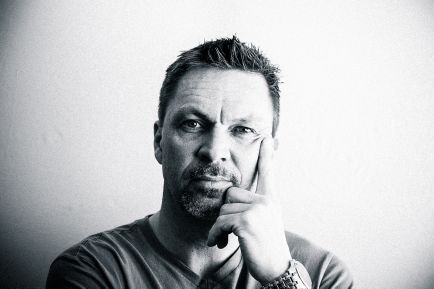
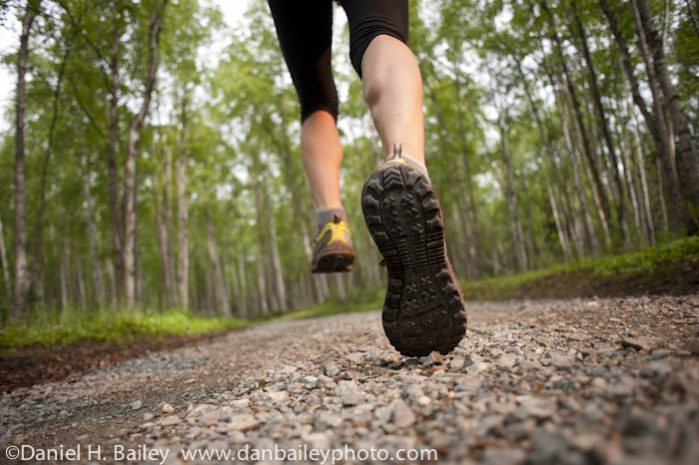
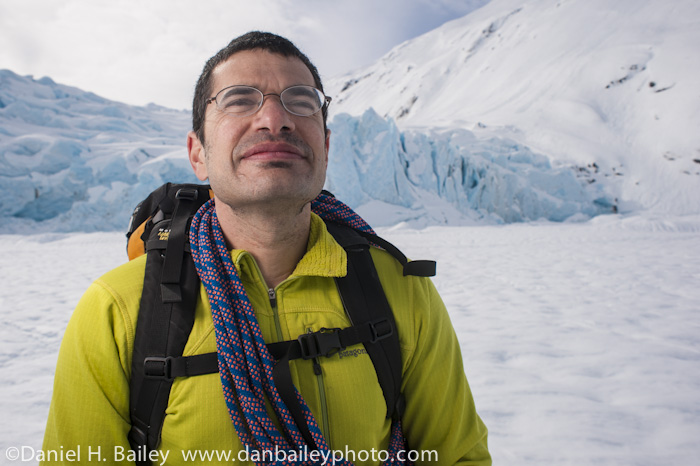
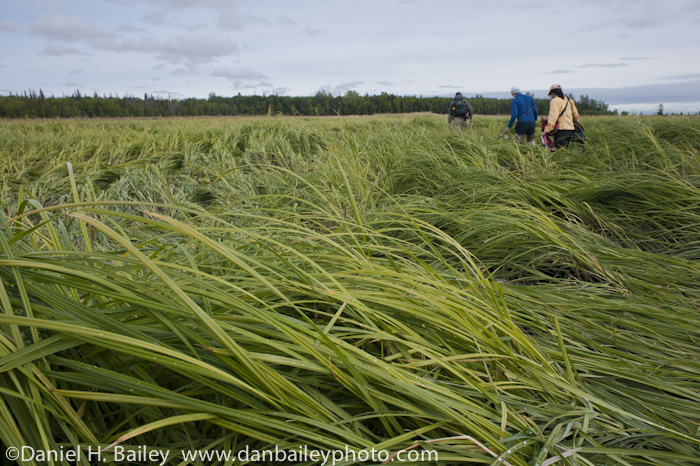
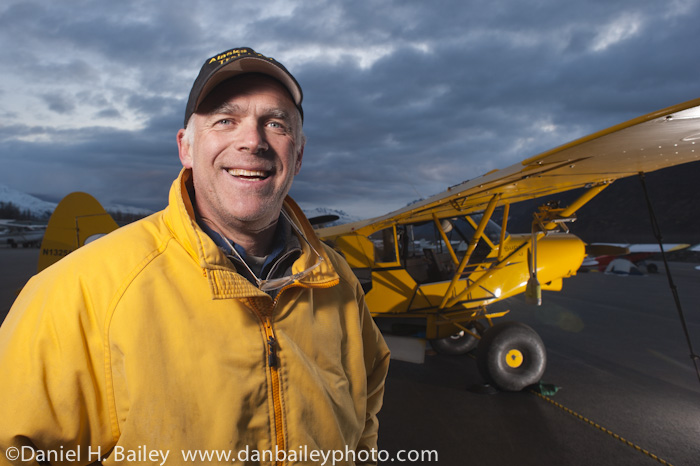
Distortion is very limited with this lens. It’s wide enough so that you can get in very close, but it won’t bend or warp the subjects too much. In fact, it’s this cleanliness that makes it such a great environmental portrait lens (see below). You can move in and really accentuate your subject within the frame, but still show enough location to help create a story around your subject instead of just shooting a photo of your subject. You get wide without effect. Portraits shot with the 24mm are genuine, because they don’t call attention to themselves with unnecessary style. However, if that’s what you’re going for, just move in even closer and you’ll get it.
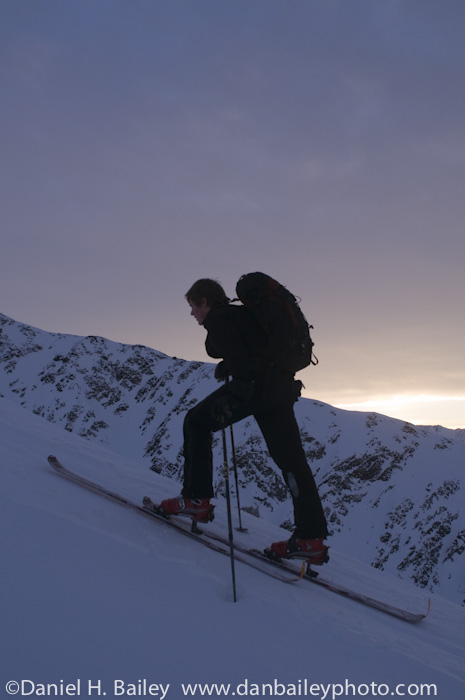
The same applies for shooting adventure, action and sports, which has always been my favorite style of photography. I’ve used my 24mm for shooting climbing, kayaking, hiking, skiing, mountaineering, biking. You name it; if I’ve shot it, I’ve shot it with this lens, and with great results. I couldn’t even begin to count the number of published photos that I’ve shot with my 24mm. It lets you get right in the middle of the action, and since it’s so compact, you won’t obtrude upon your subject matter when you do.
It’s also very fast. A maximum aperture of f/2.8, gives you lots of options for freezing action, shooting inside, shooting at night, (think star trails and aurora borealis photos) and shooting in dim ambient lighting conditions. Focus is also quick, mainly because the rotating distance on the lens barrel between close focus and infinity is only about a quarter turn.
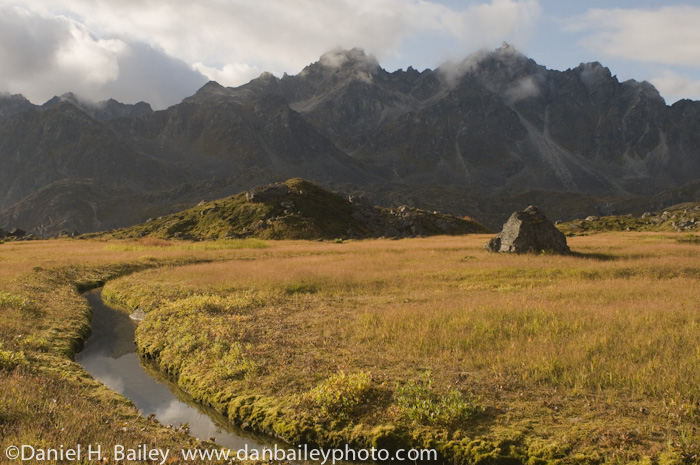
Of course, I also love this lens for shooting landscapes. It’s got a wonderful angle of view, and as I said above, it’s wide enough that you can accentuate some aspect of the foreground and still get edge to edge sharpness if you need. Stop down with a tripod and you’ll get all the sharpness you could ever want.
That said, since I tend to move quickly, I often end up hand holding this lens with no tripod, and I still get great results. If I can brace my arms and/or hands a little bit, I can go down to around half a second an still get sharp photos. If I’m not bracing, and my subject is not moving, I’m comfortable down to around 1/10 sec.
Value
Also, when compared to other lenses like that 24-70mm that I mentioned above, the Nikon 24-70mm f/2.8D costs WAY less. At around $359, it damn near falls into the budget category. You simply can’t get very many versatile pro quality lenses for under four bills. For what you get, this one is a steal. I’ve paid for it countless times over with all the photos that I’ve sold from using this lens. I also cannot count the times when I’ve banged it around, knocked it against rocks, dropped it and abused it in other ways during a decade and a half of outdoor photography. (I always use the dedicated metal lens hood.) Put simply, it’s built to last.
One thing that I’ve noticed with this lens is that you get very slight vignetting when using it on full frame cameras like the D700 and D750. We’re talking very slight, and it’s nothing that you can’t fix with a minor adjustment in the Lens Correction slider in Lightroom. You could probably even make a preset for that or do batch vignetting adjustments if you wanted. On a DX body, you don’t have this issue. It effectively renders as a 32mm, which is still a great focal length for a variety of subject matter and styles. I’ve used it for years on my D300 body.
Overall, you simply cannot go wrong with a 24mm lens. It offers great value and gives, what I feel, is the best combination of wide angle creative options, size and price for a lens of this type. In my photography, I find this to be an absolutely essential piece of gear that I NEVER leave behind. Whether you shoot landscapes, portraits, locations, interiors, street scenes, action, sports, adventure or travel, this lens will give you great imagery, it won’t break the bank and it certainly won’t slow you down.
[iframe]<iframe width=”468″ scrolling=”no” height=”60″ frameborder=”0″ style=”border:none;” border=”0″ src=”http://mer54715.datafeedfile.com/widget/aff_widget_prdt_generate-2.0.php?aff_num=6746&aff_net=1&widget_num=1236″ marginheight=”0″ marginwidth=”0″><p>Your browser does not support iFrame.</p></iframe>[/iframe]
Support This Site: When shopping for gear, please consider clicking through these links. It doesn’t cost you anything extra and it helps compensate me for the time and effort that it takes to run this site and write these reviews. Thanks! -Dan
I like to go fast and light in the mountains. Unfortunately, the whole photography thing drags that down in a big way. Even a moderately small rig consisting of a DLSR and 2 Lenses still equals around five extra pounds of gear. Take along the “big lens” and we’re nearly filling up the pack.
However, the other day, I left the house on a Saturday morning with no Nikon- only the Fujifilm X10, which is something that NEVER happens! I figured I’d give myself a break from carrying any extra weight and see how the “little camera” did for shooting adventure type subject matter.
Turns out that it did just fine. The X10 is small, so I just kept it slung around my neck as we hiked the ridge on Knoya Peak in the Chugach Mountains outside Anchorage. Exposures (all EXR auto) were great, and focusing was only a problem on a few occasions. In the dim light of overcast, grain blocked up a little bit in the darker midtones, but nothing that a slight luminance adjustment in Lightroom won’t fix.
Also, to help me capture the best moments and limit any focus or memory card delays between individual shots, I just left the camera in medium speed burst mode (5 fps) and shot away. With its high speed continuous mode, (up to 10 fps in medium resolution, and 7 fps in full res) fairly fast autofocus and smart exposure meter, the X10 is actually a pretty good camera for shooting sports and action. During the deluge, I tucked the camera inside my jacket, and even though it’s not weather sealed, a little water here and there doesn’t seem to hurt it.
What I liked was that even though I didn’t have my “big camera,” I was still able to capture what I feel are some compelling outdoor shots. This doesn’t mean that I’m about to abandon my D700 for normal adventure photography, but for those times when I want to travel ultralight, it’s nice to know that my style of photographic creativity is covered with the Fuji X10, even on nasty weather days. It’s a capable little camera that packs a lot of quality and features for it’s size and price, and is many cases, the photos it produces are good enough to send to clients.
If I had not told you, would you have guessed that these shots were all made with the X10?
Want to read more? Check out my full review of the Fujifilm X10. Also, if you’re thinking about getting an X10, they’re $50 off right now until the end of June.
Photography is an expensive game, I’ll give you that, and it’s not getting any cheaper. Have you priced high end DSLRs lately? And while we’re on the subject, neither is anything else. Have you filled up your four wheel drive adventure wagon lately?
Whether you’re an weekend enthusiast or a full time working pro, you don’t want to go overboard on your photography budget. Yes, money makes the world go ’round, and yes, good camera gear costs a pretty penny, but in the end, being resourceful will get you farther in this game than simply throwing more cash at everything.
Aside from the usual money-saving tips, like riding your bike instead of driving, and conveniently showing at friends’ houses just when they’re about to sit down for dinner, here are some rock solid ways that you can save money as a photographer. Every little bit that you save is another gallon of gas, another meal on the road, a few bucks closer to a plane ticket or a special item that you’ve got your eye on, all of which will directly lead to more, and hopefully, better imagery.
1. Buy Used Gear
Even though digital cameras don’t have the shelf life that they used to, there’s still a great market for used camera gear. I’ve bought a number of used lenses and secondhand speedlights during the course of my photography career, and they’ve all performed fine. There’s an awful lot of gear sitting on used shelves and on eBay and Craigslist that was dumped when the recession hit, and many of these items are in near mint condition, ready to be snatched up by a photographer who will give them new life. Also, check out the used department at B&H Photo. You never know what gem you’ll find hidden there.
2. Rent Gear
The camera gear rental business has boomed during the past couple of years. You can pretty much get anything you want- camera bodies, lenses, flashes, lighting gear, video equipment, MacBook Pros, iPads, GoPro video cameras, and even compact cameras like the Fuji X10 and the Canon G12. Prices are very reasonable, and shipping to and from your house is a snap. I recently rented a $6,000 lens for a week long photo assignment and paid around $400 for lens, two way shipping and insurance. If you don’t absolutely need an item long term, then consider renting it instead of buying it. Try Borrowlenses.com or Lensrentals.com.
3. Trade For Stuff
Even though you don’t want to get into the habit of trading with clients instead of being paid for your imagery, trading for services can actually be a very resourceful way to save money. Your photography has worth and value, and if you can barter it for stuff that you were going to buy anyway, you can actually make out quite well for yourself. Think beer, food, bike parts, guiding services, gear, clothing, graphic design, marketing, etc… Be careful with this one, and be smart. I generally like to limit my trading towards other small businesses and self employed people. Not corporations.
4. Visit the Library
You know, that place where they have all the free books that you can take home for a week or two? Next time you’re about to head to Barnes and Noble, stop by the library and see what they have. Sure, it’s definitely nice to own some key photography reference books for permanent instruction and inspiration on your shelf, but don’t forget about the library.
5. Don’t Upgrade Unless You Absolutely Need To
I keep writing about how photography is not about the the gear. Well, ok, it sort of is, but, nothing will send you to the poorhouse faster than upgrading when every new pice of gear comes out. Good photography gear can last for years, and unless there’s a specific reason why you need or want a particular item, and you can justify it’s purchase with increased quality, shooting options, pro work or some other important result, don’t just think you have to get every new item. The reality is that you don’t. Make due with what you have an invest wisely when practical or necessary.
If you were anywhere within earshot when I got my new 29″ mountain bike this spring, you heard me pining for dirt. For weeks, I dreamed of riding dry, hard packed trails, which, unfortunately, were still covered in two feet of snow. Now that summer is (almost) here, we celebrated the pre-solstice weekend by biking the Denali Park Road on Saturday night.
In my book, the Park road has it all for an avid cyclist. Winding through forests, over high alpine tundra and alongside steep mountainsides for nearly 90 miles, the entire route parallels the north side of the Alaska range. During the entire ride, you’re treated to amazing views of tundra, wildlife, glaciers, mile wide river bars and rugged peaks, including 20,320′ Mt. McKinley. You have more than enough hills and high passes to satisfy your desire for “rigorous exercise”, and, of course, enough daylight so that you can keep riding, even at night.
Leaving the house at 5:30 AM on Saturday morning, we drove 4 hours to the Park, caught the 11:00 AM camper bus to Wonder Lake and started riding at 5:30 PM. It took 12 hours to ride the 85 miles all the way back to the park entrance. The advantage of riding through the night, is that you have the park all to yourself. With no shuttle bus traffic, you’re treated to hours of quiet, dreamy dust free solitude.
With 24-hour daylight, we never needed headlamps. Even in the brief hours after midnight sunset, ambient light matched that of an overcast day. Riding all night long in Alaska is certainly a surreal experience, and one that I’d highly recommend, although if you wish to bike camp in the park, you’re certainly welcome to do so. The backcountry office will work with you and help you plan your trip.
Riding with bear spray and Honey Stinger waffle bars
From Wonder Lake, the road rolls and gradually rises next to the enormous McKinley River bar and the snout of the Muldrow Glacier. Eventually you turn a corner and hit Eilsen visitor’s center (closed at night), where you begin climbing your first of a handful of passes, which make up much of the route.
We’d seen a number of animals from the bus, including bears. During our bike ride, we saw caribou grazing on a tundra hillside, moose munching the taiga, ptarmigans frolicking on the empty road, dall sheep, a porcupine and lots of birds and ground squirrels, all of who glanced with little interest at us as we rode by.
Weather varied through the hours. We went from sunshine to light rain to wind and overcast, but fortunately, no downpour. Wind on the long downhills quickly dissipated heat that we built up on the climbs and gave us chilly feet. Constant movement kept the bugs away, which are now starting to make their summer appearance in the park.
Highlight of the ride was being treated to a brilliant midnight sunset at Polychrome Pass. The light appeared pretty muted as we pedaled up the hill, but as soon as we topped out, the low sun came streaming through the virga to the west lit up the hillsides and kettle ponds with bands of fiery orange. It lasted for about a half hour, before giving way to subtle pink alpenglow on the tops of the distant peaks as we crossed the East Fork of the Tokat River. A couple hours later, alpenglow appeared again in the opposite direction with early morning sunrise.
We arrived back at the car at 5:30 AM, just when the first shuttle bus departed the visitor’s center, tired, hungry and well satisfied from a 12-hour mountain biking binge that gave us enough dirt riding to last an entire weekend.
Oh yea, the photogray stuff. I went pretty light on gear, which I carried in my Lowepro Flipside AW camera pack. It held a Nikon D700, 24mm and 85mm lenses, a few Clif bars and power snacks. A 50 oz. Camelbak Antidote Reservoir, fits perfectly in the hydration pocket, and I tucked a spare jacket/shirt in the tripod flap. I also carried a Gorillapod, but didn’t end up using it, since I mostly just shot on the fly and didn’t every stop to set up any shots.
I often rode with the D700 slung over one shoulder, but the Flipside allows for such quick access to gear that I was able to pedal ahead, swing the bag around, change lenses, shoot a few frames of Amy riding by, and then sling it back to riding position without losing any ground. Like I said in my review, the Flipside Sport AW is the best biking camera pack I’ve ever used.
I also took along my Fuji X10, which I kept at close reach inside my front bike bag. I used it quite a bit during the sunset, partially because it offered additional focal lengths over my two Nikon primes, and because I wanted to see how well it did shooting evening landscapes in RAW mode. (See photo below) Overall, it performed exceptionally well, giving great color and sharpness, and while the images are not quite as sharp and noise free as those made with the D700, they’re still very good. Certainly good enough for web, prints or even publication if need be.
If you’re a biker, I’d put this route near the top of your list. Whether you do it in a single push or camp a night or two along the route, it’s a adventure that you’re not likely to forget. Visit the Denali National Park Service Cycling page for more info.
Also, check out Revelate Designs for awesome rackless bike bags that are made my good friend Eric. That’s what we used to carry our gear; they’re perfect for a ride like this, well made and highly recommended.
Resting at 1:00 AM after the long climb up Sable Pass
When shopping for gear, it’s nice to find that one specialized piece of equipment that works perfectly for your all your needs. Unfortunately, since your needs can vary, one item rarely does it all perfectly.
Take tripods. The lightest tripod isn’t always the sturdiest, and the sturdiest is rarely the least expensive. In the end, you either find one that offers good compromise between these qualities, or you buy two tripods for your outdoor photography- one for backpacking and one for general use.
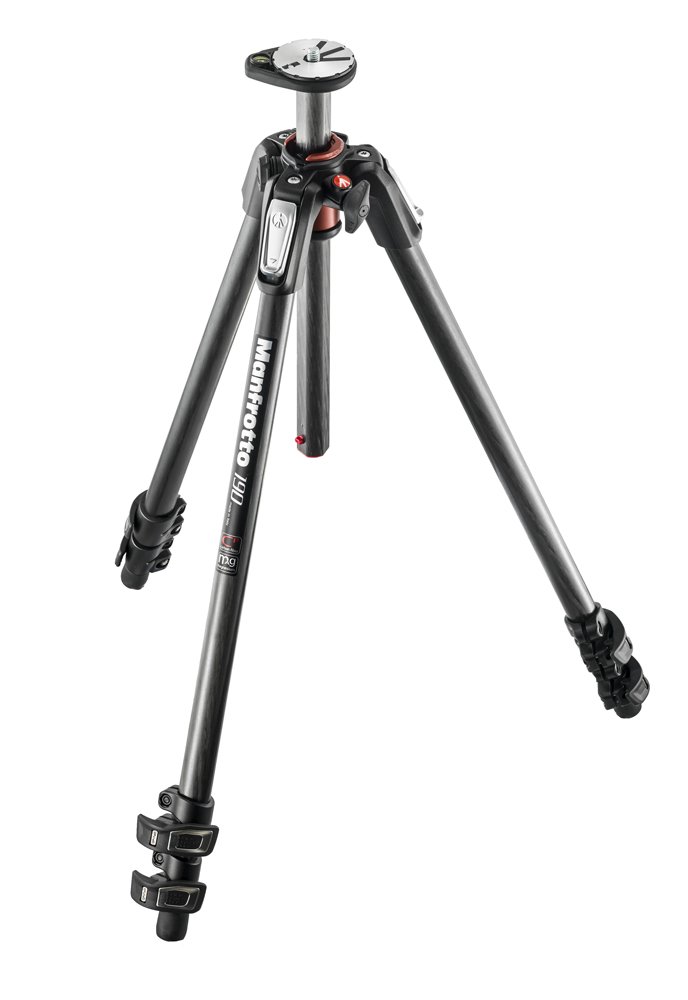
If you’re looking for a single lightweight tripod that offers good stability and value, I’d check out the Manfrotto 190CXPro3. It’s a simple 3 section carbon fiber tripod that weighs less than 3 lbs and costs less around $250-279, depending on where you buy it.
The Manfrotto 190CXPro3 is by no means the smallest or lightest tripod on the market, but it will fit on the outside of most backpacks without weighing you down too much, and it’s sturdier than some of the really lightweight tripods out there. It’s considerably more stable than the Manfrotto 7322 CY, which has pretty skinny legs, and it costs less than half the price of comparable Gitzo models, like the GT0531 Mountaineer or the GT 1541 Traveler.
It’s also solid enough for general use on location or inside the studio. It extends to 53″, holds up to 15 lbs and collapses to 24″. Round carbon fiber leg tubes offer excellent rigidity, vibration damping and a high strength to weight ratio. It’s has a low-angle adaptor on the center column for shooting really close to the ground.
Overall, for outdoor shooters on a budget, I’d give the Manfrotto 190CXPro3 my pick as the best all around tripod for the money. I feel that it offers superb value, great build quality and solid features. Like I said, it’s relatively light, relatively small and relatively inexpensive for a set of carbon fiber legs, yet it will hold your gear stable, even in the wind.
If I didn’t already have a house full of legs and heads and was looking to buy just one tripod for a wide mix of outdoor, landscapes and occasional backcountry use, I’d put my money towards the Manfrotto 190CXPro3.
They also have a non-carbon, aluminum version of this tripod, the Manfrotto 190XB, which costs $100 less, and is slightly heavier.
For head, I recommend the Giottos MN1001-652 QR ball head. It offers excellent stability, fine tune adjustments, a bubble level, rock solid construction and an Arca compatible quick release plate.
“
@Danbaileyphoto @manfrotto_us more than likely I'm placing an order tonight. Thanks for the great review Dan.
If two photographers get together, how long does it take them to start complaining about the stock photo industry?
Yea, I know. Trick question. Happened again the other day, in fact, and it didn’t take long at all. Four, maybe five minutes. We have a mutual agency representation, so we started there. Then we quickly moved to bashing Getty. I don’t need to repeat the conversation, you know just how it goes.
We’ve all taken huge hits. This morning, I received my monthly commission statement from an agency that used to bring me at least $1,000-2,000 every month. This month totaled $160. Last month was $90. The month before was $61. And that’s small potatoes compared to some of the really prolific shooters shooters who used to earn $10-50,000/month through their agencies. They’re down too. WAY down.
I’ve had this conversation over and over again with so many photographers during the past few years that it got me thinking. We all pine for the “good old days of stock,” but the reality is that those good old days didn’t last very long, pretty much the 80’s and early 90’s. That was nearly fifteen years ago, and I have to be honest with you, I remember complaining about it even back then when Royalty Free started to take hold.
Essentially, we’ve been complaining about how bad the stock industry is for longer than it was “good.” And, we don’t just complain about stock, it’s the entire photo industry that we seem to have a problem with.
To me, this is pretty sobering, but in some ways, it’s just simple economics. As a relatively young industry, a small number of people did really well for a brief period before everyone else wanted in, just like with any seemingly successful business model, whether it revolves around cars, coffee or photographs. (Think it’s any easier to sell coffee?) Now, with fierce competition, market oversaturation, a trend of massive acquisitions, and a virtual race to the bottom for sales, photographers are left with the short end of the stick. The very short end.
Like I said above, though, it’s not going to magically get better. We’re not going back, so it’s time to quit complaining and move on.
What does that mean for you, the photographer? Oh, I don’t know, how about whatever your own creativity and marketing ingenuity can come up with in this very exciting time of digital imaging, social media, retina displays and a enormous world of possible, clients, customers and opportunities.
Many photographers, me included, now make more from writing, blogging, teaching, publishing and other “social” outlets than they do with stock. Some have turned outward with their business models, while others have turned inward towards their own local community. Many do both. Some people team up with fellow photographers. Assignment work is still out there to be had, as are many other types of money making prospects that may or may not have existed ten years ago.
The possibilities and the opportunities for earning a living as a creative image maker are out there, but nobody is going to hand them to you. If you want to be a photographer, you’ll need to figure them out for yourself.
Big glass is, and always will be the staple tool for the very serious photographer. Whether you’re a professional shooter or an enthusiast with deep pockets, you will want or need a lens like this at some point in your photography career. Why? Because a fast, super telephoto will let you capture your subject matter like no other lens.
For an assignment to shoot wildlife in The Yukon last week, I rented the Nikon AF-S 300mm f/2.8G IF-ED VRII. At nearly six and a half pounds, this thing is a beast, but in truth, it’s one of the most amazing lenses ever to behold. It’s also one of the sharpest lenses you’ll ever get your hands on. Resolution and clarity are simply outstanding, and with it’s fast f/2.8 aperture and giant diameter front element, it lets in a ton of light. Add to the fact that it has Nikon’s latest incarnation of VRII vibration reduction, and this lens is capable of shooting in a wide variety of environments.
Nikon has been making the 300mm f/2.8 for just over four decades and it’s long been the go-to lens for wildlife and sports photographers. It’s got whisper quite AF-S internal focusing, four rubberized “focus operation buttons” on the far end of the lens barrel and a “memory recall” button, all of which are very ergonomically placed so that your hands naturally find them.
Five switches on the lens control M/AF focus, focusing distance range, VR mode (normal and active- for shooting from a moving vehicle), memory recall and beep/silent mode. Again, all well placed, although I found that I rarely had to even touch any of the switches. I just kept them all in default mode.
Glass quality on this lens is superb. Nikon uses the ED Extra Low Dispersion glass with an applied Nano Crystal Coating, which dramatically reduces flare and ghosting within the 11 lens elements. This translates into unbelievably sharp imagery from edge to edge.
I used this lens on my Nikon D700 body, and also on my D300 body. Advantage of using the 300 f/2.8 on a DX sensor camera is, of course, that you suddenly have a 450mm f/2.8. You simply cannot beat that kind of range and speed without approaching the $10K mark.
The built in tripod collar is perfectly placed and balanced. For my wildlife shoot, I used the lens on Bogen monopod, although when I got home, I took it around the neighborhood and shot handheld with it. Despite the weight, it’s actually pretty easy to hold, and with the VR II feature, you can get surprisingly sharp imagery with relatively low shutter speeds. Shooting at only 1/250 on a 300mm lens, I was able to capture sharp frames of subjects moving steadily away from me. However, these skateboarding shots below were shot in the shadow with the Nikon D700 at 1/1000 sec.
Focus tracking is also superb on this lens. The AF-S Silent Wave motor spins about as fast as you could want it to, and when combined with the D700’s AF system, the lens locked on and followed subjects with incredible accuracy.
Creatively, a lens like this offers options that you’d usually never be able to get. With its wide aperture and long focal length, you can isolate your subject matter and really bring it into the forefront of the frame, while placing it against a dreamy background of soft focus. One of my favorite features of using long lenses is that you zoom in your backgrounds; with the 300mm, this is even more pronounced.
Using these visual effects, the 300 f/2.8 would make an awesome portrait lens, although just be conscious of how the increasingly flattened perspective looks with your subject matter.
You can also bring in the details of your frame and show only an abbreviated section of your subject- another favorite technique of mine. With a close focus range of only 7.2 feet, the Nikon AF-S 300mm f/2.8G IF-ED VRII offers unparalleled options for capturing dramatic and compelling details.
In my twenty plus years of shooting, I can say with full confidence that the Nikon AF-S 300mm f/2.8G IF-ED VRII is the finest lens that I’ve ever used. It’s a true top shelf professional grade lens of uncompromising quality and the absolute highest caliber materials and construction. It comes with a reversible lens hood for storage, and a big padded nylon case for carrying and transport. However, when heading in the neighborhood, I found that it actually fit in my Lowepro Flipside Sport AW pack. Not while attached to the camera, but it will indeed fit inside many camera packs.
If I have anything bad to say about it, it’s that I don’t have it in my hands anymore. At $5,800, I’ve never actually bought this lens, since I mostly shoot subjects while going fast and light in the outdoors. I just rent as needed.
If you’ve a spare 6 grand to burn, and you want the best, by all means, get the Nikon AF-S 300mm f/2.8G IF-ED VRII. You will absolutely love this lens and just holding one will make you feel like the coolest photographer on the entire planet. If that matters.
However, since that’s an unrealistic prospect for many photographers, I’d highly recommend renting one for week or so and giving your outdoor, nature or action photography a creative supercharge. I got mine from Borrowlenses.com, and was impressed by the great customer of service from them, as well as the ease and convenience of shipping the thing back and forth.
It’s really an awesome deal when you consider that you can get your hands on something of this quality for about 1/20 of the actual cost of the lens per week. The fact that these rental companies take on the incredible investment of stocking so many high end items makes it really easy for the rest of us out in photo land. I plan to rent different lenses on a regular basis this summer, even when I don’t have assignments, just to shake things up.
I’ve had my Lowepro Flipside Sport AW for just over a month, and during that time I’ve taken it on a number of day trips, hiking, trail running and mountain biking in Colorado, Alaska and the Yukon. As promised, here is my full review and field test.
Main Feature- Accessibility
Lowepro has been making camera packs and bags that are geared towards outdoor and adventure photographers for years. Recently, though, their packs have seen a big improvement in technical design and they’ve added innovative features that allow for even faster access to your gear.
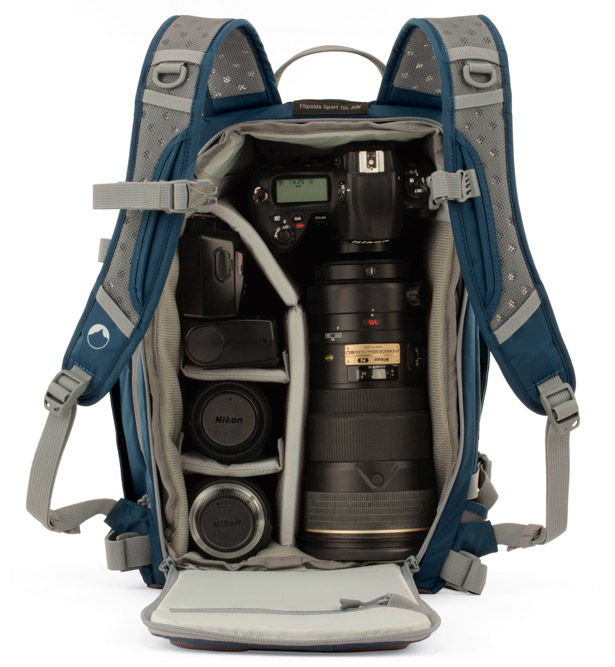
The main design feature of the Flipside Sport AW is that it allows you to get in and out of the pack without taking it off. You simply unbuckle the chest strap, unsling it from your shoulders and swing it around to the front of your body. The waistbelt holds the pack horizontal against your body and keeps the pack from flopping down.
From there, you unzip the entire back panel and *bam*, there’s your gear. All of it. Once you’re done shooting, you tuck your gear back in, zip it shut, sling it back onto your shoulders and you’re off and running. Or riding. Literally.
This is a very cool idea, and one that addresses what I feel is the most important feature from a good camera bag, which is accessibility. If you can’t get your camera into your hands as quickly as possible, you’re going to miss the shot. It’s a simple as that, especially when you’re shooting sports, action or other fast breaking subjects.
The pack’s design really does keep it sitting there against your body, and it allows you to easily see and grab what you need on the spot. There’s no having to set the pack down, unzip compartments, and reach inside to get at your gear, it’s all right there.
Size and Carrying Capacity
The Flipside Sport AW comes in two sizes, 15L and 10L. I got the smaller 10L version, mainly because I wanted something a little more streamlined for moving quickly. Also, at 5’7″ I’m a smaller framed guy. Essentially, they carry about the same amount of gear, but the 15L pack is sized to fit a ‘pro’ DLSR with an attached grip, like a Nikon D4 or a Canon 1D.
Flipide Sport 15L version
My Nikon D700 fits perfectly in the 10L version, along with a couple of extra lenses, flash and a couple of small accessories, such as a sync cord or extra batteries. I can even stuff my Lumiquest Softbox III under the zipper lid. Nice. The 15L version has enough froom to allow one more lens or flash.
Another nice thing about the Flipside Sport is that it’s sized to fit a bigger zoom lens, like an 80-200mm f/2.8 or 70-200mm f/2.8. This is a huge plus, because, with some smaller camera bags, you can’t keep the big lens attached to the camera when it’s inside the pack.
Even when carrying a big lens in the smaller 10L version, you still have enough room for two more lenses, or one more and a flash. Removable velcro dividers allow you to configure the pack as needed.
Other Features
Harness and Straps: The Flipside Sport AW has well desinged suspensions system with padded and ventilated shoulders straps and back panel, which work well for high energy/exhertion activities. Like I said, I’ve taken it running, hiking and biking, and can confirm that it’s a very comfortable pack to wear.
Hydration Pocket: Since it’s designed for high energy use, Lowepro stuck a 1L sized hydration ready pocket into the Flipside Sport AW. It’s not very big, but it fits the standard 50 oz Camelbak bladders size, as long as you don’t fill it all the way up. Even then, it’s still kind of a tight fit. Maybe it’s slightly bigger on the 15L version, but it works fine and provides you with enough water for a short to medium length outing.
However, often times I end up using this pocket as a regular side pocket for my jacket, energy bars or phone, especially if I already have a water bottle on the bike. There’s a small mesh pocket inside the compartment, so it’s obviously designed to carry other things besides just water.
Tripod Flap: On the other side of the pack, there’s a unique tripod flap that lets you strap on a small to medium sized tripod. Essentially, it’s a double flap of fabric and two straps. I have carried my Manfrotto 732 CY on there, and I’ve also used the flap to shove a an extra clothing layer. It’s not an enclosed pocket, but the straps will easily secure your jacket or long sleeve Capeline shirt. Between this and the hydration pocket, you have a variety of carrying options.
AW Rain Cover: As with all of Lowepro’s AW packs, the Flipside Sport AW comes with a rain cover that tucks away inside the base of the pack. I haven’t had to use this yet, but I’ve used the cover that’s built into my Mini Trekker AW and it has always worked fine. Last week in the Yukon, I rode for a couple of hours in a light rain and didn’t even need it, as the pack is water resistant enough for anything up to a steady drizzle.
Removable Camera Compartment: Another unique feature on this pack is that you can remove the entire camera compartment, which allows you to use the Flipside Sport as regular, single compartment day pack. I did use this feature once, and I have to say, it’s pretty cool. Hit the grocery store one evening and can confirm that the tripod flap is the perfect size to hold a baguette. Think post photo shoot picnic pack.
The Flipside Sport AW In Use
How much do I love the Flipside Sport AW? Enough that my beloved Photo Sport 200 has sat on the shelf every single day since this pack arrived. I won’t say that this is the perfect pack, (there are certainly times when my Photo Sport pack will get the call,) but for many shooting applications, the Flipside Sport really rocks.
It’s awesome for shooting trail running, hiking and cross country skiing, or anytime when you’re heading out for the day with the camera and don’t need lots of extra gear. Water in the hydration pocket and a jacket in the tripod flap and you’re good to go for hours. The pack is extremely comfortable and carries really well on your back.
If I’m not carrying a big lens, then I’ve even got more room for another lens, flash, a sandwich or my Fuji X10.
As a mountain biking photo pack, the Flipside Sport totally rules. It’s easily the best biking camera pack that I’ve ever used. Water on the bike, food in the hydration pocket, jacket in the tripod flap and an entire arsenal of camera gear in the main compartment and you’re ready for a long day on the singletrack. I recently used it with great results on my all night cycling tour of the Denali National Park Road.
Also, with such fast accessibility to your gear, you can set up for shots so quickly that you’ll hardly slow down the rest of the crew. The moments you save each time you stop to grab a few frames will definitely add up over the course of a longer ride. This lets you ride more and shoot more. Win win. Plus plus.
The pack has a small enough profile that you can zip through tight trees and not have to worry about banging it around or throwing your dexterity off as you race through technical terrain.
If the Flipside Sport has a downside, it’s that there is reduced carrying capacity for other stuff besides camera gear, especially if you load it full. If you were to use the hydration pocket for water and take along a tripod, you’d have to stuff your jacket and Clif Bars inside the main flap on top of your gear. Doable, but not ideal, which is why I like the Photo Sport 200 for longer days and more gear. Also, I’d like to see a small zipper compartment on the top of the pack, just a small one for flash cards, wallet or keys. I kept finding myself reaching for one that wasn’t there. Maybe they’ll include one on future versions.
However, to be fair, the Flipside Sport is not designed to compete with the Photo Sport. It’s designed as a light and fast photo pack for high energy activity that allows lightening quick access to your camera gear. In my mind, it does that with flying colors.
If you do adventure photography or any kind of high exertion shooting, or if you simply want a well designed, streamlined photo pack for hiking to your landscape photography destinations, then I can highly recommend this pack.
Want one? As a professional Lowepro user, I’m able to offer my readers special discounts on Lowepro gear. Click here to order either the Flipside Sport 15L AW or the Flipside Sport 10L AW pack and use code LP20 in your shopping cart to get 20% off.
Please note, the 20% discount code is good on any product purchased directly from the Lowepro site. Click the banner below to go to the Lowepro store.
After shooting an assignment in The Yukon this week, I managed to sneak in some play time before heading back to Alaska. Whitehorse biking fanatic Anthony DeLorenzo and fellow local Rory got me a bike to ride and showed me the local trails, which are suspiciously located right behind his house.
Racing around in the forest and dodging tight trees for a couple of hours gave me a chance, not only to shake out the leg muscles, but also to give my new Lowepro Flipside Sport AW a solid test. As promised, I’ll post my full review of this active camera pack next week and include more photos from this ride.
Make that three Whitehorse locals. Here’s a shot of Anthony’s mad Yukon trail dog Starbuck “my mother was a sled dog slut.” For the record, Starbuck beat me down every trail and hill except for the really long one at the end. He knows all the turns and shortcuts and is a burly runner.
As I discovered, Whitehorse has AWESOME mountain biking. If you ever go up there to ride, which you should do, consider checking out Boréale Mountain Biking, a small group of avid mountain bike guides who can show you any number of the 500 miles of quality trails that exist in the area. They do single and multi day trips and even have their own yurts. That’s a plus in my book.
Thanks for kicking my ass up the local hills, Anthony. I can’t wait to come back!


 They also have a non-carbon, aluminum version of this tripod, the