Yesterday was the official start of the 2012 Iditarod. Since I had the day off, I flew up to Willow to watch some of the mushers take off, and then watched from the air as the 66 dog sled teams worked their way across frozen swamps and onto the Yenta River as they make the 1,000 mile journey to Nome. After spending a couple of years shooting for Jeff Schultz as an official Iditarod Photographer, it was rather nice to leave all of my Nikon gear at just walk around with my pocket sized Fuji X10 camera.
If you’ve never actually followed the Iditarod, it’s actually pretty cool. Check out the official Iditarod website, especially the Current Race Page, which includes standings, great informative blog posts, photos and video.
Spend a few days checking back on the site, and you might actually find yourself with Iditarod Fever!!
Let's hear it for the guy who picks up the Idita-poop!
Modern digital camera technology is often hard to understand by “regular” people who are not scientists or photographers. For those laymen who aren’t completely self absorbed and obsessed by cameras 100% of the time, here’s a primer on what these terms actually mean.
Autofocus (AF)– The system on a DLSR camera that is guaranteed to fail when you absolutely need it the most. For example, when you’re shooting subjects like the Olympics, Bigfoot, UFOs and the Loch Ness monster.
Burst Mode – The feature on a DLSR that causes you to spend even more time at your computer editing images. Workflow is increased in direct proportion to how many frames per second your camera will fire. Note: If your camera does not have Burst Mode, then you cannot use it to shoot sports, including your kid’s soccer game.
Color Balance – The part of photography that gives you the most headaches when trying to output your images to an expensive printer.
Dynamic Range – The measure of how good your digital camera sensor is at recording the really bright and dark parts of your scene that no one will every be able to see anyway.
Exposure Bracketing – The feature on a DSLR that thankfully lets you forget everything that you ever learned about proper exposure, and that will ensure perfect pictures every time. When combined with Burst Mode (see above), you will automatically triple your workflow.
Face Detection – Special algorithms that have been secretly placed inside your camera by the Facebook software engineers so that pictures of people can automatically be tagged as soon as you take them.
Image Resolution– The measure by how sharp your pictures will be when you stand up close and view them from only an inch away, even though no one really looks at pictures from this distance. If you stand back, all pictures appear to have the same resolution.
ISO – With digital photography, “ISO” is now a completely irrelevant term that is only used on DSLR cameras to make us think that we’re still “serious photographers,” even though we don’t shoot film anymore.
Image Stabilization– Reviews will show that DSLR cameras may be difficult to hold steady for a long period of time by photographers who drink too much coffee and by amateurs who hold their cameras “wrong.” Image stabilization will help to minimize picture movement by digitally stabilizing the camera and picture for those times when you’re too lazy to use a tripod.
Live View – A feature that’s designed for younger photographers who were raised on small, viewfinder-less point and shoot cameras. Live View mode lets them feel like they’re really taking pictures without making them have to cram their face against the back of the camera like we all used to do.
MegaPixels – The all important benchmark in digital photography. The number of MegaPixels your camera has is what determines how expensive it is, and how fast you’ll fill up your hard drives.
Optical Zoom – Instead of making you actually have to get closer to your subject, the Digital SLR camera lens does the work for you by enlarging the field of view. Optical zoom is a better feature than Digital zoom because the word “Optical” implies light, whereas the word “Digital” just means numbers. We all know that “real” photography is not about numbers, it’s about light.
Scene Selection Modes – This is how you know if you have a “Pro DLSR” or a “Prosumer DSLR.” If your camera has person running mode, flower mode, mountain mode, crescent moon mode and person wearing a hat mode, then it’s a “Prosumer” model. If you don’t have any of these modes, you have a pro camera and should already know how to take photos of mountains and people wearing hats.
White Balance– This extremely useful feature on modern DSLR camera means that you don’t have to carry around a large bag of colored filters that only fit on the front of your “regular sized” 50mm lens anyway.
As photographers, it’s easy to get caught up in all the gear hoopla. After all, our entire craft essentially revolves around expensive mechanical wingdings and technology that refuses to stand still. It’s no surprise that we get so concerned with having the right and optimum equipment so that we may capture our subjects in the best possible way.
However, I’ll say this once again, even though you’ve heard it a thousand times:
It’s Not About the Gear.
The truth is that these days, just about every single piece of commercial photography equipment is good enough for most uses. Especially when you consider that over 90% of pictures end up being viewed on average sized computer screens, whether they’re on your Facebook Page, Google+, your blog or the emails that you send your friend and family.
Even when it comes to pro work, average gear is often good enough. I’ve sold plenty of photos that were shot with $150 zoom lenses. Professional bloggers, travel writers and modern journalists use point and shoots all the time. Heck, I even heard about a pro photographer who recently sold a photo to Coke™ that he shot with his iPhone 4S. They liked the shot and didn’t care what camera was used to make it.
What ultimately matters more than the gear itself is HOW YOU — USE IT. What makes the difference in whether you create compelling imagery or not is your artistic eye, your personal vision, your creative methods, your photographic method, your attitude towards photography, and how you approach your subject matter.
That’s not to say that the gear doesn’t matter at all, because it does. High end camera gear offers you more flexibility, more options, and yes, often times better quality imagery.
I’m not saying that you shouldn’t obsess about camera gear and get completely wrapped up in total photography nerdiness*, because it’s perfectly ok if you do. In fact, it’s downright fun. After all, we’re photographers; what else are we going to talk about when we get together?
So, if you love photography, then LOVE it no matter what camera and lens you use. Be PASSIONATE regardless of whether your camera costs$299, $799 or $2,799. SHOOT, LEARN and PROGRESS, and if eventually, in your educated, experienced mind you decide that you absolutely NEED that fancy new gizmo, then by all means, do your part for the economy, buy it and have whole lotta fun with your new toy.
*Special thanks to Tessa Treadway for the term “photography nerdiness.”
I’ve got a few tips that can help jump start your creativity today- three to be specific. These are very simple decisions that you can, and should apply to your image taking mentality and methodology. They’re designed to get you thinking actively about your photography, because creating powerful images should never be a passive activity.
1. Be Deliberate
Be bold. Know what you want to portray in your image, and then get right out there and show it, dammit! Don’t be timid about your photography or your compositions, come up with a creative idea, grab the moment with both hands and then slam it down onto the sensor with all your might. If it works, great. If it doesn’t, brush yourself off and try something different.
2. Think Relationships
The most compelling photos aren’t just about the subject alone, they tell a story of how the subject fits within its environment and how relates to the other elements around it. These relationships can revolve around similarities, contrasts, parallels, convergence, diverging ideas… whatever you want. It’s your picture. It’s your subject. It’s your story, so narrate your visual tale as you see fit.
3. Strive for Simplicity
Get rid of all that other crap in your photo and just give your viewer the bare essentials. Nothing kills a good photo like having too much stuff in the frame. Tell the story with as few words as possible and don’t try to include too many sub-plots and side stories in your photograph. Keep it simple… don’t worry, I won’t call you stupid. Just don’t clutter your pictures. The end.
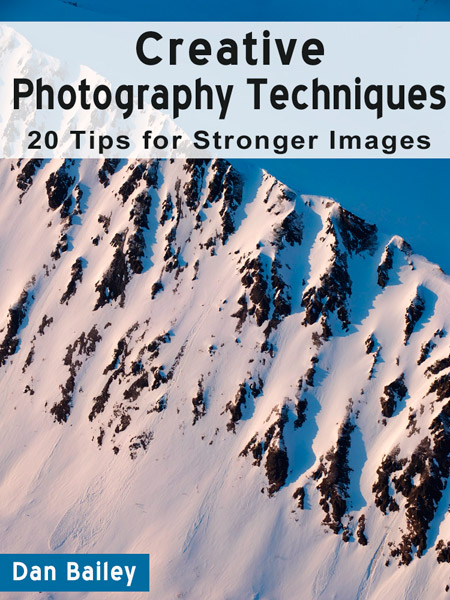
These 20 tips are all short, concise and easy to remember, and yet they clearly outline a few necessary elements that are needed to produce a great image. They’re meant to inspire and jump start your own creativity.
Right now, it’s only 99 cents, and you can read it on any device with the free Kindle app.
Most photographers were pretty darn excited when Apple first introduced the iPad two years ago. After all, images look utterly fantastic on it’s gorgeous, high resolution screen.
Also, the iPad is highly portable; it makes even a Mac Book Pro look bulky. Add to that, the growing number of awesome apps that keep coming out, (Adobe Photoshop Touch for iPad hit the iTunes store today), photographers are finding more ways to incorporate this cool, futuristic touch screen device into their daily workflow, besides just showing off their portfolios. Some photographers are even leaving their laptops at home and just taking along iPad on trips and photo assignments.
Here are just three main apps that I use on the iPad in my photography life, not counting all the eBook reading, Flipboard-ing and social media stuff that I do on it. There are, of course, many more; leave a comment and list the useful iPad apps that you use as a photographer.
1. Easy Release- For Obtaining Model Releases
I’ve been using Easy Release app on my iPhone ever since it came out. It’s the best model release app that I’ve found, and as good as it works on the iPhone, it’s even better on the iPad. The larger touch screen makes it so much easier for the model to read and sign the release. Plus, it just looks, well… more professional.
It works really well if you have an assistant on the photo shoot; you just give them the iPad and have them walk around and get releases while you do your camera thing. Again, very professional. Easy Release. Get it.
2. Photosmith- For Editing, Captioning and Keywording
I’ve had my eye on Photosmith app, the mobile companion for Adobe Lightroom for awhile now and I finally got a chance to download and try it out. I have to say, I’m pretty impressed.
Photosmith allows you use your iPad to caption, keyword, tag, rate and apply other metadata to new photos, assign them to collections, and then import the tagged images into Lightroom on your main computer. You can also share selected images right from the app to Facebook, Flickr, Dropbox or via email.
By using the Camera Connection Kit, you can upload photos directly from your camera or memory card to the iPad, do your edit and assign relevant metadata with Photosmith, and then sync to Lightroom. I’ve tried it with both RAW and JPEG images from the Nikon D700 the Fuji X10 and it works flawlessly with both cameras.
Obviously, there are limitations here. If you’re uploading multiple cards of RAW images, you may run out of room on your iPad. At this time, there’s no way to transfer images from the iPad to an external hard drive, so for extended trips and big photo shoots, this may not be practical.
However, you could always process images, upload the them to Dropbox and then delete them from the iPad. Then, when you get home from your trip or photo shoot, you can bring the shots back into Lightroom right from Dropbox. If you’re shooting JPEGs only, say on vacation, or at a family function, this may not even be an issue.
I see this as a great way to preview images with a client or with your model right after the shoot. You can sit down together at the coffee shop or on location, preview the shots and choose your selects on the iPad before uploading to Lightroom or to Dropbox. At any rate, Photosmith certainly allows for expanded freedom and flexibility for iPad toting photographers.
3. Blogsy- For Blogging on the iPad
As you know, I tend to blog. On the road, I blog from my laptop, or from my laptop. Last fall, when I went to the PDN PhotoPlus Expo, I want sans laptop and did all my blogging, professional correspondence and social media work right from the iPad. Worked out just fine.
Lately, I’ve been blogging with Blogsy app, and let me say this- Blogsy rocks. If you have an iPad and you blog, you should absolutely get this app.
Blogsy is an incredibly well designed app that lets you write, access and upload blog posts to your server right from the iPad. Sure, WordPress for iPad lets you do this too, but Blogsy is SO much better.
The visually appealing interface is incredibly easy to use, it’s much less buggy and it allows you to import content right from your iPad Photo Library, your Flickr, Picasa and You Tube accounts, as well as from the web. You can even assign tags, categories, create posts and pages – pretty much do everything you need to update your blog right from the iPad. Plus, you can send the HTML formatted content as an email message right from the iPad.
If you’re a blogging photographer, then definitely check out Blogsy.
Pick up the new Fujifilm X10 and you’ll feel like you have a real camera in your hands. Not a point and shoot. Not a digital camera. A camera. Maybe even a rangefinder, if you’re old enough to remember that term.
When I first saw the X10 last fall at the PDN PhotoPlus Expo, it was love at first sight. Eventually, I got one to try out, and by the time I was supposed to send it back, I’d already decided to buy it. After about two months of use, here’s my review and my thoughts on this fantastic little camera.
First, let me qualify my remarks. This is the first modern point and shoot camera that I’ve ever owned. The last one I had was my ice cream sandwich shaped Kodak 110 Instamatic. Ever since then, I just never justified getting a small camera. The cheap ones had too much shutter lag and low quality to be of much use, and really good ones cost more than my Nikon D700. Eventually, my iPhone became my point and shoot.
Don’t get me wrong, iPhoneography is so much fun, but in the end, it’s just not the same thing as using a real camera, much like strumming chords on the iPad is not the same as plucking strings on a real Stratocaster.
However, times have changed. Sensors are bigger. Shutter lag is gone. The age of high quality small cameras has arrived.
Continuous shooting up up to 10 fps. (7 fps at full resolution.)
Intelligent flash that can also trigger remote flashes and strobes
Full HD 1,920 x 1,080 video
Design and Feel
Like I said, the Fujifilm X10 looks and feels like a real camera, because it’s built like one. Made from die-cast magnesium and finished with a textured synthetic leather covering, the X10 carries a simple, yet rugged, classic design that makes it look much more like a Lieca than a Coolpix or a Powershot.
The top deck features a real, threaded cable release ready shutter button, (when was the last time you saw one of those?) and two metal dials, one for exposure mode, the other for exposure compensation; +/- 2EV in 1/3 stops. It also has a hot shoe that will accept one of Fuji’s dedicated flash units, the EF20, or the EF42, as well as built-in pop up flash.
The back of the X10 features a 2.8″, 460,000 pixel LCD screen with 100% coverage, two command dials, multiple button controls AND an optical zoom viewfinder with 85% coverage and diopter adjustment.
Obviously, the Fuji engineers worked closely with the design team, because in your hands, all the controls feel like there where they should be. Even turning the camera on is a satisfying event; you simply remove the metal lens cap and turn the zoom dial on the lens. As soon as you hear the smooth mechanical click, the camera comes to life.
Ease of Use
If you want to use the X10 as a fast, point and shoot style camera, it’s all there. You can turn the exposure dial to “Auto,” zoom the lens as designed and shoot away. Either use the LCD monitor or the optical viewfinder. If you’ve got a tricky lighting situation, such as snow or exceedingly dark subject matter, you can adjust the +/- EV dial with your thumb and quickly compensate accordingly.
If you need a flash, pop it up and blast away. It does TTL quite well, and will light up subjects as far away as 22 feet. When you’re ready to see your shots, hit the green “Play” button and scroll with the command dial. To delete shots, hit the “Trash” button, scroll and hit “OK” to confirm. Easy as pie with whipped cream and a cherry on top.
Going Deeper
When you start digging in a little deeper, you’ll find that the X10 is actually a very full featured camera that has an extremely wide array of creative and technical options built right in. The Fujifilm team packed so much in there, that I’ve had the camera for over two months and I still don’t know everything that it can do. It offers full manual control in just about every single of the entire picture taking process. Here are the main features.
Exposure modes: Program, Shutter, Aperture, Manual, two Custom modes, EXR, Auto, Adv (Advanced), SP (Scene Position) and Video, along with three metering patterns. (See what you can do with Manual mode and the spot meter.)
EXR mode is designed to optimize clarity, noise reduction and enhanced dynamic range. The camera automatically selects the exposure based on a preset series of shooting conditions, such as Landscape, Sunset, Snow, Sky, Portrat, Night, High Resolution, High ISO, etc… From what I’ve seen, the X10 does a pretty good job of selecting an appropriate scene and make the necessary exposure decisions. In EXR mode, you can also manually choose Resolution Priority, High ISO & Low Noise, or D-Range Priority, which increases detail in visible highlights.
Adv. Advanced Mode lets you choose between Motion Panorama 360, (lots of fun!!) Pro Focus, (short telephoto, soft background, bokeh effect for portraits or macro) and Pro Low Light (reduces noise.) In all three modes, the camera takes multiple exposures to combine or stitch together to create the final image.
I’ve used all of these modes, and they work great, especially the Panorama 360 mode, which lets you select the angle of your panorama (120, 180, 300 or 360 degrees) and the direction of your pan (left-right, right-left, up-down or down-up for vertical pans.)
SP Scene Position mode lets you choose between a wide variety of “auto” scenes, such as those commonly seen on enthusiast class DLSRs like Portrait, Landscape, Sunset, Beach, Sport, Night, Night (Tripod) and Fireworks. I haven’t really tried these modes in real shooting applications, but I imagine that they do a fine job.
ISO: 100-3200 at full resolution in 1/3 stops. In M image size (2816 x 2112) you can shoot at 4000, 5000 and 6400. In S (2048 x 1536) you can go all the way up to 12800.) The recommended setting is 400(AUTO) which limits the ISO to no higher than 400. This is adequate for general shooting. The camera also has 800(AUTO), 1600(AUTO) and 3200(AUTO).
I found that using ISO 100 is the only way to get the X10 down to a 30 second shutter speed. At ISO 200, the max slow shutter speed is 15 seconds, and at ISO 400, it’s 8 seconds. Max shutter speed on the X10 is 1/4000 sec.
Film Simulation lets you apply a classic FujiFilm look to your images. Choices are Provia (standard) Velvia (yes!!) Astia, (softer color tones), four Monochrome modes and Sepia. The effects are subtle; it’s not Instagram, and there’s no HDR mode like some newer cameras have, but it’s enough to have fun.
WB Shift allows you to adjust the white balance of your images by making incremental steps to the red/cyan or blue/yellow axis. I haven’t found a need to adjust the WB in any of my shooting. The X10 also has a standard WB selector, much like most DSLRs.
Focusing: The X10 has a 49-point AF matrix spread across nearly the entire frame, and three focus modes: Single AF, Continuous AF and Manual. Most of the time I leave it on Continuous AF for both moving and non moving subjects, although I do like the Single AF to manually select the focus zone just about anywhere in the frame (Area mode). Single AF also lets you do auto Multi center weighted focusing. Or you can use Tracking to follow subjects across the frame.
Manual focus works, but it’s not very practical. You have to spin the command dial on the back and it takes a very long time to get from close to distant focus. The X10 also features both AE and AF lock buttons, as well as an AF assist lamp for low light scenes. Overall focus is pretty fast and plenty smart, especially for a camera of this size.
Macro: Macro on the Fuji X10 is AWESOME! It’s one of the first things I loved about this camera. There are two Macro modes, and the Super Macro mode lets you focus down to 1cm. That’s WAY close. Closer than anything I can do on my Nikon lenses. I’ve already had tons of fun with this one!!
Combined with Single AF, the X10’s great macro capabilities allows for exceptionally creative close up photography.
RAW: To shoot RAW on the X10, you simply press the RAW button the back of the camera. This designates the the next picture you take will be in RAW, or RAW + JPEG, depending on what you select in the shooting menu. The X10’s 18.87 MB RAW files are now recognized in Adobe Lightroom, but quite honestly, it’s on-board JPEG processing is so good that you’re not going to notice very much of a difference.
The X10 does have an internal RAW converter as well, which lets you process a RAW capture and save a corresponding JPEG image right inside the camera. I’ve only tried this a couple of times and I have to say, I’m pretty impressed by what it can do. It’s not Photoshop, but if you are shooting RAW on the X10, it certainly saves time.
I haven’t shot RAW with the X10 very much, but what I’ve found is that the very small difference in image quality is often not worth the increased file size and additional processing and computer time. This from the guy who says you should always shoot in RAW!!
I suppose that there are situations when the additional processing might be needed, whether you do them on or off camera. However, in most cases, JPEGs from the X10 are good enough for just about anything you’re going to do with them.
Continuous Shooting: The EXR sensor on the X10 has an extremely high read and processing speed, which enables the camera to shoot at a maximum burst rate of 3, 5, 7 or 10 fps (up to 7 fps in full resolution). Remember the days of shutter lag? Gone, baby gone! That a compact camera can fire at these kinds of speeds is hands down impressive. Fast action sports with a point and shoot? You got it.
Flash: The normal mode flash on the X10 does TTL and it works fine. You also have the option of selecting Rear Sync flash as well. Depending on what exposure mode you’re using, you can force the flash to fire, or leave it up to the camera to decide when to fire the flash.
The X10 also has a Remote Flash option, which lets you use the pop-up flash on the X10 to trigger other lights. THIS IS A GREAT FEATURE! It really works too. I can put my Nikon SB-800s and 900 in SU-4 optical slave mode and trigger then remotely from the X10, and it even works with my Photoflex TritonFlash. Talk about Going Fast With Light, I could just take along the Fuji X10 and a single flash and have plenty of options.
Video: The X10 can shoot in either Full HD (1920 x 1080), HD (1280 x 720) and VGA (640 x 480) at 30 fps. It also has three high speed video modes, 640 x 480 at 30 fps, 320 x 240 at 120 fps, and a cropped screen of 320 x 112 at 200 fps. This allows for a wide variety of creative options.
Here’s an example of what it can do in Full HD.
Image Quality
Image quality in the Fujifilm X10 is outstanding. Fuji has implemented some amazing new technology into their EXR CMOS sensor and dual-CPU image processor that dramatically improve clarity, resolution, speed and low light performance. As I said above, the JPEGs that come straight out of this camera are simply fantastic, especially in bright, well-lit conditions. The 2/3″ sensor, (8.8mm wide by 6.6mm tall) produces high resolution photographs that are sharp, brilliant in color and contrast. When things get a little darker, or lower contrast, grain creeps up a little bit, but not too bad.
Keep in mind, though, that this is not the X100, and it’s certainly not the X-Pro 1, which costs nearly 3x as much, or a DSLR for that matter. Are there cameras out there that have better quality? Yes. That said, the shots that come out of the X10 are certainly suitable for prints, web publication and most sizes of professional print publication. In fact, they’re better than some cameras that have even larger sensors.
The Orb issue: When the X10 was first released, there seemed to be a problem with the way that the camera rendered specular highlights. Example images often showed large, obtrusive “orbs” of white light that definitely detracted from the quality of the imagery.
I have not had any issues with orbs in my exposures. Highlights have been rendered in an acceptable way, which might mean that early bugs were worked out with firmware updates from Fuji. You can see in the example below that the X10 seems to handle highlights with no problem, this overly bright spot is what you’d expect from direct sun reflecting on a shiny metal surface.
High ISO
Here are a few shots at higher ISO settings. Very acceptable, if not downright impressive results with not much grain for such high settings!
ISO 800 full frameISO 800 croppedISO 3200 croppedISO 6400 croppedISO 12,800 full frame
Overall Usability and Ergonomics
Shooting with the X10 is a real pleasure. The camera just feels right in your hands and all the buttons and dials are in the right place. I especially like the incredibly handy +/- EV dial, which I haven’t had on a camera since my old Nikkormat. Even though the X10 exposure meter is very good, if you need EV compensation, it’s right there.
For the most part, the two command dials are well placed and adequate size, although sometimes I have a little trouble being precise with the the sub-command dial, especially if I’m wearing gloves. That said, I’m better with it than I was a month ago.
Overall, I LOVE the Fujifilm X10. I’m glad that I bought it. It’s by far the best little camera I’ve ever owned and I’ve had a blast taking a wide mix of fun shots with the thing. It’s small enough to fit in a jacket pocket, a bike bag, a backpack top lid or any other moderately small space you can think of.
For me, the X10 represents a whole new style of photography, which is taking pictures just for fun. Sketching. Playing, Creating. Enjoying. And, the quality is good enough that if I get something I really like, I’d feel comfortable sending it to a client. I’ve also used it for video. I take it on assignments, give it to the art director or someone else on the shoot so that they can just document the event. This is great for both fun and for PR and I plan to make extensive use of this in the future.
Final Thoughts
For awhile, I debated running down to Costco and getting the Nikon AW100 as my main compact camera. After all, I’m an adventure guy. Maybe someday I will pick up one, but for now, I decided that I wanted a classic style camera that I’ll feel good about carrying and that’s durable and versatile enough to use in a wide variety of situations.
As I mentioned above, the controls on the X10 are quite user friendly and for outside shooting, they’re easier to manipulate than some of the smaller cameras out there with tiny buttons, dials and touch screens. And besides, even though the Nikon AW100 only costs half as much, I feel that it’s far less than half the camera when compared to the X10.
So far, the only thing that I don’t like about the X10 is that the battery is quite susceptible to the cold. The flat-ish shaped battery has a high surface area for its size, so doesn’t do well when temperatures get down below 20 degrees F. I’ve had the thing die numerous times this winter, but I need to qualify this by saying two things:
One, it’s been a really cold winter here in Alaska, and so I’ve often tried to use the X10 in temps that are colder than 10 degrees F, often below zero. It’s rated by Fuji to operate ata limit of 32 degrees F, so obviously I’m breaking that barrier quite a bit. Also, having never owned another point and shoot camera, I don’t know if this is just the way it is with small cameras. Someone tell me, is this the norm?
Should You Buy the Fujifilm X10?
When buying anything, especially small cameras, you can easily fall into the trap of always justifying the next model up. You think, “I want a small camera, so I’ll get a cheap one.” You then convince yourself that image quality on a cheap camera is not great, so if you’re going to buy a camera, you might as well get a decent one.
You keep talking yourself up, until you’ve finally reached the level of compact cameras that cost almost as much, or more than your DLSR. At some point you have to set a limit and make a decision to stop going up.
Keep in mind that the Fuji X10 is NOT the X100. The X100 has a bigger APS-C sensor , so even though they’re both 12 MP, the X100 produces better quality images. However, it costs twice as much. ($1,200 vs $600.) Also, the X10 has a zoom lens, better video capabilities, 360 panorama, instead of 180 degrees and it’s smaller and lighter. Did I mention that it’s cheaper?
Nor is it as good as something like the Sony Nex-7. However the Nex-7 is a bigger, interchangeable lens camera system. The Fuji X10 is not; it’s a simple, classic compact camera that takes great photos and offers a broad depth of functions and creative options for a fraction of the price.
In my mind, the Fujifilm X10 is perfect for the photographer who is looking for a compact camera to take along when they leave the DLSR at home. It’s the camera that you could take on vacation, out into the street, to family functions, heck you could even do a serious photography trip with just the X10, save lots of weight and still come back with great images, especially when you consider that it offers the same or better quality as whatever camera that you were shooting a few years ago. Its idea for the travel photographer, blogger, professional, enthusiast, minimalist- heck anyone who wants big in a small affordable package.
The bottom line is that the Fujifilm X10 is indeed an awesome little camera. For me, it was love at first sight, and as I get to know it more, the affection is only growing deeper. It’s loaded with usable options, looks and feels great, has a fast, high quality lens, and it’s built to last. The X10 makes me WANT to go shoot FUN photos that aren’t WORK photos. In fact, these days, I rarely leave the house without it.
Overall, with the depth quality and features that the X10 offers, I feel strongly that it’s the best camera in its class. Sure, it costs more than some cameras, but in the end, you get what you pay for. Sure, it’s not a small as some point and shoots, but hey, the X10 is not a point and shoot.
Using the dramatic sunset sky as a background, I set up a pair of Nikon SB-800 Speedlights and placed them about ten feet to either side, and slightly behind the subject and shot with a telephoto lens from about 50 feet away. No softboxes or other light modifiers were used, except for the regular plastic dome diffusers on the flashes.
This setup gives the dramatic, 3-dimensional lighting effect that you see in the shot above. With the dome diffusers on, the light scatters and ends up wrapping partially around the subject. Placed closer, it would wrap more. Further away, it would get even more directional and cast stronger shadows. Ten feet away seemed to give a pretty good mix of shadows and wrap.
Unlike the regular PocketWizard Plus triggers, which only let you do manual flash, the Flex TT5 radios allow you to make use of TTL flash metering from your dedicated Nikon or Canon flashes.
They’re very easy to use; you simply slide the flash onto the Flex TT5’s hot shoe, slide another TT5 onto your camera’s hot shoe to act as a master, and then fire away.
The Flex TT5’s send the TTL, i-TTL, or E-TTL information between your camera and your flash, and automatically control the output of your flash for normal, TTL exposure. You get TTL flash at radio trigger distances. Pretty cool.
The Flex TT5 radios made a HUGE difference here. In fact, they made this image possible, because if I had to do test shots and run back and forth to change the manual light settings on the flash, I would have missed the light.
In this case, they saved me time, and ultimately, in’t that what we want from technology?
Yesterday at the WPPI trade show in Las Vegas, PocketWizard unveiled their brand new radio trigger, the PocketWizard Plus III Transceiver.
I say Game on!! Why? Because unlike some “new and improved” gear that we often see, where things get more complicate AND more expensive, the new PW Plus III are actually cheaper than the old, long lived PW Plus II radios.
AND, they’re crammed full of new features that are packed into a simple, durable design with an easy-to-use interface.
Here are some of the Plus III features.
32 Channels: First of all, the Plus III operates on 32 channels, instead of the old 4. This means that even in the busiest of working environments, (take note event and wedding shooters,) photographers should have no trouble finding an open channel to use. To switch channels, all you have to do is press a button. Fast. Easy. Did I say fast? Oh, and easy too.
Quad Zone Triggering: This is a brand new feature from PW. Remember all that running back and forth you (or your assistant) used to have to do in order to activate or deactivate remote cameras and/or flashes. No more. Quad Zone Triggering allows you to set up 4 separately controllable zones, that you can turn on or off with those four big buttons on the keypad. (See above.)
Auto Sensing Transceiver: The PW Plus III automatically sense whether it’s being used as a Tx or a Rx, and instantly switch as needed. You can also set that parameter as needed and keep it there.
Two-Stage Remote Camera Triggering: Another really cool feature. When using the PW Plus III to trigger a remote camera, (Requires separate cable) the TEST button on the Plus III acts just like the shutter button on your camera. Press it halfway down and it wakes the camera up to meter and focus; press it all the way to take the shot. As soon as the shutter fires, the camera returns to sleep mode, which saves batteries, especially in situations where you have to pre-place cameras before an event and leave them turned on.
Auto Relay Mode: This mode allows you to use 3 PW Plus III radios to trigger a remote camera/flash setup. The radio in your hands triggers the radio attached to the camera. It fires the camera, and then instantly turns to Tx mode and triggers the flash. Pretty cool!
Long Range: In normal operation mode, the new PW Plus III has a range of 500 meters (1,600 feet). Switch to Long Range Mode, and the workable range of the Plus III is doubled. Using Repeater Mode, you can daisy chain multiple Plus IIIs together for extreme distances, at the cost of slightly slower trigger time.
Backwards Compatability: The question we all want answered, will they work with older PocketWizards? Absolutely. The new PW Plus III is compatible with all PocketWizard radios, as well as all other radios on the same frequency.
Price: The best part is that the new PW Plus III Transceiver is priced at only $139. That’s $30 less than the older, but long lasting Plus II!
An affordable radio trigger with a host of extremely usable features for any professional, working or enthusiast photographer, so what’s the catch? Only that you don’t have a set in your hands right now! Expected availability is the middle of March.
I am SO getting these things. If you do any kind of remote camera or lighting work, you should too. If you’ve never owned a set of radio triggers, now is the time. Just imagine the creativity. For complete info on this great new device, check out the PocketWizard Plus III website.
Be sure and check out the January issue of Trail Runner Magazine; I’ve got a shot in the 2012 Wall Calendar. The photo is of Anchorage, Alaska runner Ryan Sherman tearing up the trails in his five-finger toe shoes during the fall in Far North Bicentennial Park.
I shot the photo with a Nikon D700, 14mm f/2.8 ED lens, a single bare bulb SB-800 Speedlight fixed to a light stand at camera left about 20 feet away from the subject. Exposure info: 1/100 sec at f/5.0.
I celebrate my birthday today with two great professional notes. First of all, I’m the featured photographer this month in the Photoflex Pro Showcase. As someone who’s been using (and sometimes abusing) Photoflex gear for 20 years, I’m honored to be recognized in the same category with so many other talented shooters.
Also, I’m excited to announce that my first lighting tutorial is now online over at the Photoflex LightingSchool. In this lesson, I break down a skate skiing photo shoot that we did last month in sub zero Alaska weather with the TritonFlash battery powered strobe.
See how I go cold and fast with light at sunset while shooting action. See how the TritonFlash performs in extreme winter conditions. See just how much we suffered and nearly froze solid in order to get the shot. The lesson includes nearly every single detail of the shoot, including location scouting, gear selection, setup, specific exposure information, light placement and overall approach for getting the final image.
 Yesterday was the official start of the 2012 Iditarod. Since I had the day off, I flew up to Willow to watch some of the mushers take off, and then watched from the air as the 66 dog sled teams worked their way across frozen swamps and onto the Yenta River as they make the 1,000 mile journey to Nome. After spending a couple of years shooting for Jeff Schultz as an official Iditarod Photographer, it was rather nice to leave all of my Nikon gear at just walk around with my pocket sized Fuji X10 camera.