Fat tire snow biking, Anchorage, AlaskaAnother recent publication, this full page shot appears in the TOC page of the current Dec/Jan issue of Alaska Magazine. It’s the lead off image in the issue, which contains a feature article about the joys and gear of snow biking.

This photo of Tim Reinbold jumping his Fatback along the Hillside trails in Anchorage was one of my favorites from last winter. It was made with the added blast of the Photoflex TritonFlash battery powered strobe and WhiteDome softbox, both of which performed just fine in the sub-zero temperatures.

Here’s the behind the scenes post that talks about how I got this photograph, and below are other other photos in the snow biking article. (The night shot and the rider in the red jacket are mine.)

Photoflex has also used photos from this series in ads, trade show banners and in their 2013 product catalog to illustrate the capabilities of the TritonFlash for use in action and extreme shooting conditions. With a very fast recycle time and long battery lift, it’s a surprisingly portable and very powerful tool for getting pro quality light in just about any situation.


November 26, 2012
See this post
Publication: Alaska Magazine Snow Biking Feature Article

Thanksgiving is here, and to show my thanks to you for following my work, I’ve put together two special deals for you: A free eBook download and a very special discount on Alaska prints and cards.

Free Photography eBook

Today, tomorrow and Friday only, I’m putting up my latest photography eBook as a free download. You might remember, I did this last month, but if you missed that deal, grab a copy of  Creative Photography Techniques – 20 Tips for Stronger Images during the next three days and it won’t cost you anything.

Creative Photography Techniques is collection of 20 simple tips to that help you break out of your creative rut and start making more powerful, more compelling photographs. These are all  tried and true techniques that are designed to help you think actively about your image making process so that you can make images instead of just grabbing whatever subject matter happens to be in front of you at any given time.

Creative Photography Techniques  is only available at the Amazon Store in Kindle format, however, with the Free Kindle Apps, you can read it on any device: computers, iPad, iPhone, Windows 7 and Blackberry phones or Android tablets.

Download your free copy today and stick it on your mobile device for instant reference whenever you need a little bit of inspiration. Or read it cover to cover at home and get some new insight into tips that you might already be somewhat familiar with. At the price of Free, you only stand to gain, even if you already know some of this stuff.

If you’ve already read the book, then I’d like to thank you for grabbing a copy, and would ask you to consider leaving comment and letting your other photographers friends know about the book.

Select Alaska Print and Card Sale

ImageImageImage

Save 30% on Any Print, Card or Gift from my Alaska Select Gallery

Use Discount Code: ALASKA30

As we start heading into the holidays, this is a great time to start thinking about gifts for your nature and outdoor loving friends and family. And while we’re at it, there’s nothing wrong with grabbing a little something for yourself. You deserve it, right?

Just for my followers, I’ve put together a special exclusive gallery of 20 select Alaska images. These are some of my own favorite landscapes, aviation and bear photographs that I’ve shot during the past couple of years. This is a private gallery that isn’t viewable to just anyone who cruises by my website, it’s just for you.

Starting today, and running through December 9th, I’m offering you a special 30% discount on any print, card or gift purchase made during the next 19 days from this Alaska Select Image Gallery.

To get the special price, use discount code ALASKA30 in your shopping cart. All orders are handled right on the site, and are backed by a 100% money back guarantee. Put simply, I stand behind my work and want you to be totally happy with your purchase.

Not sure what to get? 5×7 folding gift card sets look great, I love sending them to my favorite clients, so they’d be awesome for personal use or to give as presents.

For eye catching wall decor, you can’t beat metallic prints for vibrancy and sharpness, and they don’t cost much more than regular glossy and lustre prints.

Want cool looking presentations with style, I really like the thin masonite wraps and float mounted metal prints. I gave one of these as a gift to a friend recently and he was blown away by how cool it looks on the wall!

You have a few days to decide, but don’t wait too long. If you’re like me, putting stuff off often means forgetting to get it done and then watching the deadline pass. Give yourself some time to look through the gallery and then take advantage of this limited time 30% off sale before it ends. Feel free to share the deal and coupon with your own friends, especially if you know someone who might really enjoy some Alaska imagery.

Offer expires 12/9/2012

I hope you all have a very happy Thanksgiving, but if happen to find yourself in a country that doesn’t celebrate the day with pilgrims with large flightless birds, then I hope you have a great weekend adventuring, or hanging with friends and family.

Peace,

Dan

November 21, 2012
See this post
Thanksgiving Deals: Free eBook And Alaska Print Sale

This is the second piece in a series about mobile photography and the tools that let you take your photography business/craft on the road.

When it comes to mobile photography devices, the iPad is pretty much the coolest thing around. Aside from the fact that using one makes you feel like you’re finally living in the future, (I’m still waiting for flying cars), and despite its connectivity limitations, the iPad and other tablets are proving to be indispensable devices for photographers of all types.

Studio and location photographers use them to show image captures to clients, and now with some of the wireless tethering tools that are now coming out, they’re being used as “live view” and remote camera control devices. Tablets are great for showing off your portfolio to clients, collecting model releases, reading photography eBooks and magazines such as Photographer’s i, Scott Kelby’s Light it, and Craft and Vision’s beautiful new quarterly publication, Photograph, and keeping in touch with your online peeps through social media.

That’s not all, though. The number of really useful photography apps that keep appearing in the app store each month has made it so you can do just about everything with your iPad. Obviously it doesn’t have quite the same functionality as a full fledged laptop, but for the price and mobility, it’s hard not to consider this option if you want to go on the road with minimal gear. They take up less room in a backpack or shoulder bag, they fit in most camera bags and they’re considerably less expensive than even a MacBook Air. I know of a couple of pro photographers who often use the iPad exclusively when they’re on trekking trips and backpack/travel excursions.

Want to go even lighter? Get an ipad Mini. It does everything the iPad does and takes up even less space. It’s by far the smallest, lightest weight option out there.

Getting Around the iPad’s Limitations

The main limitation of the iPad is that is lacks a USB port. This means that you can’t just hook it up to any portable hard drive and dump photos back and forth. Some Android tablets have USB ports and SD card reader ports built quite it, so for you tablet guys, you can probably skip over this section.

The Apple Camera Camera Connection Kit lets you get photos from your camera and SD card into the iPad, so dealing with new photos it not really an issue. The connection kit also gives you an inexpensive way to shoot tethered to the iPad. With apps like Photosmith (Lightroom utility) and Pixelsync (Aperture utility), Photoshop Touch and iPhoto, you can edit, tag, caption and share new work from camera to iPad with ease. However, even though the connection kit effectively adds a USB input to the iPad, it won’t recognize flash drives or external hard drives.

So, it’s getting those photos off of the iPad that’s the problem. Also, what about brining along your image archive just in case you need to send photo submissions or deliver hi res files to clients while you’re on the road? Not quite so easy, but fortunately, there are a couple of hardware solutions.

1. iPad Compatible Hard Drive: At this point, the Sanho HyperDrive is the only compatible drive that connects right to the iPad. However, they’re brand new and only available for pre-order. The Seagate GoFlex Satellite Mobile Wireless Hard Drive allows you to store and wirelessly stream data from the drive directly to the iPad. Hopefully, we’ll see more devices like this in the future.

2. iUSBPort: The new Sanho iUSBPort, formerly branded as the CloudFTP, acts as a wireless USB port. You can connect any USB external or flash drive to iUSBPort, and then stream your photos to the iPad. Also new and not out yet, but if you can get an older CloudFTP, it’s the same thing, just with a different name.


November 20, 2012
See this post
The Mobile Photographer, Part 2: iPad and Tablets


With constantly shrinking hardware technology and increasing software options, as well as things like cloud storage, iPads, iOS, mini hard drives and social media, the possibilities for being a freelance, independent mobile photographer are more attractive and doable than ever before. Who doesn’t want to be an adventure or travel photographer on the move?

Not that you couldn’t travel the world with your camera before, but with today’s gear, you can literally run your entire business from the road by carrying just a few simple tools, even if you don’t have assistants or employees back at home.

In this short mobile photography series, we’ll explore some of the different options you have for taking your business out into the world and still being able to stay connected to your clients and customers. Essentially, we’ll explore why you would choose one set of tools over another and compare the tradeoffs in terms of mobility, price and capabilities.

Laptops and MacBooks

A regular computer is still the most powerful tool you can have when it comes to going mobile with your business. Carrying a laptop allows you to sync your Lightroom or Aperture catalog and bring all of your hi res photos and work documents, in addition to your applications and the software tools you use to edit and deliver photos, price images, write estimates and invoices and do all the stuff that you do. For as many awesome and usable iOS and Android apps that are available today, the fact is that most pro work is still done on computers and full scale operating systems.

For Mac users, the new Retina Display MacBook Pros give you the most computing power and screen real estate for size and price. Anything you do with your desktop, you’ll be able to do it with your Retina MacBook Pro, which means no glitches, not hiccups and no “waiting until you get home” to do a specific task or process a high res photo. In fact, there’s a pretty good chance that the new MacBook Pros are as powerful, if not more than the Mac that’s sitting on your desk at home.

I just got one of the brand new 13″ MacBook Pros and I can attest that it’s a killer machine. They’re also not much bigger and heavier than the 13″ MacBook Air– we’re talking 0.75 inches thick vs. 0.68 inches thick for the Air, 2.96 lbs, vs. 3.57 lbs for the Pro, and only a few hundred dollars more.

And then there’s the Retina Display. Pro display, small screen. I didn’t think it would be such a big deal until I saw it for myself. It’s awesome, and I don’t feel cramped using it. All in all, my new 13″ has a better screen, is better in every way, it’s considerably smaller and lighter, and it costs less than my old 15″ MacBook Pro. Plus, they all have built in SD card readers.

If you’re not concerned so much with weight and want an even bigger screen, the new 15″ Retina Display MacBook Pro is your option. If, however you ARE concerned about weight, the 13″ MacBook Air is still a very capable machine.

The MB Air is nice because it’s so light and slim. Honestly, I think that if I were to do something like an extended bike trip or a month long travel/backpacking adventure to another country, I’d probably take along the Air. I might even consider the 11″ version of the MB Air, which is crazy small for how much computing power is packed into a tiny case.

They come stock with 4GB RAM, but for $100 extra, you can order them with 8GB, which is what I’d recommend. Still, with 4GB, they still run Lightroom just fine. In fact, I know of at least one full time sports photographer who spends a lot of time on the road and uses the 11″ Air as his main laptop. Works for him, I’m sure it will work for you.

If you’re a Windows user, I can’t compare models for you, but from what I’ve seen, ASUS laptops seem to offer pretty good computing power in relatively small packages. The fact is that ASUS actually makes the hardware for many of the other name brands. Readers, if you’ve got other suggestions for other PC options, feel free to list them below.

Hard Drives

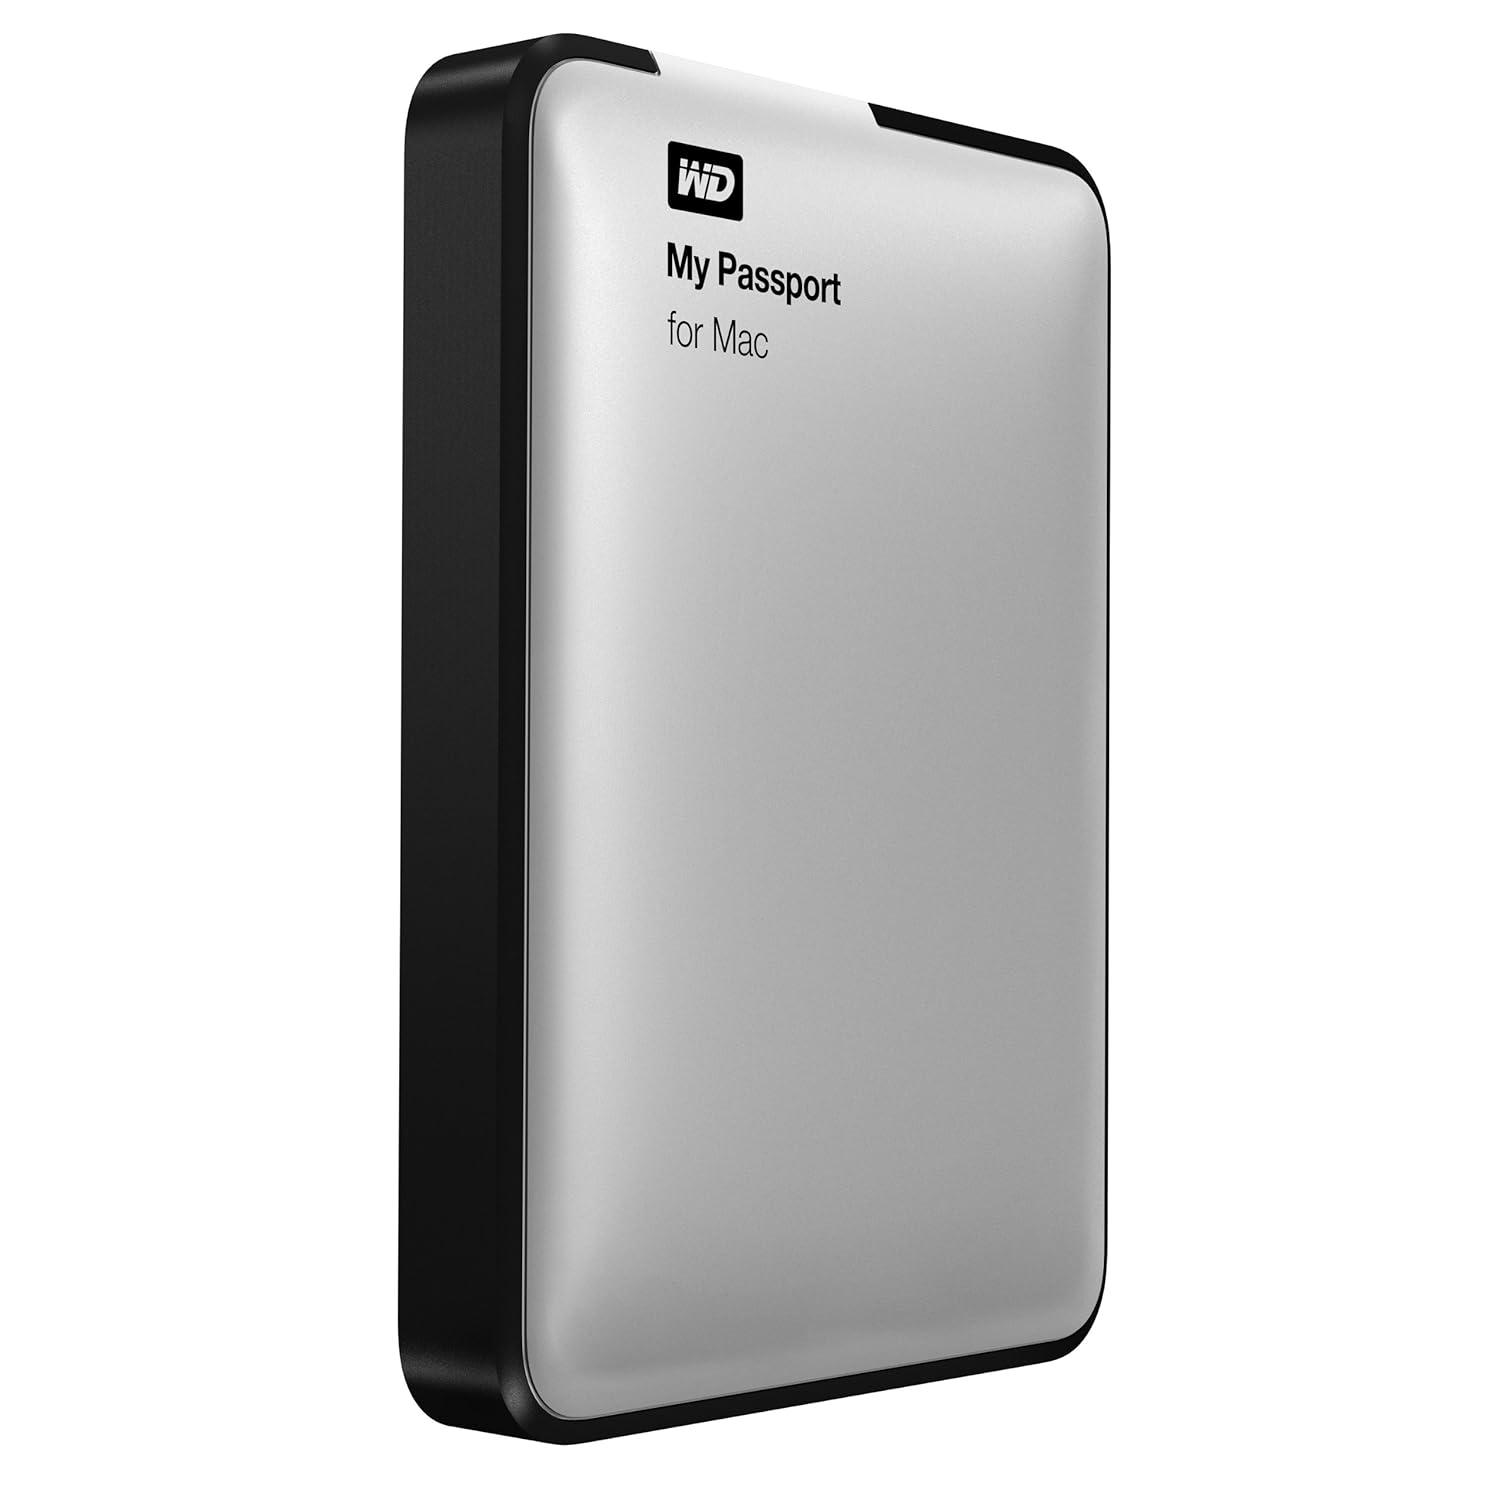
The other necessary link in the Laptop chain is the hard drive. Portable drives have gotten way bigger in size and they’ve come way down in price. There are many out there, but my current favorite is the Western Digital My Passport. The 1TB version costs about a hundred bucks, and it has fast USB 3.0 connectivity.

Two other great options are the G-Tech G-DRIVE with USB 3.0, and the LaCie Rugged USB 3.0 portable hard drive. All three are slim, lightweight and allow you to take enormous amounts of data and imagery with you, which frees up your laptop hard drive and makes it run as fast as possible. 1TB may not fit your entire image catalog, but it’s probably big enough to fit all your good images, or your “picks,” which are the ones that you’re likely to send to clients. If not, bring along a second drive, or buy a 2TB drive- it’s not like they’re very expensive or take up much space. Then, when you get home, you just sync your catalog and transfer your new images.

Tradeoffs

So what’s your tradeoff for carrying a laptop? Mainly price. They’re more expensive than iPads and tablets, but for what you get, I wouldn’t say it’s much of a tradeoff. Besides, no matter what, as a photographer, even if you own a tablet, you probably want (have) a laptop anyway.

The other tradeoff is weight, but again, if you’re going with the slimmer MacBooks, you’re still coming in pretty light. However, for sheer power, full pro options and space, you can’t beat a laptop + hard drive combo for going mobile.

Next, we talk iPads and iOS compatible hard drives.

Support this site: If you’re in the market for new gear, please consider visiting and purchasing gear through these links. This help cover the costs, effort and time that it takes me to run this site and write these reviews and articles. As always, thanks for reading!

[iframe]<iframe width=”300″ scrolling=”no” height=”250″ frameborder=”0″ style=”border:none;” border=”0″ src=”http://mer54715.datafeedfile.com/widget/aff_widget_prdt_generate-2.0.php?aff_num=6746&aff_net=1&widget_num=2238″ marginheight=”0″ marginwidth=”0″><p>Your browser does not support iFrame.</p></iframe>

<iframe width=”468″ scrolling=”no” height=”60″ frameborder=”0″ style=”border:none;” border=”0″ src=”http://mer54715.datafeedfile.com/widget/aff_widget_prdt_generate-2.0.php?aff_num=6746&aff_net=1&widget_num=2239″ marginheight=”0″ marginwidth=”0″><p>Your browser does not support iFrame.</p></iframe><iframe src=”http:///e/cm?lt1=_blank&bc1=000000&IS2=1&bg1=FFFFFF&fc1=000000&lc1=0000FF&t=danhbaisadvph-20&o=1&p=8&l=as4&m=amazon&f=ifr&ref=ss_til&asins=B008R7EXD8″ style=”width:120px;height:240px;” scrolling=”no” marginwidth=”0″ marginheight=”0″ frameborder=”0″></iframe><iframe src=”http:///e/cm?lt1=_blank&bc1=000000&IS2=1&bg1=FFFFFF&fc1=000000&lc1=0000FF&t=danhbaisadvph-20&o=1&p=8&l=as4&m=amazon&f=ifr&ref=ss_til&asins=B007472CIK” style=”width:120px;height:240px;” scrolling=”no” marginwidth=”0″ marginheight=”0″ frameborder=”0″></iframe><iframe src=”http:///e/cm?lt1=_blank&bc1=000000&IS2=1&bg1=FFFFFF&fc1=000000&lc1=0000FF&t=danhbaisadvph-20&o=1&p=8&l=as4&m=amazon&f=ifr&ref=ss_til&asins=B005CWJB5G” style=”width:120px;height:240px;” scrolling=”no” marginwidth=”0″ marginheight=”0″ frameborder=”0″></iframe><iframe src=”http:///e/cm?lt1=_blank&bc1=000000&IS2=1&bg1=FFFFFF&fc1=000000&lc1=0000FF&t=danhbaisadvph-20&o=1&p=8&l=as4&m=amazon&f=ifr&ref=ss_til&asins=B009733GWK” style=”width:120px;height:240px;” scrolling=”no” marginwidth=”0″ marginheight=”0″ frameborder=”0″></iframe><iframe src=”http:///e/cm?lt1=_blank&bc1=000000&IS2=1&bg1=FFFFFF&fc1=000000&lc1=0000FF&t=danhbaisadvph-20&o=1&p=8&l=as4&m=amazon&f=ifr&ref=ss_til&asins=B0058VIWTM” style=”width:120px;height:240px;” scrolling=”no” marginwidth=”0″ marginheight=”0″ frameborder=”0″></iframe>[/iframe]


November 19, 2012
See this post
The Mobile Photographer, Part 1: Laptops

This month, one of my images was licensed for use as a duratrans display inside the lobby of the new Alaska Native Tribal Health Consortium building in Anchorage. What’s notable about this stock photo sale is that I shot the original image on a fast afternoon hike with my Fujifilm X10.

This is not the first time I’ve sold an X10 image to a client, but it’s by far the biggest reproduction that I’ve seen from the this camera. I’m impressed at how well the image held up at a size of 4 by 6 feet. In my reviews of the X10, I often hold that it’s good enough for pro work, and this print is a testament to how good the 12 MP 2/3″ CMOS EXR sensor on the X10 really is.

To be clear, I didn’t just send an untouched file straight to the lab. I opened up the 3MB JPEG, which gets rendered as a 34MP file in Photoshop, and upsized the original file by 200%. Then I performed some advanced sharpening techniques on the file that I leaned from Martin Evening’s Photoshop book. This involves using alpha channels and doing selective sharpening on the edges, while leaving the softer areas of the image untouched.

Finally, I saved it as a 138MB TIFF file, which I uploaded to the project designer via Dropbox. I’d wondered if the X10 file would actually reproduce ok at that size, but when I saw the final display for the first time yesterday, I was pleasantly surprised to find out that it did just fine.

Below is a copy of the original image, as well as a crop of the final enlarged TIFF file, and an enlarged shot of the actual duratrans. When you look at the image from really close, you can see that there is definitely some pixelization, but overall, the image definitely holds up at that size. Also, the reality is that nobody looks at a big display print from only six inches away. When you back up to even just a couple of feet, the photo looks extremely smooth and sharp.

With this proof now in hand, I stand by my assertion that images shot with the X10 and comparable compact cameras are indeed good enough for professional reproduction as needed. Does this mean I’ll give my up my DSLR? Of course not, but I now have even more confidence that when I do want to travel light and leave the big camera behind, I can still shoot images that I’m comfortable sending to clients.

(Click the image below to see the full size image.)

November 8, 2012
See this post
4′ x 6′ Display Print From a Fujifilm X10 Image

Last year when I wrote my off camera flash eBook, Going Fast With Light, I mentioned an essential piece of gear that I often use: The 30″ Lastolite Trigrip Diffuser. This useful tool is great for shooting portraits outdoors under direct sunlight, or popping a flash through to get a softer blast of light. What makes the Trigrips so nice is that unlike most reflectors, they have a handle, which lets you hold them in position with your off camera hand while you’re shooting.

Here’s a perfect example of how I use the Trigrip: Outside. Portrait. Sunlight. Too bright. Squinting. Shadows. Grab the Trigrip Diffuser, hold it in such a way that you block the direct sunlight hitting the subject, and you suddenly have softbox quality light outside, that’s much more pleasing for portraits. Super simple, and it only takes about three seconds to grab it and hold it into position. Ok, maybe 10 if you have to take it out of your bag, unfold it and then hold it up.

McNally uses Trigrips all the time and raves about them in his books. He’s even got his own signature model of the Trigrip that features different color reflector sleeves and a velcrdo cutout window for creating striplight effects.

However, for as great as the 30″ Trigrip is, it’s just a little too big to fit inside most camera bags and backpacks, even when folded up inside its case. I’ve clipped them onto the back of my pack before, but that’s not always convenient, so more often than not, when I head outdoors with my camera, I leave at home.

Mini Trigrip

Enter the new 18″ Lastolite Mini Trigrip! Now that’s what I’m talking about! Same design, same handle, but almost half the size. Best part, it packs up small enough to easily fit inside just about any pack or camera bag.

Suddenly, the Trigrip becomes a whole lot more useful. You can actually carry it around with you in your camera bag and have an incredibly useful wherever you go. As you can see from the photo below, the 18″ is definitely big enough for shooting head shots and head/shoulder/upper body portraits, products, macro, location assignments, etc… And if you’ve ever seen the size of the 30″ Trigrip all packed up, then you can appreciate just how small the 18″ mini version is when folded up in the second photo.

Ok, to be fair, the 18″ Lastolite Mini Trigrip is not entirely new, just new to me. It actually came out last year, but I just didn’t find out about it until this year’s PhotoPlus show. Wish I’d have know, I would have put this one in the book instead of the 30″ one. At any rate, if you like to go fast with light, then the Mini Trigrip is one of the most usable, affordable and portable light shaping tools that you cold probably have.

As with the other sizes, the Mini Trigrip diffuser comes in either plain white (diffuser), 3551 model, or as a combination diffuser/reflector with either white/soft silver, 3552 model, (shown below) or white/soft gold finishes, 3553 model.

[iframe]<iframe width=”120″ scrolling=”no” height=”240″ frameborder=”0″ style=”border:none;” border=”0″ src=”http://mer54715.datafeedfile.com/widget/aff_widget_prdt_generate-2.0.php?aff_num=6746&aff_net=1&widget_num=2032″ marginheight=”0″ marginwidth=”0″></iframe><iframe src=”http:///e/cm?lt1=_blank&bc1=000000&IS2=1&bg1=FFFFFF&fc1=000000&lc1=0000FF&t=danhbaisadvph-20&o=1&p=8&l=as4&m=amazon&f=ifr&ref=ss_til&asins=B000S5KKWA” style=”width:120px;height:240px;” scrolling=”no” marginwidth=”0″ marginheight=”0″ frameborder=”0″></iframe>[/iframe]

November 7, 2012
See this post
The 18″ Lastolite Mini Trigrip: Even More Portable!

Chalk this one up to the “how did I miss this one category.” In all my lightweight tripod reviews and blog posts, I somehow overlooked the Vanguard 225CT carbon fiber tripod.

With 5 screw lock leg sections, the Vanguard 225CT closes down to a mere 13.5″ and only weighs 1.79 lbs without head.

In my book, that makes this an excellent choice for a ultra lightweight backpacking or travel tripod. It’s small enough to fit on the side of just about any pack or camera bag, light enough not to slow you down, and relatively sturdy for being so light.

The Vanguard 225CT also has a reversible center column and a hook for hanging weight to help stability. If there’s a downside, it’s that the 225CT only extends to 41″, so it’s a little on the short side. However, if you’re shooting landscapes, this may not be much of an issue. The getting it closer to the ground thing is much more critical for most outdoor photography applications.

At $259, the Vanguard 225CT costs nearly one third as much as some Gitzo tripods, and for roughly the same price, it’s lighter than just about all of the Manfrotto models, plus it gets great reviews. I got to check it out for myself at PhotoPlus this year, and after fiddling with the legs and locks for a while, it seems like the thing is built pretty well. It’s certainly sturdy enough for just about any light to moderate weight DSLR and lens combo, but it’s probably not the one you want if you’re shooting a lot with a bigger, heavier lens or a batter grip body.

Lightweight, compact, affordable- Like I said, how did I miss this one? Fortunately, I ran across it at PhotoPlus this year and suddenly realize that I might have found my new favorite set of lightweight legs. Great. Now I’ll have to go back and change my “best lightweight tripod posts.”

[iframe]<iframe width=”120″ scrolling=”no” height=”240″ frameborder=”0″ style=”border:none;” border=”0″ src=”http://mer54715.datafeedfile.com/widget/aff_widget_prdt_generate-2.0.php?aff_num=6746&aff_net=1&widget_num=2010″ marginheight=”0″ marginwidth=”0″></iframe><iframe src=”http:///e/cm?lt1=_blank&bc1=000000&IS2=1&bg1=FFFFFF&fc1=000000&lc1=0000FF&t=danhbaisadvph-20&o=1&p=8&l=as4&m=amazon&f=ifr&ref=ss_til&asins=B001HBIYI6″ style=”width:120px;height:240px;” scrolling=”no” marginwidth=”0″ marginheight=”0″ frameborder=”0″></iframe>[/iframe]

November 6, 2012
See this post
Another Ultra Lightweight Budget Carbon Fiber Tripod

Brace yourself people, the world is apparently coming to an end. No, not because of the rising seas and climate change, and certainly not because of the election.

Judging by the outrage in Kenneth Jaracke’s piece, Instagram, The Devil and You and many of the strong comments that follow his post, it’s because a major news magazine has just run a photo on the cover that was shot with *gasp!* here it comes… an iPhone.

To help document Hurricane Sandy in real time, the photo editors at Time Magazine gave five photographers access to its Instagram Feed, and in the resulting coverage, decided to run one of those iPhone shots on the cover.

How could they? Instagram is not for serious journalism, everyone knows that. It’s for people to take pictures of their meals, snap photos of the airplane wing out the window and pretend that they live in an era of grainy, color tinted film again when they really don’t.

Or is it? Here’s where the argument begins.

Or rather the question: What’s the deal with Instagram and iPhoneography anyway? For as much we all (how many billion people?) love taking pictures with our iPhones, there seems to be an incredibly strong advocacy against using them for any serious photography. i.e, journalism.

Of course, this depends on who you ask. The real working photojournalists love shooting with their iPhones because, as Ben Lowry (the guy who landed the Time cover shot) put it, [the]iPhone has allowed me to capture scenes without feeling that I am once again on the job. To “point and shoot” has been a liberating experience.”

In fact, I think that you’d be surprised if you knew how many “news” photos that you see each day were made with iPhones. After all, most news photos are published on the web, which hardly demands DLSR quality. Earlier this year, Sports Illustrated ran 6 pages of spring training Instagram photos by baseball shooter Brad Mangin, and I’ve heard of a few other professional photographer who have either had published iPhone work or who do serious personal projects with their iPhones.

There’s the key word: Professional. It’s not like Time and SI just just grab amateur photos for their magazine covers. Oh wait… Time does do that. In the case of Hurricane Sandy, though, they sourced five reputable professional photojournalists to post real time images of the storm. These guys not hacks, they’re heavyweights in the industry, and if you look through Time’s official Instagram Sandy photo feed, there are actually some pretty good shots in there.

In my mind, Instagram is like the great equalizer of modern day photography. That’s why it’s so cool. Instead of having the unique style of photography revolve around our camera choice, lens collection and software, the iPhone lays us all completely and photographically bare and makes us depend entirely on our creativity.

Think about it. With Instagram, everyone has the same simple lens box and the same little collection of nostalgic filters and borders. With no expensive glass, remote speedlights, battery powered strobes, motor drives, or light modifying tools, it becomes all about what you point it at, how you use the existing light and how/if you “accessorize” your photo with those fun retro style effects and borders that, as my friend Jessica put it, “remind us of the time when our parents were pretty.”

If you ask me, that sounds like the ultimate in personal creative expression, or, as some people like to call it, “art.” With this in mind, it surprises me that pro photographer Kenneth Jaracke has such negative things to say about Instagram. Why does a “fake” border ruin the credibility of a photograph? Why is that any different from the “real” border that you put on framed photos in your house? And when he talks about “noisy digital files,” we can point out that the 8MP camera on the iPhone is way better quality that the the first and second generation of digital cameras that pros used to shoot magazine covers a decade ago.

Keep in mind, that the same things were said about cars, airplanes, guitars, electric guitars, digital recording, art styles, political ideas and just about every other new thing that has ever come about. Doesn’t matter what it is, there will always be detractors. Early critics faulted impressionist paintings for their unfinished appearance and seemingly amateurish quality. When it all comes down, isn’t a photograph just one person’s impression of a certain fleeting moment in time? Who cares how he or she presents it? And why such strong opinions about it? Really people, we’re talking pictures. Not guns, not torture, not gays trying to marry. Pictures.

Of course, in the context of real journalism, we generally demand two things with photography. One is that a publication won’t “fake” a shot and pass if off as real. It’s been done before, usually with much outcry, which is why we probably wouldn’t tolerate a cover photo that uses Instagram filters and retro stylings.

However, Time Magazine’s “Sandy cover” is a straight iPhone photo, actually shot with Hipstamatic and uploaded to Instagram. Mere technicalities. Even though it’s been cropped, it reproduced quite well, and in my mind, the gritty quality of the image doesn’t detract, any more than a grainy black and white would in any other type of photo essay. The job of a journalism photograph is to educate, communicate and convey feel, moment, action, emotion and incident, which hopefully stir up reactionary ideas in the minds of viewers. In the wake of the brutal storm, Ben Lowry’s photo certainly does that.

The other is that no matter what gear is used, or who the photographer is for that matter, we expect that he or she will be fairly compensated for their image. That’s an entirely different argument, though, and we don’t have time to go there today. Next time maybe. I’ll just say that I hope that Ben got paid a big wad of cash for his Time cover photo.

Finally, there’s something else that we seem to like about Instagram. With all the work we have to do shooting, editing, keywording, and archiving our “serious photographs,” sometimes it’s nice to just shoot a photo and be done with it. A few brief moments of fun and creativity and it’s done. We don’t even have to worry about storing the image files on our own hard drives- let Facebook (Instagram’s owner) keep all those extra bytes on their own servers.

iPhone journalism is not going away. It’s here to stay, and we can only expect to see more professional uses of images shot with mobile phones in the future. In some ways, I applaud Time and SI for breaking that ground; in my mind, both did it with journalistic integrity and set a good standard for others to follow.

I KNOW that you have an opinion on this, so don’t be shy, leave a comment and let me know what your take is on these issues. Let’s have a discussion.

November 5, 2012
See this post
Why The Love-Hate Fest With Instagram?

iPad photography options continue to evolve, and at this year’s PhotoPlus show, I saw the latest in tethering technology: Wireless tethering for the iPad.

CamRanger gives you wireless control of your Nikon or Canon DSLR with any iOS device- iPad, iPhone or iTouch. It doesn’t require a computer or internet access, other than to download and install the CamRanger app onto your device.

With CamRanger, you get remote live view with touch focusing and full camera operation, movie recording, focus stacking, time lapse, HDR/bracketing, image capture, full resolution viewing and saving of your images, and more. Operation is simple: You connect the stand alone device to your camera via USB cord, open the CamRanger app and you’re off and running.

Operating distance on CamRanger is about 150 feet, although it’s been shown to operate with slow connection at up to 300 feet. Battery life is about 3-6 hours. Price is $299.

I got a chance to try CamRanger out at the show and it seems like a pretty cool option for a variety of applications, such as shooting location, macro, studio, still life, or photographing with complicated or remote setups.

The other system I checked out is TetherFly, which is made by TetherTools. This system also allows to wirelessly control your DSLR from your iPad, iPhone, Mac or Android device. TetherFly has a little bigger transmitter, but it has a hot shoe connector which lets you place it right on your camera.

TetherFly has many of the same features, view, time lapse, HDR, rate/tag images, self timer, bracketing, sharing, etc… There are also a number of cool Wallee connectors, stands and brackets that are designed to hold your iPad or monitor for remove viewing.
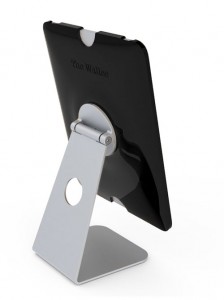
In this way, TetherFly seems like a great option for studio, location work or even teaching small groups. TetherFly costs $319 and will be available in mid to late November.

Both CamRanger and TetherFly are worth checking out if you want to incorporate your iPad even more into your photography workflow.

November 2, 2012
See this post
Camera Tethering Tools for iPad & Android

When it comes to gear that lets you go fast with light, you can’t beat Lumiquest for super lightweight flash modifiers. Seriously. There’s nothing that packs up smaller and gives you more bang for your buck and weight than their Softbox III. No matter where I go, if I leave the house with a flash, then I always take the SB III with me.

At PhotoPlus Expo this year, I got to check out the new Lumiquest Location/Portrait Kit. It’s a very simple collection, comprised of their SB III, their Snoot XTR, the FXtra gel kit and two UltraStraps, all packed into a handy carrying case that fits in just about any laptop case, camera bag or backpack.

With this kit, you’ve got a modifier for your main light, a snoot for narrowly focused accent lighting, and a gel kit that lets you add flavor to your backgrounds or throw a touch of warmth on your subject.

With a little bit of lighting knowhow and some creativity, you can do a lot with these very simple tools, and the two best things about it is that it’s affordable, and it all fits in one case. I know, I keep raving about the case, because my snoot and FXtra usually just swim around in the top lid of my pack. Gotta get me one of those cases!

The Lumiquest Location/Portrait Kit is great for beginning flash users as well as for fast moving photographers who want studio quality light without added weight. Plus, Lumiquest is a great company and I like to support them. They’re really nice people and they stand behind their products with a full guarantee.

[iframe]<iframe src=”http:///e/cm?lt1=_blank&bc1=000000&IS2=1&bg1=FFFFFF&fc1=000000&lc1=0000FF&t=danhbaisadvph-20&o=1&p=8&l=as4&m=amazon&f=ifr&ref=ss_til&asins=B0085JFLGQ” style=”width:120px;height:240px;” scrolling=”no” marginwidth=”0″ marginheight=”0″ frameborder=”0″></iframe>[/iframe]

November 1, 2012
See this post
Lumiquest Location/Portrait Lighting Kit