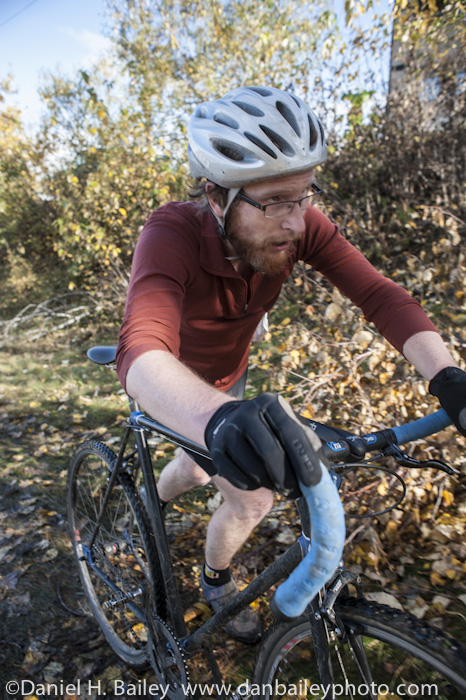
As I said in last week’s cyclocross post, I’m not usually an event photographer. However, shooting the same sport for five weeks in a row has forced me to try and look at the sport, the racers and the courses in slightly different ways each time so that I can push my creativity and create unique imagery. Believe me, it’s not always easy when you’re shooting subject matter that you’ve become well familiar with.

One thing that I hadn’t really done the previous four weeks of Arctic Cross was to capture portraits, so at the end of the race, I made a point to grab a few quick people shots at the end of the race. Also, to vary it up even more, I slapped on my 50mm lens, which I hadn’t used yet during this series. Here are a couple of my favorites.

As it always does, the 50mm is like a breath of fresh air. A spoonful of sugar. A burst of fruit flavoring. The lemon wedge in your wheat beer. With its limited depth of field at medium and long ranges, it’s not usually a great sports lens, but get up close and your backgrounds drop to deliciously soft focus.

However, it also forces you to get right up in there. No hiding off at a safe distance like you can with those telephotos, you’ve got to be bold and very sure of yourself. In that way, the 50mm lens forces you to shoot with confidence. Maybe that’s why they’re often the first lens you get when you buy a camera. Might as well get over your awkwardness right away. Step forward, compose and shoot.

Equally important when photographing action is to keep alert for the unexpected moments that occur before your eyes. During the past few races, I’d been focusing quite a bit on the races as they jumped over the barriers. I got some pretty cool shots of them in mid leap, but as I watched last weekend, it occurred to me that just as dynamic were the moments when they got back on their bikes. Leapt, really. Here are couple of those shots taken with the longer lens.

Another part of the course that I really liked was a singletrack section that led to the steep walkup at the far end of the course. I spent almost half the race shooting in this spot, mostly with the long lens.

For me, this race was my best performance yet. I held off getting lapped by the leader on the final leg, got my first bell lap of the season and rode to a 5th place finish in my class. The series ends this weekend with the final two races, Friday night and Saturday afternoon. Stay tuned!!

See more photos from this race, and check out my other cyclocross blog posts.

October 9, 2012
See this post
Photographing Cyclocross, Week 5
Fujifilm XF1

It’s time to play the “What if?” game.

That’s where you pretend you’ve got a couple thousand bucks sitting in your pocket, and since all the bills are paid, you can spend it all on new photography gear. Heck, let’s make it fun and top it out at $2,500.

What’s the point of this silly game, you ask? Simple. To have fun. What better way to kill a few minutes on a weekday than to daydream a little bit and fill your hypothetical shopping cart full of camera gear?

Also, it allows me get to know you guys a little better. By letting me know what kinds of equipment interests you, it helps me determine what kinds of gear reviews you’d probably want to read in the future. In addition, it will give me an idea of what products to check out more closely when I head to the PhotoPlus East trade show at the end of October.

I like to try and tailor my content to my readers, after all, you’re the reason that I keep my blog going in this format. If I didn’t genuinely enjoy helping foster people’s excitement and knowledge about photography, I’d just post photos and call it good.

So, here’s how we play. Visit the Amazon Photography Store, since they pretty much have everything, including books, training videos, bags and accessories, shop around, and them come back and tell me how you’d spend your hypothetical $2,500. You can even tell me why you think that particular gear would make a difference in your photography. After all, we don’t just blow money on gear for no reason, we buy it to help us make better pictures, right?

I’ll start. I wouldn’t mind having a Nikon 45mm f/2.8D tilt shift lens for those times when a Lensbaby just doesn’t cut it. Tilt shift lenses add really interesting flavor to action, sports and people images, as long as you don’t overdo it.

Also wouldn’t hurt to have a couple more Sandisk 16GB Extreme SD cards and Sanyo Eneloop AA rechargeable batteries for my speedlights – you can never have too many of those.

Ok, your turn. Go fill your proverbial shopping cart and then come back and leave a comment to tell me what you “bought”.

Have fun!

October 8, 2012
See this post
What’s On Your Photography Wish List?

Ok gang, I’ve got my own version of Free Bag Friday today. I’m giving away a Lowepro Rover Pro 35L AW camera pack!

Designed for adventure photographers, the Rover Pro AW is a brand new technical mountain photo pack that’s built to carry your camera gear and your camping, climbing or adventure gear into the backcountry.

With a zipper back panel, padded gear compartments, ice axe/trekking pole loops, and a highly breathable suspension system, the Rover Pro AW offers a rugged and comfortable solution for carrying heavy loads over long and varied terrain. Read my review of this pack here.


Does this sound like it’s the ideal pack for you?

Here’s how you enter to win:

  • Follow me and Tweet @Danbaileyphoto
  • Mention in your tweet why you’d love to have this pack
  • Use hastag #RoverPro

Not on Twitter? No problem. Simply add a comment to this blog post and tell me how you’d used the Rover Pro AW if you won. I’ll chose a random winner on Wednesday, October 10 and announce here and on my Facebook Page.

Please note: This contest is open to anyone who resides in the US or Canada.

October 5, 2012
See this post
Win a Lowepro Rover Pro 35L AW Camera Pack

Emerging professional outdoor/travel photographer and writer Anne McKinnell has just released a brand new 88-page double spread eBook called 8 Ways to Accelerate Your Photography. It’s a guide to helping you jump start your own road to photography success.

This book explores 8 fundamental areas of knowledge that are essential for today’s photographer and shows you the quickest and most effective techniques that will help you speed up your learning curve.

It takes a great deal of time and personal investment in order to become a great photographer. However, not everyone has the time to learn everything and make all the mistakes that eventually lead you towards the right path.

By sharing what she learned from spending an entire year photographing on the road, practicing her technique and marketing herself, Anne saves you valuable time by walking you through those necessary skills that you need to master:

  • How to understand the most useful camera settings
  • How to use different light to your advantage
  • How to achieve proper exposure
  • How to create more effective compositions
  • How to maximize the quality of you imagery with post processing
  • How to find your niche with photography
  • How to create a killer portfolio
  • How to get your photography on the web
  • How to make money

She also does it in a very clear and easy to understand writing style. 8 Ways to Accelerate Your Photography works so well as a learning manual for beginning photographers because Anne herself is a relative newcomer to the field who has achieved great success in a relatively short time. 

I’ve known Anne via the internet for a couple of years. She’s written guest posts here on my blog, and from what I’ve seen, she’s doing everything right. Only 4 years after buying her first DSLR, she’s gone from working a regular job to becoming a full time photographer and writer. She’s gone from total beginner to having her photos published in books and on magazine covers, writing several eBooks and building a successful blog.

Anne’s writing style is so easily approachable and effective, because it’s friendly, honest and informative. She writes as someone who didn’t just read this stuff from a book, but as someone who has stood with her camera beneath the light, at the water’s edge, in the open desert, and at the laptop in her van processing images, learning firsthand the techniques that work best. She’s done the trial and error part, and she shares what she’s learned with such open enthusiasm in a way that everyone can relate to. She also clearly illustrates each concept with page after page of great photographs.

It’s been a joy to follow Anne’s nomadic journey, watch her career unfold and see the quality of her imagery improve over the past two years. I’m excited about her latest eBook because I think it does a great job explaining the stuff that beginning photographers need to know, but often struggle to understand it quickly.

In today’s world, photographers also need to be lab techs, marketing agents, web designers, and business managers. That’s a lot of stuff to absorb, especially if you’re not trying to do photography full time.

After reading through the entire book, I highly recommend it, whether you’re looking to eventually go pro, or if you just want to get a jump start on your creative and technical skills.

If you’re just starting out in photography, or if you feel that you are struggling in any of the areas I outlined above, do yourself a favor and pick up 8 Ways to Accelerate Your Photography. I promise you, you’ll benefit from Anne McKinnell’s fast track and honest experience as an emerging pro photographer and writer.

Make the investment in your photography and get 8 Ways to Accelerate Your Photography at the special introductory price of $7.99.

October 4, 2012
See this post
8 Ways to Accelerate Your Photography eBook, by Anne McKinnell

Nikon has just entered the high performance compact camera market with the brand new Coolpix P7700. Obviously their answer to cameras like the Fujifilm X10 and the Canon G15, the Nikon P7700 offers similar quality and built to photographers who want to go light and fast, but don’t want to sacrifice quality.

Much like the X10, which this camera is sure to be compared to, the Coolpix P7700 features a 1/1.7″ 12.2 megapixel CMOS sensor, a 7.1X optical ED VR zoom lens that offers an effective view of 28-200mm, 1,080p Full HD video with stereo sound, a 3-inch Vari-angle LCD panel and of course, metal dials and a classic look and feel.

We knew that it was only a matter of time before Nikon brought something like this out, and it looks like they did a very nice job with design and usability. Following the trend of putting hard click PSAM and EV=/- dials on the top deck, the Coolpix P7700 offers everything from full manual control to a wide variety of auto exposure and scene modes, as well as three customizable user banks, video and a host of other creative editing modes and features.

As a functional outdoor camera, the P7700 has fast autofocus, no noticeable shutter lag, and a high speed continuous firing rate of 8 frames per second (up to 6 shots.) It’s fast enough for sports, diverse enough for general outdoor photography and compact enough for travel and adventure.

With a sensor that’s larger than most compact cameras, a fast f/2.0 lens at 28mm (f/4 at 200mm), and good high ISO performance, the P7700 takes great pictures. It does zoom with VR; it does macro, and reviews show that image quality is as good or better as any other camera in its class. We all know that Nikon image processing technology does great with low light and high ISO, and from what I’ve seen, the P7700 performs well in a variety of conditions, both inside and out.

The P7700 also has a built-in flash that can function as a wireless commander and it can control a single off camera Speedlight in full Nikon CLS TTL mode. Or, you can slide a Nikon SB-910,  SB-700 or SB-400, or the SU-800 Wireless Commander onto the hot shoe and use that to control your off camera flashes. A small camera that works seamlessly into Nikon’s CLS system? Pretty cool.

The Nikon Coolpix P7700 offers great quality and wide flexibility for photographers. Essentially, Nikon has taken a lot of the impressive technology that’s found in the J1 and J2 series cameras and stuck it in a box with dials and buttons, which means that you don’t have to scroll around through the menus in order to change your settings. Pick it up, turn it on, rotate dials and shoot. Just like a real camera.

I’m a huge fan of today’s compact cameras, because they allow you both freedom to explore and experiment with your photography in situations where you don’t want to carry around your DSLR or extra lenses. Convenience and quality without weight and additional lenses. In my style of outdoor photography, I especially like the flexibility of having a zoom. Sure, this size camera doesn’t offer quite the same image quality as the bigger sensor compacts like the X100, but the zoom gives you much more creative options. Plus, at only $496, it’s half the price. For what I do with my little camera, I’ll take that trade any day.

Finally, I’ve sold photos to pro clients with my X10, including a few that are destined for rather large reproductions. It’s already paid for itself, so in the end, I really don’t feel like I’m trading all that much.

I see the Coolpix P7700 as a totally comparable option to the X10 and give kudos to Nikon for coming out with this stylish and functional camera. If you’re thinking about getting a compact camera, this one is definitely worth a look.

Support this site: If you’re in the market for new gear, please consider visiting and purchasing gear through these links. This help cover the costs, effort and time that it takes to run this site and produce these reviews and articles. As always, thanks for reading!

[iframe]<iframe width=”120″ scrolling=”no” height=”240″ frameborder=”0″ style=”border:none;” border=”0″ src=”http://mer54715.datafeedfile.com/widget/aff_widget_prdt_generate-2.0.php?aff_num=6746&aff_net=1&widget_num=1685″ marginheight=”0″ marginwidth=”0″></iframe><iframe src=”http:///e/cm?lt1=_blank&bc1=000000&IS2=1&bg1=FFFFFF&fc1=000000&lc1=0000FF&t=danhbaisadvph-20&o=1&p=8&l=as4&m=amazon&f=ifr&ref=ss_til&asins=B0090SLE30″ style=”width:120px;height:240px;” scrolling=”no” marginwidth=”0″ marginheight=”0″ frameborder=”0″></iframe>[/iframe]

October 3, 2012
See this post
A Look at The Stylish New Nikon COOLPIX P7700

The 2012 Arctic Cross cyclocross series continued this past weekend with more of an urban style race on the grassy hill above the train depot in downtown Anchorage.

As with last week’s race, in addition to to doing the running around photography part, I also raced.

Despite receiving our first snowfall of the season that morning, by the time the races started, the sun had returned and brought with it a beautiful fall day.

Unlike the previous three races, where I made heavy use of my Photoflex TritonFlash battery powered strobe and my Nikon Speedlights, this time I went simple and light- camera, two lenses and no flash.

With gorgeous fall colors and bright sunlight as my background and ambient light source, I opted for a straightforward approach to capturing the action and intensity, while still looking for unique angles and perspectives. In situations like this, I often like shooting from the hip, so to speak, and following the action with my camera while it’s held away from my eye. This technique allows me to get really close viewpoints without the added danger of sticking my face too close.

Also, since I’ve been shooting and racing for the past few weeks, and getting to know some of the racers better, I’m able to get a more intimate viewpoint of the series and the people. Being a first person adventure photographer, I don’t usually shoot races and events. I’m typically shooting things that I’m also actively engaged in doing, like climbing and skiing.

While I obviously can’t shoot cyclocross very well while I’m racing myself, I find that shooting the second race right after I’m done riding my own class, with heart and lungs still pounding and legs burning, gives me a similar first person immersion that I like so much. Plus it get me in shape.

Three races left to go in the series, so stay tuned for more.

Check out the rest of my photos from this weeks’ race, and see photos from week 5 here.

October 2, 2012
See this post
Photographing Cyclocross, Week 4

Want good light?

Then pick pick up any one of the large softboxes out there that are made buy Photoflex, Lastolite or Westcott. I’d recommend 24″ or bigger, especially for shooting full length people shots. Expect to spend anywhere from $100-200.

Want really good light?

Then pick up a 7-foot OctoDome. It gives you about the best light that you could ever imagine, and in a pinch, it’s big enough to sleep in. In fact, at around $500 with shipping, it costs about the same as a small tent. Probably not as waterproof, though, especially since it has a big hole in the back where the flash goes.

Want good light really cheap?

Then check out the Style Selections 70-inch 2-light Rice Paper Floor Lamp with With White Shade. It costs $19.98 and you can get it at Lowe’s.

I spotted this thing a few weeks ago while on a home improvement mission. Realizing its potential as an awesome, inexpensive light modifier, I threw it right into my cart.

I’d been looking for a chinese paper lantern type thing for awhile, but since this one is a long tube thing instead of a round globe thing, I figured that it would work even better for full body portraits and situations where I want a big blast of omnidirectional light.

Of course, I’m talking about just the paper lantern part, not the floor lamp itself. Who cares about another floor lamp? That thing is still sitting in a box at the back of my closet ready to go to the giveaway store.

As a light modifier, this thing is so easy to set up, it’s got a little metal loop at the top that fits right over the stud of a small light stand. I simply clip a flash to the middle of the the Nano Stand with a Manfrotto Justin Clamp and drop the paper lantern thing down over the stand. Done. Two minute slater, you’re ready to shoot. Now that’s going fast with light. Folded down flat, it’s only 14″ in diameter.

To trigger the flash inside the lantern, I’ve tried it out using the D700 pop-up flash and Nikon CLS TTL, as well as with the Nikon SU-800 wireless commander and with SU-4 optical slave mode.

As for light quality, it’s just as I imagined it would be. Big, soft, even, and it wraps unbelievably well- as good as you would expect from something that puts light out in a 360-degree pattern.

The photo below was taken with the lantern light. Single SB-800 set in TTL mode at camera left, and another SB-800 through an umbrella at camera right.

It’s easily as good as an umbrella and many softboxes, and since it’s tall, it will throw great light against the side of an entire person. Can’t wait to try some full length shots with it. Also, imagine the effect that you could get if you hung it horizontally above your subject?

Last week I reviewed a new ebook called Great Light, Easy Light and pointed out how the fundamentals of great light revolve around factors like direction, angle and distance. Practice your strobist-style techniques with this 20 dollar lantern thing, and you’ve got great light, easy light AND cheap light.


October 1, 2012
See this post
$20 Rice Paper Light Modifier – Great Light, Cheap

I’m a guy who believes crossing barriers, or rather launching over them with with reckless disregard for what might be considered normal. For example. I’ll drag my studio lighting equipment and big softboxes outside where they get snowed on and knocked down in the dirt, because they might help me get a unique image.

So what does that have to do with these two very nice looking people above? This is Craft and Vision’s latest eBook and it’s called Great Light, Easy Light. It was written by a very successful studio photographer named Kevin Clark, who shoots actors, musicians and other famous, very clean, well dressed people.

And this relates to outdoor photography how…? Because Kevin can light the sh*t out of his subjects in such a way that they look awesome. He creates incredibly flattering and pleasing portraits, and you can learn a lot from him.

If you’re like me, you occasionally photograph people outside with various off-camera flash and natural light setups, and you’re always looking for ways to improve your lighting skills. Basically, you’re always looking for tips that can help you shoot more dynamic and more great looking imagery. That’s why you’re here, right?

Anyway, Great Light, Easy Light is a manual that shows you how to light your subjects in very pleasing ways. As you know, when it comes to photography, light is everything. Small changes in quality, direction and distance make a huge difference in how your image looks. Even tiny changes make a huge difference. In his book, Kevin shows you some very easy, but solid techniques that can help you drastically improve the quality and look of your own portraits and people pictures.

Now, granted, Kevin usually shoots inside with studio strobes, 7-foot octoboxes and giant reflectors. You probably don’t have that stuff. Neither do I. Can you even imagine trying to use a 7-foot box outside in the wind? Here’s the thing, though. Great light isn’t about the equipment, it’s about the angles, how close you light your subjects whether you use hard light or soft light, one light or multiple lights, and whether you bounce, reflect or diffuse.

Great Light, Easy Light shows you the angles and techniques that make a difference, and here’s the kicker: You can use them whether you’re using small flashes, strobes, windows or $20 plastic softboxes, whether you’re shooting in controlled environments or outside in the mud, and whether you’re shooting cyclocross racers or high school portraits.

For only five bucks, which, with inflation, costs less than just about anything else you’ll buy this weekend, you get some really solid tips that you can take away and apply to your own style. The best and most creative photographers draw from as many sources as they can, and often reach well outside of their own genre for ideas and inspiration.

Go ahead. Reach outside of your own box and see what happens to your creativity. If you photograph people, pick up Great Light, Easy Light and by this time tomorrow, you’ll have a whole new bag of tricks and techniques to try out on your own subjects.

And, check out this $20 paper lantern light modifier and you can have great Light, easy Light AND cheap light, all in one!

September 28, 2012
See this post
New Craft and Vision eBook: Great Light, Easy Light

The designers at Lowepro are on a roll. Following up on their two recent functional and fast access packs, the Photo Sport 200 AW and the Flipside Sport AW, they have just completed their trifecta of adventure camera packs with the brand new Rover Pro AW. Yes, it has a familiar name, but this is not your dad’s Lowepro Rover. That was back when camera packs were just big bags shoulder straps and lots of dividers. The new Rover Pro AW has been totally reworked with a brand new design and up to date backpack technology. Let’s just say that if the Photo Sport and the Flipside Sport hooked up and had a really big offspring, it would be the Rover Pro. Whereas the other two are designed for day trips, the Rover Pro is a technical, mountain-style backpack that’s built to carry your camera and your camping, climbing or other sport-specific gear into the backcountry.

Basic Carrying Design

The Rover Pro is a top loading backpack with padded camera gear cases that can be accessed from the the zipper back panel. The Rover Pro comes in two sizes, a 35L, which comes with a single gear case and a 45L, which comes with two cases. Both packs have the main case, which will fit any DSLR (including battery grip bodies) with an attached lens up to 14-24mm f/2.8, or 28-70mm f/2.8, as well as a second lens and flash. They also each have a small accessory pouch that will fit batteries, PocktWizards, etc… The second case that comes with the 45L AW is sized for a big lens, like a 70-200mm f/2.8, as well as a couple of triggers or other accessories. Or, if you leave the big zoom behind, you can carry a total of 3-4 lenses/flashes and accessories. The idea behind this system is that you have an efficient and protected way to carry your gear into the backcountry, and still have full access to your gear along the trail. Maybe you’re backpacking into a remote mountain valley to catch sunrise shots the next morning, or perhaps you’re heading out to shoot rock climbing. The Rover Pro offers a system that will carry all that stuff, whether it’s a sleeping bag and camping gear or ropes and climbing equipment, in addition to your camera gear.

Carrying Capacity

Just how much gear can the you fit inside the Rover Pro? I have the smaller, 35L version and I was still able to fit the following inside the pack:

  • Nikon D700


  • 24mm lens


  • 85mm lens


  • SB-800 flash, plus accessories


  • Sleeping bag


  • Stove


  • Clothing, including puffy, rain jacket, fleece and extra shirt


  • Food, easily enough for 2-3 days


  • Tripod


  • 2L hydration bladder


Outside it will fit a tent and sleeping pad, plus trekking poles, ice axe. With the larger 45L version, add a 15″ laptop and even more camera toys, personal gear and food. With either size, and depending on how you pack, you definitely have enough room for short and/or streamlined overnight trips, if not longer excursions.

Features

In addition to the two access points, camera pouches, ice axe loops and top lid pocket, the Rover Pro AW also has waist belt pockets, like those found on the Photo Sport 200, (I LOVE these!), and a side hydration bladder pocket and tripod stash flap, both of which come straight from the Flipside Sport. Also, the pack has an AW rain cover that tucks into a hidden zipper flap at the bottom and a shove-it pocket on the back flap where you could stash a jacket or shovel. Add to that lash points, sleeping pad/tent straps on the bottom and rugged, durable fabric that will hold its own against rocks, sticks and other outdoor hazards. However, it probably won’t keep a marmot from chewing through your pack while you’re not looking. The Rover Pro AW can also be used as a regular backpack. Leave out the camera pouches and you’ve still got an awesome, technical mountain pack that you could use for climbing, hiking, backpacking, day trips, travel, just about anything in the outdoors- you name it!

Suspension System

Backpack suspension systems have come a long way in the past few years, and I gotta hand it to the designers at Lowepro, they’re right on the forefront of this wave. The Rover Pro has a fully adjustable suspension that will fit a wide range of torso sizes. The stiff padded shoulder straps and wide waist belt distribute the load extremely well and a very breathable trapoline-style mesh back panel offers a high degree of ventilation. Overall, the Rover Pro is a very comfortable pack. It sits well on your back and even with the load of heavy glass and metal inside, it carries as well as any comparable outdoor backpack that I’ve used, even for long hours, on or off trail.

Final Thoughts

The new Rover Pro is a true adventure photographer’s pack, and when compared to some other similar sized camera packs, the Rover Pro is way more adjustable and has much better breathability. It’s even more breathable than the Photo Sport 200, and will carry a much heavier load.

No matter if you’re backpacking, climbing in the mountains, or simply transporting your gear into the backcountry, I’m sure that the Rover Pro AW will meet the demands of many shooters. Its also a really simple and straightforward pack, although I’ll admit that the padded camera pouch system might feel a little foreign at first. In fact, it might take a few tries to get your packing style dialed in to accommodate those gear pouches.

Also, if you have a really big sleeping bag, you might have trouble fitting it inside. Depending on how you pack, you may have a little trouble lining up the camera pouch perfectly with the back panel zipper, but with practice, you’ll come up with workable system. I really like the new Rover Pro. It’s well designed and it definitely fills some very specific needs; I’ve already taken it out on some initial test runs, and I can see it fitting in perfectly for a number of applications.

Whether for remote backcountry use, or even for just carting heavier/bigger gear and lighting equipment into the outdoors, My thought is that the Rover Pro AW really hits the mark. In fact, last year when I wrote my review of the Photo Sport 200, I wished that Lowepro would come out with something just a little big bigger. Wish answered. If you’re a backpacking, rock climbing, mountain exploring outdoor photographer, and need enough room for both camera gear and technical/overnight gear, this could be just the pack that you’re looking for.

[iframe]<iframe width=”468″ scrolling=”no” height=”60″ frameborder=”0″ style=”border:none;” border=”0″ src=”http://mer54715.datafeedfile.com/widget/aff_widget_prdt_generate-2.0.php?aff_num=6746&aff_net=1&widget_num=1630″ marginheight=”0″ marginwidth=”0″><p>Your browser does not support iFrame.</p></iframe><iframe style=”width:120px;height:240px;” marginwidth=”0″ marginheight=”0″ scrolling=”no” frameborder=”0″ src=”//ws-na.amazon-adsystem.com/widgets/q?ServiceVersion=20070822&OneJS=1&Operation=GetAdHtml&MarketPlace=US&source=ss&ref=as_ss_li_til&ad_type=product_link&tracking_id=danhbaisadvph-20&marketplace=amazon&region=US&placement=B009GYIGBG&asins=B009GYIGBG&linkId=99dce37f8dffd83bc850869e590b63f1&show_border=true&link_opens_in_new_window=true”></iframe>[/iframe] 


September 27, 2012
See this post
Review: Lowepro Rover Pro Adventure Photo Backpack


Today I feature a guest gear review by Anthony DeLorenzo, a guy from Whitehorse who likes to ride bikes and shoot photos. Not always at the same time, though.

This past summer, Anthony took me for a kick ass mountain bike ride with his mad Yukon trail dog, Starbuck. Look for his photo (second shot below) in the current issue of Dirt Rag magazine.

Camera Review: The Rugged Pentax Optio WG-2, by Anthony DeLorenzo

When I saw Dan’s rugged outdoor camera review, I mentioned that he should include the Pentax Optio WG-2. A few tweets back and forth led to this guest review. Please keep in mind as you read this that I don’t shoot cameras or review them for a living, so bear with me!

By way of introduction I’m an enthusiast photographer. I shoot whatever interests me which ends up being a lot of outdoor activities and landscape type shots. My other cameras are a medium format film SLR and a compact mirrorless digital camera.

In the past I’ve used a pocketable, rugged Olympus Tough camera. They’re great things to have when you don’t want to take a larger camera with you. I was getting ready for an 8-day bike/packraft expedition on the remote Canol Heritage Trail, so I decided to shop for a similar camera and ended up with the Pentax WG-2.

What I Like

Size: The Pentax WG-2 is small, durable and waterproof. I normally just have it in my pocket so it is always ready for quick shots. And of course, as they say the best camera is the one you have with you. It can shoot underwater and, more importantly, I’m not afraid to take it out and shoot while floating down a remote northern river.

http://www.flickr.com/photos/delorenzo/7773975542/

Easy to use: I find this camera dead simple. I almost always leave it in P mode, Auto ISO (max 800), infinity focus (the small chip and aperture don’t give you much depth of field anyways) and auto white balance. I shoot just about everything fuly wide although occasionally use the zoom or myabe some focus tracking. It is a true point and shoot, I just grab it from my pocket, hit the power button on the way up, frame, shoot, and back into the pocket.

That isn’t to say that you can’t take your time and compose your image. I feel like I got one of my best shots this year so far by having this along on a ride when the light was right.

http://www.flickr.com/photos/delorenzo/7608276820/

Decent image quality: Sure it’s not as good as an SLR or even a high-end point and shoot but you can get some good shots with this camera. The image above was printed as a double-page spread in the current issue of Dirt Rag magazine.

What I Don’t Like

No manual control: Lacking A, S, M modes means no way of controling your shutter speed or aperture. Ansel Adams would hate this camera. Now granted, the lens only stops down from F3.5-5.5 which really doesn’t give you much to work with. But it would be nice to be able to set, say, a 1/60 shutter for a panning motion shot. I’m not sure if any of the competitors have those modes or not.

Noisy: Even at ISO 100 there is a fair bit of noise in the images. I use Lightroom and almost always need to add at least 20-30 points of luminance reduction. Then of course you lose some sharpness and the images can come out looking a little like a painting.

http://www.flickr.com/photos/delorenzo/7793389960/

Slow burst mode: Unless you want to shoot tiny .jpeg images, the burst mode is really slow. Like 2 frames per second slow which means that for shooting fast action, for example a mountian biker, you basically have one shot to get it.

No lens cover: There is no sliding lens cover so your lens is always exposed. I believe it is some sort of mineral crystal which has been resistant to scratches so far. The bigger problem is just getting water/dust on it all the time. I find myself trying to wipe in on my shirt which is probably already wet and/or dirty.

Other stuff you should know

Shooting modes: This camera has a whole pile of modes that I never use. I use P mode 95% of the time and have used landscape, sports and underwater modes a few times. There are modes that will recognize faces, recognize your pet, shoot a picture when someone smiles, shoot at night, etc. It also has a ring of LED lights around the lens for super close-up macro shots and comes with a little tiny stand for ‘microscope’ shots like if you wanted to shoot grains of sand or something. One pretty cool feature for people who like to shoot outdoor selfies, the camera can use the LED lights on the front to tell you where you are located in the frame.

Video: There are video modes including 1080p and it also has an intervalometer setting for time lapse shots which is pretty cool. I don’t do a lot of video so haven’t used these at all.

Remote: Mine came with a little waterproof remote but it needs line of sight and the range seems really limited. I tried to shoot a group photo with the camera about 10 m away and it wasn’t close enough. Thankfully it has the usual self-timer option.

Batteries: The battery life isn’t great but it is good enough. Between two batteries my camera lasted for the twelve days of our trip. I got about 300 shots on the first one before it died and took about 500 total.

Bottom Line

The Pentax Optio WG-2 is a true point and shoot camera. If you want something you can climb mountains and wade through rivers with, then pull out, shoot and stuff back in your pocket, this is the camera for you. You sacrifice some control and image quality but in the end you get the shots you might not have gotten otherwise.

http://www.flickr.com/photos/delorenzo/7778215816/

Thanks for reading! Happy to answer any questions here in the comments or on Twitter. You can see some of my photos at blog.delorenzo.ca.

Support this site: Give your virtual thumbs up for the time, energy and research that it takes me to bring you reviews like this one by shopping through these links. Thanks! -Dan

[iframe]<iframe src=”http:///e/cm?lt1=_blank&bc1=000000&IS2=1&bg1=FFFFFF&fc1=000000&lc1=0000FF&t=danhbaisadvph-20&o=1&p=8&l=as4&m=amazon&f=ifr&ref=ss_til&asins=B007P1X7XY” style=”width:120px;height:240px;” scrolling=”no” marginwidth=”0″ marginheight=”0″ frameborder=”0″></iframe><iframe width=”120″ scrolling=”no” height=”240″ frameborder=”0″ style=”border:none;” border=”0″ src=”http://mer54715.datafeedfile.com/widget/aff_widget_prdt_generate-2.0.php?aff_num=6746&aff_net=1&widget_num=1621″ marginheight=”0″ marginwidth=”0″></iframe>[/iframe]

September 26, 2012
See this post
Review: The Rugged Pentax Optio WG-2 Point and Shoot