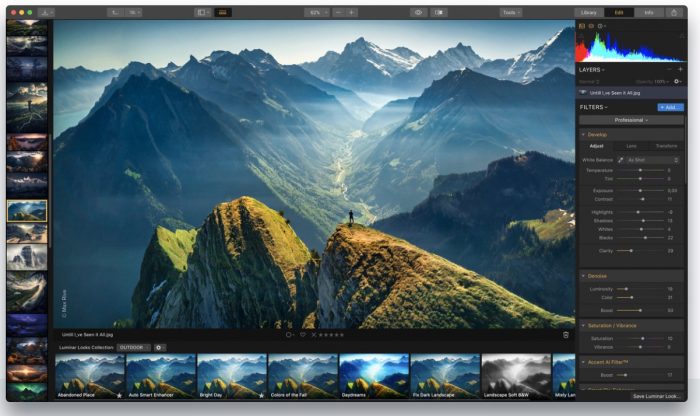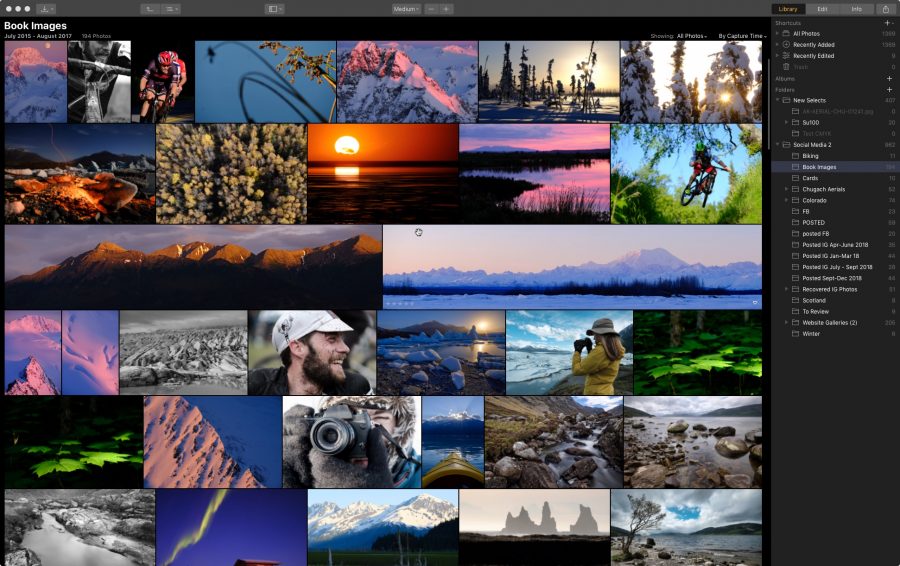
Skylum Software has just released Luminar 3. This much-anticipated update to what has become a very popular photo editing app will contain the new Library module, which will now allow you to use Luminar to import, store and organize your images. Essentially, Luminar can now function as your primary, full-solution photography program.
Skylum first announced that they were working on a catalog system for Luminar in the fall of 2017. This got everyone’s attention, because if they did it right, it would allow many photographers to leave the frustrations of Lightroom’s subscription model and increasing complicity behind. For the many photographers who are drawn to the simplicity and flexibility of Luminar’s photo editing interface, we’ve been excited to see what they come up with.
Development of the catalog system took the better part of 2018, but it’s finally here! After meeting with the Luminar developers at PhotoPlus back in October, I got to test the Luminar 3 beta versions, and I was highly impressed with what I saw.
Having listened to a wide range of photographers, they took the necessary time to make sure the program met their own expectations. Now they’ve finally unveiled it to the world, and it looks awesome.
In this blog post, I’m going to give you a quick rundown of Luminar 3 and let you know what I think.

The Interface
Luminar’s tag line is “Your photos. More beautiful. In Minutes.” Their approach is to make the computer aspect of photography fun, easy and efficient. They want to create an enjoyable user experience that inspires creativity and allows you to quickly adjust your images and give them maximum visual impact in a minimal amount of time.
With customizable Workspaces, a wide variety of Tools and Presets, a handful of very innovative A.I. “smart tools,” a powerful RAW Develop engine, simple shortcuts and non-destructive editing, Luminar 3 offers a straightforward user interface that seamlessly lets you easily jump between viewing, organizing and editing your images.
I’ve been using Luminar for over two years and I find the program very easy to use. It allows me to quickly select the tools I want to use, preview what each one does and quickly come up with a final look I want for the final image.
Luminar now builds on that with the ability to catalog and manage your images.
The Library Panel
Organization, Speed and Performance
Upon launching for the first time, Luminar 3 asks you where your photos are stored and where you would like to store your catalog. You can create as many catalogs as you like and store them wherever you want on your computer.
Importing images is a fast, easy process. You can import from folders, memory cards, external hard drives, and even cloud storage folder locations like Dropbox and Google Drive.
When selecting a folder, Luminar import all the images inside, and it will keep the entire hierarchy and folder structure. This makes it easy to import your existing catalog. Currently, there’s no dedicated menu item to “Import Catalog From Another Program…” but as long as you know where your images are stored, you should be able to move your entire catalog over with ease.
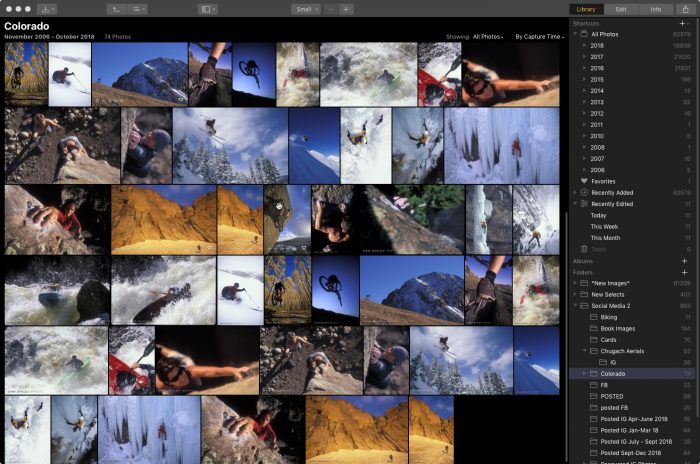
It takes a few minutes if you have a very large folder, but in my tests, I’ve been able to import up to 50K images in less than five minutes. Image previews are built pretty quickly, but if you have thousands of images, it will still take time to get them all loaded. On my Mid 2010 Mac Pro, it takes about 20 seconds to render 100 image previews.
However, once all the previews are built, navigating and scrolling through your catalog is an blazingly fast process. Last year, the lead developer told me that they were using Photo Mechanic as a benchmark, and they seem to have achieved their goal.
Keep in mind, that Photo Mechanic isn’t a catalog per-se; it doesn’t store any previews or editing information, it’s just browsing folders. That’s who it’s so fast. The fact that Luminar 3 attains this kind of browsing speed is quite remarkable. Hats off to Ivan and his team.
Managing, Exporting Images and Syncing Folders
Moving images around is easy inside Luminar 3, you just drag images or entire folders to a new location within the program. You can rename folders, create subfolders and add any folder to your Shortcuts, which lives at the top of the Library. You can even move and rename images and folders on your desktop outside the program and Luminar will instantly sync the changes.
Navigating the catalog is simple and it uses keystrokes that are similar to Lightroom: G = Grid, F = Full Screen, D = Develop (Edit), P = Favorite (Pick), X = Reject. There are probably more that I don’t know about yet. Double clicking an image brings it up a large preview inside the Edit window, which I’ll talk about below.
Luminar allows you to add star ratings, colors and tag images as Favorites or Rejects. You can create Albums and add images by dragging them into an Album, or by selecting one or more images and creating a New Album.
If you have a shared folder in your library from a service like Dropbox or Google Drive, Luminar will stay synced with the contents of that folder. If you, or anyone else adds, modifies or removes any images from that folder, Luminar will automatically sync the changes. I really like this feature, as it allows for synced sharing and collaboration between multiple users if they include the same shared folder in their own Luminar catalog.
Even if a folder is “offline,” or an external drive is not connected, you can still browse the image previews inside Luminar, and you can still move and organize images, add to albums and add ratings. You just can’t edit them.
The Edit Panel
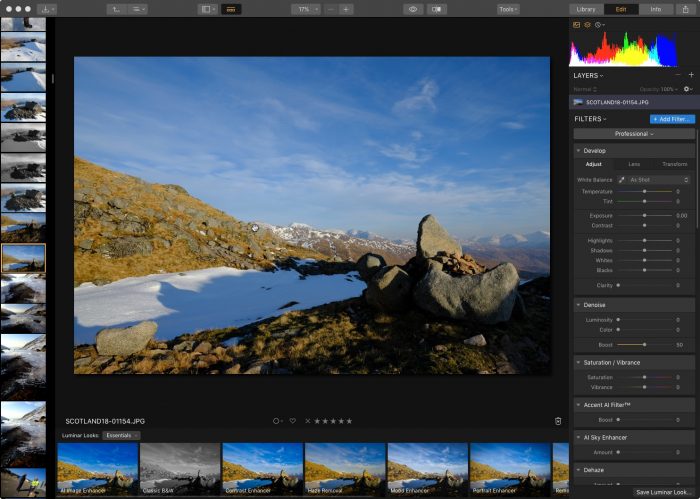
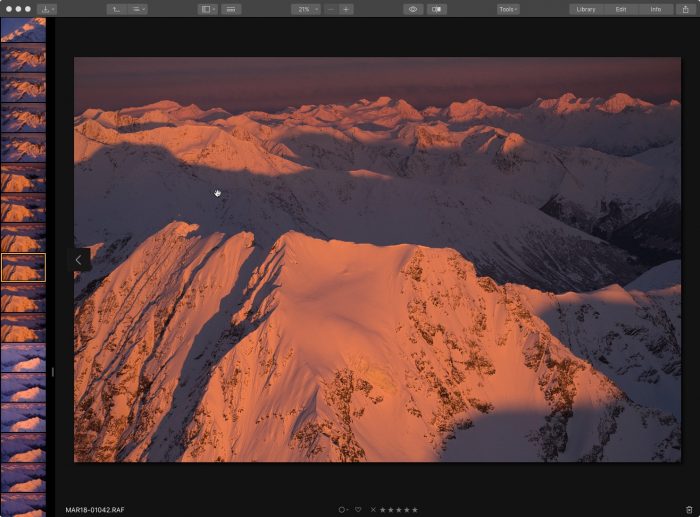
The Edit, or Develop panel is where you process your images. Selecting the Edit tab at the top, double clicking an image in the Library, or hitting D on the keyboard brings up Luminar’s Develop screen. If you’ve used Luminar before, then the editing interface will look familiar. It’s the same layout as before, except you have a new thumbnail Filmstrip along the left side of the window.
You have the option to show the standard view above, or you can hide the Filmstrip and/or the side Tool panel. You can also scroll through images and choose a new one to work on without leaving the Edit Window.
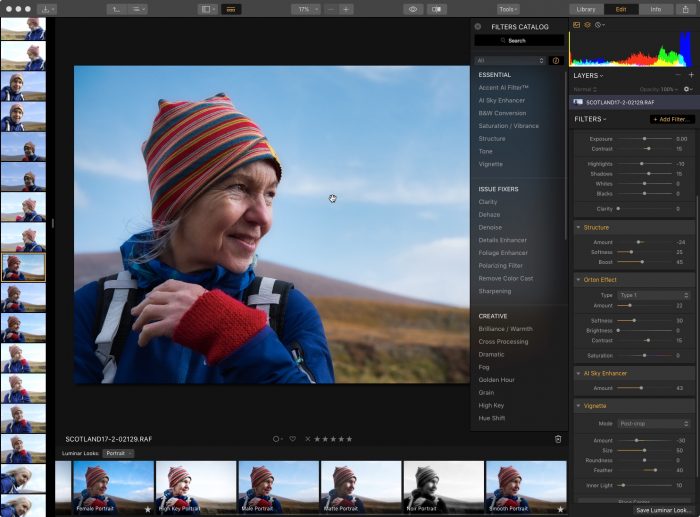
Once you’re in the Edit window, you can process your images using a wide range of tools and presets, inducing their awesome AI tools. You can make use of the different Workspaces include in Luminar, or you can create your own custom Workspaces. A Workspace is simply a set collection of tools, and you can always add or subtract tools from any Workspace.
Editing in Luminar 3 is a non-destructive process. Your edits are stored as small steps that can always be undone or altered without affecting the original image. There are also shortcuts inside the Edit Window, including J = Show/Hide Gamut Warning, C = Crop.
Luminar 3 allows you to Copy Adjustments and apply them to other images, and you can do Batch Processing and apply the same preset to multiple images.
As with previous versions, Luminar 3 allows you to create your own presets, modify and rename them. These are called Custom Looks and once you make one, you find it in the regular Preset Menu. You can also download other Preset packs from the Luminar website, many of which are free.
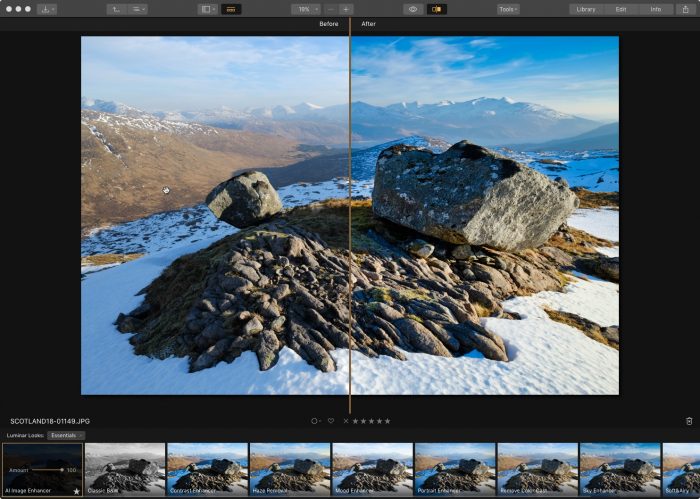
Quick Edit and Using Luminar as a Plugin
If you don’t want to upload images to a Luminar catalog before editing them, say if you already have a catalog system and don’t want to change, you can use the Quick Edit option. This allows you to choose any image on your computer and bring it up in a separate Edit Window so you can use Luminar’s processing tools to work on the photo. The program will save your Quick Edits so you can easily find them again
You can then export or save the image as desired. You can also use Luminar 3 as a Plugin for Lightroom, Photoshop, Photoshop Elements, Apple Photos or Aperture. This gives total flexibility for using the program however you want. Some people might love the library feature, other people prefer to use the editing tools inside another environment or as a standalone editor.
What It Doesn’t Have…Yet
Skylum is very clear: The Luminar catalog system is a work in progress. Although they nailed it right out of the box, keep in mind, this is their first release, so it’s missing a few essential features that are surely to come in future updates. If they tried put include everything on the first release, it would take forever to get the first build out. Releasing a foundation that performs well will allow them to build up with the most stability.
As it was put to me by the Skylum people, there are a whole lot of things that fall under the category “Not at this time.” Although they haven’t told anyone for certain what will be added, there are definitely a few things we’d like to see.
Here’s a short list of “Not at this time” features I personally requested when I met with the developers.
- Captions and keywords: There is no search function yet, nor is there anyway to add captions or keywords. This is a big one and I’m sure they’ll add this feature in a future edition.
- Read metadata from files: Right now, Luminar 3 doesn’t read color tags, star ratings or picks from other programs. Colors and stars are universal across most programs, so I’d be very surprised if they didn’t add this sometime soon.
- Adjust Capture Times
- Watermark: This is a very big item. You can create watermarks using Layers in Luminar, but they should give you a very easy and fast way to add watermarks on your images during export.
- Geotagging
- Smart Folders/Collections
- Publish Recipes: Lightroom and Capture One both have this kind of feature.
- Dual Monitor: It would be nice to have the Library on one monitor and the Edit Window on another.
Final Thoughts
For all that it doesn’t have yet, Luminar 3 is still an exceptional program. It’s got a very straightforward interface and it does what it’s supposed to do: You can easily upload your images, sync and store them in a very easy-to-use library and edit them with a variety of fun, creative tools.
As I said, if you’ve used Luminar before, you’ll feel right at home with this new version. If you’ve been waiting for the catalog, or if you’re thinking of leaving Lightroom, I think you’ll be impressed. It runs well, it plays well with any camera system, it’s easy to navigate and it keeps things synced between shared folders.
Although the first release may not include full support for the Fujifilm X-T3, it’s guaranteed to come soon in a future update. That said, Luminar 3 will recognize the files and you can include them in your catalog with what appears to be full comparability. I’m able to edit my own X-T3 RAW files in Luminar 3, and although it may lack full functionality with some tools, I can perform many develop adjustments and apply presets.
Have no fear, though. Luminar’s developer is a Fuji user, and I know that they’re dedicated to fully support all Fuji cameras. Unfortunately, as some people have found, Adobe only gave X-T3 support to Lightroom CC, and have even stated that the standalone Lightroom 6 version will not get X-T3 support. All the more reason to try out Luminar.
It’s recommended but not necessary that you store your catalogs on a solid state drive, and it can be an internal or external drive. If you don’t have an SSD installed inside your computer, you can pick one up for a decent price. My own personal favorite is the SanDisk Extreme SSD External drive. It’s a very good value and offers extremely fast data transfer rates and good storage size for a variety of uses.
Overall, I’m really liking what I see in Luminar 3, even on my 8 year old Mac Pro. It’s awesome that you can include and sync shared folders in your library. There are a lot of potential uses for this kind of feature. I’ve using Luminar as my main image editing program because I love the fast creative workflow it inspires. With the new Library feature, the whole thing just got a lot more handy.
Right now, I use Photo Mechanic for almost all of my image browsing/moving/saving/copying/export tasks, Lightroom for my catalog and Luminar for my processing. Although I’ll probably never stop using Photo Mechanic for some things, I can see shifting towards Luminar for much of my daily imaging workflow and starting my transition away from Lightroom.
I know that some photographers will find the first version of Luminar’s Library module a bit limiting. However, I think that Luminar offers a perfectly viable solution for the vast majority of people who are looking for a comprehensive, and frustration-free photography management and editing program. Again, hats off to the development team for creating a gorgeous program that offers the creative inspiration, performance and highly intuitive interface we all deserve.
Luminar 3 is now out. You can purchase the program and save $10. If you use discount code DANBAILEY, you’ll save another $10 and get the program for only $49.
If you’ve already purchased the program and currently use Luminar 2018, then you’ll get the update for free as soon as it’s released.
You can check out the user manual for Luminar 3 and read about all the new features here.





 Being a great photographer still requires a high level of proficiency and experience with your camera. It takes knowing which settings to change, being able to adjust them quickly in real-time, anticipating your scenes and knowing how to translate your creative vision into a final photograph.
